How to Install Drywall: Expert’s Step-by-Step Guide
Drywall installation is one of the most fundamental skills in home construction and renovation. Whether you’re finishing a basement, remodeling a bedroom, or building an addition, understanding proper drywall installation techniques ensures professional results and long-lasting walls. This comprehensive guide walks you through every step of the process, from material selection through final finishing touches.
Installing drywall yourself can save thousands in labor costs while giving you complete control over your project quality. However, success requires proper planning, the right tools, and attention to detail. We’ll cover everything you need to know to transform bare studs into smooth, finished walls that meet building standards and look professional.
Materials and Tools You’ll Need
Before beginning your drywall installation, gather all necessary materials and equipment. Standard drywall sheets come in 4×8, 4×10, 4×12, and 4×16 foot dimensions, with thicknesses ranging from 1/4 inch to 5/8 inch. For most residential applications, 1/2-inch drywall on walls and 5/8-inch on ceilings provides optimal strength and fire resistance. Check your local International Building Code requirements for specific thickness recommendations in your area.
Essential materials include drywall screws (1 1/4 inches for standard installations), joint compound (also called mud), drywall tape, and primer-sealant. You’ll need approximately 25-30 screws per sheet, spaced 12 inches apart on studs and 16 inches on ceilings. Quality joint compound comes in both all-purpose and specialized formulations for different stages of finishing.
Critical tools for installation include a drywall lift or T-square for positioning sheets, a screw gun with clutch control, a utility knife with sharp blades, a tape measure, a level, and a straightedge. For finishing work, invest in putty knives (6, 10, and 12-inch widths), a mud pan, a drywall sander with dust collection, and a sanding pole for reaching high areas safely. Proper OSHA safety equipment including dust masks, eye protection, and work gloves protects your health during the entire project.
When working on larger projects like DIY basement finishing, consider renting professional-grade equipment such as automatic taper systems and hoists, which dramatically improve efficiency and reduce physical strain.
Preparing Your Work Space
Proper preparation determines whether your drywall installation succeeds or fails. Begin by inspecting all framing to ensure studs are straight, properly spaced 16 inches on center (or 24 inches for some applications), and securely fastened. Use a straightedge to identify any bowed studs, which should be shimmed or replaced before hanging drywall. Studs must be perfectly vertical and aligned for seamless drywall application.
Install all mechanical systems—electrical wiring, plumbing, and HVAC ducts—before drywall hangs. This prevents costly callbacks and safety hazards. Mark all electrical outlet and switch locations on studs with pencil before hanging sheets. Ensure insulation is installed in exterior walls and between conditioned and unconditioned spaces, following your regional energy code requirements.
Protect your work area by laying drop cloths and removing or covering fixtures. Drywall dust penetrates everything, so seal doorways with plastic sheeting. Establish a material staging area near the work zone to minimize handling and damage. Store drywall sheets flat or at slight angles, never standing upright, as this causes warping. Maintain proper temperature and humidity (50-85°F and 30-85% relative humidity) during installation and for at least 24 hours afterward to prevent moisture-related issues.
Measuring and Cutting Drywall
Accurate measurements prevent waste and ensure tight, professional-looking joints. Measure from floor to ceiling and record the exact height, accounting for any irregularities in older homes. Measure horizontally across the wall width, dividing the space into sheet-width sections. Plan your layout to minimize seams and cut-outs for maximum strength and faster installation.
For straight cuts, score the drywall face with a utility knife using a straightedge as a guide, then snap the sheet over a supporting edge. The backing paper tears, and you simply fold the sheet to complete the cut. For outlet and switch boxes, measure the location carefully, mark the dimensions on the drywall, and use a drywall saw to cut precise openings. Measure twice and cut once—this principle saves time and materials.
When cutting around pipes and irregular openings, create cardboard templates to ensure accuracy. Dull utility blades create rough edges and poor cuts, so change blades frequently throughout your project. For complex angles or curved cuts, consider using a drywall cutting tool or spiral saw for cleaner results. Always cut from the finished (white) side to minimize visible damage on the front face.
Hanging Drywall Sheets
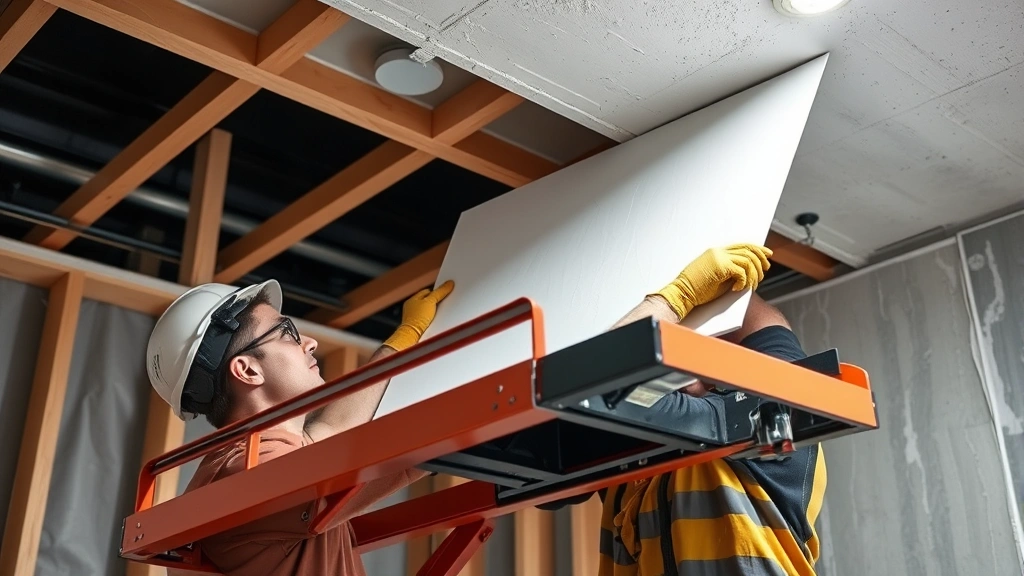
Begin hanging drywall on ceilings first, working systematically across the room. Ceiling drywall is more challenging because it requires overhead support, making a drywall lift invaluable—this mechanical device lifts and holds sheets at ceiling height, eliminating dangerous ladder work and reducing physical strain. Position the first sheet tightly into the corner, ensuring it sits flush against all framing members.
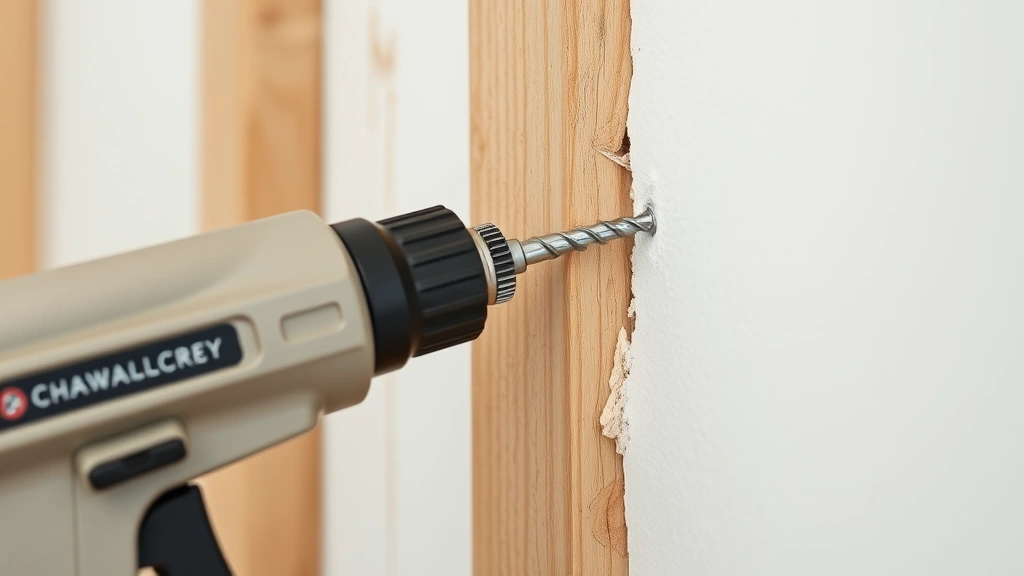
Drive drywall screws using a screw gun set to the proper depth—the screw head should dimple the paper surface without breaking it. Space screws 12 inches apart along studs and 16 inches on ceilings. Apply moderate pressure; excessive force breaks the paper and weakens the fastening. Aim for a slight dimple rather than a deep hole. Improper screw depth is a leading cause of joint compound failure and visible fasteners in finished walls.
For walls, begin at the top and work downward, staggering seams between rows for maximum strength. Offset vertical seams by at least 4 feet between adjacent rows, which creates a running bond pattern that distributes stress across multiple fasteners. Seams should never align vertically, as this creates a weak line prone to cracking. Keep all sheets tight to framing, using a hammer or drywall lifter to close gaps. Gaps larger than 1/4 inch require shimming before fastening.
When working on home security improvements that involve wall modifications, coordinate drywall installation with electrical and security system placement for professional integration. Install drywall around all penetrations carefully, leaving appropriate gaps for building code compliance with fire ratings and sound ratings.
Taping and Mudding
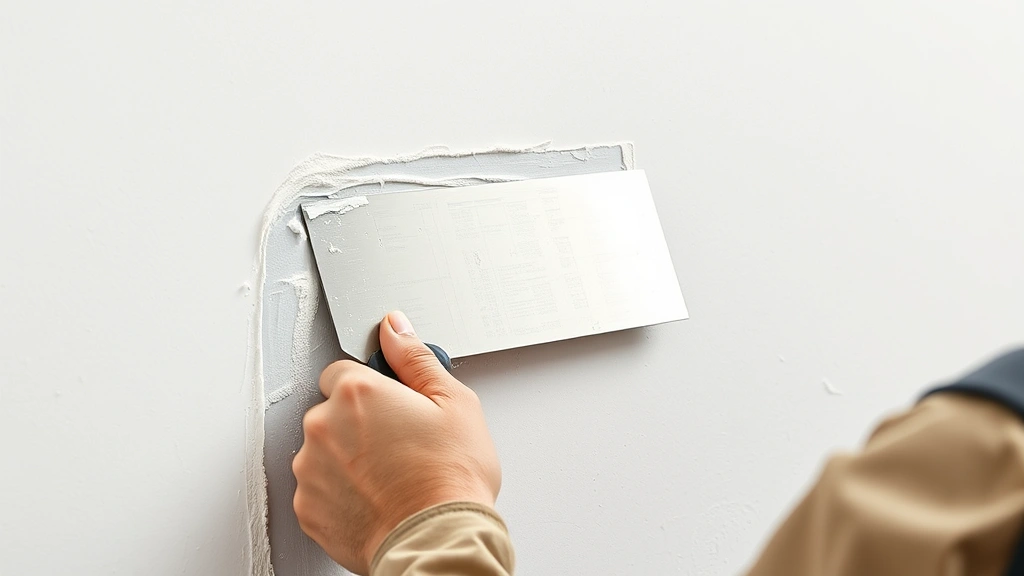
Joint finishing transforms raw drywall into smooth, seamless walls. This process involves three coats of joint compound applied over drywall tape. Begin by applying a thin layer of all-purpose compound along the seam using a 6-inch putty knife. Center self-adhesive drywall tape over the joint and press firmly into the wet compound. The tape should sit flat with no wrinkles or air bubbles. Use a putty knife to embed the tape completely, pressing out excess compound.
The first coat (scratch coat) covers tape and fasteners, using a 10-inch knife. Apply compound in a thin layer, feathering edges to blend with the surrounding drywall. Allow this coat to dry completely—typically 12-24 hours depending on humidity and product specifications. Sand lightly between coats with 120-150 grit sandpaper to remove ridges and imperfections. Always sand in circular motions to avoid cross-grain scratches.
The second coat (fill coat) uses a 12-inch knife to build up the joint and hide the tape. Apply a thicker layer, feathering edges further. This coat fills minor imperfections from the first coat and begins establishing final contours. Again, allow complete drying before sanding. Some professionals apply a third coat using ultra-lightweight compound, which sands more easily and produces superior results for perfectionist finishes.
Inside corners require special attention. Use a corner tool or fold drywall tape in half lengthwise, applying it with compound into the corner angle. Feather each side evenly to create smooth transitions. Outside corners receive corner bead (metal or plastic strips) fastened with compound or fasteners, then covered with multiple coats of joint compound and sanded smooth. Professional-grade corner bead with self-adhesive backing simplifies this critical step.
Sanding and Finishing
Proper sanding produces smooth, paint-ready surfaces. Use a drywall sander with dust collection to minimize airborne particles—these machines include vacuum systems that capture dust before it settles. Sand between coats with 120-150 grit paper, then use 150-220 grit for final finishing. Light sanding removes imperfections without over-working the surface or exposing tape.
Sand in circular motions with consistent pressure, avoiding aggressive scrubbing that creates gouges. A sanding pole reaches high areas safely without ladder work. Pay special attention to feathered edges, ensuring smooth transitions with no visible compound lines. Check your work under bright lighting—raking light reveals imperfections invisible in normal conditions. Professional painters often use 500-watt work lights for inspection.
After final sanding, vacuum thoroughly and wipe surfaces with a tack cloth to remove all dust. Prime all drywall with a quality drywall primer-sealer before painting. This seals the porous surface, ensures uniform paint coverage, and prevents future moisture problems. Quality primer costs less than applying extra paint coats to achieve proper coverage and appearance. Check National Association of Builders guidelines for finishing standards in your region.
Common Mistakes to Avoid
Improper screw spacing creates visible fasteners and weak joints. Maintain consistent 12-inch spacing on walls and 16 inches on ceilings. Screws driven too deep break the paper facing and lose holding power; those driven too shallow don’t securely fasten the sheet. Aim for a subtle dimple that your fingernail can barely catch.
Rushing drywall compound application creates ridges, voids, and uneven surfaces requiring excessive sanding. Apply thin, even coats, feathering edges gradually. Multiple thin coats produce superior results compared to fewer thick coats. Allow adequate drying time between coats—moisture trapped under surface compound causes bubbling and separation.
Poor tape application leads to visible tape lines and joint failure. Center tape precisely over seams, embedding it completely in compound with no wrinkles or air bubbles. Misaligned tape creates visible ridges that no amount of compound can hide. Practice proper technique on inconspicuous areas before tackling visible walls.
Inadequate corner finishing is immediately visible and difficult to repair. Invest time in perfect corner execution, as these transitions define the overall appearance of finished walls. Use quality corner bead and apply compound carefully, feathering evenly on both sides of the corner.
Skipping primer application leads to uneven paint coverage and moisture problems. All drywall must be primed before final painting. This especially applies when performing DIY projects where professional standards may be overlooked—proper primer ensures lasting results.
Insufficient dust control creates cleanup nightmares and health hazards. Always use dust collection equipment and seal work areas with plastic sheeting. Drywall dust contains fine particles that penetrate deep into lungs, making proper respiratory protection essential. Quality dust masks meeting NIOSH standards protect your health during sanding operations.
FAQ
How long does drywall installation take?
Installation time varies by project size and complexity. A single room typically requires 2-4 days for hanging, 3-5 days for taping and mudding, and 1-2 days for sanding and finishing. Larger projects require proportionally longer. Professional crews complete faster, while DIY installation takes longer due to learning curves and equipment setup time. Factor in drying time between compound coats—this cannot be accelerated without risking quality.
What thickness drywall should I use?
Use 1/2-inch drywall for standard residential walls and 5/8-inch for ceilings and fire-rated applications. Check your local building code for specific requirements—some jurisdictions mandate 5/8-inch drywall in certain applications for fire safety. Thicker drywall costs more but provides superior strength and sound dampening.
Can I install drywall in humid environments?
Drywall requires proper environmental conditions for successful installation and drying. Humidity should remain between 30-85% and temperature between 50-85°F during installation and for 24 hours afterward. High humidity dramatically extends drying time and can cause mold growth. Use dehumidifiers and ventilation to maintain proper conditions, especially in basements or newly constructed spaces.
How many coats of joint compound do I need?
Most professionals apply three coats: scratch coat (covering tape and fasteners), fill coat (building up the joint), and finish coat (final smoothing). Some applications require four coats for flawless results. Thin coats dry faster and produce better results than thick coats. Quality matters more than quantity—thin, well-feathered coats look superior to thick, poorly applied coats.
What’s the best way to repair drywall damage?
Small holes (less than 1 inch) patch easily with spackling compound and a putty knife. Larger holes require drywall patches cut to size, fastened to backing boards, then taped and mudded like new seams. Deep gouges need filling with compound in multiple thin layers, sanded between applications. Always sand, prime, and paint repairs to match surrounding surfaces.
Should I hire professionals or do it myself?
DIY installation saves money but requires skill development and significant time investment. Professionals work faster and achieve superior finishes, particularly with complex layouts or specialized requirements. Consider hiring professionals for ceilings, which are challenging overhead work, while handling walls yourself. Hybrid approaches combine DIY labor with professional finishing for optimal value.


