
How to Install Drywall: Pro Tips from Experts
Drywall installation is one of the most fundamental skills in modern construction and renovation. Whether you’re finishing a basement, building an addition, or simply updating a room, understanding proper drywall installation techniques will save you time, money, and frustration. This comprehensive guide walks you through every step of the process, from material selection to final finishing touches, ensuring professional results even for first-time installers.
The beauty of drywall work lies in its accessibility to DIY enthusiasts while maintaining enough complexity to warrant professional expertise. With the right tools, materials, and knowledge, you can transform raw framing into smooth, finished walls that are ready for paint or wallpaper. This guide incorporates expert recommendations and industry best practices to help you achieve results that rival professional installations.
Understanding Drywall Basics
Drywall, also known as gypsum board or plasterboard, consists of a gypsum core sandwiched between two layers of heavy paper. This material has become the standard for interior wall construction in residential and commercial buildings throughout North America. Understanding the different types of drywall available is crucial before beginning your project, as each type serves specific purposes and environments.
Standard drywall, typically ½ inch or ⅝ inch thick, works well for most interior applications. Moisture-resistant drywall, often called “green board,” contains additives that resist water absorption and is ideal for bathrooms and kitchens. Fire-rated drywall provides enhanced fire resistance and is required in certain building code applications, particularly in garages and above drop ceilings. Soundproof drywall incorporates materials that absorb sound waves, making it perfect for home theaters, studios, or shared walls between units.
Before starting your installation, review your local ICC building codes to understand specific requirements for your project. Different areas have varying regulations regarding drywall thickness, fire ratings, and installation methods. Consulting these standards ensures your work meets safety requirements and will pass inspection if needed.
Tools and Materials You’ll Need
Successful drywall installation begins with assembling the proper tools and materials. Having everything on hand before you start prevents interruptions and ensures quality workmanship throughout the project. The investment in quality tools pays dividends through improved efficiency and superior results.
Essential Tools:
- Drywall saw or jigsaw for cutting openings
- T-square or drywall square for marking straight lines
- Drywall lift or jack to hold sheets during installation
- Drill-driver with mixing paddle for compound preparation
- Joint knives in 6-inch, 10-inch, and 12-inch widths
- Taping knives for applying joint compound
- Pole sander with extension handle for ceiling work
- Sandpaper in 120-grit and 220-grit varieties
- Tape measure and pencil for marking
- Level to ensure proper alignment
- Safety equipment including dust mask, goggles, and gloves
Materials Required:
- Drywall sheets (appropriate type for your application)
- Drywall screws (1¼ inch for ½-inch drywall, 1⅝ inch for ⅝-inch drywall)
- Joint compound (also called “mud”) in lightweight and all-purpose varieties
- Drywall tape (paper or fiberglass mesh)
- Corner bead for outside corners
- Joint compound primer for finishing
- Caulk for gaps and transitions
When selecting materials, consider purchasing 10-15% extra to account for waste and mistakes. Quality joint compound from reputable manufacturers ensures smoother application and better results. The Gypsum Association provides detailed specifications for materials and installation techniques recognized throughout the industry.
Preparing Your Workspace
Proper preparation sets the foundation for successful drywall installation. Before hanging a single sheet, ensure your framing is square, level, and properly spaced. Studs should be 16 inches or 24 inches on center, depending on your drywall thickness and local building codes. Check that all framing members are straight and properly secured, as imperfections will telegraph through the finished surface.
Inspect for any electrical wiring, plumbing, or HVAC components that need repositioning or protection. Drywall installation often requires cutting around these utilities, so knowing their exact locations prevents costly mistakes and safety hazards. Mark utility locations clearly on your framing before hanging sheets.
Environmental conditions significantly impact drywall installation quality. Maintain temperatures between 50°F and 85°F and humidity levels between 30% and 85% during installation and for at least 48 hours after completing mudding. Extreme conditions can cause joint compound to dry improperly, resulting in cracks and poor adhesion. Ensure adequate ventilation throughout the process to prevent moisture accumulation and promote proper curing.
Protect flooring and adjacent surfaces from dust and compound splatter. Lay down temporary flooring protection and cover doorways with plastic sheeting. This simple step dramatically reduces cleanup time and prevents damage to existing finishes.
Hanging Drywall Sheets
Installing drywall sheets requires careful planning to minimize seams and waste while maintaining structural integrity. Begin by determining the best orientation—horizontal or vertical installation. Horizontal installation, where sheets run perpendicular to wall studs, is generally preferred because it requires fewer vertical seams, creates a stronger wall assembly, and makes mudding easier by reducing the number of joints requiring finishing.
Start at the top of the wall and work downward. This approach allows the weight of upper sheets to help support lower sheets during installation. For ceilings, work from the center of the room outward, which provides better support and reduces the risk of sheets sagging during fastening.
Use a drywall lift or jack to position sheets at the correct height. This tool eliminates the need for scaffolding or multiple workers holding sheets, significantly improving safety and installation speed. Position sheets with approximately ⅛-inch gap at the ceiling and ¼-inch gap at the floor to accommodate expansion and contraction.
Fasten sheets using drywall screws spaced 12 inches apart on ceilings and 16 inches apart on walls. Screws should be driven perpendicular to the surface, with heads slightly recessed below the surface without breaking the paper. Proper screw placement is critical—fasteners driven into studs between 1 and 1½ inches from sheet edges provide maximum holding power and prevent buckling.
Stagger vertical seams so they don’t align from one row to the next. This staggering strengthens the wall assembly and reduces the visibility of finished seams. Cut openings for electrical outlets, switches, and other penetrations using a drywall saw, measuring carefully to ensure proper fit. When cutting around corners, use a drywall square to mark precise lines and cut on the back side to minimize paper tearing.
For additional insights on wall construction and finishing, review our guide on DIY basement finishing, which covers drywall installation in challenging environments.
Taping and Mudding
The taping and mudding process transforms installed drywall sheets into smooth, seamless surfaces ready for finishing. This stage requires patience and technique, as quality finishing depends on proper compound application and adequate drying time between coats.
First Coat Application:
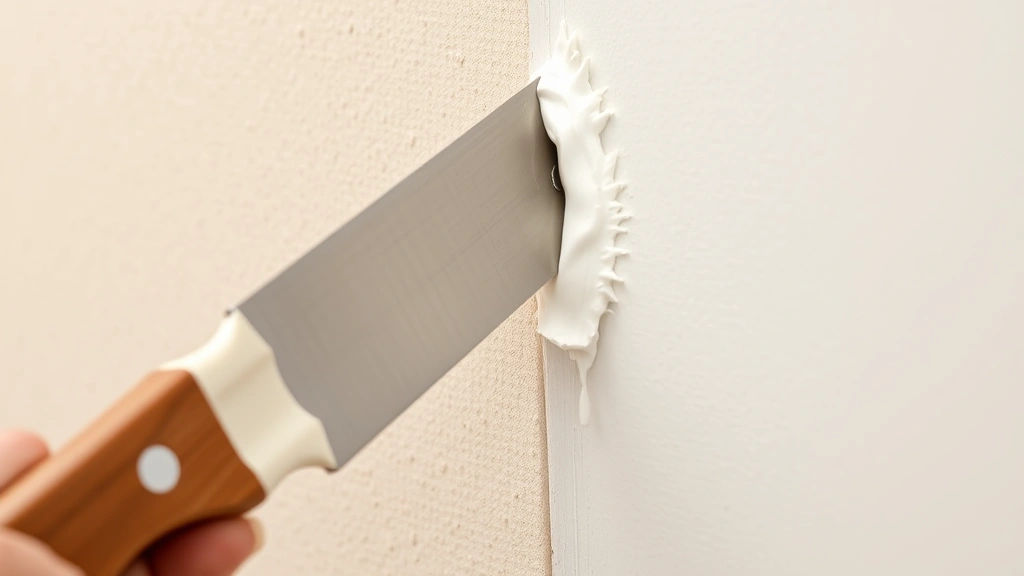
Begin by applying joint compound over all seams, corners, and fastener heads. Mix compound to a peanut butter-like consistency—thick enough to hold its shape but thin enough to spread smoothly. Apply a thin layer of compound over seams using a 6-inch joint knife, then embed drywall tape into the compound using firm, even pressure. The tape should be completely covered with compound, with excess removed using the edge of your knife.
For outside corners, apply a bead of compound along the corner and press corner bead firmly into place. Corner bead provides a straight edge and protects the vulnerable corner from damage. Apply a thin layer of compound over the bead, feathering the edges to blend with the wall surface.
Cover all fastener heads with compound, applying enough to slightly overfill the depression. This initial “fill” coat will shrink as it dries, requiring additional coats for a smooth finish. Allow all first coats to dry completely before applying subsequent coats—typically 24 hours under normal conditions.
Subsequent Coats:
The second coat expands the compound coverage area, feathering edges further to blend with surrounding surfaces. Use a 10-inch knife for this application, applying compound with minimal pressure to create a thin, smooth layer. Focus on achieving a uniform surface without visible ridges or valleys.
The third and final coat uses a 12-inch knife to further feather edges and create a seamless finish. This coat requires the lightest touch, as excessive pressure can create visible knife marks. Many professionals apply three coats minimum, with additional coats necessary for seams in high-visibility areas or under harsh lighting.
Allow adequate drying time between coats and maintain proper environmental conditions throughout the process. Rushing the drying stage results in poor adhesion and cracking. Some professionals prefer to use lightweight joint compound for the first two coats, switching to all-purpose compound for the final coat because it sands more smoothly.
Sanding and Finishing
Sanding transforms the taped and mudded surface into a smooth finish ready for paint or wallpaper. This critical stage requires careful technique to achieve professional results without over-sanding or creating low spots that will be visible under paint.
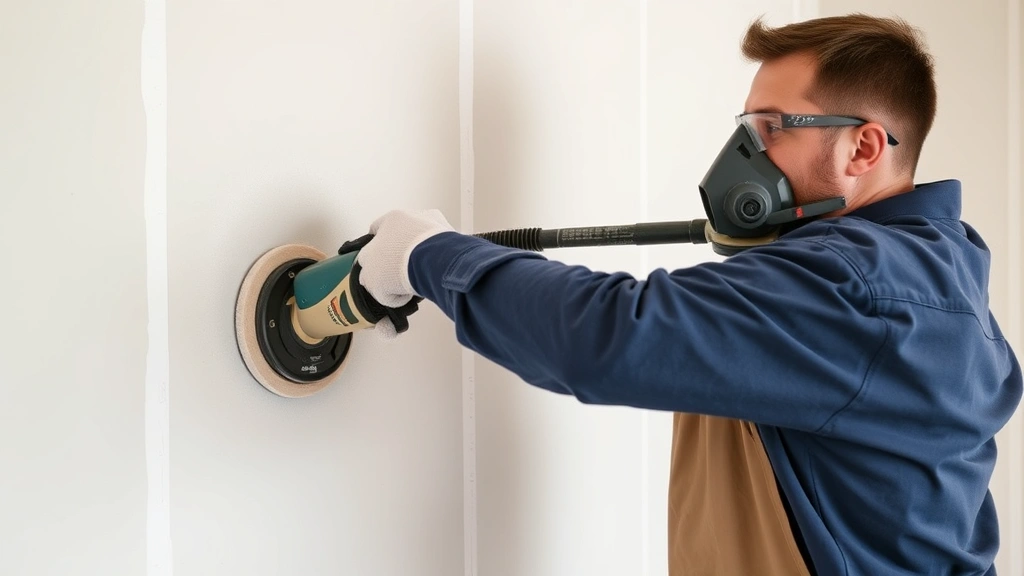
Begin sanding only after all coats have fully dried. Use 120-grit sandpaper for initial sanding, removing high spots and ridges created during mudding. Sand with light pressure in circular motions, working systematically across the wall. Avoid aggressive sanding, which removes too much compound and creates depressions that require additional mudding and sanding.
After initial sanding, inspect the surface under bright lighting to identify low spots or imperfections requiring additional compound. Apply spot repairs as needed, feathering edges smoothly to blend with surrounding areas. Allow repairs to dry completely before final sanding with 220-grit sandpaper.
Final sanding creates a smooth surface suitable for paint application. Use light pressure and 220-grit sandpaper to gently smooth the surface without removing the underlying compound. Dust thoroughly with a damp cloth before priming and painting to ensure proper paint adhesion.
Proper dust control is essential during sanding. Use a pole sander with dust collection attachment to minimize airborne particles. Wear a quality dust mask rated for fine particles, as drywall dust can irritate respiratory systems during extended exposure.
Common Mistakes to Avoid
Even experienced installers occasionally make mistakes that compromise quality or efficiency. Learning from common errors helps you avoid costly rework and achieve superior results on your first attempt.
Inadequate Fastening: Insufficient fasteners or improper spacing creates weak spots where drywall can sag or crack. Follow manufacturer recommendations precisely, maintaining proper spacing and ensuring all fasteners penetrate studs at least ¾ inch. Under-fastening is one of the most common causes of drywall failure and visible imperfections.
Poor Joint Compound Consistency: Compound mixed too thick doesn’t spread smoothly, while thin compound doesn’t hold tape or fill voids properly. Achieve the proper consistency by slowly adding water while mixing, testing frequently until the compound reaches the desired thickness. Different applications may require slightly different consistencies.
Insufficient Drying Time: Applying subsequent coats before previous coats have fully dried causes adhesion problems and cracking. Always allow adequate drying time, particularly in humid conditions where moisture evaporation slows significantly. When in doubt, wait an extra day before applying the next coat.
Skipping Primer: Applying paint directly to joint compound without primer results in uneven color and poor adhesion. Joint compound is porous and absorbs paint differently than drywall paper, creating visible variations in sheen and color. Always apply primer before painting to achieve uniform, professional results.
Improper Seam Placement: Aligning vertical seams from one row to the next weakens the wall assembly and makes finished seams more visible. Stagger seams by at least 16 inches from row to row to improve strength and reduce visual impact.
Neglecting Safety Equipment: Working without proper dust masks, goggles, and gloves exposes you to irritating compounds and potential injuries. Invest in quality safety equipment and use it consistently throughout the project. Drywall dust contains fine particles that can irritate eyes, skin, and respiratory systems.
For more information on home improvement best practices, explore our DIY Nests Hub Blog for comprehensive guides on various projects.
Frequently Asked Questions
How thick should drywall be for standard wall applications?
Standard wall applications typically use ½-inch drywall for 16-inch stud spacing and ⅝-inch drywall for 24-inch stud spacing. Check local building codes, as some jurisdictions have specific requirements. Thicker drywall provides better sound transmission class (STC) ratings and fire resistance.
Can I install drywall over existing drywall?
Yes, you can install drywall over existing drywall in many situations, though removing old drywall first is often preferable. If covering existing drywall, ensure the surface is clean and stable, use longer fasteners to penetrate studs, and apply joint compound over fastener heads that will be slightly recessed due to the additional layer.
What’s the difference between paper and fiberglass drywall tape?
Paper tape requires embedding in joint compound and provides excellent results when properly applied. Fiberglass mesh tape is self-adhesive and easier for beginners but requires more coats of compound for a smooth finish. Professional installers often prefer paper tape for superior results, though quality work is achievable with either type.
How long does joint compound take to dry?
Standard joint compound typically dries in 24 hours under normal conditions (70°F, 50% humidity). Quick-setting compounds dry in 20 minutes to 6 hours depending on the product. Check manufacturer specifications, as drying times vary significantly based on product type and environmental conditions. Humidity and temperature dramatically affect drying speed.
What’s the best way to cut drywall?
Score the drywall paper using a utility knife along a straightedge, then snap the gypsum core over a table edge. Cut through the back paper to complete the cut. For openings and irregular cuts, use a drywall saw or jigsaw. Always measure carefully before cutting to minimize waste and ensure proper fit around utilities and openings.
Do I need to prime drywall before painting?
Yes, priming is essential before painting. Joint compound is highly porous and absorbs paint differently than drywall paper, resulting in uneven color and poor paint adhesion without primer. Use a quality drywall primer designed for this purpose, applying it evenly across the entire surface according to manufacturer instructions.
How can I repair drywall damage?
Small holes and dings can be repaired using spackling compound and a putty knife. Larger holes require patching with drywall scraps secured with fasteners or adhesive, then taped and mudded like seams. Very large damage may require removing and replacing entire drywall sections. The repair process is identical to initial installation and finishing.


