Build a Deck Yourself? Expert Tips Inside
Building your own deck is one of the most rewarding DIY projects you can undertake. Whether you’re adding outdoor living space to your home or creating a gathering place for family and friends, a well-constructed deck enhances both property value and quality of life. However, the process requires careful planning, proper materials, and adherence to building codes to ensure safety and longevity.
Many homeowners wonder about the timeline and complexity involved in deck construction. Unlike how long it takes to build a house, a deck project typically spans several weeks to months depending on size and complexity. This comprehensive guide walks you through every phase of deck building, from initial design through final finishing touches, ensuring your outdoor space stands the test of time.
Planning and Obtaining Permits
Before driving a single nail, successful deck construction begins with thorough planning and understanding local requirements. Building permits exist to protect you and future property owners by ensuring structures meet safety standards. Contact your local building department to learn about specific requirements for your area, as codes vary significantly by location and region.
Most jurisdictions require permits for decks, particularly those over 30 inches in height or larger than 200 square feet. The International Code Council (ICC) publishes model building codes adopted by most municipalities. Your deck must comply with these standards regarding post spacing, railing height, fastener specifications, and structural capacity.
Create a detailed design plan including dimensions, materials list, and construction timeline. Sketch your layout considering factors like sun exposure, drainage, proximity to utilities, and how the deck connects to your home. Professional plans are available from various sources, but simple designs can be sketched on graph paper. Present these plans with your permit application—inspectors need to verify your design meets local codes before you begin construction.
Budget for permit fees, which typically range from $50 to $300 depending on your jurisdiction and project size. Schedule inspections at critical phases: foundation/posts, framing, and final completion. These inspections ensure your work meets code before you proceed to the next phase.
Essential Materials and Tools
Selecting appropriate materials significantly impacts your deck’s durability and maintenance requirements. Pressure-treated lumber remains the most economical choice for structural components, offering rot and insect resistance. The American Wood Council provides specifications for treated lumber appropriate for ground contact and various climate zones.
For decking surface, you have several options: pressure-treated wood (affordable, requires regular maintenance), cedar or redwood (attractive, moderate maintenance), composite materials (low maintenance, higher cost), or tropical hardwoods (extremely durable, premium pricing). Consider your climate, budget, and willingness to maintain the surface when making this decision.
Essential tools include a circular saw or miter saw, drill-driver, level, tape measure, square, and post-hole digger. A power miter saw dramatically speeds up crosscutting, while a cordless drill-driver handles fastening efficiently. Rent specialized equipment like a power auger for digging multiple post holes or a pneumatic nailer for faster fastening.
Safety equipment is non-negotiable: work gloves, safety glasses, dust mask, and steel-toed boots protect you during construction. Have a first-aid kit accessible and keep your work area organized to prevent accidents. Many deck injuries result from falls or improper tool use, so prioritize safety throughout your project.
Fasteners matter tremendously—use galvanized or stainless steel nails and screws to resist corrosion. Regular steel fasteners will rust and fail, compromising structural integrity. Follow manufacturer recommendations for fastener specifications, spacing, and installation depth to ensure code compliance.
Foundation and Post Installation
A proper foundation prevents settling, rot, and structural failure. Posts must rest on footings that extend below the frost line—the depth at which ground freezes in winter. This depth varies by location, typically ranging from 12 inches in mild climates to 48 inches in cold regions. Contact your local building department for your area’s frost line depth.
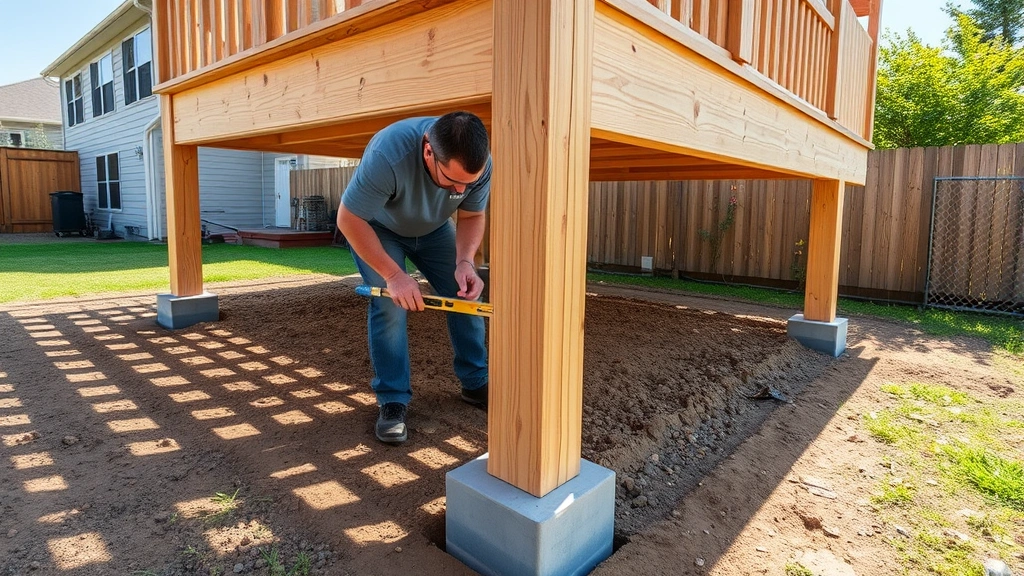
Dig post holes to the required depth using a post-hole digger or power auger. Fill the bottom 6-8 inches with gravel for drainage, then set concrete footings. Post bases should never rest directly on soil, as moisture causes rot. Use concrete footings or adjustable post brackets that elevate wood away from ground contact.
Space posts according to local code, typically 4-6 feet apart for residential decks. Ensure posts are perfectly vertical using a level—even slight tilts compound over the deck’s length. For a 16-foot deck with 6-foot spacing, you’ll need approximately 3 posts along the width and more along the length depending on your design.
Install posts securely using galvanized bolts, screws, or brackets rated for deck construction. The connection between posts and footings is critical—this is where lateral forces from wind or people moving on the deck transfer to the ground. Inadequate connections are a leading cause of deck collapse.
Allow concrete to cure fully (typically 48 hours) before applying significant loads. Rushing this phase compromises the foundation’s integrity and your entire deck’s safety.
Framing the Deck Structure
Framing creates the skeleton supporting everything above. The rim board (also called band board) connects posts and supports the outer edge of joists. Joists are the primary structural members spanning between support posts, typically spaced 12 or 16 inches apart. Joist spacing affects both strength and deflection—closer spacing provides more support for the decking surface.
Select joist size based on span and spacing per American Wood Council load tables. A 2×8 joist might safely span 12 feet with 16-inch spacing, but a 2×10 handles longer spans. Don’t guess—verify your design meets code requirements for your specific dimensions.
Attach rim board to posts with bolts or lag screws, ensuring the connection transfers loads properly. Install joists perpendicular to rim board, typically using joist hangers rated for the joist size. Joist hangers provide superior connections compared to toenailing and are required by most modern building codes.
Install blocking (short pieces between joists) at midspan for longer joists to prevent twisting and increase lateral stiffness. This seemingly minor detail significantly improves deck performance and code compliance.
Ensure the deck is level by checking with a long level as you build. Small slopes are acceptable for water drainage, but major tilts indicate foundation problems that must be corrected before proceeding.
Installing Decking and Railings
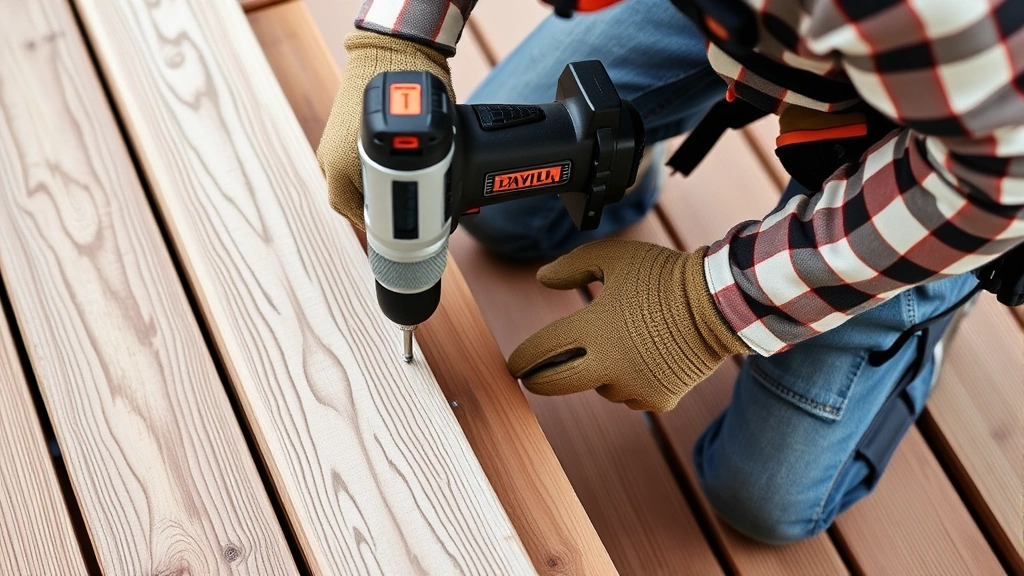
With framing complete, you’re ready for the visible surface—decking boards. Lay boards perpendicular to joists, leaving 1/8-inch gaps for expansion and water drainage. Some materials require different spacing; follow manufacturer guidelines for your specific decking product.
Stagger joints so adjacent board ends don’t align over the same joist. This distributes loads more evenly and prevents stress concentration. Use galvanized or stainless fasteners appropriate for your decking material, typically 2.5-inch screws or ring-shank nails.
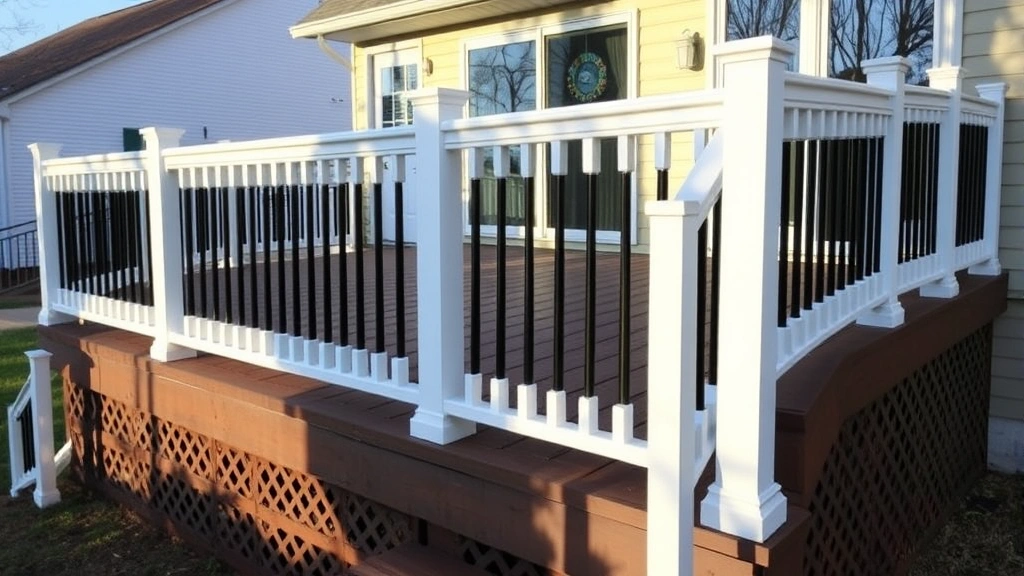
Railings are critical safety features, not optional upgrades. Code requires railings on decks over 30 inches high, with specific requirements for height (typically 36-42 inches), baluster spacing (4-inch sphere rule prevents children’s heads from passing through), and load capacity (typically 200 pounds lateral force per lineal foot). These requirements exist because railing failures cause serious injuries and deaths.
Install railing posts securely to framing, typically bolted to rim board or joists. Balusters (vertical spindles) must be spaced so a 4-inch sphere cannot pass through—this prevents entrapment hazards. Top rail must be sturdy enough to support someone leaning heavily or falling against it.
Consider stairs carefully—they’re common injury points. Steps require consistent rise (height) and run (depth), typically 7-8 inches rise and 10-11 inches run. Handrails are required on stairs with more than three steps, positioned 34-38 inches above the step nosing.
When designing railings, remember that home safety extends to outdoor structures, making proper railings essential investment in family protection.
Finishing and Long-Term Maintenance
After construction, finishing protects your investment and enhances appearance. Pressure-treated wood benefits from sealing to reduce moisture absorption and UV damage. Cedar and redwood require regular staining or sealing to maintain color and prevent weathering. Composite materials generally need minimal maintenance but benefit from periodic cleaning.
Apply sealant or stain within 6-12 months of construction, before the surface weathers significantly. Quality exterior finishes protect wood from moisture, which causes rot and structural failure. Plan to re-seal every 2-3 years depending on your climate and product used.
Regular maintenance extends deck life dramatically. Clean debris from surface and gutters to prevent water pooling. Inspect fasteners annually, tightening loose ones and replacing corroded fasteners. Check for soft spots indicating rot, particularly around railings and stairs where water accumulates.
Similar to how basement finishing requires moisture management, deck maintenance focuses on preventing water damage. Ensure proper drainage beneath and around your deck, clearing debris that traps moisture against wood.
Document your construction with photos and keep permits and inspection records. This documentation proves compliance with codes and helps future owners understand your deck’s specifications. If you ever sell your home, these records demonstrate the deck was properly constructed and maintained.
Properly maintained decks last 15-20 years or longer. Neglected decks deteriorate rapidly, developing rot, loose boards, and safety hazards within just a few years. The maintenance effort required is relatively minimal compared to the enjoyment and value your deck provides.
FAQ
How long does a DIY deck project typically take?
The timeline varies significantly based on deck size and complexity. A modest 12×16 foot deck typically requires 4-8 weeks from planning through final finishing. This includes permit acquisition (2-4 weeks), material gathering (1 week), construction (2-3 weeks), and finishing (1-2 weeks). Larger or more complex designs extend this timeline proportionally. Weather delays and inspection scheduling can add additional time.
Do I really need a building permit?
Yes, permits are essential for safety and legal reasons. They ensure your deck meets structural codes, preventing collapses and injuries. Unpermitted work can create liability issues, complicate home sales, and void homeowner’s insurance coverage. Permit costs are minimal compared to potential problems from code violations.
What’s the difference between pressure-treated and composite decking?
Pressure-treated wood is economical and structurally superior but requires regular maintenance including sealing and staining. Composite materials (wood-plastic blends) resist rot and insects, require minimal maintenance, but cost 2-3 times more. Choose based on your budget and maintenance preferences—both are code-compliant when properly installed.
How deep should deck footings be?
Footings must extend below your area’s frost line to prevent heaving during freeze-thaw cycles. This depth ranges from 12 inches in mild climates to 48 inches in cold regions. Contact your local building department for your specific frost line depth—this is non-negotiable for code compliance.
Can I build a deck on a concrete patio?
Yes, but posts must not sit directly on concrete, as water wicks up and causes rot. Use adjustable post brackets or concrete footings with proper drainage. Concrete also requires proper slope for water drainage—standing water accelerates rot and fastener corrosion.
What railing height is required?
Residential deck railings typically require 36-42 inches measured from the deck surface to the top rail. Balusters must be spaced so a 4-inch sphere cannot pass through. Railings must withstand 200 pounds of lateral force per lineal foot without failing. Check your local code for specific requirements.
How often should I seal my deck?
Most wood decks require resealing every 2-3 years, depending on climate and product quality. Signs that resealing is needed include water beading up on the surface rather than soaking in. Composite materials require less frequent maintenance but benefit from occasional cleaning and protective treatments.


