DIY Shed Roof Guide: Pro Tips for Beginners
Building a shed roof is one of the most rewarding DIY projects you can tackle, combining structural integrity with practical craftsmanship. Whether you’re constructing your first backyard storage solution or expanding your outdoor workspace, understanding roof fundamentals will save you time, money, and potential headaches down the road. A properly built shed roof protects your investment from the elements while providing years of reliable service.
This comprehensive guide walks you through every stage of shed roof construction, from initial planning and material selection through final finishing touches. We’ll cover the essential techniques that separate amateur mistakes from professional results, ensuring your roof withstands weather challenges and performs exactly as intended. By following these proven methods, even beginners can achieve structural excellence.
Understanding Shed Roof Basics
A shed roof, also called a lean-to roof, is the simplest roofing design available for DIY builders. Unlike pitched roofs with two sloping sides, a shed roof slopes in only one direction, making it easier to frame, sheath, and finish. This single-slope design reduces material costs while maintaining excellent water drainage when properly angled.
The fundamental principle behind shed roof construction involves creating a structural framework that supports roofing materials while directing water away from the building. Your roof must bear its own weight plus snow loads, wind resistance, and the weight of anyone working on it during installation or maintenance. Understanding load requirements before you begin ensures your structure remains safe and durable.
Most shed roofs require a minimum pitch of 4:12 (meaning 4 inches of vertical rise for every 12 inches of horizontal run) to ensure adequate water drainage. However, steeper pitches offer better shedding properties and allow snow to slide off more easily in winter climates. When planning your DIY building project, consider your local climate patterns carefully.
Choosing Your Roof Style and Pitch
Selecting the right roof pitch depends on several interconnected factors: your climate, available materials, aesthetic preferences, and local building codes. Flatter pitches (4:12 to 6:12) work well in drier climates where snow accumulation isn’t a concern, while steeper angles (8:12 to 12:12) perform better in regions with heavy precipitation or seasonal snowfall.
The relationship between pitch and material selection is critical. Asphalt shingles typically require minimum 4:12 pitch, while metal roofing can work on pitches as low as 3:12. Check your International Code Council building standards for regional requirements. Before finalizing your design, consult with local building inspectors about pitch requirements in your specific area.
Budget considerations also influence pitch selection. Steeper roofs require more materials and more complex framing, increasing costs significantly. However, they often extend roof lifespan and improve drainage performance. Balance your immediate budget constraints against long-term durability expectations when making this decision.
Essential Materials and Tools
Gathering proper materials before starting prevents mid-project delays and ensures code compliance. Your material list includes lumber for framing (typically 2×6, 2×8, or 2×10 rafters depending on span), plywood sheathing, roofing underlayment, roofing material (shingles, metal, or other options), flashing, fasteners, and sealants.
Quality matters significantly with roofing materials. Pressure-treated lumber resists rot and insect damage, extending structural lifespan considerably. Premium plywood sheathing (typically CDX grade) provides better moisture resistance than standard options. National Roofing Contractors Association recommendations emphasize using manufacturer-specified materials for warranty compliance.
Essential tools include a circular saw, power drill, hammer, measuring tape, level, roofing nailer (pneumatic or battery-powered), and safety equipment. Rent specialized equipment like roof jacks and staging if your shed exceeds 12 feet width. Proper safety gear—including harnesses for steeper pitches—prevents serious injuries during installation.
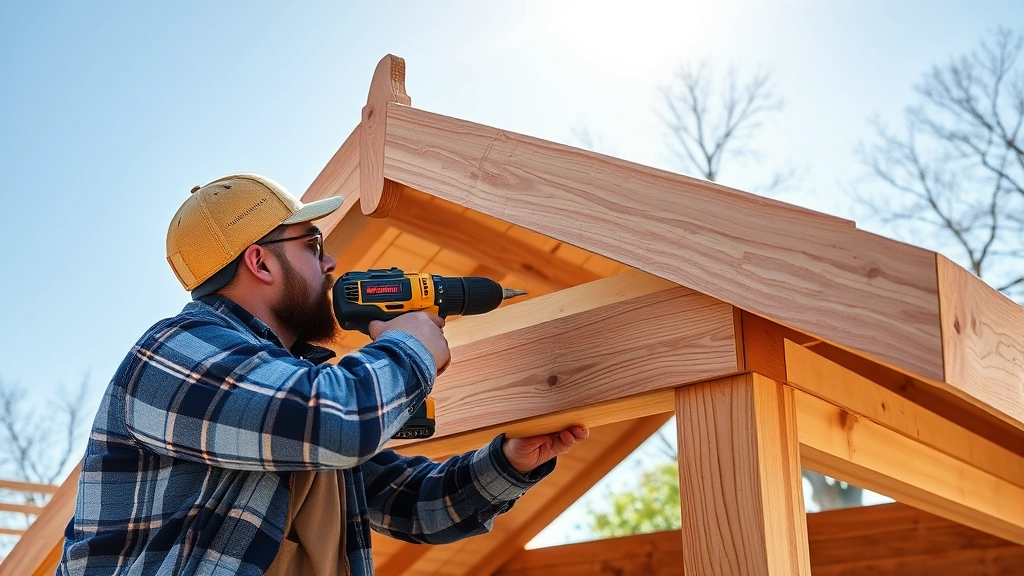
Framing the Roof Structure
Roof framing begins with establishing the slope through your wall height difference. If your shed measures 10 feet wide and you want a 6:12 pitch, one wall should be 5 feet higher than the opposite wall (6 inches rise per 12 inches run × 10 feet = 5 feet). This creates the slope necessary for water drainage and snow shedding.
Calculate rafter length using the Pythagorean theorem or rafter tables found in most framing guides. For a 10-foot span with 6:12 pitch, rafters measure approximately 11 feet 5 inches from wall plate to ridge. Cut your first rafter as a pattern, then use it to mark and cut remaining rafters identically. This ensures uniform slope and proper load distribution.
Space rafters 16 or 24 inches on center depending on snow loads in your region and rafter size. Secure rafters to wall plates with metal hurricane ties rated for your expected wind speeds. In high-wind areas, local building codes may require additional bracing or reinforcement. Your local building department provides specific requirements for your location.
Install collar ties (horizontal members connecting opposite rafters) every third rafter to prevent spreading. These ties resist outward thrust from the sloped structure, maintaining structural integrity during storms. Proper tie placement and fastening prevent catastrophic failure during extreme weather events.

Installing Sheathing and Underlayment
Roof sheathing provides the base for roofing materials while distributing loads across the rafter system. Install plywood perpendicular to rafters, staggering seams so they don’t align vertically. Leave 1/8-inch gaps between sheets to allow for wood movement during temperature and humidity changes.
Nail sheathing every 6 inches along supports using 8-penny nails for 1/2-inch plywood or 10-penny for 5/8-inch material. Proper fastening prevents sheathing uplift during high winds. Check that your fastener spacing meets American Wood Council specifications for your specific region and wind zone.
Underlayment (also called felt paper or synthetic wrap) creates a secondary water barrier beneath roofing materials. Synthetic underlayment offers superior durability and slip resistance compared to traditional felt. Install underlayment horizontally, overlapping each course by at least 4 inches, with the upper course overlapping the lower to direct water downward.
Secure underlayment with roofing nails every 12 inches along supports, or use the minimum fastening specified by manufacturers. Proper underlayment installation prevents water intrusion if roofing materials fail or during severe storms. This layer has prevented countless roof leaks in real-world conditions.
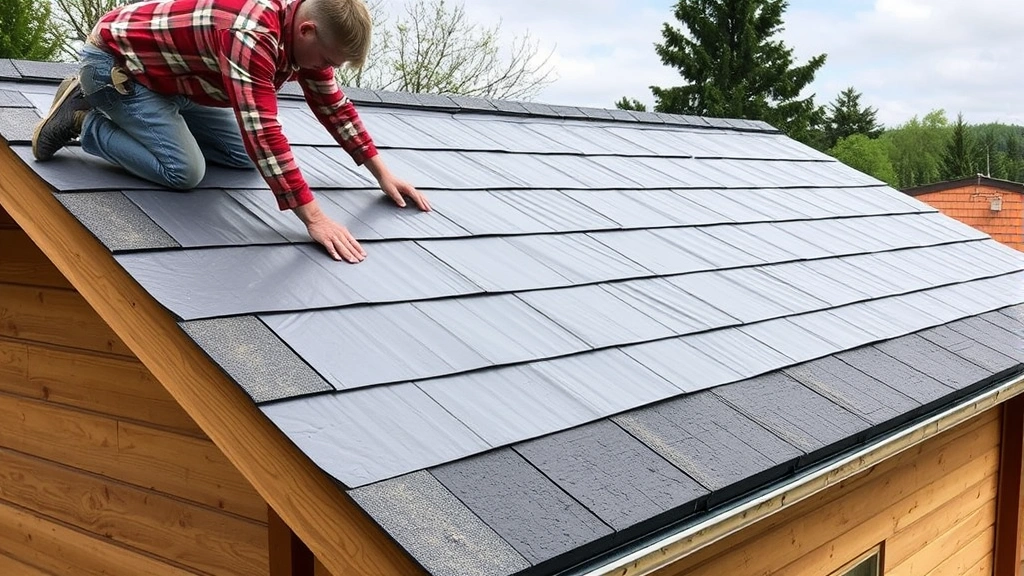
Applying Roofing Materials
Asphalt shingle installation begins at the eave with a starter course of shingles installed upside-down. This creates a solid base for subsequent courses and improves water shedding. Nail shingles with 4 nails per shingle (or 6 in high-wind areas), placed in the manufacturer’s designated nail line, typically 5/8 inches below the cutouts.
Work upward in horizontal courses, overlapping each row by the amount specified on shingle packaging (typically 5 inches). Stagger shingle tabs so cutouts don’t align vertically, which compromises wind resistance. Proper staggering distributes wind loads more effectively across multiple shingles.
Metal roofing offers superior longevity and weather resistance, though initial costs exceed asphalt shingles. Metal roofing requires different fastening approaches—typically screws rather than nails—to prevent fastener separation during thermal expansion. Follow manufacturer installation instructions precisely, as improper installation voids warranties on expensive materials.
Avoid common installation mistakes: over-driving nails that damage shingles, under-driving nails that allow blow-off, and improper overlap that creates water pathways. Take time with each course, maintaining consistent alignment and fastener placement throughout the project.
Ventilation and Drainage Solutions
Proper ventilation extends roofing material lifespan by reducing moisture accumulation in the attic space. Install soffit vents (intake) and gable or ridge vents (exhaust) to create continuous airflow. The ventilation area should equal 1/150th of the roof area minimum, or 1/300th if a balanced intake-exhaust system is installed.
Flashing prevents water intrusion at roof penetrations (chimneys, vents, wall junctions) and along edges. Install drip edge flashing along eaves and rakes, with the eave flashing installed before underlayment and rake flashing installed after. Proper flashing overlap directs water away from vulnerable areas.
Gutter and downspout installation completes your drainage system. Install gutters with a slight slope (1/16 inch per foot) toward downspouts, ensuring water flows rather than pooling. Position downspouts to direct water at least 4-6 feet away from shed foundations, preventing soil erosion and moisture problems.
Consider your shed’s relationship to surrounding structures. Water runoff that drains toward adjacent buildings creates problems for neighbors and may violate local drainage codes. Proper grading and downspout placement demonstrate good stewardship while protecting your installation investment.
Common Mistakes to Avoid
One critical error many beginners make involves insufficient roof slope, which leads to water pooling and eventual leaks. Always verify your pitch meets minimum requirements for your chosen roofing material. When in doubt, steeper is safer than flatter for long-term performance.
Inadequate fastening causes shingle blow-off during windstorms, exposing underlying layers to damage. Use the correct fastener type and quantity specified by manufacturers. Pneumatic nailers sometimes under-drive nails when compressor pressure is insufficient—verify proper fastening by hand-checking random nails.
Poor underlayment installation creates pathways for water intrusion beneath roofing materials. Overlaps must be sufficient and oriented correctly (upper course overlapping lower). Rushing this step invites future leaks that are expensive and difficult to locate and repair.
Neglecting ventilation causes premature shingle deterioration from excessive heat and moisture. Proper ventilation extends roofing lifespan by 10-15 years compared to poorly ventilated installations. This investment in ventilation pays dividends through extended material life.
Improper flashing installation around penetrations remains a leading cause of roof leaks. Take extra time with flashing details, ensuring overlaps are correct and sealants are applied generously. When you’re considering larger DIY renovation projects, flashing mastery becomes increasingly valuable.
Many DIYers skip local building permits, risking code violations and insurance complications. Permits ensure your installation meets safety standards and receive required inspections. The modest permit cost protects your investment and maintains property value.
FAQ
What’s the minimum roof pitch for a shed?
Most roofing materials require minimum 4:12 pitch for proper water drainage. Some metal roofing systems allow 3:12, while steeper pitches (6:12 to 8:12) perform better in high-precipitation climates. Check local building codes for your specific region, as requirements vary by area.
How long should a shed roof last?
Asphalt shingle roofs typically last 15-20 years with proper installation and maintenance. Metal roofing extends to 40-50+ years. Underlayment quality, ventilation, and climate conditions significantly impact actual lifespan. Regular inspections and prompt repairs extend roof life considerably.
Can I install a shed roof in winter?
Asphalt shingles become brittle in cold temperatures, making installation difficult and risking damage. Most manufacturers recommend installation between 50-85°F. If winter installation is necessary, use cold-weather adhesive products and handle shingles gently. Metal roofing installation is less temperature-sensitive.
What’s the difference between 4:12 and 6:12 pitch?
The pitch ratio indicates vertical rise per 12 inches of horizontal run. A 4:12 pitch rises 4 inches per foot of run, while 6:12 rises 6 inches per foot. Steeper pitches shed water and snow more effectively but require more materials and complex framing.
Do I need building permits for a shed roof?
Most jurisdictions require permits for structures exceeding certain size thresholds (typically 100-200 square feet). Permits ensure compliance with local codes, wind/snow load requirements, and setback regulations. Unpermitted construction may affect property value and create insurance issues. Always check with your local building department.
How do I know if my roof framing is strong enough?
Rafter size and spacing depend on span, pitch, roofing material weight, and local snow/wind loads. Use rafter span tables available through your building department or Structural Building Components Industry Association. When in doubt, consult a structural engineer or building inspector to verify adequacy.


