Build a Wooden Deck: Expert Tips Inside
Building a wooden deck transforms your outdoor living space into a functional entertainment area that adds significant value to your home. Whether you’re a seasoned DIY enthusiast or tackling your first major project, constructing a deck requires careful planning, proper materials, and adherence to building codes. This comprehensive guide walks you through every step of the deck-building process, from initial design considerations to final finishing touches.
A well-constructed wooden deck can last 15-20 years or more with proper maintenance and care. The key to longevity lies in understanding load requirements, selecting appropriate materials, and following local building codes. Unlike simpler DIY projects, deck construction involves structural integrity and safety considerations that demand precision and attention to detail. This guide ensures you have the knowledge to build a deck that’s both beautiful and safe for your family and guests.
Planning Your Deck and Obtaining Permits
Before breaking ground on your project, invest time in thorough planning and design. Sketch out your deck layout, considering the size, shape, and intended use. Most residential decks range from 12×16 feet to 16×20 feet, though your space and budget will dictate the final dimensions. Think about sun exposure, prevailing winds, and how the deck connects to your home’s architecture.
Obtaining proper permits is non-negotiable, despite the temptation to skip this step. Building permits ensure your deck meets local codes and safety standards. Contact your local International Code Council (ICC) or building department to understand requirements specific to your area. Most jurisdictions require permits for decks exceeding 30 square feet or elevated more than 30 inches above grade. Permit costs typically range from $50-300, a small investment compared to potential fines or safety issues.
When submitting permit applications, you’ll need detailed drawings showing post locations, joist spacing, beam sizes, and railing specifications. Many municipalities provide templates or have inspectors available for pre-construction consultations. Take advantage of these resources—they help catch design issues before construction begins. Additionally, check American Wood Council guidelines for load calculations and span tables specific to your lumber grade and species.
Consider hiring a structural engineer if your deck is large, elevated significantly, or built on challenging terrain. The modest investment in professional review ($200-500) prevents costly mistakes and ensures compliance with frost line requirements, which vary by climate zone and directly impact post depth and foundation stability.
Essential Materials and Tools
Selecting quality materials makes the difference between a deck lasting 10 years and one lasting 25 years. For the structure, choose pressure-treated lumber rated for ground contact (typically rated for 40+ pounds per square inch retention). For decking boards, you have several options: pressure-treated wood, cedar, composite materials, or tropical hardwoods like ipe. Pressure-treated lumber is budget-friendly and durable, while composite decking requires less maintenance but costs more upfront.
Essential materials include galvanized or stainless steel fasteners (never use regular nails or screws—corrosion will compromise structural integrity), concrete for footings, gravel for drainage, and flashing to prevent water damage where the deck attaches to your house. Galvanized bolts, lag screws, and joist hangers ensure connections remain secure for decades. Budget approximately $15-25 per square foot for materials on a basic pressure-treated deck, or $30-50 per square foot for composite or premium wood options.
Your tool list should include a circular saw or miter saw, power drill, level, tape measure, adjustable wrench, post hole digger, and a reciprocating saw for trimming. A pneumatic nail gun or cordless screw gun dramatically speeds up installation. Safety equipment—including safety glasses, work gloves, dust masks, and hearing protection—is mandatory. Many tools can be rented affordably if you don’t own them, reducing your initial investment while ensuring you have professional-grade equipment.
Foundation and Post Installation
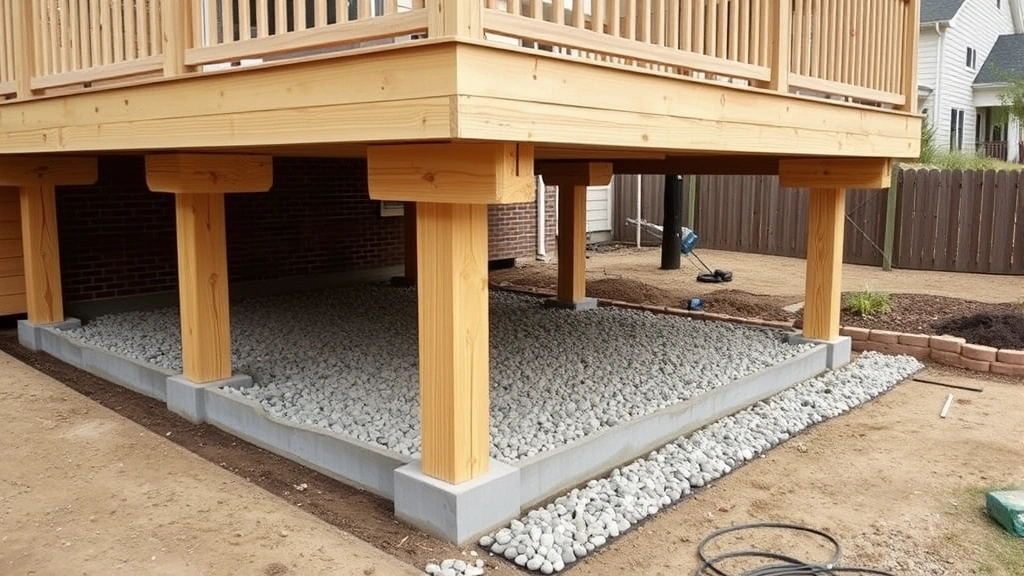
The foundation determines whether your deck stands strong or fails prematurely. Posts must rest on footings that extend below the frost line—the depth soil freezes in winter. In northern climates, this may be 48 inches or deeper; in southern regions, 12-18 inches often suffices. Check your local building code for exact requirements, as frost heave (soil expansion when frozen) can lift posts and destabilize your entire structure.
Dig post holes using a post hole digger or power auger, ensuring holes are plumb (perfectly vertical). Pour 6-8 inches of gravel into each hole for drainage, then set your posts on concrete footings. You have two options: dig below the frost line and pour concrete directly around the post, or use adjustable post bases that allow seasonal movement. Many builders prefer adjustable bases because they accommodate minor settling without cracking concrete.
Space posts according to your joist span and load requirements—typically 8, 10, or 12 feet apart depending on beam size and lumber grade. Use a level to ensure posts are perfectly vertical in both directions. Posts should extend above the rim joist by approximately 1.5 inches to allow for proper railing attachment. After concrete cures (48 hours minimum), verify that posts haven’t shifted by re-checking with your level.
Connect beams to posts using bolts or structural brackets rated for your load calculations. Never rely on nails alone—bolts with washers provide the strength needed for long-term durability. This foundation work, though time-consuming, is absolutely critical. Poor post installation is the leading cause of deck failure and potential injury.
Framing and Joist Installation
With posts and beams in place, install your rim joist around the perimeter. The rim joist connects to your house’s rim band (the horizontal board at the top of your foundation) using flashing and bolts. This flashing is critical—it prevents water from running behind the rim joist and into your house’s wall framing, which would cause rot and structural damage. Use NFPA building standards when installing ledger boards to ensure proper attachment and water management.
Space floor joists 16 inches on center for most residential applications, though some designs use 12-inch spacing for added strength or 24-inch spacing for cost savings (verify span tables for your lumber grade). Attach joists to the rim joist using joist hangers—metal brackets that prevent twisting and shifting. Never rely on toe-nailing (driving nails at an angle) for primary joist connections, as this method fails under load.
Install blocking or bridging between joists at mid-span for decks exceeding 12 feet in length. This cross-bracing prevents joist twisting and improves overall deck stiffness. Use a level frequently during joist installation to maintain proper slope (1/8 inch per 12 inches of length) for water drainage. Proper slope prevents water pooling and extends the life of your decking boards.
For decks with complex shapes or angles, use a circular saw to cut joists precisely. Mark cut lines clearly and double-check measurements before cutting—you can’t undo a cut. Gang-cut identical pieces (multiple joists stacked together) to save time and ensure consistency. After installing all joists, verify that your deck frame is square by measuring diagonals; they should be equal if your frame is square.
Installing Decking Boards
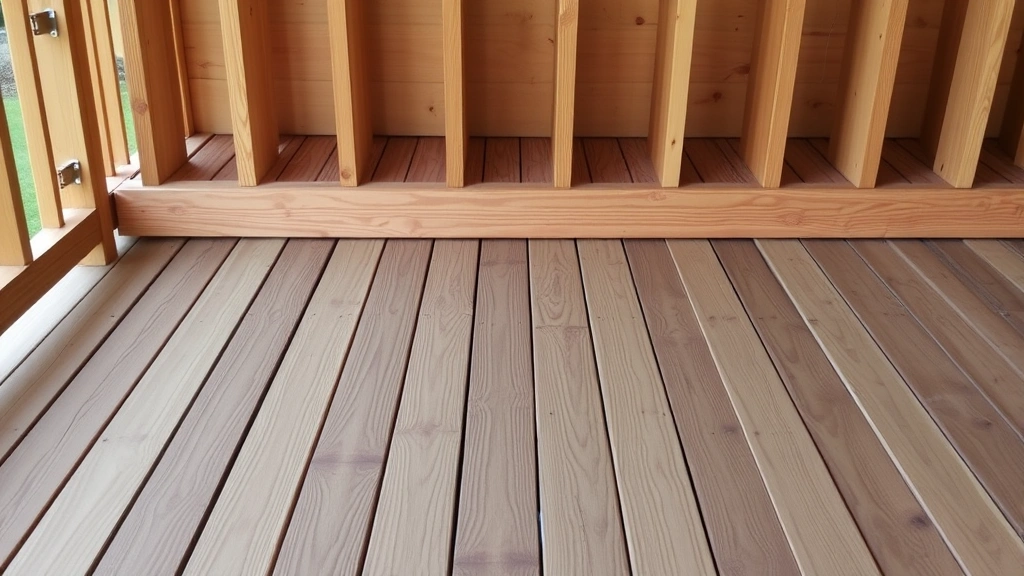
Decking board installation is where your deck’s appearance truly comes together. Start at the house side and work outward, leaving a consistent gap between boards for water drainage and wood expansion. Gaps should be 1/8 to 1/4 inch depending on your wood species and climate. Pressure-treated lumber shrinks as it dries, so spacing is essential to prevent buckling and cupping.
Fastening methods vary: traditional screws or nails, hidden fastening systems, or composite-specific clips. Screws offer superior holding power and allow easy removal if needed. Use exterior-grade screws at least 2.5 inches long, driving two screws per joist to prevent twisting. Space fasteners 1-1.5 inches from board edges to prevent splitting. Pre-drill screw holes in hardwoods to reduce splitting and make installation easier.
For a professional appearance, stagger board joints so they don’t align across multiple joists. This distribution of joints strengthens the deck and creates a more aesthetically pleasing pattern. If you’re using composite decking, follow manufacturer specifications exactly—some composite boards require specific fastening methods and spacing to maintain warranty coverage and ensure proper performance.
Sand or plane the decking surface after installation to remove splinters and create a smooth, safe walking surface. A belt sander works efficiently for large areas. Pay special attention to board edges and any rough spots. This finishing step prevents splinters that can cause injuries, particularly for children and elderly guests.
Railings and Stairs
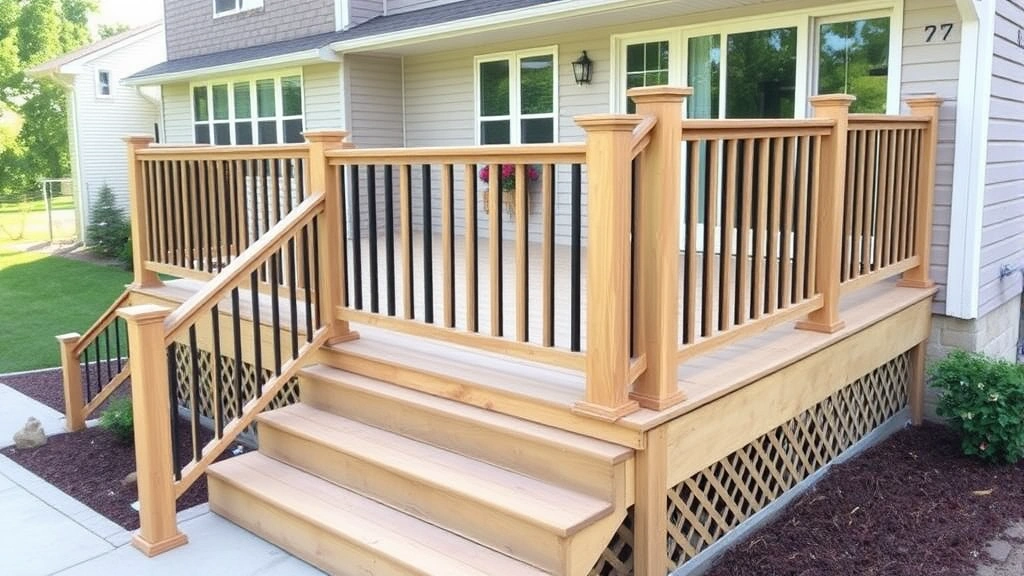
Building code requires railings on any deck elevated more than 30 inches above ground. Railings must meet specific standards: vertical balusters (spindles) spaced no more than 4 inches apart to prevent a sphere 4 inches in diameter from passing through. This seemingly arbitrary measurement prevents children from becoming trapped between balusters. Railings must withstand 200 pounds of outward horizontal force without failing.
When constructing deck structures with multiple levels, ensure each level meets railing requirements independently. Railing height must be 36-42 inches measured from the deck surface to the top of the railing. Use a level when installing railing posts to ensure they’re perfectly vertical, and bolt posts securely to the deck frame.
For stairs, each step must have consistent rise (vertical height) and run (horizontal depth). Standard residential stairs use 7-8 inch rises with 10-11 inch runs. Inconsistent step dimensions create tripping hazards and are a leading cause of deck-related injuries. Calculate total vertical distance from your deck to ground, divide by desired rise height, and you’ll know exactly how many steps you need.
Stair treads must be at least 10 inches deep and extend fully across the stairway width. Attach treads securely to stringers (the angled support boards) using bolts or lag screws—never rely on nails alone for stair construction. Install handrails on at least one side of stairs exceeding three steps, following the same railing code requirements. A handrail must be 1.25-2 inches in diameter and positioned 34-38 inches above stair nosing.
Finishing and Maintenance
Once your deck is structurally complete, apply a finish to protect the wood from UV damage and moisture penetration. You have several options: clear sealers that showcase the wood’s natural color, semi-transparent stains that add color while showing grain, or solid stains that provide maximum color and UV protection. Whatever you choose, apply finish within 3-6 months of installation for optimal results.
Prepare the surface by cleaning thoroughly with a deck cleaner and pressure washer (use 1500 PSI maximum to avoid damaging wood fibers). Allow the wood to dry completely—ideally 48-72 hours of dry weather—before applying finish. Apply finish according to manufacturer instructions, typically using a roller or brush. Most exterior stains require reapplication every 2-3 years, while some premium finishes last 5-7 years.
Regular maintenance extends your deck’s lifespan significantly. Sweep debris regularly to prevent moisture accumulation and mold growth. Inspect annually for signs of rot, particularly where wood contacts the ground or where water pools. Minor repairs now prevent expensive replacements later. If you notice soft spots when walking or pressing with a screwdriver, wood rot has begun and that board needs replacement.
Power wash your deck annually or as needed to remove mold, mildew, and accumulated grime. Keep gutters and downspouts clean so water doesn’t cascade onto your deck. Trim overhanging branches to improve air circulation and reduce moisture retention. These simple maintenance tasks—totaling just a few hours annually—keep your deck looking beautiful and prevent structural deterioration.
Consider seasonal preparations in harsh climates. In winter, remove snow and ice promptly to prevent water damage and slipping hazards. In summer, ensure proper drainage by checking that water doesn’t pool in low spots. If pooling occurs, you may need to adjust grading or add drainage solutions beneath the deck.
Frequently Asked Questions
How much does it cost to build a wooden deck?
Wooden deck costs range from $15-50 per square foot depending on materials and complexity. A basic 16×12-foot deck using pressure-treated lumber costs approximately $2,880-5,760 before labor. Composite decking costs $30-50 per square foot, significantly increasing project expenses but reducing long-term maintenance costs. Add 20-30% for labor if hiring professionals, or invest your time for DIY construction.
How long does it take to build a deck?
A straightforward 16×12-foot deck typically requires 40-60 hours of work spread over 2-3 weekends for a single person. More complex designs with stairs, railings, and multiple levels may require 80-120 hours. Weather delays, material availability, and your experience level all affect timeline. Professional crews complete similar projects in 5-7 days.
What’s the best wood for decking?
Pressure-treated lumber offers excellent value and durability. Cedar and redwood provide natural beauty but require more maintenance. Composite decking lasts longest with minimal upkeep but costs more initially. Tropical hardwoods like ipe are extremely durable but expensive and difficult to work with. Choose based on your budget, maintenance preferences, and aesthetic goals. Research National Wood Flooring Association recommendations for species-specific information.
Do I need a permit for my deck?
Yes, virtually all jurisdictions require permits for decks exceeding 30 square feet or elevated more than 30 inches. Permits ensure your deck meets local codes and structural requirements. Unpermitted decks can cause problems when selling your home and may be unsafe. The permit cost ($50-300) is minimal compared to potential fines or liability issues.
How do I prevent deck rot?
Prevent rot through proper construction (posts on footings, not direct ground contact), water management (flashing, proper slope, good drainage), and regular maintenance. Use pressure-treated lumber rated for ground contact, seal exposed wood surfaces, and keep debris clear. Address water pooling immediately, as standing water accelerates rot. Inspect annually and replace any soft or damaged boards promptly before rot spreads.
What’s the difference between composite and wood decking?
Wood decking requires regular maintenance (staining every 2-3 years) but costs less initially. Composite decking, made from wood fibers and plastic, requires minimal maintenance and lasts longer but costs significantly more upfront. Composite won’t rot or splinter, making it ideal for low-maintenance decks. Wood offers traditional aesthetics and warmth. Your choice depends on budget, maintenance preferences, and desired appearance.
How often should I stain my deck?
Most wood decks need restaining every 2-3 years depending on climate and finish quality. High-quality stains last 4-7 years. Signs your deck needs restaining include water beading poorly on the surface or uneven coloring. Always prepare the surface thoroughly by cleaning and sanding before applying new stain. Proper maintenance extends finish life and keeps your deck looking beautiful.


