How to Build a Shed: Expert Tips & Tricks
Building a shed is one of the most rewarding DIY projects you can undertake. Whether you need extra storage space, a workshop, or a garden retreat, constructing your own shed gives you complete control over design, materials, and functionality. This comprehensive guide walks you through every step of the process, from planning and permits to the final finishing touches.
A well-built shed adds value to your property while providing practical storage solutions. With proper planning, the right tools, and attention to detail, even first-time builders can create a sturdy structure that lasts for decades. We’ll cover everything you need to know, including foundation options, framing techniques, roofing methods, and weatherproofing strategies used by professional contractors.
Planning Your Shed Project
Before purchasing a single nail, invest time in proper planning. Start by determining your shed’s purpose and desired size. A storage shed typically ranges from 8×10 feet to 12×16 feet, while workshop sheds may require more height and interior space. Check local building codes and zoning regulations to understand setback requirements, maximum permitted size, and whether you need permits.
Create detailed sketches or use design software to visualize your structure. Consider climate factors in your region—snow load capacity, wind resistance, and moisture protection are critical in different areas. Research your local architectural and construction standards to ensure compliance. Most jurisdictions require permits for structures over 120 square feet, though this varies by location.
Develop a comprehensive materials list and budget. Account for lumber, fasteners, roofing materials, siding, hardware, and finishing supplies. Visit your local building department to understand specific requirements for your area. Many municipalities provide shed construction guidelines that specify minimum requirements for foundation depth, wall framing, and roof pitch.
Foundation Types and Installation
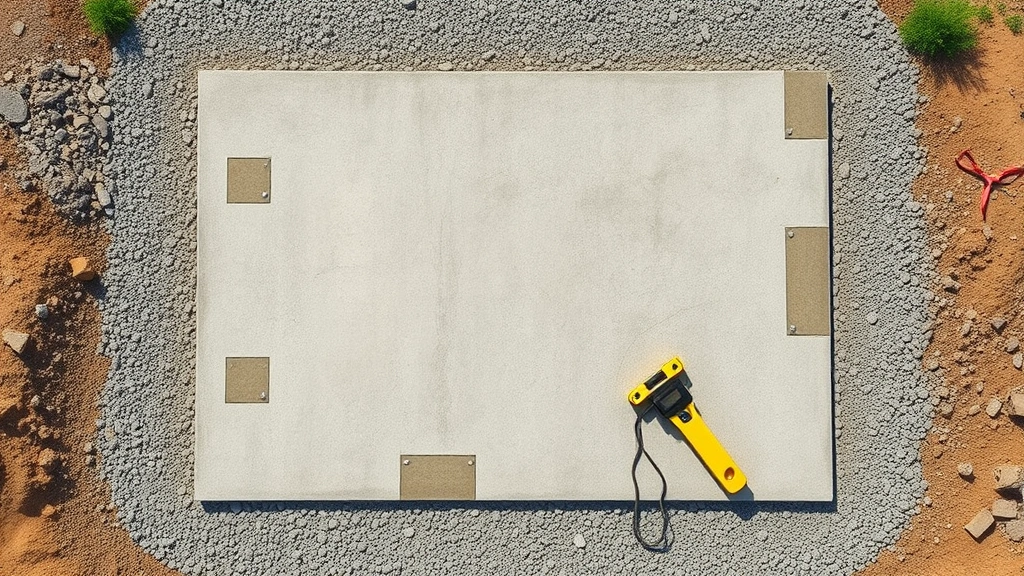
A solid foundation is absolutely critical for shed longevity. Three primary options exist: concrete pads, gravel beds, and concrete footings. Each has advantages depending on your climate, soil conditions, and budget.
Concrete Pad Foundations provide the most durable option. Pour a 4-6 inch concrete slab with reinforced rebar or wire mesh over a 4-6 inch gravel base. This prevents frost heave in cold climates and eliminates moisture wicking. Slope the surface slightly (1/8 inch per foot) for drainage. Allow concrete to cure for 7 days before building.
Gravel Pad Foundations work well in temperate climates with good drainage. Excavate 6-8 inches and fill with 4-6 inches of compacted gravel. Install pressure-treated skids or 4×4 beams on the gravel base. This method is economical and allows for air circulation underneath, reducing rot risk.
Concrete Footings suit areas with significant frost depth. Dig holes below the frost line (typically 3-4 feet in cold climates), set concrete footings, and mount pressure-treated posts on top. This method prevents frost heave that can crack foundations and shift structures.
Regardless of method, ensure your foundation is level and square. Use a transit level or laser level to check elevation across all points. Diagonal measurements should be equal to confirm squareness. A proper foundation prevents door misalignment, water intrusion, and structural stress.
Building the Frame Structure
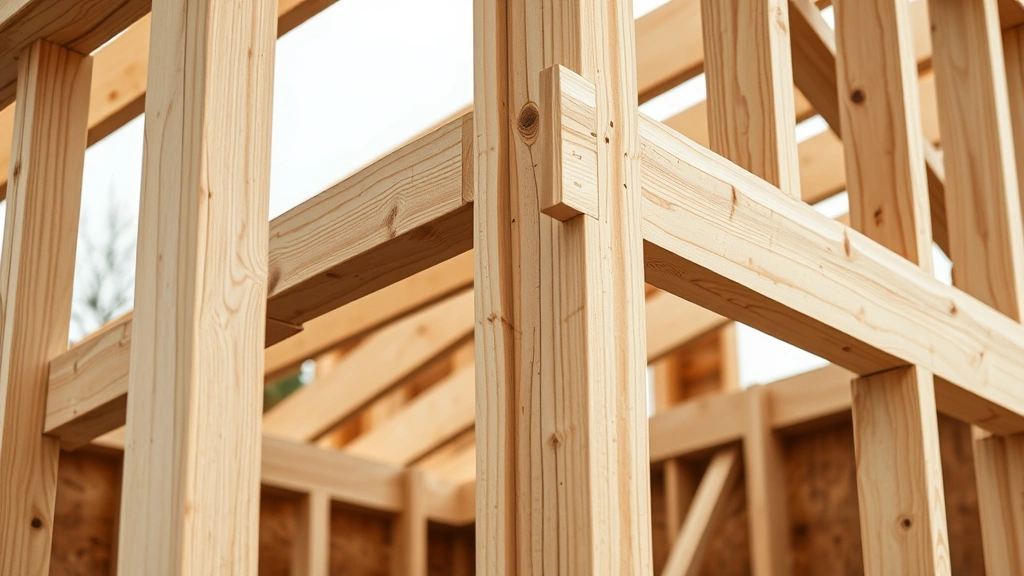
Frame construction determines your shed’s structural integrity. Use pressure-treated lumber for all components contacting the ground or foundation. Standard 2×4 lumber works for most residential sheds, though 2×6 provides additional strength for larger structures.
Begin by installing the rim board (perimeter framing) on your foundation. Check for square using the 3-4-5 triangle method: measure 3 feet along one side, 4 feet along the adjacent side, and the diagonal should measure exactly 5 feet. Secure the rim board with concrete anchors or bolts spaced 4-6 feet apart.
Install floor joists 16 inches on center (OC) for typical sheds, or 12 inches OC for heavier loads. Span joists should not exceed 8 feet without additional support. Use joist hangers for secure connections and add a center beam support for spans over 8 feet. Floor decking should be ¾ inch pressure-treated plywood, laid perpendicular to joists and screwed down with 2½ inch deck screws.
Construct wall frames on a flat surface before raising them. Standard wall height is 8 feet, though 7 feet suffices for small storage sheds. Space studs 16 inches OC and use king studs at corners, jack studs around openings, and header beams above doors and windows. Header size depends on opening width—consult National Frame Builders Association guidelines for proper sizing.
Raise walls carefully using temporary bracing. Secure walls to the floor frame with 16d nails or 3-inch screws spaced 16 inches OC. Install diagonal bracing (let-in bracing or X-bracing) on at least two walls to prevent racking. This critical step prevents wind from twisting your structure.
Roofing Your Shed
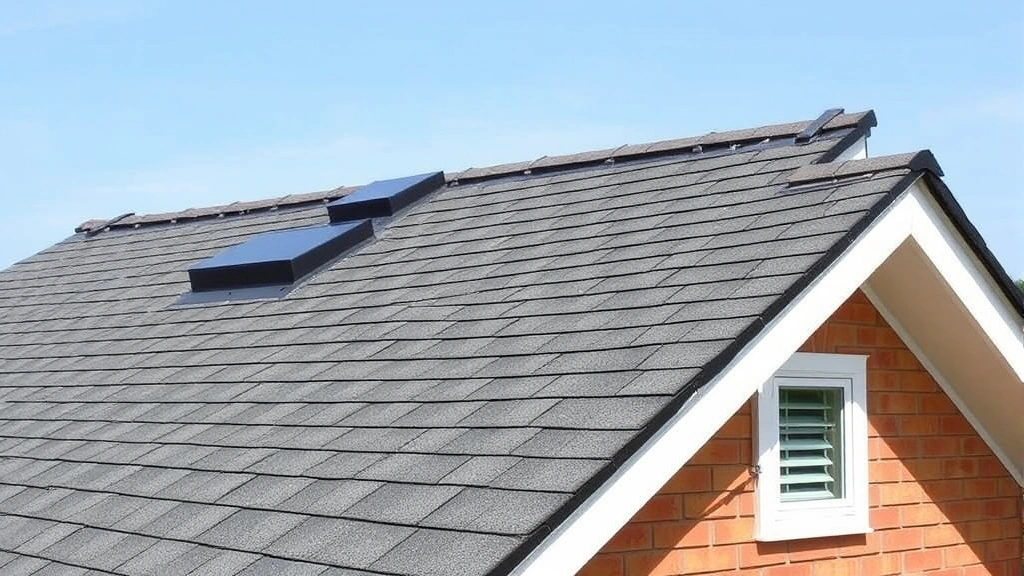
Roof design significantly impacts weather protection. Common options include gable roofs (peaked), gambrel roofs (barn-style), and shed roofs (single slope). Gable roofs shed water effectively and provide attic space, while shed roofs are economical and simple to construct.
Install roof trusses or rafters with appropriate pitch for your climate. Minimum 4:12 pitch (4 inches rise per 12 inches run) ensures adequate water drainage. In heavy snow areas, increase pitch to 6:12 or steeper. Space trusses 24 inches OC for typical loads, or 16 inches OC for heavy snow regions.
Secure trusses with hurricane ties and collar ties to prevent uplift and spreading. Add soffit vents and ridge vents for attic ventilation, preventing moisture buildup and extending roof life. Install 1-inch roof sheathing (plywood or OSB) perpendicular to rafters, leaving 1/8 inch expansion gaps between sheets.
Apply 30-pound roofing felt underlayment, overlapping courses 4 inches. For asphalt shingles, install drip edge along eaves and gables, then nail shingles starting at the eave line with 4 galvanized nails per shingle. Stagger seams and follow manufacturer specifications for nailing patterns. Metal roofing provides superior durability and longevity, though asphalt shingles remain the most economical choice.
Walls and Siding Installation
Wall sheathing ties together your frame and provides a base for siding. Install ½ inch exterior plywood or OSB sheathing, securing with 8d nails or 2-inch screws spaced 8 inches OC at edges and 12 inches OC at intermediate framing. Stagger joints between courses for strength.
Apply house wrap or felt paper over sheathing before siding installation. This breathable barrier prevents water intrusion while allowing interior moisture to escape, protecting against rot and mold. Overlap all seams and tape corners with compatible tape. Ensure proper drainage by sloping courses downward.
Siding options include vinyl, wood, fiber cement, and metal. Wood siding offers classic appearance but requires regular maintenance. Vinyl siding is economical and maintenance-free, though less durable in extreme temperatures. Fiber cement combines durability with wood aesthetics. Metal siding resists pests and fire, ideal for workshop sheds.
Install siding bottom-to-top, ensuring proper overlap and nailing pattern. Vinyl requires ½ inch fastener spacing to allow expansion. Wood shingles need staggered nailing with galvanized nails. Seal all joints and penetrations with compatible caulk. Install corner trim and finish trim around windows and doors for a professional appearance and weather protection.
Doors and Windows
Doors and windows require careful installation to prevent water leaks. Pre-hung doors simplify installation—they arrive with hinges and hardware pre-installed. For standard 36-inch doors, the opening should be 36¾ inches wide and 82¼ inches tall.
Install a door frame (buck) with shims to ensure squareness and plumb. The door should swing freely with consistent ¼ inch gaps on top and sides, ½ inch at the bottom. Use exterior-grade caulk and trim to seal the perimeter. Install a door sweep or threshold to prevent water penetration.
Windows improve light and ventilation. Ensure proper flashing and caulking to prevent leaks—this is the leading cause of shed water damage. Install flashing above and on sides of windows, overlapping house wrap downward. Use exterior-grade caulk compatible with your siding material.
Consider ventilation needs for your shed type. Workshops benefit from operable windows for air circulation. Storage sheds may use fixed windows. Gable vents or ridge vents improve air flow, preventing moisture accumulation that causes rot and mold.
Final Finishing and Maintenance
Paint or stain exterior surfaces to protect wood and enhance appearance. Use quality exterior paint formulated for your climate. Pressure-treated lumber requires drying time (6-12 months) before staining, though paint can apply immediately. Apply primer and two paint coats for maximum durability.
Install gutters and downspouts to direct water away from the foundation. This simple addition prevents foundation erosion, soil saturation, and moisture problems. Gutters should slope ¼ inch per 10 feet toward downspouts. Downspouts should extend 4-6 feet from the structure.
Interior finishing depends on shed purpose. Workshops benefit from workbenches, storage shelving, and electrical service. Storage sheds may need only basic shelving and organization. Proper home security measures like locks protect valuable equipment and tools.
Establish a maintenance routine to extend your shed’s lifespan. Inspect the roof annually for damaged shingles or flashing. Check walls for gaps, cracks, or pest entry points. Ensure gutters remain clear of debris. Re-caulk joints every 3-5 years. Repaint exterior surfaces every 5-7 years. Consider installing proper drainage systems around the foundation to prevent water issues.
For those planning additional projects like basement finishing, the framing and foundation skills learned here apply directly. Similarly, understanding proper ventilation and moisture control prevents problems in any structure you build.
FAQ
Do I need a permit to build a shed?
Most jurisdictions require permits for structures over 120 square feet. Check with your local building department—permits ensure your shed meets safety codes and doesn’t violate zoning restrictions. Unpermitted structures may create issues when selling property or filing insurance claims.
What’s the best foundation for a shed?
Concrete pads work best in most climates, providing durability and moisture protection. Gravel pads suit temperate regions with good drainage. Concrete footings prevent frost heave in cold climates. Choose based on your climate, soil conditions, and budget.
How long does it take to build a shed?
A small 8×10 shed typically takes 2-4 weeks with one person working part-time, or 3-5 days with a small crew. Larger structures or those with electrical service take longer. Weather delays and material availability affect timelines.
What tools do I need for shed construction?
Essential tools include a circular saw, drill-driver, level, tape measure, square, hammer, and pneumatic nailer. A reciprocating saw, miter saw, and table saw accelerate work but aren’t mandatory. Rent specialty equipment like nail guns and scaffolding rather than purchasing.
Can I build a shed on a sloped lot?
Yes, but it requires additional planning. Level the building site or use stepped footings at different elevations. Ensure proper drainage around the structure. A sloped lot may increase costs but provides opportunities for creative designs like elevated decks.
What’s the best siding material for sheds?
Vinyl offers affordability and low maintenance. Wood provides classic aesthetics but requires regular upkeep. Fiber cement combines durability with wood appearance. Metal resists pests and fire. Choose based on climate, budget, and maintenance tolerance.
How do I prevent shed rot and mold?
Proper ventilation, drainage, and moisture barriers prevent rot. Install soffit and ridge vents, ensure gutters direct water away from the foundation, use house wrap, and maintain caulking. Avoid direct ground contact with wood by using concrete foundations or pressure-treated materials.
Can I add electricity to my shed?
Yes, but hire a licensed electrician to ensure code compliance. Run underground conduit from your home’s electrical panel or install a separate circuit breaker. Ensure proper grounding and use GFCI outlets in damp areas. Check local codes before beginning electrical work.


