Can You DIY a Shed? Carpenter’s Guide Inside
Building a shed yourself is one of the most rewarding DIY projects you can tackle, combining practical skills with tangible results. Whether you’re looking to create storage space, a workshop, or a backyard retreat, constructing your own shed offers flexibility, cost savings, and the satisfaction of completing a substantial structure. This comprehensive guide walks you through every phase of shed construction, from initial planning through final touches, helping you determine if DIY shed building is right for you and equipping you with the knowledge to succeed.
Before diving into construction, it’s important to understand that shed building involves multiple disciplines: site preparation, framing, roofing, and finishing. The complexity varies significantly based on your design choices, local building codes, and your existing skill level. Many homeowners successfully complete basic shed projects in a few weekends, while more elaborate structures may take several weeks. Understanding the scope upfront helps you make informed decisions about whether to proceed independently or seek professional assistance for specific stages.
Understanding Shed Building Basics
A shed is fundamentally a simple structure, but that doesn’t mean it’s foolproof. The basic anatomy includes a foundation, frame, roof, and exterior covering. Most residential sheds range from 8×10 feet to 12×16 feet, though smaller and larger variations exist. The construction method typically follows standard residential framing practices, though at a reduced scale and complexity compared to full houses.
Your decision to build a DIY shed should consider several factors: your carpentry experience, available time, budget constraints, and the shed’s intended purpose. A simple storage shed with basic rectangular framing is far more achievable for beginners than a shed with complex roof lines, windows, or electrical systems. Start by honestly assessing your comfort level with tools, reading plans, and problem-solving when unexpected issues arise.
The construction timeline varies considerably. A straightforward 8×10 shed might take 3-5 weekends for someone with moderate experience, while a more elaborate 12×16 structure with utilities could require 6-8 weeks working part-time. Weather, material availability, and your physical stamina all influence actual completion time. Planning for setbacks—weather delays, material shortages, or learning curves—prevents frustration and keeps your project on track.
Permits and Building Code Requirements
Before you purchase a single piece of lumber, check your local building codes and permit requirements. This is non-negotiable and often overlooked by eager DIYers. Most jurisdictions require permits for structures over a certain size, typically 100-150 square feet, though some areas have different thresholds. The International Code Council (ICC) publishes the International Building Code that most municipalities adopt and enforce.
Building permits serve critical purposes: they ensure your structure meets safety standards, verify proper foundation design for your soil conditions, and confirm that electrical or plumbing work (if applicable) meets code. Skipping permits can result in fines, difficulty selling your home, insurance claim denials, or being forced to tear down your completed shed. Contact your local building department for specific requirements in your area.
Beyond size-based requirements, your shed location matters. Setback requirements—minimum distances from property lines—vary by jurisdiction and sometimes by zoning. Some areas require sheds to be setback 5-10 feet from property lines. Utility easements may restrict where you can build. Homeowners associations often have specific shed approval processes. Understanding these regulations before purchasing materials and beginning construction saves time and prevents costly mistakes.
Review building code requirements for your shed’s specific use. A storage shed has different requirements than a workshop with electrical service or a structure housing animals. Wind load requirements, snow load capacity, and ventilation standards all vary. Builder’s Journal and similar resources provide detailed code interpretations specific to residential structures.
Site Preparation and Foundation
Proper site preparation determines your shed’s longevity more than any other factor. Start by selecting a location with good drainage—avoid low spots where water pools after rain. Your shed needs to be accessible but positioned to maximize your property’s functionality. Consider sun exposure for summer cooling and winter heating, sight lines from your home, and how the shed relates to your landscape.
Clear the site of vegetation, rocks, and debris. Remove the top 2-4 inches of soil and any organic matter from the footprint. This prevents rot and pest issues by eliminating food sources and moisture traps. Level the ground as much as practically possible—minor slopes are acceptable, but significant grade changes require additional support.
Foundation options range from simple to sophisticated. The most common approaches for DIY sheds include:
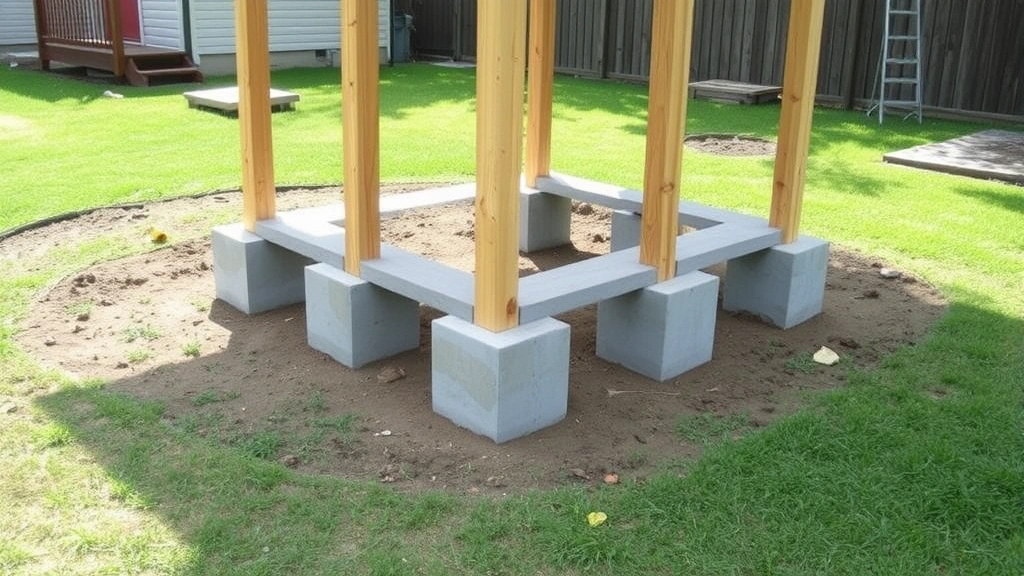
- Concrete piers: Holes dug below frost line with concrete footings and posts set on top. Excellent drainage, prevents frost heave, and allows easy repairs.
- Concrete slab: A poured concrete pad provides excellent stability and weather resistance. Requires more preparation but offers superior durability and a clean finished floor.
- Gravel base with pressure-treated skids: The most budget-friendly option, suitable for small sheds in well-draining locations. Requires periodic maintenance and eventual replacement.
- Grade beams: Continuous concrete foundations that follow the shed’s perimeter, combining benefits of piers and slabs.
For most DIY projects, concrete piers offer the best balance of cost, durability, and installation difficulty. Dig holes at each corner and midpoints along the walls, extending below your frost line (varies by region, typically 2-4 feet). Set concrete footings, allowing them to cure fully before building.
Framing Your Shed Structure
Framing is where your shed truly takes shape. Standard framing uses 2×4 lumber for walls, 2×6 or 2×8 for roof rafters, and 2×6 or 2×8 for floor joists. The wall frame consists of a bottom plate, vertical studs spaced 16 inches on center, and a top plate. This spacing is standard in residential construction and balances strength with material efficiency.
Begin by constructing the floor frame on your prepared foundation. Use pressure-treated lumber for all members that contact concrete or soil. Lay out the bottom plate, mark stud locations every 16 inches, and cut studs to length. Nail or screw studs to the plates using 16-penny nails or 3-inch screws. Ensure corners are square by measuring diagonals—they should be equal when the frame is square.
Wall assembly follows similar logic. Construct wall sections on the ground, then raise them into position. This approach is safer and more efficient than building walls in place. Brace walls temporarily with 2×4 diagonals as you raise them, then secure permanent bracing once all walls are upright and square. Install wall sheathing (plywood or oriented strand board) to add rigidity and provide a base for siding.
Roof framing depends on your shed design. A simple gable roof uses two rafters meeting at a peak, supported by a ridge board. Calculate rafter length and angle based on your desired roof pitch—typically 4:12 (4 inches of rise per 12 inches of run) for adequate water shedding and snow load capacity. Building codes specify minimum pitch requirements based on your roofing material and regional climate.
Ensure all connections use appropriate fasteners. Toe-nailing (driving nails at an angle through one member into another) is acceptable for light-duty connections, but metal connectors provide superior strength for critical joints. Install collar ties (horizontal members connecting opposite rafters) to prevent rafter thrust from pushing walls outward.
Roofing Installation
Your roof protects everything inside from weather, making proper installation critical. Start by installing roof sheathing—plywood or OSB boards that provide a base for roofing material. Space boards to allow for thermal expansion, typically 1/8-inch gaps. Ensure sheathing is properly fastened with nails or screws spaced 6-8 inches apart.
Next, install underlayment—a water-resistant barrier between sheathing and roofing material. This critical layer catches any water that gets past your primary roofing and channels it harmlessly off the roof. Modern underlayment is typically synthetic, offering superior durability compared to older tar-based products.
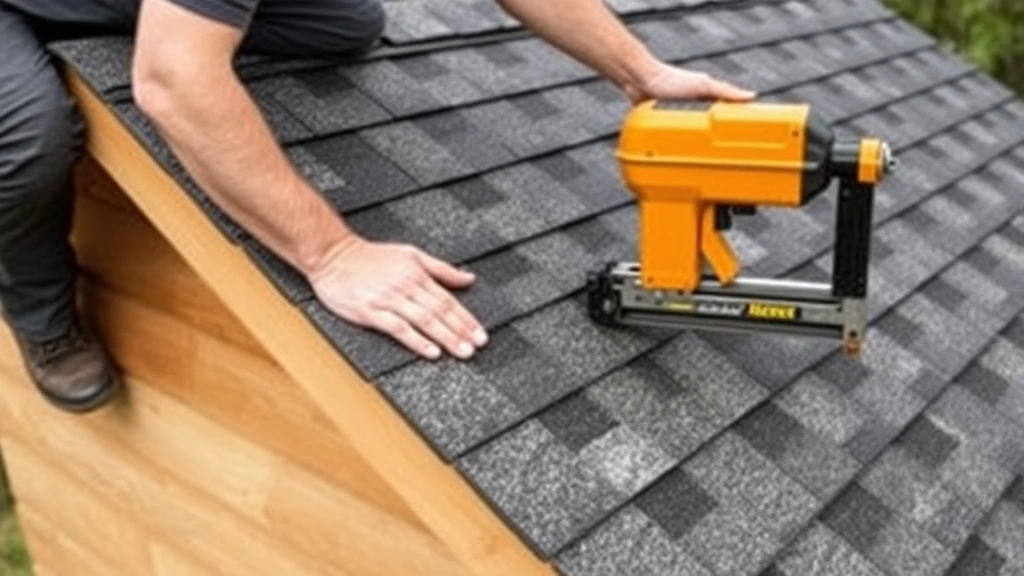
Most residential sheds use asphalt shingles for roofing because of their cost-effectiveness and ease of installation. Shingles are installed starting at the eave and working upward in overlapping rows. Each shingle is nailed or stapled according to manufacturer specifications, typically four fasteners per shingle. Roof edges require specialized trim pieces to prevent water infiltration and wind damage.
Flash all penetrations—where pipes, vents, or chimneys pass through the roof—with appropriate flashing materials. Improperly flashed penetrations are common sources of roof leaks. Ridge vents or roof vents improve attic ventilation, preventing moisture accumulation and extending roof life.
Siding and Exterior Finishing
Siding protects your framing while defining your shed’s appearance. Options include:
- Plywood or T1-11: Affordable, quick to install, and available in various textures. Requires regular maintenance and paint.
- Wood siding: Classic appearance with excellent durability when properly maintained. More expensive and labor-intensive than plywood.
- Vinyl siding: Low-maintenance, durable, and available in many colors. Good value for the money, though some find it less aesthetically appealing.
- Metal siding: Extremely durable, fire-resistant, and low-maintenance. More expensive upfront but offers decades of service.
- Composite materials: Engineered wood products offer wood-like appearance with improved durability and lower maintenance than solid wood.
Install siding vertically or horizontally, depending on your chosen material and aesthetic preference. Ensure proper overlap for water shedding—horizontal siding should overlap at least 1.5 inches. Install J-channel or trim around windows, doors, and corners to create professional-looking transitions and prevent water infiltration.
Finish exterior wood with paint or stain to protect against weather damage. Quality exterior paint or stain is a worthwhile investment that extends siding life by years. Plan on repainting every 3-5 years for painted finishes, longer for stains.
Interior Setup and Functionality
Once your shed is weathertight, interior work can proceed. This phase includes insulation (if desired), interior wall finishing, and functional elements like workbenches or shelving. Many basic storage sheds skip insulation and drywall, instead using open framing with plywood flooring.
If you plan to use your shed year-round or store temperature-sensitive items, insulation becomes important. Fiberglass batts are affordable and easy to install between studs. Rigid foam board offers superior R-value in minimal space. Ensure adequate ventilation if you insulate to prevent moisture accumulation and mold growth.
Interior walls can remain open studs for maximum storage flexibility, or you can install drywall or plywood for a more finished appearance. Open studs allow easier access for future modifications and repairs. Plywood provides a slightly more finished look while maintaining flexibility for adding shelving or hooks.
Plan your storage layout carefully. Pegboard walls, shelving units, and wall-mounted cabinets maximize vertical space. A secure storage solution protects valuable tools and equipment. If you’re building a workshop shed, dedicated workbench space and tool storage become primary design considerations.
Electrical service is optional but useful for lighting and tool charging. If you choose to add electricity, hire a licensed electrician—this isn’t a DIY area where shortcuts are acceptable. Improper electrical installation creates fire and safety hazards. The National Electrical Code (NEC) specifies requirements for outdoor structures.
Tools and Materials You’ll Need
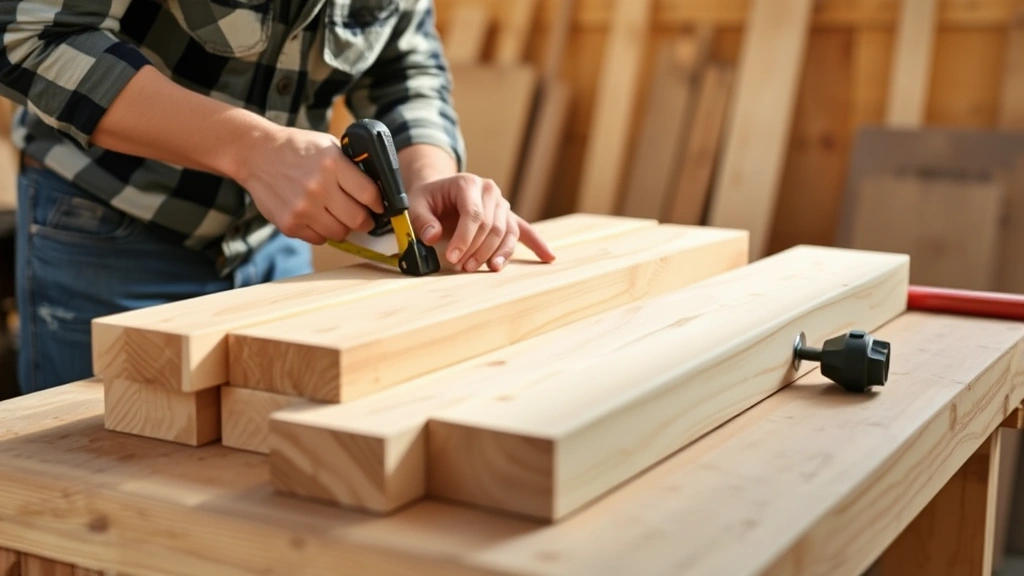
Successful shed building requires appropriate tools and quality materials. Basic hand tools include a hammer, circular saw, drill-driver, level, tape measure, square, and pencil. Power tools make the work faster and easier—a miter saw for accurate angle cuts and a reciprocating saw for demolition or complex cuts are valuable additions.
Safety equipment is non-negotiable: safety glasses protect your eyes from flying debris, work gloves prevent splinters and cuts, and a dust mask protects your lungs when cutting wood. Hearing protection is essential when operating power tools. A first aid kit should be readily accessible during construction.
Material quantities depend on your shed size and design. A typical 8×10 shed requires approximately 1,200-1,500 board feet of lumber, 6-8 sheets of plywood for sheathing and siding, roofing materials for roughly 1,000 square feet (accounting for pitch), and fasteners including nails, screws, and metal connectors.
Purchasing materials from reputable suppliers ensures quality. Pressure-treated lumber, exterior-grade plywood, and roofing materials rated for your climate zone are worth the investment. Cheap materials often result in premature failure and costly repairs.
Consider renting specialized equipment rather than purchasing. A nail gun, power auger for digging foundation holes, and a scaffolding system can be rented affordably and make work significantly easier. Concrete mixing equipment is also worth renting if you’re pouring a slab foundation.
FAQ
Do I need a permit to build a shed?
Most jurisdictions require permits for sheds over 100-150 square feet, though requirements vary. Check with your local building department before starting. Permits ensure your structure meets safety codes and can prevent legal issues when selling your home.
How much does it cost to DIY a shed?
A basic 8×10 storage shed costs $1,500-$3,000 in materials, depending on siding choice and finish level. A more elaborate 12×16 shed with better finishes might cost $4,000-$6,000. Professional construction costs significantly more, typically 2-3 times the material cost.
How long does it take to build a shed?
A straightforward 8×10 shed takes 3-5 weekends for someone with moderate carpentry skills. More complex designs or larger structures require proportionally more time. Weather delays and learning curves should be factored into your timeline.
Can I build a shed without a foundation?
Technically yes, but it’s not recommended. A proper foundation prevents rot, pest damage, and structural failure. Even simple concrete piers or gravel pads with pressure-treated skids are better than building directly on soil.
What’s the easiest shed to build as a beginner?
Start with a simple rectangular storage shed, 8×10 or 8×12 feet, with a gable roof and basic plywood siding. Avoid complex roof lines, large windows, or integrated utilities. This allows you to focus on fundamental framing and roofing skills.
Should I hire an electrician for shed wiring?
Yes. Electrical work in outbuildings must meet code requirements, including proper grounding and weatherproof fixtures. Improper installation creates serious safety hazards. A licensed electrician ensures compliance and safety.
Can I use recycled or reclaimed materials?
Recycled materials can work for non-structural elements like siding or shelving, but use new, code-approved materials for structural framing, roofing, and foundation elements. Your shed’s structural integrity depends on material quality and reliability.
What’s the best roofing material for a shed?
Asphalt shingles offer the best value for most DIY sheds, lasting 15-20 years with minimal maintenance. Metal roofing costs more upfront but lasts 40+ years. The choice depends on your budget and long-term plans for the shed.
Building a shed yourself is achievable for most homeowners willing to invest time in learning proper techniques. Start with a simple design, follow building codes, and don’t hesitate to seek professional help for specialized work like electrical installation or complex structural elements. The skills you develop on your shed project transfer to other home improvement endeavors, making this investment in your abilities valuable far beyond the finished structure. Whether you’re creating storage space, a workshop, or a backyard retreat, your DIY shed becomes both a functional asset and a source of pride in your craftsmanship. Remember that understanding construction timelines and processes helps you plan realistically, and consulting resources like DIY Nests Hub Blog keeps you informed throughout your project.


