Build a Shed? Carpenter’s Tips for Beginners
Building your own shed is one of the most rewarding DIY projects you can undertake. Whether you’re looking to create extra storage space, a workshop, or a garden retreat, constructing a shed from the ground up teaches you fundamental carpentry skills while delivering a functional structure you’ll use for years. This comprehensive guide walks you through every phase of shed construction, from initial planning through final finishing touches, with practical advice drawn from decades of carpentry experience.
Before you pick up a hammer, understand that successful shed building requires careful planning, proper materials selection, and adherence to local building codes. Many beginners underestimate the importance of site preparation and foundation work—these elements determine whether your shed stands straight and level for decades or develops structural problems within a few years. This guide emphasizes the foundational work that separates amateur projects from professional-quality results.

Planning Your Shed Project
The foundation of any successful shed project begins with thorough planning. Start by determining your shed’s purpose—will it primarily store lawn equipment, serve as a workshop, or function as a garden studio? Your intended use directly influences size requirements, ventilation needs, and internal layout decisions. A 8×10 foot shed works well for basic storage, while a workshop might require 10×12 or larger dimensions to accommodate workbenches and equipment.
Check your local building codes and zoning regulations before purchasing materials. Many jurisdictions require permits for structures exceeding 100 square feet, and setback requirements determine how far your shed must sit from property lines. Contact your local building department—this small step prevents costly mistakes and ensures your project complies with regulations. Some areas require professional engineering for larger structures, while others allow owner-built sheds under specific size thresholds.
Create detailed plans or purchase pre-designed shed blueprints. Even if you’re handy, having documented plans ensures consistent measurements and helps you calculate material quantities accurately. Include roof pitch, door placement, and window locations in your planning. A steeper roof (8:12 pitch or higher) sheds water and snow more effectively than shallow pitches, particularly in wet climates. Document these decisions before construction begins—changes mid-project waste materials and create structural inconsistencies.
Choosing the Right Location and Foundation
Site selection dramatically impacts your shed’s longevity. Avoid low-lying areas prone to water accumulation; poor drainage causes wood rot, foundation settling, and structural failure. Choose a location with good water drainage, adequate sunlight if you’ll work inside, and convenient access for moving materials and finished projects. Test drainage by observing how water flows during rain—you want runoff moving away from the building site.
Foundation type depends on your climate, soil conditions, and local codes. Beginners typically choose between three options: concrete piers, concrete slab, or treated wood skids. Concrete piers (holes dug below frost line with concrete footings supporting wooden posts) work well in cold climates where frost heave causes movement. Concrete slabs provide the most stable foundation but require site preparation and professional pouring. Treated wood skids (pressure-treated beams laid directly on gravel) offer simplicity for smaller sheds but require careful leveling and may settle over time in poor soil.
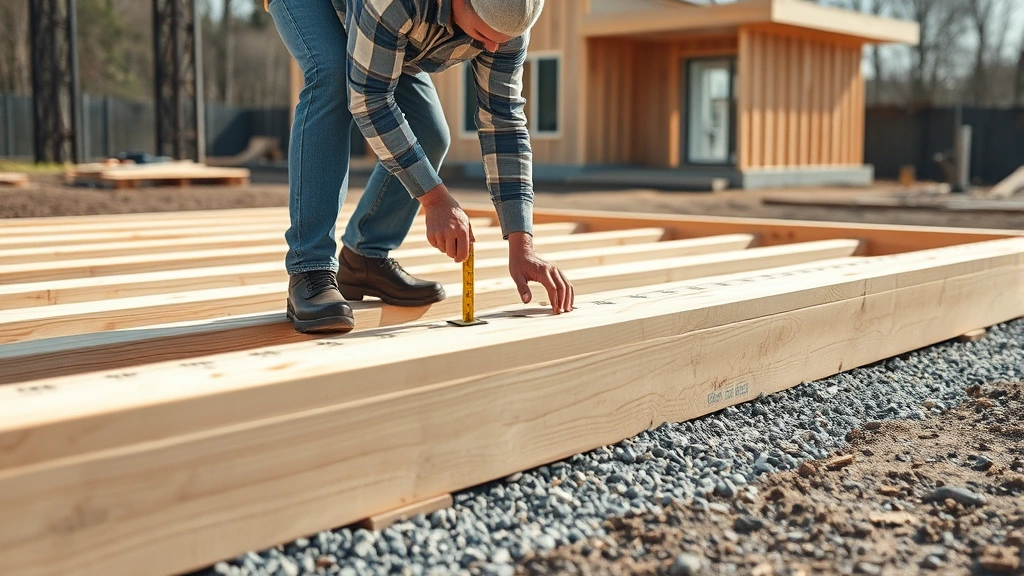
For most beginners, concrete piers represent the best balance of simplicity and durability. Frost line depth varies by region—check with your local building department for your area’s requirements. Typically, frost lines extend 12-48 inches deep. Dig holes below this depth, add 4-6 inches of gravel for drainage, and pour concrete around pressure-treated posts. This method prevents frost heave while allowing water to drain away from the structure.
Level your foundation obsessively. Use a 4-foot level and check multiple directions. An unlevel foundation causes doors and windows to stick, creates wall gaps, and stresses the frame. Spend extra time here—correcting foundation problems after framing requires dismantling work. A laser level ($30-50) makes this task much easier for beginners than traditional levels.
Essential Tools and Materials
Before construction begins, gather proper tools. At minimum, you’ll need: circular saw or miter saw, drill/driver, hammer, tape measure, carpenter’s square, level, chalk line, and safety equipment (eye protection, dust mask, work gloves). Quality matters—cheap tools frustrate you and produce inferior results. Invest in mid-range tools from established brands rather than ultra-budget options.
Material selection significantly affects shed durability. Lumber: Use pressure-treated wood for any components contacting soil or exposed to moisture. Standard framing uses 2×4 and 2×6 lumber. Roofing: Asphalt shingles offer affordable durability; metal roofing costs more but lasts longer. Siding: Plywood sheathing with exterior siding, metal panels, or shingles all work. Hardware: Use galvanized or stainless steel fasteners to prevent rust.
Calculate materials precisely. Measure your site, sketch your design, and list every board, nail, and fastener needed. Overestimate slightly (add 10% for waste), but avoid excessive overbuying. Most suppliers accept lumber returns within 30 days if you keep receipts.
Building the Frame Structure
Frame construction begins with the band board (perimeter frame connecting your foundation). Cut pressure-treated 2×6 or 2×8 boards to length, ensuring corners are perfectly square using the 3-4-5 method: measure 3 feet along one side, 4 feet along the adjacent side, and the diagonal should measure exactly 5 feet. Secure boards to foundation posts with lag bolts or concrete anchors, checking level constantly.
Wall framing follows traditional stud spacing: studs placed 16 inches on center (measured from center to center of adjacent studs). This spacing balances structural strength with material efficiency. Cut studs to length, accounting for top and bottom plates. A standard 8-foot wall uses studs approximately 92 5/8 inches long (accounting for plate thickness). Assemble walls flat on the ground—this prevents mistakes and makes fastening easier. Use 16-penny nails or 3.5-inch screws to secure studs to plates.
Roof framing represents the most complex carpentry work. Rafters (the angled pieces supporting roof covering) must be precisely cut with angles matching your chosen roof pitch. Use a rafter square to calculate angles, or purchase pre-cut rafters from suppliers. Spacing typically matches wall framing (16 inches on center). Install collar ties (horizontal braces connecting opposing rafters) to prevent outward thrust from pushing walls apart.
Check your DIY building resources for detailed rafter layout instructions specific to your roof pitch. This calculation determines whether your roof sheds water properly and distributes weight evenly. An incorrectly pitched roof causes water pooling and premature failure of roofing materials.
Installing Walls and Roofing
Once the frame stands and is braced for squareness, install wall sheathing (plywood or OSB sheets). These sheets add rigidity and provide nailing surfaces for siding. Space fasteners 6 inches apart around edges and 12 inches in the field (interior). Leave 1/8-inch gaps between sheets to allow wood movement as humidity changes—failure to account for wood movement causes buckling and splitting.
Install roof decking (plywood sheets) over rafters, again leaving gaps between sheets. Add underlayment (tar paper or synthetic) before installing roofing material. This layer provides weather protection if shingles fail. Proper underlayment installation prevents water infiltration, extending your roof’s lifespan significantly.
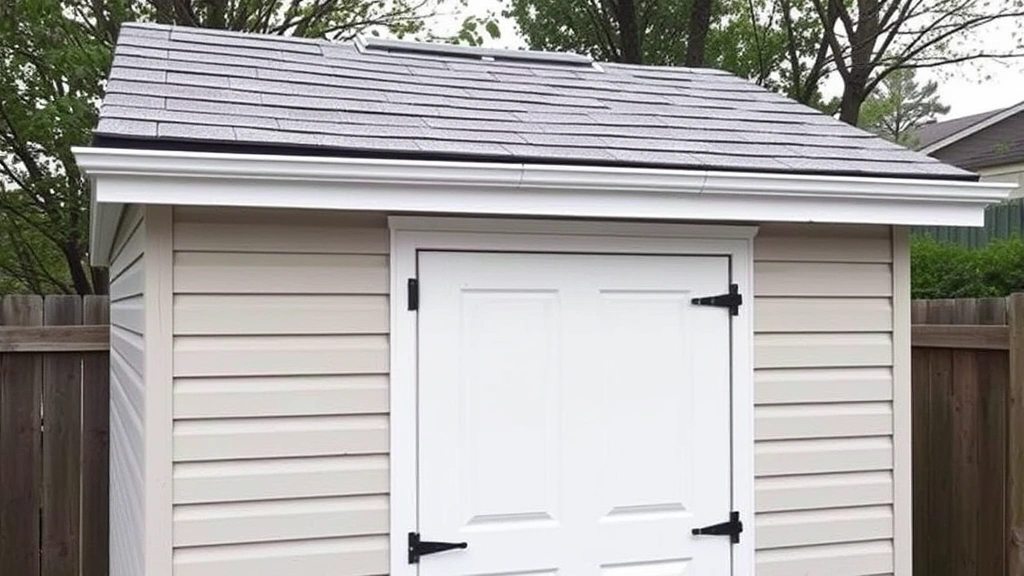
Asphalt shingle installation requires starter strips along the eaves, then successive rows nailed with four fasteners per shingle. Proper nailing height ensures fasteners hold shingles securely without penetrating through to the interior. Metal roofing requires different fastening techniques—follow manufacturer specifications precisely. Improper fastening causes leaks and premature failure.
Install gutters and downspouts to direct water away from the foundation. This seemingly minor detail prevents water accumulation that causes rot and foundation problems. Position downspouts to direct water at least 4-6 feet from the building.
Finishing and Weatherproofing
Siding installation protects the structure and improves appearance. Options range from simple plywood (stained or painted) to vinyl or fiber cement boards. Each material requires specific fastening and finishing techniques. Vertical board-and-batten siding offers rustic appeal while hiding seams. Horizontal lap siding requires careful overlap spacing to shed water properly.
Paint or seal all exposed wood to prevent weather damage. Quality exterior paint lasts 5-7 years; stain lasts 3-5 years. Bare wood deteriorates rapidly—never skip this step. Ensure proper surface preparation: sand rough spots, fill gaps, and apply primer before topcoat. Two topcoats provide better protection than one.
Install door and window frames before installing final siding. Proper flashing (metal or rubber pieces) around openings directs water away from the building interior. Flash every opening—this detail separates amateur projects from durable structures. Many interior water problems originate from improperly flashed windows and doors.
Ventilation prevents moisture accumulation and extends structural life. Install soffit vents (under eaves) and roof vents to allow air circulation. This prevents mold growth and wood rot in the attic space. The International Code Council provides ventilation requirements in their building standards—follow these guidelines even for small sheds.
Safety Considerations
Construction safety protects you and your helpers. Always wear appropriate personal protective equipment: safety glasses, dust masks, and work gloves. Long hair should be tied back when operating power tools. Keep work areas clear of tripping hazards and maintain tool cords away from walking paths.
Ladder safety deserves special attention. Use proper ladder techniques: maintain three points of contact, position ladders on stable ground, and never overreach. Falls cause serious injuries—take ladder safety seriously. When working at heights, consider fall protection if you’re uncomfortable with traditional methods.
Electrical safety matters when using power tools. Use ground fault circuit interrupters (GFCIs) when working outdoors. Inspect extension cords for damage before use. Never operate power tools in wet conditions. Respect tool capabilities—circular saws and nail guns demand full attention and proper technique.
Lifting technique prevents back injuries. Bend your knees when lifting heavy materials; avoid bending at the waist. Ask for help with awkward or heavy items rather than risking injury. Proper technique prevents injuries that could derail your project.
Check OSHA guidelines for construction safety standards. These regulations exist because they prevent injuries. Taking safety seriously protects you, your helpers, and ensures your shed project remains enjoyable rather than becoming a source of regret.
FAQ
Do I need a building permit for my shed?
Most jurisdictions require permits for structures exceeding 100-120 square feet. Some areas require permits for any permanent structure. Check with your local building department—permit requirements vary significantly by location. Skipping permits risks fines and complications when selling your property. The small permit cost and inspection process ensure your shed meets safety standards.
What’s the best foundation type for beginners?
Concrete piers offer the best combination of simplicity and durability for most beginners. They’re easier to install than slabs, more durable than wood skids, and work well in most climates. Ensure holes extend below your local frost line to prevent frost heave problems.
How long does a shed typically last?
A well-built shed with proper maintenance lasts 20-30 years or longer. Longevity depends on climate, maintenance, and construction quality. Regular painting, roof maintenance, and gutter cleaning extend shed life significantly. Neglected sheds deteriorate much faster—budget for annual maintenance to protect your investment.
Can I build a shed without prior carpentry experience?
Absolutely. Start with a smaller shed (8×10 feet) rather than an ambitious 12×16 project. Use pre-cut materials and detailed plans to simplify the process. Don’t hesitate to ask experienced builders for advice. Many communities have building clubs where experienced builders mentor beginners. Learning from others accelerates your skill development and prevents costly mistakes.
What’s the most common shed-building mistake?
Inadequate foundation preparation tops the list. Beginners underestimate foundation importance, leading to unlevel structures and long-term settling problems. Spend extra time leveling and ensuring proper drainage. Second mistake: insufficient weatherproofing. Incomplete flashing, poor paint coverage, and missed siding gaps cause water damage that destroys structures from within. Take weatherproofing seriously—it’s not cosmetic; it’s structural protection.
How much should I budget for a basic 8×10 shed?
Budget $2,000-$4,000 for materials on an 8×10 shed with basic finishing. This includes lumber, roofing, siding, hardware, and paint. Costs vary significantly by region and material choices. Metal roofing costs more than asphalt shingles; fiber cement siding costs more than plywood. Get quotes from local suppliers to refine your budget. Labor costs (if hiring contractors) add $3,000-$8,000 depending on complexity and local rates.


