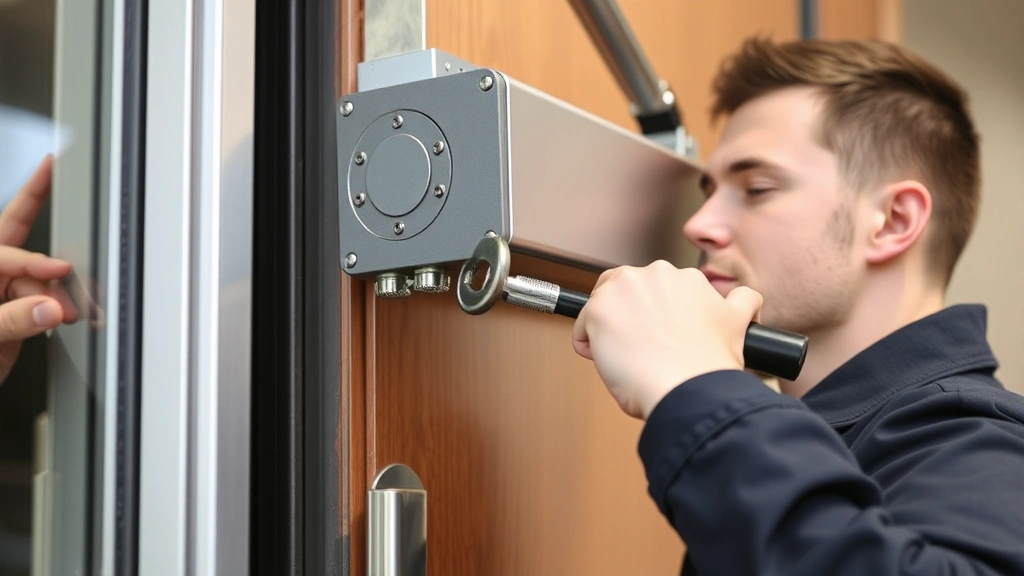
How to Adjust Door Closer: Expert Tips Inside
A properly functioning door closer is essential for building safety, accessibility, and energy efficiency. Whether you’re managing a commercial entrance, office hallway, or residential exterior door, understanding how to adjust your door closer ensures smooth operation and extends the lifespan of this critical hardware component. Door closers control the speed at which doors close and latch, preventing slamming while maintaining security and compliance with building codes.
Door closer adjustment might seem intimidating, but with the right guidance and tools, most homeowners and facility managers can perform these maintenance tasks themselves. This comprehensive guide walks you through every adjustment you need to know, from basic closing speed to advanced hold-open settings, helping you achieve optimal door performance in any environment.
Understanding Door Closer Basics
Door closers are hydraulic or pneumatic devices mounted on doors to control closing speed and ensure proper latching. The main components include the body (containing hydraulic fluid), an arm mechanism connected to the door frame, and adjustment screws that regulate fluid flow through internal chambers. Understanding these components helps you make informed adjustments without causing damage.
Most modern door closers have three primary adjustment points: the main closing speed valve, the latching speed valve, and the backcheck adjustment. Each controls a different phase of the door’s closing cycle. The main valve controls how quickly the door closes during the majority of its swing, while the latching speed valve slows the final inches to prevent slamming. The backcheck prevents the door from opening too quickly when pushed open.
Building codes, including those from the International Code Council (ICC), specify that doors in certain locations must have automatic closers. Commercial buildings, healthcare facilities, and multi-family residential buildings typically require door closers on entrance doors, stairwell doors, and fire-rated doors. Understanding these requirements helps ensure your adjustments maintain compliance.
When you’re working on DIY home security improvements, properly functioning door closers contribute to both security and safety by preventing unauthorized access and ensuring doors close completely.
Tools and Safety Preparation
Before adjusting your door closer, gather the appropriate tools and prepare your workspace. You’ll need an adjustable wrench or hex key set (typically 3/32-inch to 5/16-inch sizes), a Phillips head screwdriver, and potentially a flat-head screwdriver depending on your closer model. Some adjustments require specialized tools available from closer manufacturers, so consult your specific model’s documentation.
Safety should always be your primary concern when working with door hardware. Ensure the door can swing freely without obstructions, and consider propping it open at a safe angle using a door wedge or stopper. Never place your fingers or hands in the path of the closing door, as the hydraulic pressure can cause serious injury. If working on an entrance door, post a notice alerting others that maintenance is in progress.
Before making any adjustments, photograph or document the current position of all adjustment screws. This documentation serves as a reference point if you need to revert changes or troubleshoot issues. Most door closers have factory-set positions marked on the body; note these locations as well. Taking measurements with a ruler can help you track exactly how many turns you’ve made on each screw.
Consult the manufacturer’s documentation for your specific closer model. Different brands—including Dorma, Geze, LCN, and Yale—have varying adjustment mechanisms and recommended settings. The National Association of Architectural Metal Manufacturers (NAAMM) provides industry standards for door closer specifications and adjustment procedures.
Main Closing Speed Adjustment
The main closing speed valve, typically labeled as the primary or general adjustment screw, controls how quickly your door closes during the majority of its swing arc. This adjustment is usually the most frequently needed modification, as building occupants often complain about doors closing too fast or too slowly.
To adjust main closing speed, locate the primary adjustment screw on your door closer body. This is typically a large screw on the side or top of the hydraulic unit. Using your appropriately-sized hex key or wrench, turn the screw clockwise to increase closing speed (reduce hydraulic fluid flow) or counterclockwise to decrease closing speed (increase hydraulic fluid flow). Most manufacturers recommend making quarter-turn adjustments and testing the door between each change.
When adjusting closing speed, the door should close smoothly and consistently without jerking or hesitating. The typical closing speed should allow a standard door to close from 90 degrees to fully closed in approximately 5-8 seconds for standard commercial applications. Healthcare facilities and accessibility-focused environments may require slower closing speeds to accommodate individuals with mobility limitations.
Test your adjustments by opening the door to 90 degrees and observing the closing motion. The speed should be uniform throughout the closing cycle. If the door closes quickly at first then slows dramatically, you may need to adjust the latching speed valve as well. Document each adjustment you make, noting the direction and number of turns, so you can reference your changes if needed.
For doors serving high-traffic areas similar to vehicle maintenance facilities, you may need slower closing speeds to ensure safe passage for multiple occupants. Balance safety with energy efficiency—slower-closing doors help maintain climate control in heated or cooled spaces.

Latching Speed Control
The latching speed valve controls the final phase of door closure, specifically the last 10-15 degrees of the swing. This adjustment prevents the door from slamming into the frame, which can damage the door, frame, and hardware while also creating noise and safety hazards. Proper latching speed adjustment is crucial for building occupant comfort and door longevity.
The latching speed adjustment screw is typically smaller than the main closing speed valve and located nearby on the closer body. Some models label this as the “latch adjustment” or “final close” valve. This screw requires more delicate adjustment than the main valve, as the latching phase involves only a small portion of the door’s movement. Start with very small adjustments—one-eighth to one-quarter turns—and test between each change.
The latching speed should slow the door significantly as it approaches the frame, creating a gentle final closure without slamming. You should hear a soft click as the door latches, not a loud bang. If the door slams despite your adjustments, you may need to adjust the backcheck setting or check for mechanical issues like worn door seals or frame misalignment.
Different environments require different latching speeds. Quiet office environments typically need slower latching speeds to minimize noise, while high-traffic commercial areas might accommodate slightly faster latching. Healthcare facilities often require very slow latching speeds to accommodate patients, elderly visitors, and individuals with hearing impairments who may not hear a slamming door as a warning.
When adjusting latching speed, pay attention to the door’s behavior throughout the closing cycle. The main closing speed should remain consistent, with only the final inches showing noticeable deceleration. If you notice the door slowing throughout the entire closing motion, you’ve likely adjusted the main valve instead of the latching valve, and you should revert those changes.
Backcheck Adjustment
The backcheck setting controls how quickly the door opens when pushed, preventing the door from swinging open too rapidly and potentially hitting walls, obstacles, or people. This adjustment is particularly important in healthcare facilities, schools, and other environments where door safety is paramount. A properly set backcheck creates a controlled opening motion that enhances safety without impeding normal door operation.
Locate the backcheck adjustment screw, typically found on the door closer body and labeled as “backcheck,” “opening speed,” or “hold-open.” This screw works in reverse from the main closing valve—turning clockwise typically increases backcheck resistance (slows opening), while counterclockwise decreases resistance (allows faster opening). Make quarter-turn adjustments and test between changes.
To test backcheck settings, open the door forcefully as someone might during normal use. The door should decelerate noticeably as it approaches the fully-open position, preventing violent opening. The door should still open smoothly without excessive resistance that would make it difficult for users to operate. Backcheck adjustment is especially important for doors opening into hallways, corridors, or areas where rapid door opening could create safety hazards.
Some door closers feature hold-open settings that keep doors open at specific angles, typically 90-120 degrees. This feature assists with accessibility and allows for hands-free passage during high-traffic periods. If your closer has this feature, the backcheck adjustment works in conjunction with the hold-open mechanism. Consult manufacturer documentation to understand how these features interact on your specific model.
Hold-Open Features
Many modern door closers include hold-open mechanisms that allow doors to remain open at predetermined angles without manual prop-open devices. These features enhance accessibility, improve traffic flow during busy periods, and reduce the need for door wedges or stops. Understanding how to adjust hold-open settings ensures your door closer functions optimally for your specific environment.
Hold-open adjustments typically involve either a mechanical catch mechanism or an electronic/pneumatic delay setting. Mechanical hold-opens use a lever or cam that engages at a specific opening angle, typically around 90-120 degrees. To adjust these, locate the hold-open lever on the door closer arm and note the engagement angle. Some models allow you to adjust the angle by repositioning the engagement point or using adjustment screws on the arm assembly.
Electronic or delayed-action hold-opens keep the door open for a set period before automatically closing. These are particularly useful in healthcare facilities, schools, and commercial buildings where brief hands-free passage is beneficial. Adjustment typically involves a dial or screw on the closer body marked with time increments. Turn the dial to increase or decrease the hold-open duration, usually ranging from 5 to 30 seconds.
When adjusting hold-open features, ensure they comply with local NFPA building codes and accessibility requirements. The Americans with Disabilities Act (ADA) specifies that doors in public buildings must remain accessible, and hold-open features should never compromise fire safety or security. Some jurisdictions prohibit hold-open features on fire-rated doors, so verify compliance before implementing these adjustments.
Test hold-open settings by opening the door and observing when the mechanism engages. The engagement should be smooth and occur at the intended angle. After the hold-open duration expires, the door should close smoothly without jerking or hesitation. If the door fails to close automatically, check that the mechanism is properly adjusted and that no obstructions are preventing closure.
Troubleshooting Common Issues
Even with proper adjustments, door closers can develop issues requiring troubleshooting. Common problems include inconsistent closing speed, failure to latch properly, leaking hydraulic fluid, and noisy operation. Identifying the root cause helps you determine whether adjustment is needed or if professional repair is necessary.
Inconsistent Closing Speed: If your door closes at varying speeds or hesitates during the closing cycle, the issue likely involves the main closing valve or internal hydraulic seal. Start by checking that all adjustment screws are properly tightened—vibration can cause screws to loosen over time. If screws are tight, the internal seal may be worn, requiring professional service or closer replacement.
Door Fails to Latch: When a door doesn’t close completely or bounces open after closing, the latching speed valve typically requires adjustment. Turn the latching speed screw counterclockwise (increasing hydraulic resistance) to slow the final closing phase. If the door still fails to latch after significant adjustment, check for frame misalignment, worn door seals, or mechanical damage to the closer arm.
Hydraulic Fluid Leakage: Small amounts of oil weeping from the closer body are normal and don’t require immediate action. However, significant leaks indicate seal failure and require professional repair. Never attempt to refill hydraulic fluid yourself—door closers are sealed units, and improper refilling can damage internal components and void warranties.
Noisy Operation: Squeaking, creaking, or groaning sounds typically indicate worn pivot points or lack of lubrication. Apply a small amount of silicone-based lubricant to the pivot points where the closer arm connects to the body and the door frame. Avoid using oil-based lubricants, which can damage seals and attract dirt. If noise persists after lubrication, the closer may require professional service.
Slow or No Opening Response: If the door opens very slowly or barely opens after being pushed, excessive backcheck resistance is likely the cause. Turn the backcheck adjustment screw clockwise to reduce resistance. Test after each quarter-turn adjustment. If the door still opens slowly, internal mechanical issues may require professional attention.
Stuck or Binding Doors: When doors stick or bind during closing, check for debris in the door track or frame misalignment. Clear any obstructions and ensure the door swings freely without resistance. If the door still binds, the closer arm may be bent or the door frame may require adjustment by a professional.
Before attempting adjustments, review the Architectural Aluminum Manufacturers Association (AAMA) guidelines for door hardware specifications. These standards provide recommended adjustment ranges and troubleshooting procedures recognized across the construction industry.
For complex issues or if you’re uncomfortable making adjustments yourself, contact a professional door closer service. Many building maintenance companies offer door closer adjustment and repair services, and manufacturers can recommend certified technicians in your area. When you’re managing various DIY building projects, knowing when to call a professional prevents costly mistakes and ensures safety compliance.
FAQ
How often should I adjust my door closer?
Door closer adjustments depend on usage and environmental factors. High-traffic doors may need adjustments every 6-12 months as seals wear and hydraulic fluid settles. Residential doors typically require adjustment only when occupants request changes or when issues develop. Seasonal adjustments may be necessary in extreme climates, as hydraulic fluid viscosity changes with temperature.
Can I adjust my door closer myself, or do I need a professional?
Most homeowners and facility managers can perform basic door closer adjustments with minimal tools and instruction. Simple adjustments to closing and latching speed are straightforward. However, complex repairs like seal replacement or internal hydraulic work require professional service. If you’re uncomfortable working with door hardware or if adjustments don’t resolve issues, contact a professional technician.
What’s the ideal door closing time?
Standard commercial applications typically target 5-8 seconds from 90 degrees open to fully closed. Healthcare and accessibility-focused environments may require 10-15 seconds for safe passage. Always verify local building codes and accessibility requirements, as some jurisdictions specify minimum closing times. The ADA website provides detailed accessibility requirements for door operation.
Why is my door slamming despite adjustment?
Door slamming usually indicates insufficient latching speed adjustment. Turn the latching speed screw counterclockwise to increase hydraulic resistance in the final closing phase. If slamming continues, check for frame misalignment, worn seals, or mechanical damage. In some cases, excessive main closing speed can cause slamming—ensure the main valve isn’t set too fast.
Do door closers work on all door types?
Door closers work on most standard doors but function best on doors with adequate weight and proper frame construction. Very light doors or doors with poor frame alignment may have difficulty closing properly even with adjustment. Interior partition doors sometimes require lighter-duty closers than entrance doors. Consult manufacturer specifications to ensure your closer matches your door type and weight.
Can temperature affect door closer performance?
Yes, temperature significantly affects hydraulic fluid viscosity and door closer performance. Cold temperatures thicken hydraulic fluid, causing slower closing speeds and sluggish operation. Hot temperatures thin the fluid, potentially causing faster closing. In extreme climates, you may need to make seasonal adjustments or select closers with temperature-compensating fluid formulations.
What should I do if my door closer leaks?
Small amounts of hydraulic oil weeping from the closer are normal and don’t require action. However, significant leaks indicate seal failure and require professional repair or closer replacement. Never attempt to refill hydraulic fluid yourself—door closers are sealed units. Contact a professional technician or the closer manufacturer for repair options.


