DIY Basketball Hoop: Pro Tips for Your Backyard
Installing a basketball hoop in your backyard transforms your outdoor space into an athletic training ground and recreational hub for family entertainment. Whether you’re a serious player looking to improve your game or a homeowner seeking to add value to your property, building and installing a basketball hoop requires careful planning, proper materials, and attention to safety standards. This comprehensive guide walks you through every step of the process, from selecting the right location to fine-tuning your hoop for optimal performance.
A backyard basketball court provides more than just entertainment—it encourages physical activity, improves coordination and shooting technique, and creates a gathering space for neighbors and friends. The good news is that with proper guidance and the right tools, most homeowners can successfully install a basketball hoop without professional help. Understanding the technical requirements, local building codes, and safety considerations will ensure your installation stands the test of time and provides years of reliable use.
Choosing the Right Location and Foundation
The foundation of your basketball hoop project begins long before you install the actual equipment. Selecting an appropriate location determines safety, usability, and the longevity of your installation. Start by identifying an area in your backyard that receives adequate sunlight, has level ground, and maintains a safe distance from obstacles like trees, power lines, fences, and structures. The National Association of Basketball Coaches recommends a minimum clearance of 4 feet on all sides of the court area to prevent injuries from collisions.
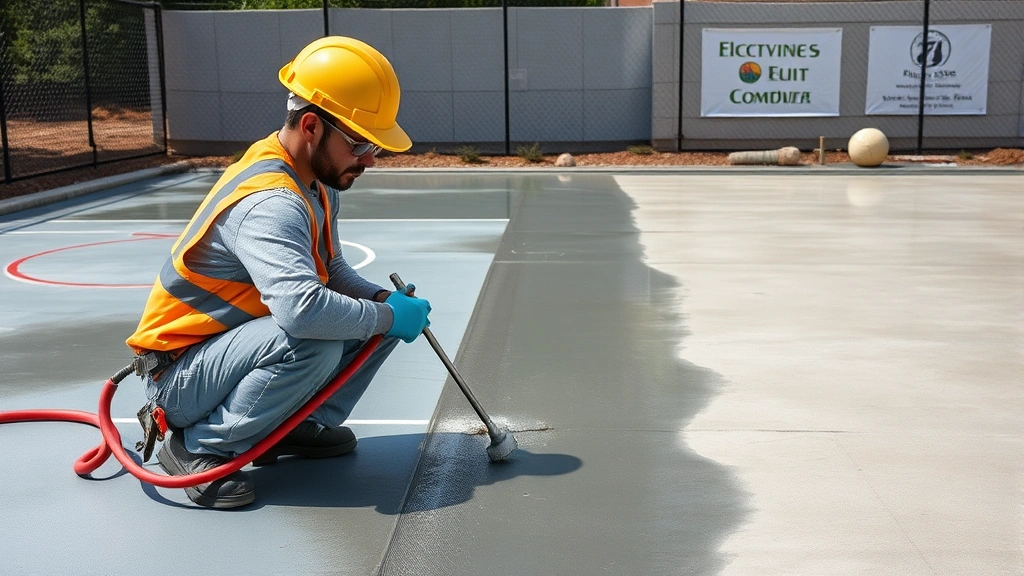
Inspect your chosen location for drainage issues. Basketball courts require proper water runoff to prevent standing water and surface deterioration. If your backyard tends to collect water, consider installing a slight slope or drainage system. Concrete surfaces are ideal because they provide a stable, durable foundation that resists movement and settling. Before pouring concrete, verify local building codes and regulations in your area, as some municipalities require permits for permanent outdoor structures.
For a concrete foundation, excavate the area to a depth of 4-6 inches, depending on your climate and soil conditions. Colder regions may require deeper foundations to prevent frost heave. Compact the subgrade thoroughly, add a 4-inch gravel base, and use reinforced concrete mix (at least 3000 PSI) to ensure durability. Allow the concrete to cure for a minimum of 7 days before installing your hoop. If you prefer a quicker solution, asphalt or recycled rubber surfaces can work, though concrete offers superior longevity and performance.
Essential Tools and Materials Needed
Gathering the correct tools before beginning your installation prevents delays and ensures professional results. You’ll need a level (both 4-foot and torpedo styles), tape measure, drill with masonry bits, socket set, adjustable wrench, and a stud finder if mounting to a structure. A concrete saw and jackhammer may be necessary if you’re working with existing concrete, and safety equipment including gloves, eye protection, and a dust mask should always be worn.
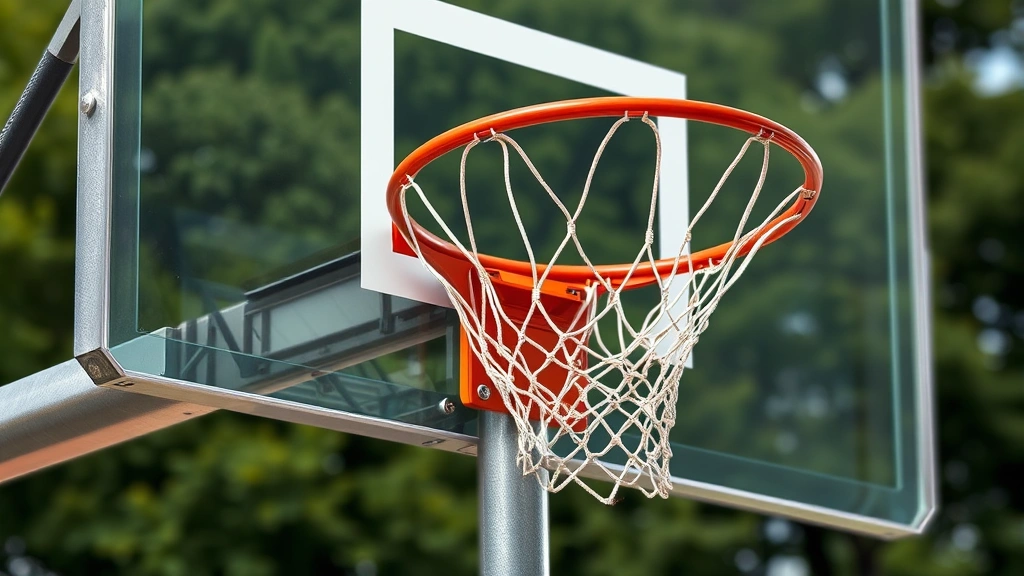
Material requirements depend on your chosen mounting method. For an in-ground installation, you’ll need a basketball hoop kit (typically $200-$1,500), concrete mix, gravel, rebar, anchor bolts, galvanized steel pole (3.5-4 inches diameter), and backboard material. Tempered glass backboards ($300-$800) offer superior rebound and visibility compared to acrylic or plywood alternatives. Ensure all metal components are galvanized or stainless steel to resist rust and corrosion. The rim should be regulation size (18 inches inner diameter) and made from solid steel with a breaking strength of at least 315 pounds, meeting ASTM International standards for sports equipment.
Additional materials include lag bolts, washers, lock nuts, nylon bushings to reduce vibration, and weatherproof sealant. For a wall-mounted installation, you’ll need heavy-duty through-bolts rated for outdoor use and a sturdy wall structure capable of supporting 500+ pounds of force. Document all material specifications and keep receipts for warranty purposes.
Installation Step-by-Step Guide
Begin your installation by marking the exact location where your pole will be installed. Use a chalk line and measure carefully from reference points like your house or driveway. For in-ground installations, dig a hole 3-4 feet deep and 12-18 inches in diameter, depending on your pole size and local frost line depth. In regions with significant freeze-thaw cycles, consult local building authorities to determine proper foundation depth.
Position your pole in the hole and ensure it’s perfectly vertical using a level. Temporary bracing with 2×4 lumber helps maintain alignment while you pour concrete. Mix your concrete according to manufacturer specifications and fill the hole slowly, tamping as you go to eliminate air pockets. This process requires patience—rushing can create voids that weaken the foundation. Allow at least 7 days for full curing before applying any load to the pole.
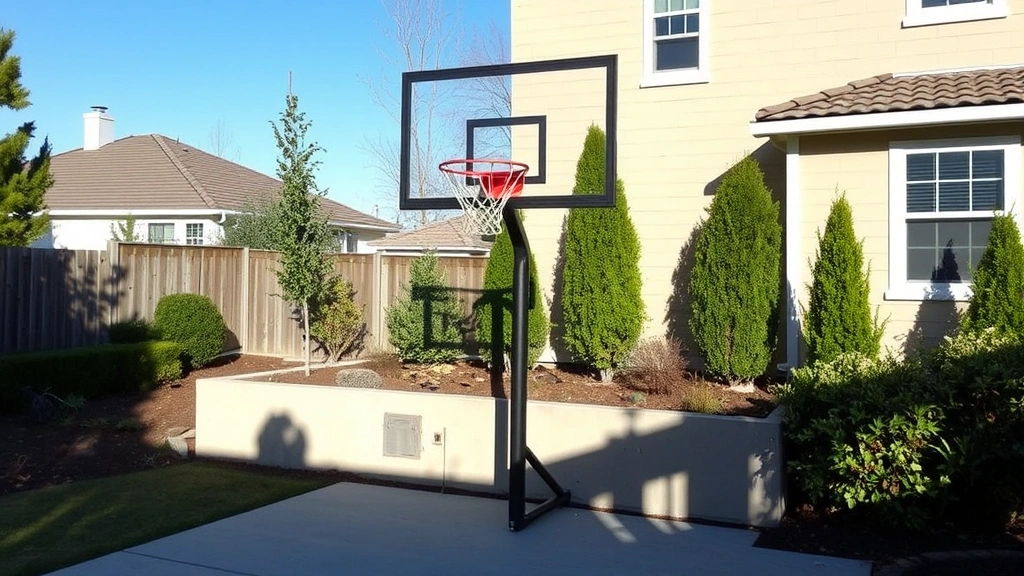
Once the concrete has cured, attach the backboard assembly to the pole using the mounting hardware provided with your kit. Most backboards mount 10-12 feet above ground level, with the bottom edge of the rim positioned at exactly 10 feet (regulation height). Use a laser level or transit to ensure precise height measurement. Secure all bolts firmly but avoid over-tightening, which can crack the backboard or strip threads.
Mount the rim to the backboard using the provided brackets, ensuring it extends 15 inches from the backboard surface. The rim should be perfectly horizontal—any tilt compromises game play and can cause the ball to roll unexpectedly. Install the net using all attachment points provided; a properly installed net should hang 15-18 inches below the rim, creating adequate clearance for shots while maintaining visibility.
Hoop Height and Regulation Standards
Regulation basketball hoop height is precisely 10 feet from the ground to the top of the rim, a standard established by the NBA, NCAA, and FIBA (International Basketball Federation). This height applies to all age groups above youth leagues, making your backyard hoop compatible with competitive play and player development. The rim diameter must be exactly 18 inches (inner measurement), and the rim should be made from solid steel with a minimum diameter of 5/8 inches.
For younger players or casual play, you may consider installing an adjustable hoop system that allows height modification. These systems typically range from $400-$1,200 and accommodate players of different ages and skill levels. If you’re building a court for multiple users, an adjustable system offers flexibility that permanent installations cannot provide.
Backboard dimensions vary, but standard sizes include 42 inches wide by 24 inches tall for residential installations, or 48 inches by 32 inches for more serious players. Tempered glass backboards (1/2 inch thickness) are preferred because they provide optimal rebound characteristics and durability. The bottom of the backboard should be positioned 2-3 feet above the rim, creating proper sight lines for shooting. Ensure your backboard is securely fastened at all four corners to prevent movement during play.
Mounting Options and Structural Considerations
Three primary mounting methods exist for backyard basketball hoops: in-ground pole installations, wall-mounted systems, and roof-mounted configurations. In-ground installations provide maximum stability and are ideal for dedicated courts. They require a solid concrete foundation and proper depth to prevent movement caused by wind or impact. This method is most popular for permanent, high-quality installations.
Wall-mounted hoops attach directly to your garage, shed, or fence structure. This option works well for limited space and costs less than in-ground systems. However, the mounting surface must be structurally sound—wood frame walls require reinforcement with additional studs, and the mounting location must be at least 15 inches from any roof edge or overhang. Masonry or concrete walls are ideal, as they provide superior load-bearing capacity. All through-bolts must be rated for outdoor use and properly sealed to prevent water infiltration.
Roof-mounted systems are less common but viable for homes with appropriate roof structures. This method requires professional assessment to ensure the roof can support the load without structural compromise. Insurance implications and local code requirements often make this option impractical for most residential applications.
When selecting a mounting method, consider wind exposure in your area. Hoops in windy regions require additional bracing and may benefit from structural reinforcement similar to security installation techniques. The rim should have a spring-loaded breakaway mechanism that reduces stress on the backboard and pole during dunks or aggressive play, extending equipment lifespan and improving safety.
Maintenance and Longevity Tips
Proper maintenance ensures your basketball hoop remains safe and functional for years. Inspect the installation quarterly, checking all bolts and fasteners for tightness. Over time, vibration from play can loosen hardware, so periodic tightening prevents deterioration. Examine the backboard for cracks or damage, and check the rim for rust or bent sections that could cause injury.
Cleaning your backboard regularly maintains visibility and appearance. Use a soft cloth with mild soap and water for acrylic or plywood backboards. Tempered glass can be cleaned more aggressively with glass cleaner, though avoid abrasive scrubbing that might scratch the surface. The net requires replacement every 1-2 years depending on usage and weather exposure. Nets are inexpensive ($20-$60) and easy to replace, making this a simple maintenance task.
Weather protection is critical for longevity. All metal components should be inspected annually for rust, especially in humid or coastal climates. Touch up any rust spots with rust-inhibiting paint. In winter months, remove snow or ice accumulation on the backboard to prevent excessive weight and stress. Consider installing a protective cover during off-season months if your region experiences harsh weather.
Your concrete foundation requires sealing every 2-3 years to protect against water penetration, freeze-thaw damage, and surface deterioration. Properly sealed concrete lasts decades with minimal maintenance. If you notice cracks developing in the foundation, address them promptly with concrete repair sealant to prevent water from entering and expanding the damage.
For players looking to improve their game, consider how your installation supports skill development. Proper lighting extends playing hours and improves visibility for practice. Installing LED flood lights on nearby structures creates an ideal practice environment. If you’re serious about court development, explore comprehensive outdoor space planning similar to basement finishing techniques, which involve similar structural and safety considerations.
Frequently Asked Questions
What permits do I need to install a basketball hoop?
Permit requirements vary by municipality. Contact your local building department or planning office to determine if your installation requires a permit. Most residential hoops don’t need permits, but in-ground installations with concrete foundations sometimes do. Permanent structures over certain heights or those near property lines may require approval. It’s always better to check beforehand than face fines or removal orders later.
How long does concrete take to cure before I can use the hoop?
Standard concrete requires a minimum of 7 days to cure sufficiently for light use, though full strength develops over 28 days. For a basketball hoop that will endure significant impact, wait the full 28 days before allowing heavy use. Weather conditions affect curing time—cold temperatures slow the process, while warm conditions accelerate it. Keep the concrete moist during the curing period by misting with water and covering with plastic sheeting.
Can I install a basketball hoop on asphalt?
Yes, asphalt can work for basketball hoop installation, though it’s less ideal than concrete. In-ground pole installations on asphalt require a concrete footer that extends below the asphalt surface to prevent the pole from sinking or shifting as the asphalt softens in heat. Wall-mounted and roof-mounted systems work equally well on asphalt surfaces as concrete. Asphalt requires more maintenance than concrete, including periodic sealing and crack repair.
What’s the difference between tempered glass and acrylic backboards?
Tempered glass provides superior rebound, better visibility, and greater durability, lasting 15+ years with proper care. Acrylic is more affordable ($150-$300) but offers less rebound and typically lasts 5-7 years before yellowing or cracking. Plywood backboards are the most budget-friendly option but require frequent replacement and provide inconsistent rebound. For serious players, tempered glass is worth the investment. For casual recreational use, acrylic or plywood may suffice.
How much space do I need for a basketball court?
A full NBA court is 94 feet by 50 feet, but residential courts are typically smaller. A half-court requires approximately 47 feet by 50 feet. For a functional shooting practice area, 30 feet by 30 feet provides adequate space. Ensure at least 4 feet of clearance on all sides of the playing area for safety. If space is limited, a wall-mounted hoop on a small pad (10 feet by 15 feet) still allows for shooting practice and skill development.
Can I move my basketball hoop to a new location?
In-ground installations are essentially permanent structures that cannot be easily relocated. Moving an in-ground hoop requires removing the pole, filling the old hole with concrete, and installing new concrete at the new location—a significant undertaking. Portable hoops mounted on wheels can be moved, though they lack the stability of permanent installations. If you anticipate moving, consider a wall-mounted system or portable option instead of an in-ground installation.
What safety features should my basketball hoop have?
Essential safety features include a spring-loaded breakaway rim that reduces stress on the backboard and pole during dunks, proper padding on the pole, secure fastening of all components, and a backboard that can absorb impact without shattering (tempered glass is ideal). The playing surface should be level and free of debris. Regular inspections ensure no sharp edges, rust, or loose components create hazards. Install the hoop in an open area free from obstacles that could cause falls.
How do I prevent rust on my basketball hoop?
Use galvanized or stainless steel components throughout your installation to resist rust. Inspect your hoop quarterly for any rust spots, and address them immediately with rust-inhibiting paint or steel wool. In coastal or humid climates, apply a rust-preventative coating annually. Avoid using salt-based de-icing products near your hoop, as salt accelerates rust formation. Proper drainage around the pole prevents water accumulation that promotes rust development.
Building a backyard basketball hoop represents a meaningful investment in your home and family’s active lifestyle. By following these comprehensive guidelines, selecting quality materials, and performing regular maintenance, your installation will provide years of reliable performance and enjoyment. Whether you’re developing your shooting skills or creating a recreational gathering space, a properly installed basketball hoop becomes a centerpiece of backyard entertainment and athletic development.


