Highlight Your Home: Painter-Approved Tips for Professional Results
When most people hear “highlighter,” they think of makeup or office supplies. But in the professional painting world, highlighting refers to a strategic technique that draws attention to architectural features, creates visual interest, and transforms ordinary spaces into showcase homes. Whether you’re preparing for a home improvement project or simply want to elevate your interior design, understanding how to apply highlighter techniques can dramatically enhance your property’s aesthetic appeal and perceived value.
Professional painters have long used highlighting methods to accentuate crown molding, trim work, architectural details, and focal wall features. This comprehensive guide reveals the secrets that contractors charge premium rates for, breaking down the science and art of applying highlighter techniques that work with any paint color scheme. Whether you’re tackling a basement finishing project or refreshing your living spaces, these painter-approved methods will help you achieve gallery-quality results.

Understanding Paint Highlighting Fundamentals
Paint highlighting is fundamentally about creating contrast and depth through strategic color placement and finish selection. Unlike general wall painting, highlighting requires understanding how light interacts with different paint sheens, colors, and surface textures. Professional painters use highlighting to manipulate perception—making spaces appear larger, drawing eyes toward desirable features, and away from architectural imperfections.
The core principle involves using lighter shades, glossier finishes, or contrasting colors to create focal points. When light hits a glossy or semi-gloss finish, it reflects more brightly than matte finishes, naturally drawing the eye. Similarly, lighter colors appear to advance toward viewers, while darker colors recede. Combining these principles allows you to sculpt your interior spaces with paint alone, no structural changes required.
Understanding the International Code Council guidelines for interior finishes ensures your highlighting choices meet building standards, particularly regarding fire ratings on trim and decorative elements. Professional painters always verify local building codes before applying specialty finishes to ensure compliance with safety regulations.
Selecting the Right Highlighter Paint and Colors
The foundation of successful highlighting begins with paint selection. You’ll need to choose between several paint sheen options: flat, eggshell, satin, semi-gloss, and high-gloss. Each serves different purposes in a highlighting strategy. Flat and eggshell finishes work well for subtle highlighting on walls, while satin and semi-gloss finishes create more dramatic, reflective highlights on trim and architectural details.
Color selection requires careful consideration of your existing palette. Professional painters often use the “60-30-10 rule”—60% dominant color, 30% secondary color, and 10% accent highlight color. Your highlighter color should complement but distinctly contrast with surrounding surfaces. For traditional spaces, crisp whites or off-whites highlight trim beautifully. For contemporary designs, consider warmer neutrals like cream or ivory, or bold accent colors that align with your design vision.
When selecting paint brands, professional-grade options from manufacturers like Benjamin Moore and Sherwin-Williams offer superior coverage, durability, and color consistency compared to budget options. These brands provide extensive color matching services and technical support that prove invaluable during application.
Metallic and pearlescent paints represent advanced highlighting options. These specialty finishes contain light-reflective particles that create subtle shimmer effects, perfect for accent walls or decorative trim. However, they require more careful application and preparation than standard paints. Always test metallic options in your actual lighting conditions before committing to full application.
Preparation and Surface Assessment
Proper preparation separates professional results from amateur attempts. Begin by thoroughly inspecting all surfaces you’ll highlight. Look for cracks, holes, peeling paint, or damage that requires repair. Use spackling compound for small imperfections and patching compound for larger areas. Sand all patched areas smooth once dry, creating seamless transitions.
Cleaning is absolutely critical. Dust, dirt, and grime prevent paint adhesion and create uneven finishes. Wash all surfaces with appropriate cleaners—TSP (trisodium phosphate) for heavy soiling, mild soap and water for general cleaning. Allow surfaces to dry completely, typically 24 hours, before proceeding. Moisture trapped under paint causes adhesion failure and finish defects.
Sanding preparation depends on existing finishes. Glossy surfaces require light sanding with 120-150 grit sandpaper to create tooth for new paint adhesion. Flat or eggshell finishes need minimal sanding unless heavily soiled. Always sand in the direction of wood grain on trim work. Use a tack cloth to remove all dust before priming or painting.
Priming is non-negotiable for highlighting success. Use a quality primer appropriate to your surface—latex primer for most interior work, shellac-based primers for stain blocking, bonding primers for glossy surfaces. Primer creates uniform color foundation, improves paint adhesion, and ensures consistent finish appearance. Skip primer and you’ll likely need additional paint coats, wasting time and money.
Application Techniques for Flawless Results
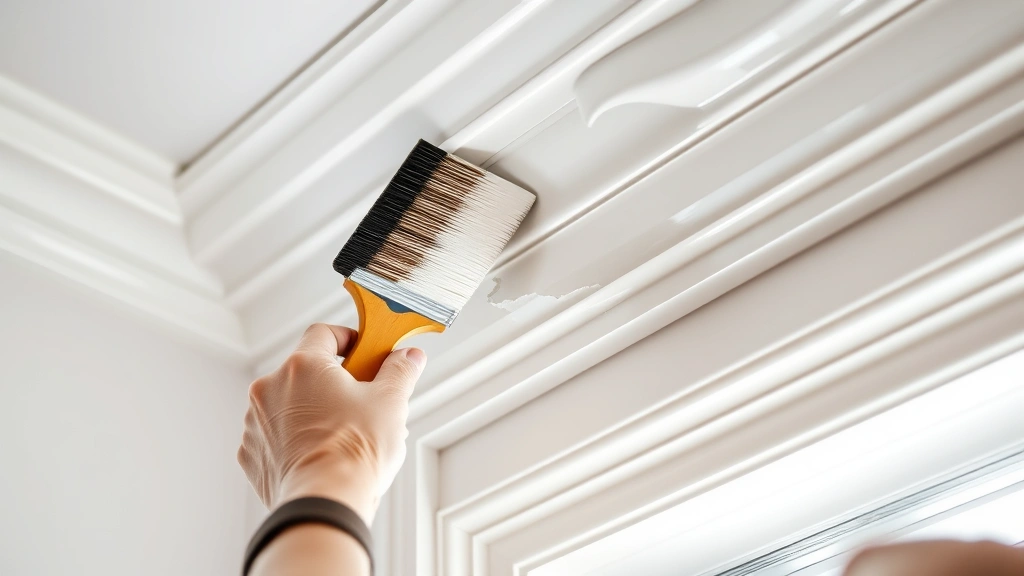
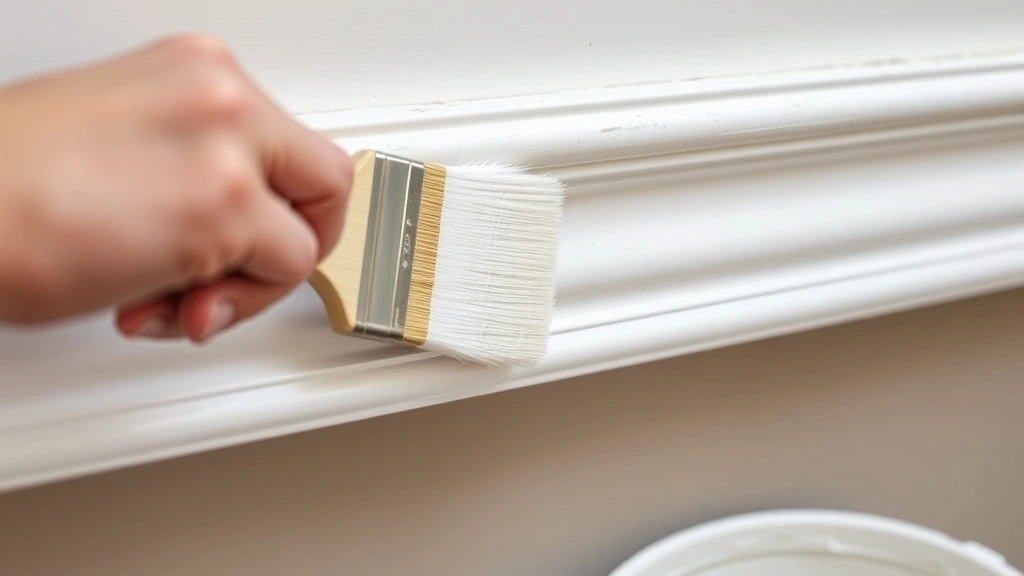
Professional painters use specific techniques to apply highlighter paint flawlessly. Begin with proper tool selection. Quality brushes—natural bristle for oil-based paints, synthetic for latex—make dramatic differences in finish quality. Invest in 2-inch angled sash brushes for trim work and 1-inch cutting-in brushes for detailed areas. Cheap brushes shed bristles and create texture problems that are difficult to correct.
For trim and architectural details, use the “dry brush” technique. Load your brush with paint, then remove excess on the brush’s edge before applying. This prevents drips and creates smoother, more controlled coverage. Apply paint in long, even strokes, maintaining consistent pressure. For glossy finishes, use “feathering”—gradually reducing pressure as you reach the end of each stroke to create seamless transitions.
Cut-in work requires steady hands and practice. When highlighting trim against wall paint, cut in along the trim edge using careful, controlled movements. Work in sections, maintaining a wet edge to prevent lap marks. A quality angled brush and proper technique allow you to cut in quickly without tape, though tape provides safety for those less experienced.
Roll application for wall highlighting demands attention to technique. Use quality roller covers—microfiber for smooth surfaces, textured covers for matte finishes. Apply paint in overlapping “W” patterns, then back-roll to smooth. Maintain consistent pressure and avoid pressing too hard, which creates texture irregularities. Multiple thin coats outperform single heavy coats for professional appearance.
Drying time between coats significantly impacts final results. Follow manufacturer recommendations—typically 2-4 hours for latex paint, though humidity and temperature affect actual drying time. Rushing between coats traps solvents in paint, causing adhesion problems and finish defects. Patience during application ensures durability and appearance.
Advanced Highlighting Strategies
Professional painters employ sophisticated strategies to maximize highlighting impact. The “accent wall” technique involves painting one wall with contrasting color or finish, creating visual interest and apparent dimension. Choose walls opposite main entry points or walls with architectural features you want emphasized. This strategy works particularly well in open-concept spaces where it defines separate functional areas.
Ceiling highlighting creates dramatic transformed spaces. Painting ceilings slightly darker than walls makes them appear lower, creating intimacy in tall spaces. Conversely, lighter ceiling paint makes rooms feel more spacious. Glossy ceiling paints reflect light, brightening rooms. For basement spaces or lower-light areas, consider semi-gloss ceiling treatments that enhance available light.
Crown molding and trim highlighting deserves special attention. Paint trim a lighter shade than walls, or use glossy finishes on matte walls, creating architectural emphasis. This traditional approach draws eyes upward, making ceilings appear higher. For contemporary designs, matching trim to wall color eliminates visual separation, creating clean, minimalist aesthetics. Both approaches work—choose based on your design goals.
Two-tone wall techniques combine two paint colors on single walls, typically with darker color on lower portion and lighter above. This approach, called “wainscoting effect,” adds traditional elegance and visual interest. The color break typically occurs at chair rail height (approximately 36 inches), though you can adjust based on ceiling height and design preference. This technique works brilliantly in hallways, bedrooms, and dining spaces.
Architectural feature highlighting emphasizes existing details like niches, archways, or built-in shelving. Paint these features contrasting colors or use glossy finishes to draw attention. This approach transforms overlooked architectural elements into focal points, adding perceived value and design sophistication to your spaces.
Common Mistakes and How to Avoid Them
Even experienced DIYers make highlighting mistakes that compromise results. The most common error involves inadequate surface preparation. Painting over dirty, glossy, or damaged surfaces creates adhesion failures, peeling paint, and uneven finishes. Invest sufficient time in cleaning, sanding, and priming—this foundation work prevents costly mistakes later.
Choosing incompatible paint types causes significant problems. Applying latex paint over oil-based paint without proper primer creates peeling issues. Conversely, oil-based paint over latex requires bonding primer. Always verify existing paint type and use compatible products. When uncertain, use shellac-based primers that work universally—they’re slightly more expensive but eliminate compatibility guesswork.
Insufficient primer application ranks among frequent mistakes. Primer isn’t optional—it’s essential for uniform color, improved adhesion, and stain blocking. Skipping primer or applying inadequate primer coats forces additional paint applications, wastes money, and often produces substandard results. Quality primer application is never wasted effort.
Poor lighting assessment leads to color selection regrets. Paint colors appear dramatically different under various lighting conditions—natural daylight, incandescent bulbs, LED lights, and fluorescent fixtures all render colors differently. Always test paint samples in your actual spaces under your lighting conditions. Paint large sample patches and observe them throughout the day before committing.
Selecting colors without considering surrounding spaces creates clashing, disharmonious interiors. Highlighter colors must work within your overall design scheme. If you’re unsure about color compatibility, consult design resources or consider hiring color consultants for guidance. Professional color selection prevents expensive mistakes.
Rushing application destroys professional results. Applying paint too quickly, working in unsuitable conditions, or skipping drying time between coats produces inferior finishes. Professional painters work deliberately, maintaining wet edges, using proper technique, and allowing adequate drying time. Patience directly correlates with quality.
Safety Considerations and Best Practices
Interior painting safety requires attention to ventilation, personal protection, and proper product handling. Ensure adequate air circulation when applying paint, particularly with oil-based products or specialty finishes. Open windows, use fans, and maintain cross-ventilation throughout application and drying periods. Poor ventilation exposes you to volatile organic compounds (VOCs) that cause headaches, respiratory irritation, and long-term health effects.
Personal protective equipment (PPE) protects against paint exposure. Wear safety glasses to prevent paint splashes in eyes, latex gloves to protect skin from irritants, and appropriate respiratory protection when working with oil-based paints or in poorly ventilated areas. For extensive projects, N95 masks provide basic protection; for heavy-duty applications, consider respirators with organic vapor cartridges.
Proper ladder safety prevents falls—the leading cause of home injuries. Use appropriate ladder types for your tasks. Step ladders work for wall and lower trim work; extension ladders reach ceiling areas. Maintain three-point contact (three limbs touching ladder at all times), never overreach, and position ladders on level surfaces. Consider hiring professionals for high-ceiling or difficult-to-reach areas.
Paint disposal follows environmental regulations. Never pour paint down drains—it contaminates water supplies and violates environmental protection laws. Allow latex paint to dry completely, then dispose with regular trash. Oil-based paint requires hazardous waste disposal through local facilities. Contact EPA resources for disposal location information in your area.
Temperature and humidity control significantly impacts paint performance. Apply paint when temperatures are between 50-85°F and humidity below 85%. Cold temperatures slow drying and prevent proper film formation. High humidity traps moisture in paint, causing adhesion failures. Avoid painting in direct sunlight, which accelerates drying and creates uneven finishes. Early morning or late afternoon application typically provides optimal conditions.
Proper storage preserves paint quality for future touch-ups. Store paint in cool, dry locations away from extreme temperatures. Keep lids sealed tightly to prevent skinning and contamination. Latex paint freezes at approximately 32°F, causing separation and quality loss. Oil-based paint stored properly remains viable for years; latex paint typically lasts 1-2 years after opening.
FAQ
What exactly is paint highlighting in home improvement?
Paint highlighting refers to using strategic color placement, contrasting finishes, or lighter shades to draw attention to architectural features, create visual interest, and enhance interior spaces. Professional painters use highlighting to accentuate trim, molding, and focal wall features, making ordinary rooms appear more sophisticated and valuable.
Can I highlight paint without professional help?
Absolutely. With proper preparation, quality materials, and attention to technique, DIYers achieve professional highlighting results. Success requires investing time in surface preparation, understanding paint applications, and using quality brushes and paint. Start with simpler projects like trim highlighting before attempting complex techniques like two-tone walls.
How many paint coats do I need for highlighting?
Most highlighting projects require two coats—one coat of primer and two coats of finish paint. However, if covering dark colors with light highlighter paint, you may need three finish coats. Quality primer application often reduces finish coat requirements. Always follow manufacturer recommendations for your specific paint products.
What’s the best paint finish for highlighting trim?
Semi-gloss or satin finishes work excellently for trim highlighting, as they reflect light and create visual emphasis. Satin finishes offer subtle sheen and durability for high-traffic areas. Semi-gloss provides more dramatic reflection and easier cleaning, making it ideal for kitchens and bathrooms. Match finish selection to your design goals and maintenance preferences.
How do I prevent lap marks when highlighting?
Lap marks result from painting over partially dried paint. Maintain wet edges by working in manageable sections and slightly overlapping each new section before previous paint dries. Use quality brushes and proper technique, applying paint in long, smooth strokes. Multiple thin coats prevent lap marks better than single heavy coats.
Can I use metallic paint for highlighting?
Yes, metallic and pearlescent paints create stunning highlighting effects, particularly on accent walls or decorative trim. These specialty finishes require careful application—test samples extensively before full application, as light-reflective particles render colors differently than standard paints. Expect to pay premium prices for specialty finishes.
What’s the difference between latex and oil-based highlighting paints?
Latex (water-based) paints dry faster, emit fewer fumes, and clean up easily with water. Oil-based paints offer superior durability, smoother finishes, and better adhesion to glossy surfaces. For most interior highlighting, latex paints prove adequate and preferable due to lower VOC emissions. Use oil-based only when specific advantages outweigh environmental and health concerns.
How long before I can apply second coat?
Drying times vary by product, temperature, and humidity. Most latex paints dry to touch in 1-3 hours and recoat in 2-4 hours. Oil-based paints require 16-24 hours between coats. Always check manufacturer recommendations, as rushing between coats traps solvents and causes adhesion problems. When uncertain, wait longer—patience prevents expensive mistakes.
Should I tape edges when highlighting trim?
Painter’s tape prevents accidental paint transfer and creates clean lines, particularly valuable for inexperienced applicators. Professional painters often skip tape using careful technique, but tape provides safety for DIYers. Use quality painter’s tape, apply firmly to prevent paint bleed, and remove while paint is still slightly tacky for cleanest results.
How do I choose highlighter colors that complement my space?
Test paint samples in your actual spaces under your specific lighting conditions. Paint large sample patches on walls and observe throughout the day. Consider the 60-30-10 design rule—your highlight color should comprise approximately 10% of visible surfaces. Consult design resources or hire color consultants for professional guidance if uncertain about compatibility.


