Can You Build a Deck? Expert Tips Inside
Building a deck is one of the most rewarding DIY projects you can undertake as a homeowner. Whether you’re dreaming of a cozy retreat for summer gatherings or a functional outdoor living space, constructing your own deck offers both financial savings and the deep satisfaction of creating something with your own hands. However, deck building requires careful planning, proper technique, and adherence to local building codes to ensure your finished project is safe, durable, and structurally sound.
This comprehensive guide will walk you through everything you need to know about deck construction, from initial planning and material selection to finishing touches and maintenance. We’ll explore whether you have the skills to tackle this project yourself, what tools and materials you’ll need, and the critical safety considerations that must never be overlooked. By the end, you’ll have the knowledge to confidently assess your abilities and begin your deck-building journey.
Assessing Your DIY Skills and Experience
Before you commit to building a deck, honestly evaluate your current skill level and experience with construction projects. Deck building is moderately challenging and falls into the intermediate DIY category. If you’ve successfully completed projects like DIY car repairs or installed home security systems, you likely have the foundational skills necessary. However, deck construction demands precision, physical strength, and an understanding of structural principles.
Key skills you should possess or be willing to develop include:
- Ability to read and interpret construction plans and measurements
- Comfort using power tools safely, including drills, saws, and nail guns
- Understanding of basic carpentry techniques and joinery
- Physical capability to lift heavy materials and work at heights
- Patience for detailed work and attention to proper spacing and alignment
- Willingness to research local building codes and obtain necessary permits
Many homeowners successfully build their first deck with proper preparation and research. However, if you lack confidence in any of these areas, consider hiring professionals for specific components while handling other aspects yourself. This hybrid approach can reduce costs while ensuring critical structural elements meet code requirements.
Planning and Design Fundamentals
Successful deck construction begins long before you purchase a single board. The planning phase determines whether your deck will be beautiful, functional, safe, and compliant with local regulations. Start by defining your deck’s purpose. Will it serve as an entertainment space, a quiet retreat, or a transition between your house and yard? Your intended use influences size, shape, and feature placement.
Consider your site’s existing conditions carefully. Observe how sunlight moves across your yard throughout the day. Note drainage patterns, prevailing winds, and views you want to enhance or block. Sketch your design on graph paper, marking the house location, existing trees, utilities, and property lines. Measure your space multiple times to ensure accuracy.
Design considerations for optimal functionality:
- Size and shape: Determine whether a simple rectangular deck or complex multi-level design suits your needs and skills
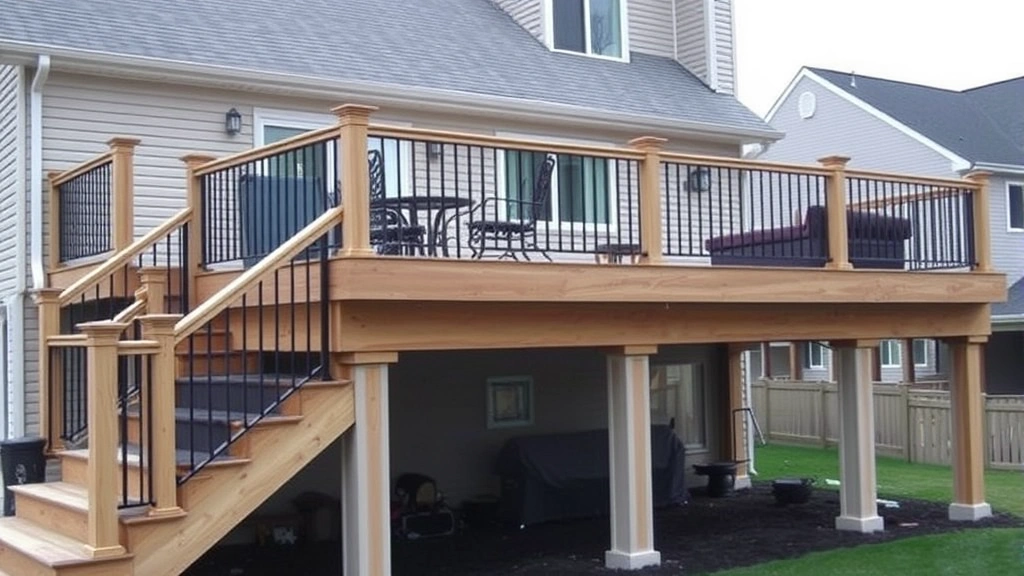
- Height: Decks under 30 inches typically require less stringent railing requirements, while elevated decks demand robust support systems
- Access points: Plan stairs and entry locations for natural traffic flow and safety
- Features: Decide if you want benches, planters, shade structures, or other built-in elements
- Material selection: Choose between pressure-treated lumber, composite materials, or hardwoods based on budget and maintenance preferences
Your design should balance aesthetic appeal with practical construction requirements. Complex angles and curves look impressive but demand greater skill and material waste. Start with simpler geometric shapes if this is your first deck project.
Essential Materials and Tools
Gathering the right materials and tools before beginning construction prevents delays and ensures quality results. The specific items you’ll need depend on your deck’s size, design, and local climate, but certain essentials are universal.
Primary structural materials include:
- Posts (typically 4×4 pressure-treated lumber or composite)
- Beams and joists (2×8, 2×10, or 2×12 lumber)
- Decking boards (2×6 or 2×8 lumber, composite, or exotic hardwood)
- Fasteners (galvanized or stainless steel bolts, screws, and nails)
- Post footings (concrete, post holes, or frost-protected foundation systems)
- Railings and balusters (if required by code)
- Stairs and stringers (if elevated above ground)
Essential tools for deck construction:
- Circular saw or miter saw for precise cuts
- Power drill with assorted bits
- Level (4-foot minimum for checking post and beam alignment)
- Tape measure (25-foot minimum)
- Speed square or framing square for layout
- Hammer and rubber mallet
- Reciprocating saw for notching and cutting
- Impact driver for fastening
- Post hole digger or power auger for foundation work
- Safety equipment (gloves, safety glasses, dust mask, hearing protection)
Rent expensive specialty tools rather than purchasing them if you’ll only use them once. Many home improvement stores offer affordable daily rental rates for equipment like power augers and concrete mixers.
Understanding Building Codes and Permits
This aspect of deck building cannot be overstated in importance. Building codes exist to protect your safety and property value. Every jurisdiction has specific requirements for deck construction, including setback distances from property lines, maximum post spacing, railing height and spacing, stair dimensions, and fastening specifications. Ignoring these requirements can result in failed inspections, costly corrections, difficulty selling your home, and potential liability if someone is injured.
Critical code requirements typically include:
- Frost line depth: Posts must extend below the frost line to prevent heaving during freeze-thaw cycles
- Post spacing: Usually no more than 6 feet apart (varies by jurisdiction and load requirements)
- Beam sizing: Determined by span and joist spacing using code-approved tables
- Joist spacing: Typically 12, 16, or 24 inches on center depending on joist size and species
- Railing requirements: Minimum 36-42 inches high with balusters spaced no more than 4 inches apart
- Stair dimensions: Tread depth and riser height must fall within specific ranges for safety
- Ledger board attachment: If your deck connects to your house, the ledger must be properly flashed and fastened to prevent water damage
Contact your local building department early in the planning process. Many departments offer free consultations and can provide code summaries or approved plans you can reference. Obtaining a permit may seem like an extra expense and hassle, but it protects your investment and ensures your deck meets safety standards.
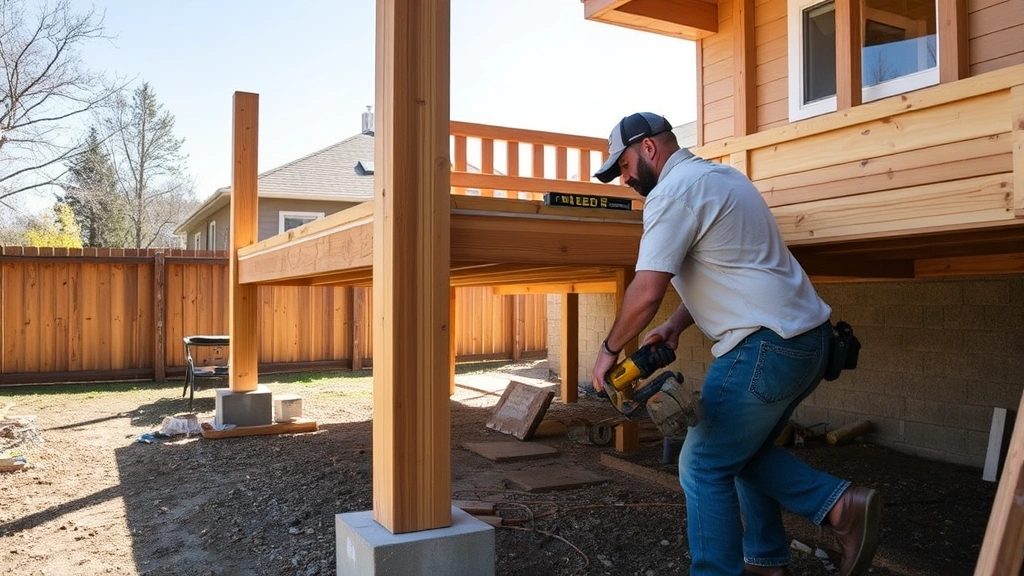
Foundation and Post Installation
A strong foundation is absolutely essential for deck longevity and safety. Poor foundation work is the leading cause of deck failure and collapse. Posts must be set on solid footings that extend below the frost line in your region, which varies from near ground level in warm climates to 4 feet deep in northern areas.
Foundation methods vary by climate and code requirements:
- Concrete footings: Dig holes below the frost line, set posts on concrete piers or directly in concrete
- Adjustable post bases: Allow for easier leveling and prevent water pooling at the post base
- Frost-protected shallow foundations: Use foam insulation to protect shallow footings in cold climates (check local code approval)
- Helical anchors: Screw-in anchors work well in poor soil conditions
Spacing posts correctly is critical for structural integrity. Standard spacing is 6 feet apart along the beam, but this may vary based on your deck’s load requirements and local code. Posts must be perfectly vertical—use a level in two directions to verify plumb during installation. Diagonal bracing may be required for elevated decks to prevent lateral movement.
Ensure all wood components are pressure-treated or naturally rot-resistant, especially those in contact with soil or concrete. The interface between post and concrete is particularly vulnerable to moisture damage, so consider using adjustable post bases that create an air gap.
Framing and Structural Construction
Once your foundation is solid and posts are set, you’ll install the beam and joist system that forms your deck’s frame. This structural skeleton must be properly sized and fastened to safely support live loads (people, furniture) and dead loads (the deck itself).
The beam typically sits on top of the posts and runs perpendicular to the house. Joists are smaller members that span between the beam and the house rim board (or ledger board). Proper spacing between joists—typically 12, 16, or 24 inches on center—depends on the joist size and the decking you’ll install.
Critical framing considerations:
- All connections must use galvanized, stainless steel, or hot-dipped galvanized fasteners to resist corrosion
- Bolts should be tightened securely and checked periodically as wood settles
- Joists should slope slightly away from the house (approximately 1/8 inch per foot) to promote water drainage
- If your deck attaches to your house, the ledger board connection is critical for preventing water infiltration and structural failure
- Use flashing between the ledger and house wall to direct water away from the house foundation
- Install blocking between joists to prevent twisting and add rigidity
Many deck failures result from improper ledger board installation. If your deck will attach to your house, research proper flashing details in your local building code or consult the American Wood Council’s guidance on deck construction. This connection must prevent water from running behind the ledger into your house structure, which causes rot and structural damage.
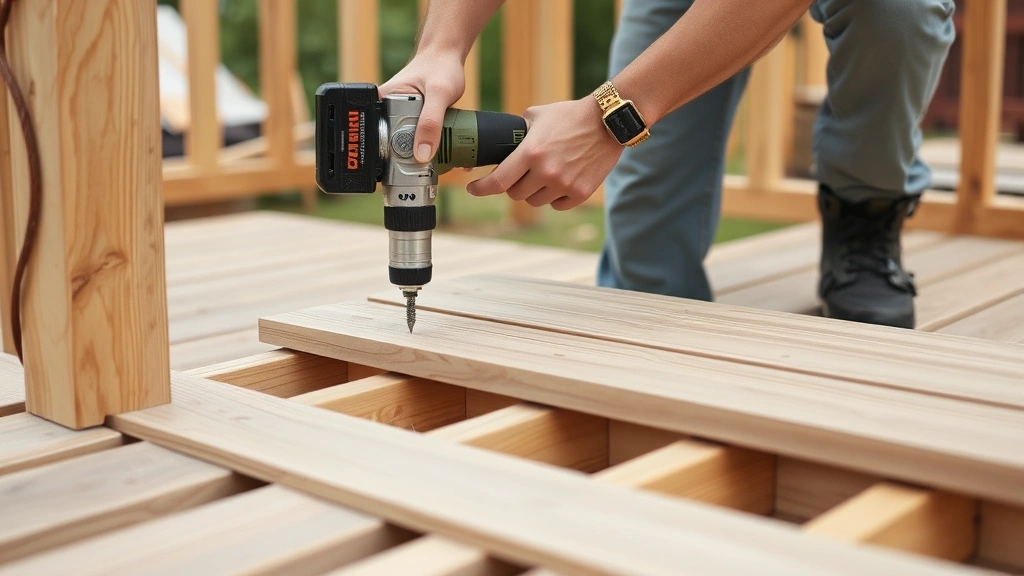
Decking Installation and Finishing
With your structural frame complete, you’re ready for the visible decking boards. This stage offers opportunities for creativity in pattern and appearance while maintaining proper spacing and fastening.
Decking boards should be spaced to allow for expansion and contraction due to moisture changes. Pressure-treated lumber typically requires 1/8 inch spacing, while composite materials may need different spacing—always check manufacturer specifications. Use spacers during installation to maintain consistent gaps.
Decking installation best practices:
- Start from the house and work outward, or vice versa, depending on your pattern preference
- Use corrosion-resistant fasteners—galvanized nails, stainless steel screws, or hot-dipped galvanized fasteners
- Stagger board joints rather than aligning them in rows, which looks better and distributes stress more evenly
- Cut boards so that end joints fall over joists for maximum support
- Pre-drill screw holes in hardwoods to prevent splitting
- Countersink fasteners slightly below the board surface if desired, then fill with colored plugs or epoxy
- Sand rough surfaces and apply finish to extend the life of your deck
Material choice significantly impacts appearance, maintenance requirements, and longevity. Pressure-treated lumber is affordable but requires regular staining and sealing. Composite materials offer low maintenance but higher upfront costs. Tropical hardwoods like ipe or cumaru are extremely durable but very hard to work with and more expensive. Consider your budget, climate, and willingness to perform maintenance when selecting materials.
Safety Considerations Throughout the Process
Safety must be your paramount concern throughout every stage of deck construction. Construction injuries can range from minor cuts and splinters to serious falls, electrical hazards, and respiratory problems.
Essential safety practices include:
- Fall protection: Use fall arrest systems, guardrails, or work platforms if working more than 6 feet above ground
- Eye protection: Wear safety glasses whenever operating power tools or dealing with wood particles
- Hearing protection: Prolonged exposure to power tools causes permanent hearing damage—wear earplugs or earmuffs
- Respiratory protection: Use a dust mask when cutting lumber, especially pressure-treated wood containing copper compounds
- Hand protection: Wear work gloves when handling rough lumber and pressure-treated wood
- Tool safety: Keep hands clear of blade paths, maintain proper stance for balance, and never operate power tools when tired or impaired
- Electrical safety: Use ground-fault circuit interrupter (GFCI) protection for outdoor power tools
- Chemical safety: If using wood stains, sealers, or preservatives, follow label directions and ensure proper ventilation
- Ladder safety: Use stable ladders on level ground, maintain three points of contact, and never overreach
Pressure-treated lumber contains copper compounds that can cause respiratory irritation. Avoid inhaling sawdust when cutting, and wash your hands thoroughly after handling. Never burn pressure-treated scrap wood, as this releases toxic chemicals.
Work with a helper whenever possible, especially during foundation and framing work. A second person can hold materials steady, spot you for safety, and assist with heavy lifting. Know your physical limitations and ask for help rather than risking injury from overexertion.
If you’re uncertain about any aspect of construction—particularly structural calculations, ledger board attachment, or electrical work—consult a professional. Organizations like the National Fire Protection Association provide safety guidelines for residential construction. The cost of professional consultation is minimal compared to the expense of fixing structural failures or treating injuries.
Before inviting friends and family to enjoy your new deck, have it inspected by your local building official if required. This verification ensures your work meets code requirements and is safe for use. Many jurisdictions offer free or low-cost final inspections, and passing inspection protects your property value and liability.
FAQ
How much does it cost to build a deck?
Deck costs vary dramatically based on size, materials, and complexity. A simple 12×12 pressure-treated deck might cost $1,500-$3,000 in materials, while a 20×20 composite deck could exceed $10,000. Labor costs for professional installation typically add 50-100% to material costs. Building your own deck saves labor but requires tool investment and time.
How long does it take to build a deck?
A modest deck can be completed in 3-5 weekends if you have experience and help. Larger or more complex projects may require several weeks of part-time work. Weather delays, permit processing, and material delivery all affect timeline. Plan for at least a month from initial planning to completion for a first-time builder.
Do I need a permit to build a deck?
Most jurisdictions require permits for decks larger than a certain size (often 200 square feet) or elevated more than 30 inches. Some areas require permits for all decks. Contact your local building department to determine requirements. Building without required permits can result in fines, difficulty selling your home, and voided homeowner’s insurance claims.
What’s the best material for a deck?
The best material depends on your budget, climate, and maintenance tolerance. Pressure-treated lumber is affordable but requires regular sealing. Composite materials offer low maintenance and longevity. Tropical hardwoods are extremely durable but expensive. Consider climate impacts—materials that perform well in dry climates may not suit humid regions.
Can I build a deck attached to my house myself?
Yes, but the ledger board connection is critical and must be done correctly. Improper attachment is the leading cause of deck collapse and water damage to houses. Research your local building code requirements carefully, or hire a professional for the ledger installation while handling other components yourself. The cost is worthwhile for this critical connection.
What skills from other DIY projects transfer to deck building?
If you’ve completed projects like basement finishing, you understand framing and structural concepts. Skills from various DIY projects like measuring, using power tools, and following instructions all apply to deck building. However, deck construction adds outdoor exposure and structural load requirements that differ from indoor projects.
How do I maintain my deck after building it?
Annual maintenance extends deck life significantly. Inspect for loose fasteners, damaged boards, and water damage. Sweep debris regularly and keep gutters clean to prevent water accumulation. Clean algae and mildew with a deck cleaner. Pressure-treated lumber needs resealing every 2-3 years, while composite materials require less maintenance. Replace damaged boards promptly to prevent structural compromise.
What if I discover code violations after building?
Contact your local building department to discuss corrective measures. Some violations require immediate correction for safety reasons (like improper railing), while others may allow for grandfathering if the deck was built before new codes took effect. Working with the building department is better than ignoring violations, which can affect your insurance and property value.


