Buff Your Car Like a Pro: DIY Expert Tips
Learning how to buff a car is one of the most rewarding automotive maintenance skills you can master. Whether your vehicle’s paint has developed swirl marks, oxidation, or minor scratches, buffing can restore that showroom shine without the hefty professional detailing bill. This comprehensive guide walks you through the entire process, from selecting the right equipment to executing flawless techniques that rival professional results.
Car buffing isn’t just about aesthetics—it’s about protecting your investment. A properly buffed and sealed finish extends paint longevity, maintains resale value, and shields against environmental contaminants. With the right tools, patience, and knowledge, any dedicated DIYer can achieve professional-grade results in their own driveway or garage.
Understanding Car Buffing Fundamentals
Before diving into the practical aspects of how to buff a car, it’s essential to understand what buffing actually accomplishes. Buffing is a controlled abrasion process that removes a thin layer of clear coat or paint to eliminate imperfections. Unlike polishing, which uses finer abrasives and is more about enhancement, buffing actively corrects paint defects.
The paint system on modern vehicles consists of multiple layers: primer, base coat, and clear coat. Buffing primarily works on the clear coat layer, which protects the colored base coat underneath. When you buff correctly, you’re removing oxidized or damaged clear coat, revealing fresh, protected paint beneath. This process restores clarity, depth, and gloss to the finish.
Different paint conditions require different approaches. Light swirl marks and minor oxidation need gentler buffing compounds, while deeper scratches and severe oxidation demand more aggressive products and techniques. Understanding your specific paint condition determines the entire buffing strategy you’ll employ.
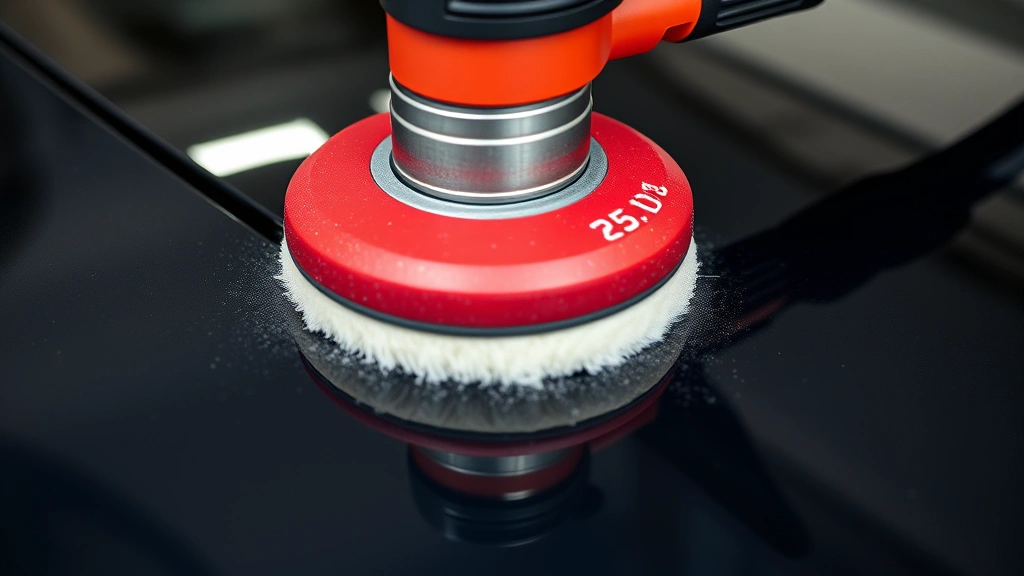
The science behind buffing involves controlled friction and heat generation. As the buffing pad moves across the paint, it creates friction that slightly heats the clear coat, allowing the compound to work more effectively. This is why pad speed, pressure, and compound selection are critical variables in achieving professional results.

Essential Tools and Materials
Investing in quality tools is paramount when learning how to buff a car properly. While budget options exist, professional-grade equipment delivers superior results and lasts longer through multiple projects.
Power Tools
- Dual Action Polisher/Buffer: This is your primary tool. Dual action (orbital) polishers are safer and more forgiving than rotary buffers, making them ideal for beginners. Look for models with variable speed control (typically 600-3,500 RPM) from reputable manufacturers.
- Rotary Buffer: More aggressive than dual action polishers, rotary buffers require significant experience. They’re better suited for professional detailers or experienced enthusiasts.
- Cordless Drill with Buffing Attachment: A backup option for small areas or touch-ups, though less effective than dedicated buffers.
Buffing Pads
Pad selection directly impacts results. You’ll need multiple types for different stages:
- Cutting Pads (Red/Orange): Most aggressive, designed for heavy oxidation and deep scratches. Use these first when significant correction is needed.
- Polishing Pads (Yellow/White): Medium aggression for general paint correction and swirl mark removal.
- Finishing Pads (Black/Blue): Least aggressive, used for final refinement and application of finishing products.
Buffing Compounds and Polishes
The product you select determines your results. Quality matters significantly here:
- Heavy Cut Compound: For severe oxidation and deep scratches. Contains larger abrasive particles.
- Medium Cut Polish: Versatile option for most paint conditions. Balances correction with paint preservation.
- Fine Polish: Minimal abrasion, used for finishing and light correction.
- Finishing Wax or Sealant: Applied after buffing to protect the refreshed paint and enhance gloss.
Consider consulting SEMA (Specialty Equipment Market Association) guidelines for product specifications and safety standards.
Additional Equipment
- Microfiber towels (multiple, for different stages)
- Foam applicator pads
- Spray bottle with water
- Masking tape and plastic sheeting
- Safety glasses and dust mask
- Work lights for visibility
- Bucket for water and cleaning supplies
Preparation Steps Before Buffing
Proper preparation determines your success more than any other factor. Rushing this phase leads to poor results and potential paint damage.
Wash Your Vehicle Thoroughly
Start with a complete wash using automotive soap and water. Remove all dirt, bird droppings, tree sap, and contaminants. Dirty paint during buffing acts like sandpaper, scratching your clear coat rather than correcting it. Use the two-bucket method: one for soapy water, one for rinsing your wash mitt. This prevents reintroducing dirt to the paint.
Clay Bar Treatment
After washing, use a clay bar to remove embedded contaminants that washing alone can’t eliminate. Spray the panel with lubricant, then gently rub the clay bar across the surface. You’ll feel it grab and remove particles. This step is crucial—it ensures your buffing compounds work directly on paint, not contaminants.
Dry Completely
Allow the vehicle to dry completely before buffing. Water remaining on the paint interferes with compound application and creates uneven results. Use clean microfiber towels and consider air drying in sunlight for 30 minutes after towel drying.
Inspect and Tape
Carefully inspect the paint under good lighting to identify problem areas. Use masking tape to protect trim, rubber seals, and any areas you don’t want buffed. Modern buffing equipment is fairly controlled, but accidents happen. Better safe than sorry.
Test in Inconspicuous Area
Always test your buffing technique and products on a hidden area first—the inside of a door jamb or behind a wheel. This allows you to dial in your technique, pad pressure, and compound selection without risking visible panels.
Buffing Technique and Process
Now that preparation is complete, executing proper buffing technique is essential. This is where many DIYers struggle, but with practice, the technique becomes second nature.
Setup and Safety
Work in a well-ventilated area, preferably outdoors or in a garage with doors open. Wear safety glasses to protect against compound splatter and dust mask to avoid inhaling fine particles. Ensure adequate lighting—use work lights to see the paint clearly as you buff. This prevents missing problem areas and helps you monitor your progress.
Compound Application
Apply compound using one of two methods: direct application to the pad or to the paint surface. Most professionals apply directly to the pad in small dots around the pad’s surface. Use approximately a golf ball-sized amount of compound. More isn’t better—excess compound creates mess and reduces control.
Buffing Motion and Pressure
Position the buffer at a slight angle (about 15 degrees) to the paint surface. Start the buffer at a medium speed (around 1,500-2,000 RPM for dual action) before placing it on the paint. Use light to medium pressure—let the buffer do the work. Many beginners press too hard, generating excessive heat and potentially burning through clear coat.
Work in overlapping passes, moving systematically across the panel. Use a pattern: work from top to bottom or in horizontal strips. This ensures complete coverage and prevents missing spots. Each pass should overlap the previous by about 50%.
Speed and Duration
Keep the buffer moving. Staying in one spot generates excessive heat and risks clear coat damage. For a typical panel, spend 30-60 seconds per area, depending on paint condition. Monitor temperature by touching the panel occasionally (carefully—it gets warm).
Multiple Stages
If your paint has severe oxidation or deep scratches, use multiple stages:
- First Pass (Heavy Cut): Use cutting compound and red pad at 1,500-2,000 RPM
- Second Pass (Medium Cut): Use polishing compound and yellow pad at 2,000-2,500 RPM
- Final Pass (Finishing): Use fine polish and black pad at 2,500-3,000 RPM
Between passes, thoroughly clean the pad or switch to a clean one. Compound residue from the previous stage contaminates your next product and reduces effectiveness.
Buffing Pad Maintenance
During buffing, compound accumulates on your pad. Stop periodically and wipe the pad with a clean microfiber towel. This removes dried compound and improves contact with the paint. Some professionals use a pad cleaning tool or simply wipe by hand.
After buffing, clean pads thoroughly with water and mild soap. Allow them to air dry completely before storing. Proper pad care extends their lifespan significantly and ensures consistent results across multiple projects.
Common Mistakes to Avoid
Learning from others’ mistakes accelerates your mastery of how to buff a car effectively.
Applying Too Much Pressure
This is the most common beginner error. Excessive pressure generates heat, burns through clear coat, and creates swirl marks rather than removing them. Let the tool’s orbital motion do the work. Gentle pressure produces better results than aggressive force.
Buffing in Direct Sunlight
Heat accelerates compound drying, making it difficult to work and creating uneven results. Buff in shade or on cooler days. If working in sun, work quickly to prevent compound from drying prematurely.
Using Dirty or Contaminated Pads
A dirty pad scratches paint rather than correcting it. Clean pads between stages and inspect for embedded debris. Replace pads showing significant wear or damage.
Skipping Proper Preparation
Attempting to buff dirty paint leads to additional scratching. Invest time in thorough washing and clay bar treatment. This foundation determines your success.
Ignoring Paint Thickness
Modern clear coats are relatively thin (typically 1-2 mils). Aggressive buffing removes this protective layer permanently. Use the least aggressive approach that achieves your goals. When in doubt, start light and progress to more aggressive techniques if needed.
Neglecting Masking and Protection
Buffing compound damages rubber seals, trim, and unpainted surfaces. Mask everything carefully before starting. Five minutes of masking prevents hours of cleanup and potential damage.
Post-Buffing Care and Maintenance
Your work isn’t complete when buffing finishes. Post-buffing steps lock in your results and provide protection.
Final Cleaning
Remove all compound residue by wiping with clean, damp microfiber towels. Use separate towels for this stage—dirty towels reintroduce compound. Continue wiping until no haze remains. Some residual compound appears as a light haze; this is normal and easily removed with proper wiping.
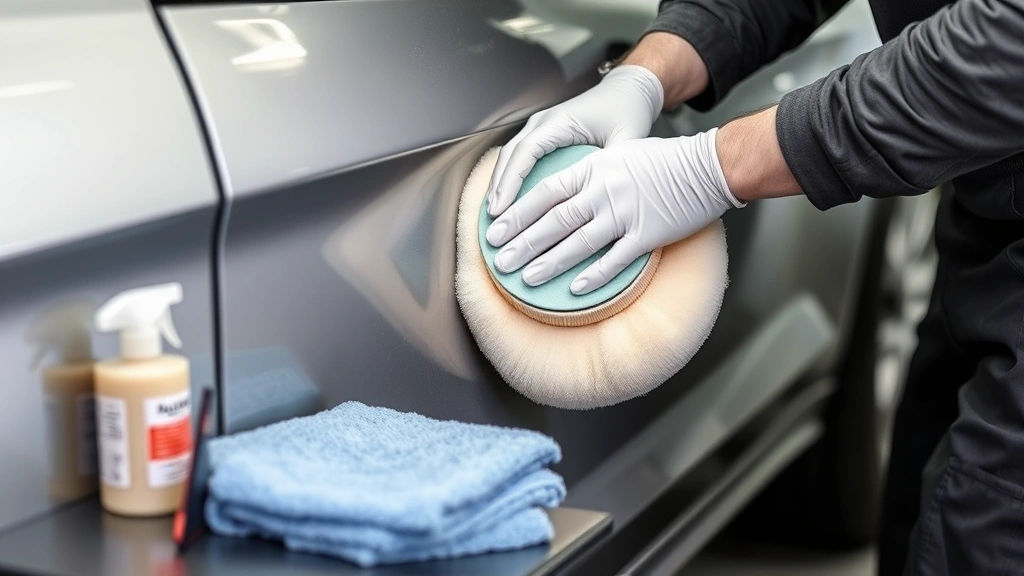
Wax or Sealant Application
After buffing, apply a protective wax or paint sealant. This isn’t optional—it’s essential. Buffing removes the protective clear coat layer, leaving paint vulnerable. A quality wax or sealant provides protection and enhances gloss. Apply according to product instructions, typically using circular motions with a foam applicator pad.
Curing Time
Most waxes and sealants require curing time before exposing the vehicle to water or washing. This typically ranges from 4-24 hours depending on the product. Read instructions carefully and avoid washing during the cure period.
Maintenance Schedule
Maintain your buffed finish with regular washing and periodic reapplication of protective products. Wash every two weeks using proper automotive techniques. Reapply wax or sealant every 2-4 months depending on product type and environmental factors.
Long-Term Paint Health
Regular maintenance extends the life of your buffed finish. Avoid parking under trees where sap and bird droppings accumulate. Use car covers for long-term storage. Address paint damage promptly before it worsens. Consider professional ceramic coating for maximum long-term protection—consult resources from IICRC (Institute of Inspection, Cleaning and Restoration Certification) for advanced protection options.
FAQ
How often should I buff my car?
Most vehicles need buffing only every 1-3 years, depending on paint condition, climate, and environmental exposure. Regular washing and waxing reduce the need for frequent buffing. Buff only when you notice oxidation, swirl marks, or clarity issues.
Can I buff my car by hand?
While possible, hand buffing is extremely labor-intensive and produces inferior results compared to power buffing. For small touch-ups, hand buffing works, but for full panels or significant correction, invest in a dual action polisher. The time savings and superior results justify the equipment cost.
What’s the difference between buffing and polishing?
Polishing uses finer abrasives and gentler techniques to enhance paint without significant correction. Buffing uses more aggressive compounds and techniques to remove imperfections. Think of polishing as maintenance and buffing as correction.
Will buffing damage my paint?
When performed correctly with proper technique and appropriate compounds, buffing doesn’t damage paint—it improves it. The risk of damage comes from excessive pressure, improper technique, or using overly aggressive products on thin clear coats. Follow guidelines, test first, and use light pressure to minimize risk.
How long does buffing take?
A complete vehicle buffing typically takes 4-8 hours depending on size, paint condition, and your experience level. Plan for single panels to take 30-60 minutes. Don’t rush—quality results require patience and proper technique.
What compound should I use for my paint condition?
Light swirl marks and minor oxidation: fine or medium polish. Moderate swirl marks and oxidation: medium cut polish. Severe oxidation and deep scratches: heavy cut compound followed by medium and fine polishes. When uncertain, start with medium cut and progress to more aggressive products only if needed.
Can I buff matte or satin paint?
Matte and satin finishes require special techniques and products. Standard buffing compounds can damage these finishes by adding unwanted shine. If your vehicle has a matte finish, consult the manufacturer’s guidelines or seek professional help. Many matte finishes aren’t designed for traditional buffing and polishing.
Should I buff before or after waxing?
Always buff before waxing. Wax creates a protective layer that prevents compounds from working effectively. After buffing, apply wax as the final protective step. If your car is already waxed, strip the wax before buffing using a wax removal product or clay bar.


