DIY Home Bar Build: Expert Tips & Tricks
Building a home bar transforms any space into an entertainment hub where friends and family gather for memorable occasions. Whether you’re converting a basement corner, dedicating a living room section, or utilizing unused closet space, a well-designed home bar adds both functionality and aesthetic appeal to your residence. This comprehensive guide walks you through the entire process, from planning and material selection to installation and finishing touches.
A successful bar build requires careful consideration of layout, structural integrity, plumbing and electrical requirements, and compliance with local building codes. Unlike casual DIY projects, bar construction often involves permanent fixtures, load-bearing considerations, and potentially hazardous materials. Understanding these elements ensures your finished bar is not only beautiful but also safe and durable for years of enjoyment.
This guide combines professional construction principles with practical DIY techniques, helping you avoid costly mistakes while achieving professional-quality results. You’ll learn how to design your space efficiently, select appropriate materials, handle necessary installations, and apply finishing techniques that rival commercial establishments.
Planning Your Home Bar Layout
Successful bar construction begins with thorough planning. Start by measuring your available space and determining the optimal bar dimensions. Standard bar counter height is 36 inches, with the working surface typically 18-24 inches deep. These measurements accommodate both bartender comfort and guest access.
Consider your space’s traffic flow and whether guests will access the bar from one side or multiple directions. An L-shaped or U-shaped configuration works well in larger areas, while linear bars suit narrow spaces. Evaluate natural light sources, existing windows, and wall conditions before finalizing placement.
Document your measurements and create a detailed sketch or digital floor plan. This planning stage prevents costly errors during construction and helps you visualize the finished product. If you’re converting a basement space into a bar area, consider existing utilities, moisture control, and ventilation requirements specific to below-grade installations.
Essential Materials and Tools
Building a professional-quality bar requires both specialized and standard construction materials. For the structural frame, you’ll need pressure-treated lumber (2x4s and 2x6s), exterior-grade plywood for the base, and quality hardwood for visible surfaces. Common choices include oak, maple, walnut, or engineered wood veneer for a polished appearance.
For the counter surface, select from these durable options: solid surface material (Corian, Silestone), granite or marble, stainless steel for commercial aesthetics, or high-quality laminate. Each material offers different maintenance requirements and visual appeal. Granite and marble require sealing but provide timeless elegance, while solid surface materials offer superior durability and easier repairs.
Essential tools include a miter saw, circular saw, table saw, drill-driver, level (preferably a 4-foot model), stud finder, and pneumatic nailer. Rental options exist for specialized equipment like tile saws or countertop cutting tools. Safety equipment—including safety glasses, hearing protection, dust masks, and work gloves—is non-negotiable throughout construction.
Additional materials include construction adhesive, wood screws (2.5-inch and 3-inch), finishing nails, sandpaper (80, 120, and 220-grit), wood stain or paint, polyurethane sealant, and hardware for cabinet doors and drawers. Budget 15-20% extra for waste and mistakes, a standard industry practice.
When selecting materials, reference International Code Council standards for any structural components and OSHA guidelines for safety compliance, particularly if your bar involves electrical or plumbing work.

Structural Considerations and Building Codes
Before breaking ground, verify local building codes and zoning regulations. Many jurisdictions require permits for permanent bar installations, particularly those involving structural modifications, plumbing, or electrical work. Contact your local building department to understand specific requirements in your area.
Structural integrity is paramount. Calculate load capacity based on your bar’s length and anticipated weight from bottles, glassware, and equipment. A typical bar loaded with inventory can weigh 40-60 pounds per linear foot. Ensure your flooring can support this distributed load, and use proper framing techniques to distribute weight effectively.
If your bar installation requires removing drywall or modifying walls, locate existing utilities first. Use a stud finder to identify framing members, and consider hiring a professional to locate electrical wiring and plumbing pipes before cutting. This prevents dangerous and costly mistakes.
For basement bars specifically, address moisture issues before construction. Ensure proper grading outside your foundation, install perimeter drainage if needed, and consider vapor barriers under flooring materials. A damp basement can destroy your bar investment and create health hazards.
Building codes typically specify requirements for fire-rated materials in certain applications, egress (emergency exit) requirements for lower-level bars, and ventilation standards if you’re installing a beverage cooler or ice maker. Consult National Association of Home Builders resources for comprehensive building code information relevant to your region.
Constructing the Bar Counter
Begin construction by building a sturdy base frame from pressure-treated 2×6 lumber. Create a rectangular frame matching your bar’s dimensions, with support legs positioned every 24-30 inches. Use 3-inch exterior-grade screws at all joints, applying construction adhesive before fastening. This creates a solid foundation capable of supporting significant weight.
Add a plywood substrate layer, typically 3/4-inch exterior-grade plywood, secured with 2.5-inch screws spaced 8 inches apart. This substrate provides a smooth, stable base for your finished surface material and accommodates plumbing and electrical installations underneath.
Install support bracing underneath to prevent sagging and deflection. Additional 2×4 cross-bracing at mid-span, particularly on bars longer than 6 feet, maintains structural integrity under load. Verify everything is level using a 4-foot level before proceeding to surface installation.
For the finished surface, cut your selected material to size and secure it with appropriate adhesive and fasteners. Granite or marble requires professional installation due to weight and precision requirements. Solid surface materials can be installed with construction adhesive and edge-banded for a seamless appearance. Stainless steel offers a commercial aesthetic and requires stainless steel fasteners to prevent corrosion.
Create a professional edge treatment by applying edge banding, installing trim pieces, or beveling the perimeter. This detail significantly impacts the finished appearance. Sand all wood components thoroughly, progressing through 80, 120, and 220-grit sandpaper for a smooth finish.

Plumbing and Electrical Installation
Most home bars require both plumbing and electrical modifications. For plumbing, you’ll typically need to run supply lines for a sink and drain lines for wastewater. A standard bar sink is 18-24 inches wide with a minimum 8-inch faucet reach. Position your sink strategically for bartender access and guest convenience.
Drain installation is critical. Ensure proper slope (typically 1/4 inch per foot) toward a main drain or septic system. Improper drainage creates backups and structural damage. If you’re unfamiliar with plumbing, hire a licensed plumber for these connections. The cost is minimal compared to potential damage from mistakes.
Electrical work requires careful planning. A home bar typically needs outlets for a refrigerator, ice maker, bottle cooler, and possibly a beverage dispenser. Run dedicated circuits for high-amperage appliances to prevent overloading. All outlets within 6 feet of a water source must be GFCI (Ground Fault Circuit Interrupter) protected per National Fire Protection Association standards.
If you lack electrical experience, hire a licensed electrician. Improper electrical work creates fire hazards and safety risks. At minimum, ensure all work complies with local electrical codes and obtain required permits. Never attempt to bypass or modify existing circuits without professional guidance.
Plan lighting circuits separately from appliance circuits. Dimmer-controlled ambient lighting enhances atmosphere, while task lighting over the bar ensures functional illumination. Run electrical conduit through the bar frame before installing the countertop, making future modifications easier.
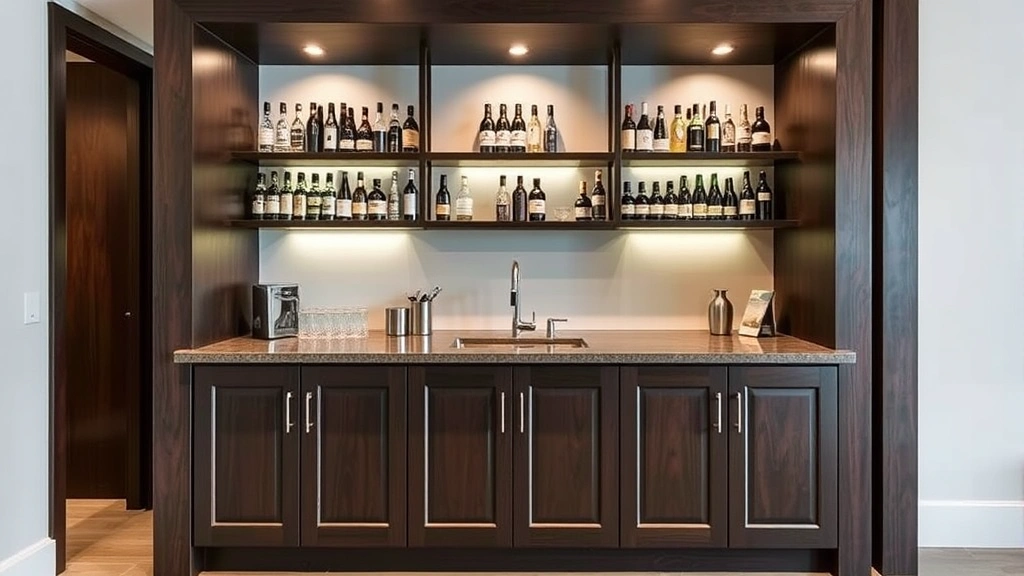
Storage Solutions and Organization
Effective storage maximizes your bar’s functionality. Install open shelving above the counter for displaying premium bottles and glassware. Shelves should support 25-50 pounds per linear foot depending on contents. Use sturdy brackets rated for your anticipated load and secure them to wall studs.
Incorporate closed storage below the counter for backup inventory, mixers, and supplies. Build cabinet frames from 3/4-inch plywood with adjustable shelving to accommodate various bottle sizes. Install quality hinges and soft-close mechanisms for a professional appearance and quiet operation.
Consider specialized storage for glasses, bar tools, and linens. A dedicated drawer with dividers keeps tools organized and accessible. Stemware racks mounted under shelves maximize space and display glassware beautifully. Beverage coolers and ice makers require dedicated space with proper ventilation clearance.
For comprehensive guidance on organizing complex storage systems, explore our complete how-to-build guides covering custom cabinetry and storage solutions. Proper organization transforms your bar from functional to exceptional.
Label shelves and compartments clearly so guests understand your setup. A well-organized bar invites use and showcases your beverages effectively. Invest time in storage planning—it dramatically impacts daily usability and guest experience.
Finishing Touches and Aesthetics
Finishing treatments determine your bar’s visual impact. For wood surfaces, select stain colors that complement your décor. Test stains on scrap wood first, as colors vary dramatically depending on wood species and grain. Apply stain with a brush or cloth, working in the direction of grain, and allow proper drying time between coats.
Seal all wood surfaces with polyurethane or conversion varnish for durability and moisture resistance. Multiple coats (typically 3-4) create a protective finish that withstands spills and heavy use. Polyurethane provides easier application while conversion varnish offers superior durability for high-traffic areas.
Consider decorative elements that reflect your personality. Tile or stone accents create visual interest. Footrails (brass, stainless steel, or wood) add authentic bar character while providing ergonomic support. Backsplashes protect walls from spills and offer opportunities for creative design.
Paint selection for surrounding walls should coordinate with your bar’s color scheme. Darker colors create intimate atmosphere while lighter colors maintain openness. Matte or eggshell finishes work better than gloss in bar environments, which can feel institutional.
For inspiration and advanced techniques, review comprehensive woodworking resources covering finishing techniques, staining methods, and aesthetic treatments. Professional finishing distinguishes amateur projects from gallery-worthy installations.
Lighting and Ambiance
Lighting dramatically affects your bar’s atmosphere and functionality. Combine task lighting with ambient lighting for versatile control. Under-cabinet LED strips illuminate the counter for bartending while creating visual interest. These energy-efficient lights generate minimal heat, important for enclosed bar spaces.
Install dimmable overhead lighting to adjust ambiance from bright and functional (during setup) to warm and intimate (during entertaining). Warm color temperature (2700K) creates relaxing atmosphere, while cooler temperatures (4000K+) provide functional brightness.
Consider pendant lights or sconces above the bar for visual appeal and focused illumination. Backlit bottle displays showcase your collection while providing ambient light. Neon or LED signage adds personality and can define your bar’s theme.
Wall-mounted shelving lights highlight glassware and bottles without creating glare on the counter. Use diffusers to soften harsh light and prevent shadows. Proper lighting design transforms your bar from a simple counter into an inviting entertainment space.
Energy-efficient LED lighting reduces operating costs and heat generation. Most LED fixtures are dimmable, providing flexibility in ambiance control. Invest in quality fixtures rated for damp environments if your bar is in a basement or near moisture sources.
FAQ
Do I need a permit to build a home bar?
Permit requirements vary by jurisdiction. Most areas require permits for permanent installations, especially those involving structural modifications, plumbing, or electrical work. Contact your local building department before starting. Unpermitted work may complicate future home sales and void insurance coverage.
What’s the minimum space needed for a functional home bar?
A functional bar requires minimum 4-6 linear feet of counter space. This accommodates a sink, beverage cooler, and bottle display. Smaller bars work in tight spaces but sacrifice storage and functionality. Ideal bars offer 6-8 linear feet or L-shaped configurations for enhanced capacity.
Can I install plumbing and electrical myself?
While some experienced DIYers handle basic plumbing and electrical, most jurisdictions require licensed professionals for permanent installations. Incorrect work creates safety hazards and code violations. Professional installation ensures compliance and protects your investment. Costs are minimal compared to potential damage.
What countertop material is best for a home bar?
Granite and marble offer timeless elegance but require sealing and professional installation. Solid surface materials (Corian, Silestone) provide durability and easier repairs. Stainless steel offers commercial aesthetics and superior durability. High-quality laminate provides budget-friendly durability. Select based on aesthetic preference, maintenance tolerance, and budget.
How can I prevent water damage in a basement bar?
Address moisture before construction through proper grading, perimeter drainage, and vapor barriers. Install a sump pump system if needed. Use moisture-resistant materials for flooring and lower wall surfaces. Consider a dehumidifier for climate control. Regular monitoring prevents costly water damage.
What’s the typical cost for a DIY home bar?
DIY bars typically cost $1,500-$5,000 depending on size, materials, and customization. Basic 6-foot bars with standard materials run $1,500-$2,500. Premium materials and professional finishes increase costs to $3,000-$5,000+. Professional installation adds 30-50% to material costs.
How do I ensure my bar is structurally sound?
Use proper framing techniques with support legs every 24-30 inches. Secure all joints with construction adhesive and quality fasteners. Calculate load capacity based on anticipated weight and ensure your flooring supports distributed loads. Have a structural engineer review complex installations.
Can I convert a closet into a bar?
Absolutely! Closet bars are excellent space-savers. Install a counter at standard bar height (36 inches), add shelving above, and incorporate a small sink if plumbing permits. Closet doors can conceal the bar when not in use. Ensure adequate ventilation for appliances like refrigerators or coolers.
What safety considerations are important for home bars?
Ensure GFCI-protected outlets near water sources. Properly ground all electrical circuits. Use slip-resistant flooring to prevent accidents. Install handrails if the bar is elevated. Ensure adequate ventilation for appliances. Secure heavy items to prevent tipping. Follow all local building codes for fire safety and structural requirements.
How do I add a beverage cooler to my bar?
Beverage coolers require dedicated electrical circuits rated for their amperage. Ensure adequate ventilation clearance (typically 4-6 inches on sides and back) for proper cooling. Install the cooler before finalizing surrounding cabinetry. Consider under-counter models for seamless integration or open-front designs for easy access.
Building a home bar combines woodworking skills, basic plumbing and electrical knowledge, and creative design. By following these expert tips and prioritizing structural integrity and safety, you’ll create an impressive entertainment space that adds value to your home while providing years of enjoyment. Start with thorough planning, invest in quality materials, and don’t hesitate to hire professionals for specialized work. Your finished bar will be a source of pride and a gathering place for countless memorable moments.


