Build a Drawer: Pro Tips for DIY Success
Learning how to build a drawer is one of the most rewarding woodworking skills you can master. Whether you’re constructing custom storage for a bedroom, kitchen, or office space, understanding the fundamentals of drawer construction will elevate your DIY projects and create functional pieces that last for years. A well-built drawer combines precision joinery, proper hardware selection, and attention to detail—elements that transform a simple box into a smooth-gliding storage solution.
Drawers are foundational components in countless furniture pieces, from nightstands to built-in cabinetry. The difference between a professional-quality drawer and a disappointing one often comes down to technique, material selection, and understanding how various components work together. This comprehensive guide walks you through every stage of the process, from initial planning through installation, ensuring your DIY drawer project succeeds regardless of your skill level.
Understanding Drawer Anatomy and Components
Every functional drawer consists of several critical components working in harmony. The front face is what you see and interact with daily—it’s the aesthetic focal point and handles your hand pressure. The sides support the entire structure and bear weight during operation. The back panel completes the box and provides rigidity, while the bottom piece distributes weight evenly and prevents sagging. Understanding how each component contributes to overall performance helps you make informed decisions throughout your build.
The drawer box itself must be square, meaning opposite sides are equal length and all corners form perfect 90-degree angles. Even small deviations compound during assembly, resulting in binding slides and poor operation. The bottom must be perfectly flat and properly supported to prevent warping under load. Sides need sufficient thickness to resist racking—the tendency for the box to twist into a parallelogram shape when pushed or pulled at an angle.
Drawer slides are mechanical systems that enable smooth opening and closing. Full-extension slides allow the drawer to open completely, providing access to the entire interior. Standard three-quarter extension slides open about 75 percent of the way, suitable for most applications. Soft-close mechanisms prevent slamming and reduce wear. Understanding your slide type before building ensures your drawer box dimensions match your hardware specifications precisely.
Selecting Materials for Durability
Material selection dramatically impacts drawer longevity and performance. Hardwoods like oak, maple, and walnut offer strength and attractive grain patterns, making them ideal for visible drawer fronts. Softwoods like pine and fir are budget-friendly and suitable for drawer sides and backs, though they dent more easily. Plywood provides excellent stability and strength-to-weight ratio, especially for larger drawers where solid wood might warp.
The grain direction matters significantly. Wood expands and contracts with humidity changes, but movement occurs primarily across the grain, not along its length. Your drawer bottom should be oriented to accommodate this movement—typically running perpendicular to the front face to prevent binding. Many experienced builders use hardboard or thin plywood for bottoms because these materials resist warping better than solid wood.
Thickness considerations affect both performance and aesthetics. Drawer sides typically measure 1/2 inch to 3/4 inch thick, providing adequate strength without excessive weight. Fronts can be thicker—up to 1.5 inches—for a substantial feel. Backs can be thinner, around 1/4 inch, since they’re primarily for rigidity. Visit our guide on DIY beginner woodworking projects for wood selection fundamentals.
Moisture content is critical. Wood at 8-12 percent moisture content is ideal for interior furniture. Kiln-dried lumber maintains stability better than air-dried material. Store materials in your climate-controlled workspace for at least a week before building, allowing them to acclimate and preventing post-assembly warping.
Essential Tools and Hardware
Building quality drawers requires specific tools. A table saw produces straight, accurate rips and crosscuts. A miter saw ensures square ends on all pieces. A router creates dovetail joints and decorative edges. A pocket hole jig enables quick, strong joinery with minimal visible fasteners. A square verifies 90-degree angles throughout assembly. A clamp set holds pieces during gluing—you can never have too many clamps.
Hardware selection is equally important. Drawer slides come in various load capacities—verify yours matches your anticipated contents weight. Soft-close dampers add cost but dramatically improve user experience and reduce wear. Drawer pulls or knobs should be positioned 2-3 inches from the drawer bottom for ergonomic comfort. Drawer stops prevent over-extension and protect slides.
Fasteners matter too. Wood glue creates stronger bonds than the wood itself when properly applied. Pocket hole screws hide fasteners while providing strength. Finish nails secure bottoms without visible hardware. Adjustable shelf pins support optional drawer dividers. Quality hardware isn’t where you cut costs—cheap slides bind and fail quickly, frustrating future users.
Measuring and Planning Your Drawer
Accurate measurements determine project success or failure. Measure the opening where your drawer will fit three times—top, middle, and bottom—because cabinet openings often aren’t perfectly square. Use the smallest measurement as your maximum drawer width. Subtract 1/2 inch for clearance, then deduct slide width to determine your internal drawer box width.
Depth measurement requires understanding your slide type. Full-extension slides need the drawer box to be slightly shorter than the slide length. Check your specific slide specifications—manufacturers provide detailed dimension charts. A common mistake is building the drawer box too deep, preventing full extension and wasting interior space.
Height planning accommodates both aesthetics and function. Shallow drawers suit small items and office supplies. Medium drawers work for clothing and kitchen utensils. Deep drawers handle bulky items but become difficult to access if positioned high. Sketch your planned drawer configuration on paper, noting dimensions, materials, and hardware choices before cutting any wood.
Create a detailed cutting list specifying each piece’s dimensions, quantity, and material. This prevents mid-project confusion and catches errors before you waste expensive wood. Double-check all measurements against your cutting list before making your first cut—this is where precision begins.

Cutting and Preparing Wood Pieces
Precision cutting is non-negotiable for drawer success. Use a table saw with a quality blade for straight, clean cuts. Set your rip fence accurately using a reliable measuring tool, then make several test cuts on scrap wood before cutting expensive material. Square your miter saw before crosscutting—place a combination square against the blade and adjust the fence until the blade is perfectly perpendicular.
Sand all pieces after cutting but before assembly. Start with 120-grit sandpaper to remove saw marks, progressing to 150-grit for smoothness. Pay special attention to edges—slightly ease sharp corners with a block plane or sanding block. Sand in the direction of the grain to avoid tearout and scratches that are difficult to conceal later.
Mark all pieces clearly with pencil, indicating which face goes outward and where each piece belongs. This organization prevents assembly confusion and ensures grain direction matches your aesthetic preferences. Mark your joinery locations precisely—dovetail pins and tails, pocket hole locations, and mortise positions should be marked before any cutting.
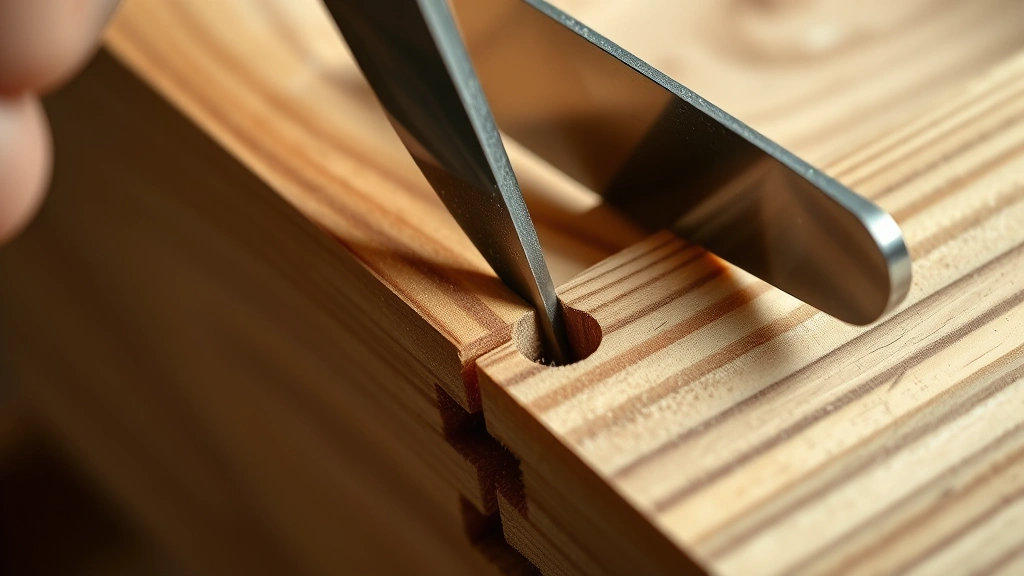
For dovetail joints, mark your baseline 1/4 inch from the edge, then lay out your tails or pins using a sliding bevel set to approximately 8 degrees—this angle provides strength and visibility. Transfer marks to adjoining pieces using sharp marking knives for accuracy. Careful layout here prevents misaligned joints that compromise both strength and appearance.
Joinery Methods That Work
Several joinery methods prove reliable for drawer construction. Dovetail joints are the gold standard—they resist racking, prevent separation under tension, and look professional. Hand-cut dovetails require practice but produce beautiful results. Router jigs enable fast, accurate machine-cut dovetails. Half-blind dovetails hide the joint on the front face while remaining visible on sides, perfect for finished furniture.
Pocket hole joinery offers simplicity and speed, especially for beginners. A pocket hole jig creates angled holes that allow screws to pull pieces together at 90-degree angles with fasteners hidden inside the drawer. This method works well for drawer sides to front and back pieces. Verify your jig is properly calibrated—incorrect angle or depth compromises joint strength.
Box joints (also called finger joints) interlock like puzzle pieces, providing excellent strength and visual appeal. A router table with a box joint jig produces these quickly and accurately. The interlocking design prevents racking and distributes stress evenly across the joint.
Mortise and tenon joints combine maximum strength with traditional craftsmanship. A mortise chisel creates the rectangular recess while a router with a straight bit offers precision alternatives. Tenons—the protruding parts—should be exactly 1/3 the thickness of the receiving board for optimal strength and glue coverage.
Regardless of your chosen method, dry fit all joints before gluing. Assemble the drawer without adhesive, verify everything squares up, and ensure all joints seat fully. This trial run catches problems when they’re easily correctable, preventing the heartbreak of discovering poor fit after glue sets.
Assembly and Gluing Techniques
Proper gluing technique creates joints stronger than the wood itself. Apply wood glue to both mating surfaces using a small brush or applicator bottle—you want a thin, even coat, not excessive glue that creates squeeze-out and mess. Too little glue creates weak joints with voids; too much creates cleanup problems and can stain wood if not wiped immediately.
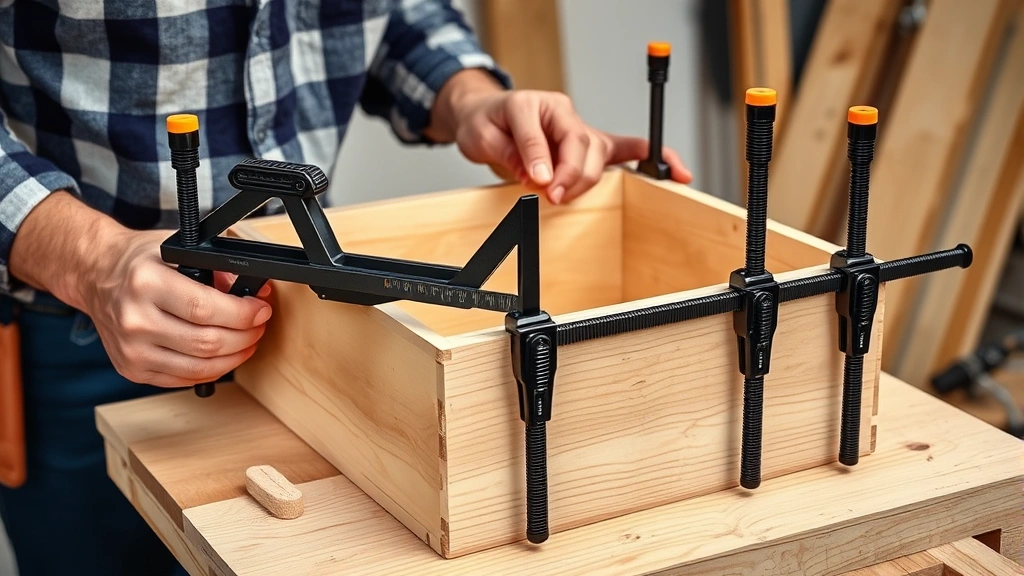
Clamp your drawer box with even pressure across all joints. Place cauls—straight boards—on outside faces to distribute clamp pressure and prevent bowing. Clamp diagonally across opposite corners to verify your box is square before the glue sets. Measure corner-to-corner diagonals—if they’re equal, your box is square.
Allow glue to cure fully before removing clamps—this typically means overnight for most wood glues, though some premium formulations set faster. Resist the temptation to work with the drawer before full cure. Premature handling can shift joints slightly, compromising long-term strength.
Once glue sets, remove clamps carefully and inspect all joints. Sand away any glue squeeze-out with 120-grit paper. Test your joints by hand—they should feel solid with no movement or flex. A properly glued drawer box should be rigid enough to hold square without clamps, indicating strong adhesion.
Installing Slides and Hardware
Drawer slide installation determines how smoothly your finished drawer operates. Measure carefully from the bottom of your drawer box to position slides at the correct height. Most slides mount 1-1/2 to 2 inches from the bottom, though your specific hardware may vary. Mark mounting hole locations with a sharp pencil or awl.
Install the cabinet-mounted portion of your slides first, ensuring they’re perfectly level and parallel. Use a level and straightedge to verify alignment. Slides that aren’t parallel cause binding and uneven wear. Start with one screw per slide, verify operation before fully tightening, then add remaining fasteners.
Attach the drawer-mounted portion to your drawer box, ensuring proper alignment with cabinet-mounted slides. Soft-close mechanisms require specific installation—follow manufacturer instructions precisely as incorrect installation reduces their lifespan. Test operation before fully securing all fasteners.
Install your drawer front next, ensuring it’s centered in the opening and aligned with adjacent drawers. Use shims—thin wedges—to position the front perfectly, then drill pilot holes and secure with fasteners from inside the drawer. This hidden fastening method creates a clean, professional appearance.
Add your drawer pull or knob, positioning it ergonomically—typically 2-3 inches from the bottom. Verify the pull doesn’t interfere with adjacent drawers or cabinet doors. Test opening and closing through a full range of motion, making adjustments if binding occurs.
Finishing and Refinement
Your drawer box construction might be complete, but finishing transforms it into a polished, protective component. Sand all visible surfaces progressively—120-grit to remove construction marks, 150-grit for smoothness, 180-grit for final prep. Pay special attention to edges and the drawer front, sanding out any defects before finishing.
Stain or paint according to your design preferences. Test finishes on scrap wood first—stain color varies dramatically based on wood species and grain orientation. Apply finish in thin coats rather than thick applications. Sand lightly between coats with 220-grit paper for maximum adhesion.
Polyurethane or lacquer topcoats protect your investment and create durability for daily use. Water-based finishes dry quickly and emit fewer fumes, while oil-based finishes offer deeper appearance but require longer drying time. Apply multiple coats—typically three for furniture-grade protection—sanding between each coat.
After finishing cures fully, test your drawer operation one final time. Verify slides operate smoothly through their full range. Check that soft-close mechanisms engage properly. Ensure the drawer stops prevent over-extension. Make any final adjustments to hardware positioning if needed.
For built-in applications, integrate your drawer into your larger DIY project by matching finishes and ensuring hardware complements surrounding elements. Consistency in appearance and function creates professional results that enhance your entire space.
FAQ
What’s the best wood for building drawers?
Hardwoods like oak and maple offer strength and attractive grain for visible surfaces. Plywood provides stability and is ideal for larger drawers or hidden components. Choose wood at 8-12 percent moisture content that’s acclimated to your workspace. Avoid green lumber, which warps unpredictably as it dries.
How do I prevent my drawer from racking or twisting?
Square your box by measuring diagonals—they should be equal if corners are true 90-degree angles. Use a solid bottom panel or quality plywood to prevent warping. Dovetail joints or box joints provide superior racking resistance compared to simple butt joints. Proper bracing and diagonal supports in the cabinet opening also help.
Can I build a drawer without specialized joinery tools?
Yes. Pocket hole joinery requires only a jig and drill, making it accessible for beginners. Butt joints with screws work adequately for simple drawers, though they’re less elegant. Mortise and tenon joints can be cut with hand tools if you’re patient. Start simple and progress to more complex joinery as your skills develop.
Why does my drawer stick or bind when opening?
Binding usually indicates your box isn’t square or slides aren’t properly aligned. Check that opposite sides are equal length and corners are 90 degrees. Verify slides are level and parallel. Sometimes wood swelling from humidity causes sticking—ensure your workshop is climate-controlled at 50-60 percent relative humidity.
How much weight can my drawer support?
This depends on your slide rating—check your hardware specifications. Most residential slides handle 50-150 pounds. Distribute weight evenly and avoid overloading. Remember that concentrated weight in one spot stresses the drawer bottom—use dividers to distribute contents throughout the drawer.
Should I finish the drawer before or after installation?
Finishing before installation prevents drips on surrounding cabinetry and ensures complete coverage. However, you can finish after installation if you protect surrounding areas carefully. Many builders finish the box, install hardware, then apply final topcoats after everything operates smoothly.
What’s the difference between soft-close and standard slides?
Soft-close slides incorporate hydraulic dampers that gently decelerate the drawer as it closes, preventing slamming. Standard slides allow full-speed closing. Soft-close mechanisms reduce noise, prevent damage, and extend hardware lifespan, justifying their additional cost for frequently-used drawers.
How do I align multiple drawers in the same cabinet?
Install all slides first, ensuring they’re level and parallel. Build drawer boxes to identical dimensions. Install drawer fronts with even spacing and alignment—use spacers between drawers to maintain consistency. Step back frequently to verify visual alignment. Adjustable slides allow fine-tuning if minor misalignment occurs.


