
Burp Coolant System: Mechanic’s Step-by-Step Guide
Bleeding air from your vehicle’s cooling system—commonly called “burping”—is one of the most critical maintenance tasks every DIY mechanic must master. Air pockets trapped in your coolant lines can cause overheating, reduced heat output, and catastrophic engine damage if left unaddressed. Whether you’re performing routine maintenance or completing a coolant flush, understanding how to properly burp your coolant system ensures your engine stays at optimal operating temperature and extends the lifespan of your vehicle’s critical components.
This comprehensive guide walks you through the entire process of removing air from your cooling system, from preparation and safety considerations to advanced techniques for stubborn air pockets. You’ll learn why burping matters, what tools you need, and exactly how professional mechanics eliminate every bubble of air that could compromise your engine’s performance. By following these detailed steps, you’ll prevent expensive repairs and maintain your vehicle’s reliability for years to come.

Why Burping Your Coolant System Matters
Air bubbles in your cooling system act as insulators, preventing coolant from effectively transferring heat away from engine components. Even small air pockets can create localized hot spots that damage cylinder heads, warp gaskets, and compromise the integrity of water pump seals. Modern vehicles with tight tolerances and high-performance engines are particularly susceptible to overheating problems caused by inadequate coolant circulation.
When you perform any work involving the cooling system—whether replacing the radiator, water pump, thermostat, or flushing old coolant—you inevitably introduce air. This air must be completely removed through a methodical burping process. Failing to do so results in symptoms like dashboard warning lights, inconsistent cabin heat, coolant leaks at gasket joints, and in severe cases, complete engine failure requiring thousands of dollars in repairs.
Professional technicians understand that burping isn’t optional—it’s mandatory whenever the cooling system is opened. The process typically takes 15-45 minutes depending on your vehicle’s design and complexity, but the investment in time prevents far more expensive problems down the road.
Tools and Materials You’ll Need
Gathering the right equipment before starting ensures a smooth, efficient burping process. Here’s what every mechanic should have on hand:
- Jack and jack stands or wheel ramps for safe vehicle elevation
- Socket set and wrenches (typically 8mm to 16mm for various fittings)
- Screwdrivers (Phillips and flathead) for hose clamps
- Coolant catch pan to prevent environmental contamination
- Distilled water for topping off the system
- Coolant appropriate for your vehicle (check your owner’s manual for the correct type)
- Funnel specifically designed for coolant work
- Clear vinyl tubing (typically 3/8″ diameter) for observing air bubbles
- Shop towels and rags for cleanup and spill management
- Safety glasses and work gloves for personal protection
- Pressure tester (optional but recommended for verification)
Having these items ready prevents interruptions and allows you to work systematically through the entire procedure. Many mechanics keep a dedicated coolant system toolkit that includes specialized adapters and bleed screws specific to their frequently-serviced vehicle models.
Safety Precautions Before Starting
Coolant safety cannot be overstated. Hot coolant can cause severe burns, and certain coolant types contain toxic chemicals that pose health risks. Always observe these critical safety measures:
- Allow the engine to cool completely before opening any cooling system components. A hot engine pressurizes the system, causing coolant to spray violently when caps are removed.
- Never open the radiator cap while the engine is warm. Wait at least 30 minutes after shutdown before beginning work.
- Wear safety glasses to protect against coolant splash and debris.
- Use heavy-duty work gloves to prevent skin contact with coolant, which can cause irritation or allergic reactions.
- Keep a fire extinguisher nearby in case of accidental engine ignition during work.
- Ensure proper ventilation if working in an enclosed space, as coolant fumes can be harmful.
- Never dispose of coolant down drains. Most municipalities require proper hazardous waste disposal. Check with your local waste management facility for approved disposal locations.
- Keep children and pets away from the work area and stored coolant containers.
Following OSHA safety guidelines and your vehicle manufacturer’s service manual ensures you work safely and legally. Many serious injuries occur when mechanics skip safety steps to save time—never let schedule pressure compromise your well-being.
Preparation Steps for Success
Proper preparation dramatically improves your burping success rate. Start by consulting your vehicle’s service manual, which contains specific instructions for your make and model. Some vehicles have dedicated bleed screws designed for this process, while others require alternative methods.
Position your vehicle on level ground and engage the parking brake firmly. If you need to raise the vehicle for better access, use proper lifting equipment and secure it with jack stands—never rely solely on a jack. Some mechanics prefer slightly elevating the front of the vehicle to position the highest cooling system points at the top, making air removal easier.
Locate all cooling system access points: the radiator cap, coolant reservoir, heater control valve, thermostat housing, and any bleed screws specific to your vehicle. Trace the coolant hoses to understand the system layout. This familiarization prevents surprises during the procedure and helps you identify potential problem areas.
Remove the negative battery terminal if your vehicle has electronic cooling fans. This prevents accidental fan activation during work, which could cause injury or interfere with the burping process. Take a photo of your battery terminals before disconnecting them so you remember the correct reconnection sequence.
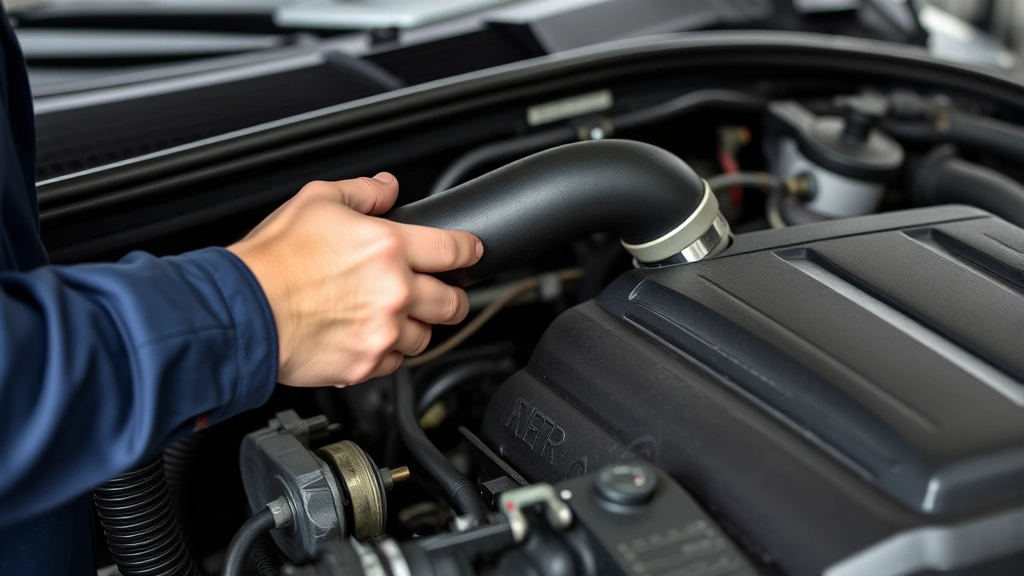
Basic Burping Procedure
The fundamental burping technique works for most vehicles and follows this systematic approach:
- Open the radiator cap slowly and carefully, allowing any residual pressure to escape gradually. Once depressurized, remove it completely and set it aside on a clean surface.
- Locate the heater control valve under the dashboard or in the engine bay. Set it to maximum heat to open the heater core circuit, which must be filled with coolant to prevent air pockets.
- Position your clear vinyl tubing over the radiator filler neck or designated bleed screw. If using a bleed screw, open it slightly—you want a controlled flow, not a geyser.
- Fill the radiator slowly with your premixed coolant, watching the clear tubing for air bubbles. Continue filling until coolant flows steadily through the tube with no visible bubbles.
- Start the engine and allow it to idle while monitoring coolant level. The thermostat will open as the engine warms, circulating coolant throughout the system. Watch for bubbles continuing to appear in the tubing.
- Squeeze the upper radiator hose gently while the engine idles. This helps dislodge stubborn air pockets that may be hiding in hose sections. Repeat several times.
- Allow the engine to warm up to normal operating temperature (typically 180-195°F), then turn it off and let it cool slightly.
- Top off the coolant to the proper level marked on the radiator or reservoir. Air that was trapped in the system has now been removed, requiring additional coolant to reach the correct fill level.
- Close any bleed screws and reinstall the radiator cap, ensuring it’s seated properly and clicks into place.
- Take a test drive and monitor your temperature gauge. The needle should rise steadily to the normal operating range and remain stable.
This basic procedure removes the majority of air from most cooling systems. However, some vehicles require additional techniques or have design features that make standard burping less effective.
Advanced Burping Techniques
Certain vehicles—particularly those with complex cooling systems, high-mounted radiators, or specific manufacturer requirements—need advanced burping methods. Understanding these techniques separates experienced mechanics from novices.
Reverse Flush Burping: Some mechanics use a reverse flow method where coolant is introduced through the lowest system point and flows upward, pushing air ahead of it. This technique is particularly effective for vehicles where the thermostat housing sits above the radiator. Consult your specific vehicle’s service manual to determine if this method applies to your cooling system.
Pressure Tester Method: A cooling system pressure tester can be adapted to actively remove air. Connect the tester to the radiator cap opening, pressurize the system slightly (typically 10-15 PSI), and open bleed screws sequentially. Pressurized coolant forces air out more effectively than passive methods. This approach requires care to avoid over-pressurizing and damaging components.
Vacuum Bleeding: Some specialized equipment creates negative pressure in the cooling system, literally sucking air out through bleed screws or the radiator cap opening. This method is highly effective but requires expensive equipment typically found in professional shops. If your DIY burping attempts fail, this is often the technique professional technicians use to solve the problem.
Multiple Heat Cycles: For particularly stubborn air pockets, some mechanics perform multiple heat cycles: warm the engine fully, cool it completely, and repeat. Each cycle helps dislodge trapped air. This time-intensive method works when other techniques fail but requires patience and multiple sessions.
Burp Bottles and Catch Cans: Aftermarket SAE-approved burp bottles and catch cans are designed to trap air while allowing coolant to flow. These devices connect between the radiator cap and a vent line, automatically separating air from coolant. They’re particularly useful for vehicles with difficult-to-bleed cooling systems.
Troubleshooting Common Issues
Even experienced mechanics encounter challenges when burping cooling systems. Here’s how to address the most common problems:
Persistent Bubbles in the Tubing: If air continues appearing after multiple attempts, you likely have an air pocket trapped in a high section of the cooling system. Try elevating the vehicle’s front end further, squeezing all accessible hoses repeatedly, or allowing longer warm-up cycles. Sometimes running the engine at 1500 RPM (instead of idle) for several minutes helps dislodge stubborn bubbles.
Coolant Spraying from Bleed Screws: This indicates excessive pressure or a completely blocked air passage. Reduce pressure by opening the radiator cap slightly and allowing some coolant to escape before attempting to open bleed screws again. Work more gradually and methodically.
Coolant Leaking from Gasket Surfaces: If coolant seeps from the thermostat housing or water pump after burping, you may have over-tightened fasteners or the gasket may need replacement. Remove the fastener, inspect the gasket for damage, and reinstall with proper torque specifications from your service manual.
Overheating After Burping: If your vehicle overheats immediately after burping, significant air remains in the system. Do not drive the vehicle—this risks engine damage. Instead, allow it to cool and repeat the burping procedure more thoroughly. If the problem persists after multiple attempts, you may have a thermostat failure or circulation pump issue requiring professional diagnosis.
Heater Not Producing Heat: A cold cabin after burping suggests air is trapped in the heater core. Ensure the heater control valve is fully open and repeat the burping process with extra attention to the heater circuit. Some vehicles require opening a specific heater hose bleed screw to fully remove air from this section.
Coolant Level Dropping Quickly: Significant coolant loss after burping indicates a leak. Inspect all hoses, connections, and gasket surfaces carefully. Look for wet spots or staining that indicate seepage. Tighten any loose clamps, but if leaking persists, the affected component likely needs replacement.
Post-Burping Inspection
After completing the burping procedure, thorough inspection ensures everything functions correctly and prevents future problems.
Visual Inspection: Walk around your vehicle and examine every coolant hose, connection point, and gasket surface. Look for wet spots, staining, or crystalline deposits indicating past or present leaks. Gently squeeze hoses to verify they’re firm (not soft or spongy) and properly secured with clamps.
Temperature Gauge Monitoring: Take a 15-20 minute test drive on varied terrain, including highway speeds and low-speed city driving. The temperature gauge should rise smoothly to normal operating range and hold steady. If it fluctuates erratically or climbs higher than normal, air likely remains in the system.
Cabin Heat Verification: Set the heater to maximum heat and verify warm air flows from all vents. If some vents produce cold air while others are warm, air pockets remain in the heater core circuit. Return home and repeat the burping procedure with focus on the heater system.
Coolant Level Check: After the engine cools completely (wait at least 2 hours), check the coolant level in both the radiator and reservoir. Top off if necessary to reach the proper cold-fill mark. Mark the current level with a piece of tape on the reservoir, then check it daily for a week. Any significant drop indicates a leak requiring attention.
Pressure Test (Optional): If you have access to a cooling system pressure tester, apply the manufacturer’s recommended pressure (typically 15-20 PSI) and hold it for 15 minutes. The pressure should not drop, indicating no leaks. This test provides confidence that your burping work was successful and the system is properly sealed.
Document your work by recording the date, coolant type used, and any issues encountered. This information proves valuable if cooling problems develop later or if you need to explain your maintenance history to a mechanic or during vehicle resale.
Frequently Asked Questions
How long does it take to burp a coolant system?
Most burping procedures require 20-45 minutes depending on your vehicle’s cooling system design and complexity. Simple vehicles with easily accessible bleed screws may take as little as 15 minutes, while complex systems with multiple air pockets can require an hour or more. Always allocate extra time rather than rushing—hurried work often results in inadequate air removal and future overheating problems.
Can I burp my coolant system without a bleed screw?
Yes, absolutely. Many vehicles lack dedicated bleed screws and rely on the radiator cap opening as the primary burping point. Use clear vinyl tubing connected to the radiator filler neck to observe air bubbles, fill slowly, and follow the basic burping procedure outlined above. The process takes slightly longer but works effectively on most vehicles.
What type of coolant should I use?
Always consult your vehicle’s owner’s manual for the correct coolant type. Using the wrong coolant can cause corrosion, gasket damage, and cooling system failure. Common types include green (ethylene glycol), orange (extended-life), pink (Japanese vehicles), and blue (European vehicles). Never mix different coolant types, and always use distilled water when topping off between services.
Is it normal for air bubbles to appear after burping?
Small bubbles occasionally appearing immediately after burping are normal—they’re residual air being pushed out. However, if significant bubbles continue appearing after 10-15 minutes of idle running, air pockets remain in the system. Continue the burping process, paying particular attention to high-point sections and the heater circuit.
Why is my heater not working after burping?
Air trapped in the heater core prevents hot coolant from flowing through it. Ensure your heater control valve is set to maximum heat, then repeat the burping procedure. Some vehicles require opening a specific heater hose bleed screw. If the heater remains cold after thorough burping, the heater control valve may be stuck closed and require professional service.
Should I burp my coolant system after a simple radiator top-off?
If you’re only adding coolant to replace minor loss and haven’t opened any system components, burping isn’t necessary. However, if you’ve disconnected hoses, replaced the radiator, thermostat, water pump, or flushed the system completely, thorough burping is essential to remove any air introduced during the work.
Can I drive my vehicle immediately after burping?
Avoid extended driving immediately after burping. Take a short 5-10 minute test drive around your neighborhood to verify the temperature gauge behaves normally and the heater produces heat. If everything works correctly, you can resume normal driving. If problems appear, return home and investigate before driving further.
What should I do if my engine overheats after burping?
Stop driving immediately and allow the engine to cool completely before investigating. Continued driving with overheating risks severe engine damage. Once cool, repeat the burping procedure more thoroughly. If overheating persists, consult your vehicle’s service manual or contact a professional mechanic, as the problem may involve a faulty thermostat or water pump rather than trapped air.


