How to Check for Parasitic Draw: Complete Mechanic’s Guide
A parasitic draw occurs when electrical components in your vehicle continue consuming power even after the engine is turned off and the ignition is in the off position. This hidden power drain can flatten your battery in days or even hours, leaving you stranded with a dead car. Understanding how to diagnose and fix parasitic draw is essential for any DIY mechanic, as it can save you hundreds of dollars in unnecessary battery replacements and towing fees.
Parasitic draws are one of the most frustrating electrical issues vehicle owners face because they’re often invisible until your battery dies unexpectedly. Whether it’s a faulty alternator, a stuck relay, a malfunctioning module, or a simple interior light that won’t turn off, identifying the source requires systematic testing and a solid understanding of your vehicle’s electrical system. This comprehensive guide will walk you through the diagnostic process using tools you likely already have in your garage.
Understanding Parasitic Draw Basics
Every vehicle has some level of parasitic draw—this is completely normal. Modern cars contain dozens of computers, modules, and sensors that require small amounts of power to maintain memory and keep systems ready for startup. A healthy parasitic draw typically ranges from 20 to 50 milliamps (mA), though some luxury vehicles with advanced systems may draw up to 100 mA. When your parasitic draw exceeds 150 mA, you’ve entered problem territory.
The distinction between normal and excessive parasitic draw is crucial. Your battery can supply 100+ amps during startup, but when the engine is off, it can only lose small amounts of current without consequences. A 200 mA draw will completely discharge a fully charged battery in approximately 25 hours. If you’re dealing with a 500 mA draw—common with certain electrical faults—your battery will be dead in just 10 hours.
Understanding the electrical system’s architecture helps tremendously. Your vehicle has a negative battery terminal connected to the chassis and engine block, creating a ground return path for all electrical circuits. A parasitic draw occurs when current flows through a path it shouldn’t, or when components that should be dormant remain active. This is why systematic testing is essential—you need to isolate which circuit or component is misbehaving.
Tools and Equipment You’ll Need
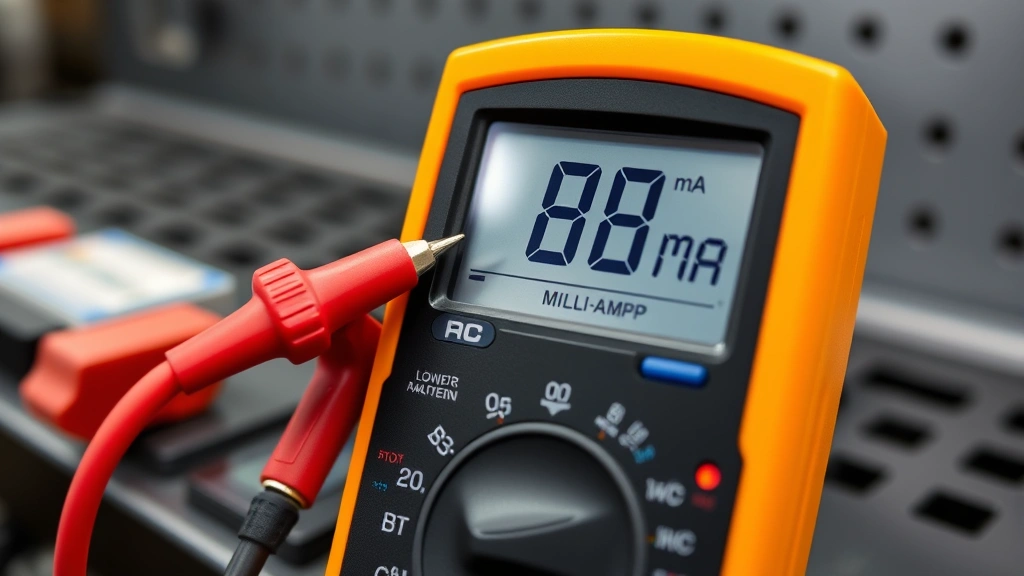
Before beginning any parasitic draw diagnosis, gather the proper tools. The most critical tool is a digital multimeter capable of measuring DC current in the milliamp range. Your multimeter should have a dedicated milliamp (mA) setting, as the standard amp setting won’t provide the precision needed for accurate diagnosis. If you’re unfamiliar with multimeter operation, our guide on how to check battery with multimeter covers fundamental skills you’ll need.
Additional tools and supplies include:
- Safety glasses and work gloves to protect against battery acid and electrical hazards
- Wrench set (typically 8mm, 10mm, and 13mm) for battery terminal removal
- Fuse puller or small needle-nose pliers for removing fuses without damage
- Wire strippers for isolating individual circuits if needed
- Flashlight or headlamp for visibility in engine compartments and under dashboards
- Vehicle service manual specific to your make, model, and year for accurate wiring diagrams and amperage specifications
- Electrical tape for temporarily securing connections
- Notebook to document readings and observations
Having a quality service manual is invaluable because it shows you exactly which fuses and relays control which systems, and provides baseline current draw specifications for your vehicle. Many manufacturers publish these specifications, and knowing what’s normal for your car prevents unnecessary troubleshooting.
Safety Precautions Before Testing
Working with vehicle electrical systems requires respect for safety protocols. Battery terminals contain sulfuric acid capable of causing severe burns, and electrical current can cause injury or death if mishandled. Always wear safety glasses when working near the battery, as corrosion particles can become airborne during terminal removal.
Before disconnecting anything, ensure the engine is completely cold and the ignition switch is in the off position. Allow at least 15-20 minutes after engine shutdown for all modules to enter sleep mode—this is crucial for accurate baseline readings. Many vehicle computers remain partially active for several minutes after shutdown, which can skew your initial measurements.
When removing the negative battery terminal, always disconnect it first and reconnect it last. This prevents accidental shorts that could damage expensive electronic modules or cause injury. Use the proper wrench size to avoid stripping the terminal bolt. Work slowly and deliberately; rushing through electrical diagnostics is how accidents happen.
Never use a multimeter’s resistance (ohms) setting while the battery is connected, as this can damage the meter and potentially cause electrical fires. Additionally, if you’re testing near the fuel system or in areas with fuel vapors, ensure no ignition sources are present—absolutely no smoking, sparks, or open flames.
Step-by-Step Diagnostic Process
Begin by verifying you actually have a parasitic draw problem. If your vehicle sits for more than two weeks without use and the battery dies, parasitic draw is likely. If the battery only dies after normal daily use, the issue may be with charging rather than draw. These are different problems requiring different solutions.
Start by disconnecting the negative battery terminal and allowing the vehicle to sit for 20 minutes. This gives all electronic modules time to fully power down and enter sleep mode. Then, set your multimeter to the DC milliamp setting. Most multimeters have a dedicated milliamp socket separate from the standard measurement sockets—consult your multimeter’s manual if you’re unsure.
Connect your multimeter’s positive probe to the negative battery terminal and the negative probe to the negative battery cable. This creates a series circuit where all current leaving the battery must flow through your multimeter, allowing you to measure the actual draw. Record this baseline reading. If it’s under 50 mA and your battery drains quickly, you may have a charging system problem rather than a parasitic draw.
If your reading exceeds 150 mA, you’ve confirmed a parasitic draw exists. Now the systematic isolation begins. You’ll methodically remove fuses one at a time, watching for the amperage reading to drop. When you remove a fuse and the amperage decreases significantly, you’ve identified the problem circuit.
Using a Multimeter to Measure Current Draw
Proper multimeter technique is essential for accurate parasitic draw diagnosis. Many technicians make the mistake of measuring current in the wrong configuration, which produces misleading readings. Your multimeter must be in series with the battery circuit—meaning current flows through the meter itself—not in parallel as you would measure voltage.
Insert the red probe into the milliamp socket (not the standard amp socket, which has different scaling). Connect the black probe to the common socket. Set the dial to DC milliamps, typically marked as mA or DCA (Direct Current Amperage). Some multimeters have a manual range selector; choose the 200 mA range for parasitic draw testing.
Position your multimeter where you can easily read it while working. Ensure the probes are making solid contact with the battery terminal and cable—loose connections create resistance and produce inaccurate readings. If your readings fluctuate wildly, check for poor contact or consider using alligator clip connectors instead of hand-holding the probes.
Document your baseline reading in a notebook, including the time and any unusual circumstances. If you’re testing a vehicle that’s been sitting for several hours, note this. If it’s been running recently, note that too. This information helps identify patterns—some parasitic draws only occur under specific conditions.
Isolating the Problem Circuit
With your baseline parasitic draw confirmed, begin the isolation process. Consult your vehicle’s service manual to identify the fuse box location and layout. Most vehicles have multiple fuse boxes—typically one under the dashboard and one under the hood near the battery. You may need to test both.
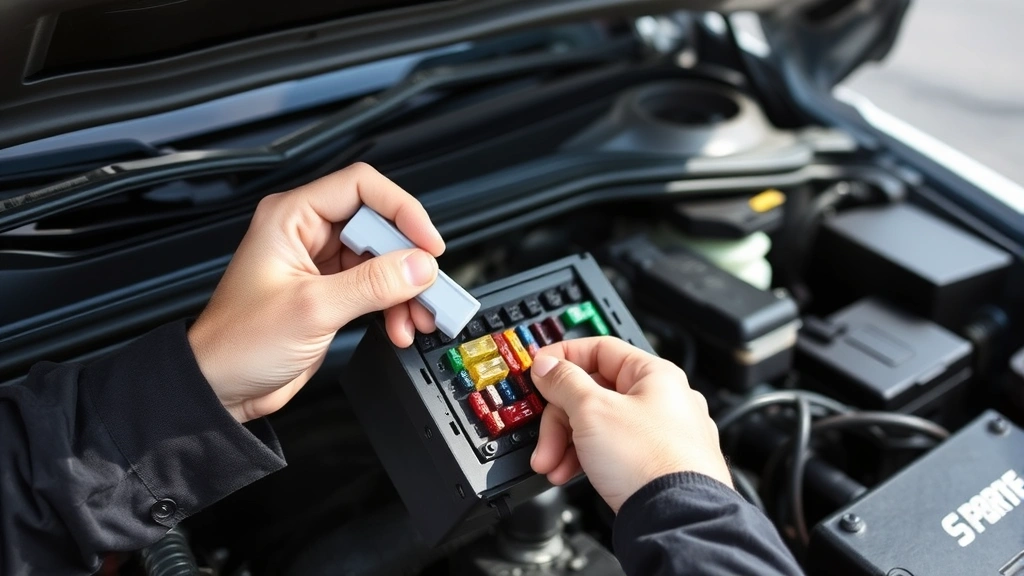
Starting with the underhood fuse box, carefully remove the first fuse using a fuse puller to avoid damaging the fuse terminals. Watch your multimeter reading—if it drops significantly (more than 20-30 mA), you’ve found the problem circuit. Reinstall the fuse and move to the next one. Continue this process methodically, testing every fuse.
If you find a fuse where removal dramatically drops the amperage reading, you’ve identified the circuit containing the parasitic draw. Note the fuse number and consult your service manual to determine what components that circuit controls. This information directs your next troubleshooting steps.
If removing individual fuses doesn’t produce significant changes, you may be dealing with a component that’s always connected to the battery, like an alternator or a module powered through a relay that’s stuck closed. You’ll need to disconnect components directly rather than removing fuses. This is where having a proper wiring diagram becomes invaluable.
For vehicles with multiple fuse boxes, repeat this process at each location. Some parasitic draws originate from underdash circuits controlling interior lighting or infotainment systems, while others come from underhood circuits controlling cooling fans or other engine compartment components.
Common Parasitic Draw Culprits
Certain components are notorious for causing parasitic draws. Understanding these common offenders helps you focus your diagnostic efforts efficiently. The alternator is a frequent culprit—a failing alternator’s internal diodes can fail, allowing current to flow backward through the charging circuit even when the engine is off. Testing involves disconnecting the alternator and measuring whether the draw disappears.
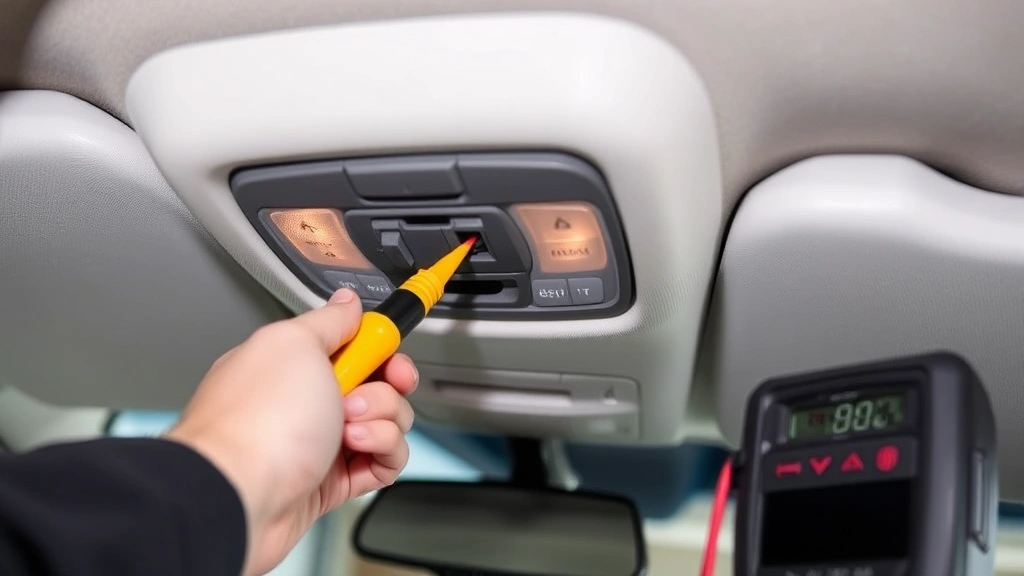
Interior lighting circuits rank among the most common parasitic draw sources. A stuck dome light, glove box light, or trunk light that won’t turn completely off can drain a battery in hours. These switches are mechanical and can wear out, fail to make proper contact, or become stuck in the on position. Inspect all interior lights carefully, and don’t assume a light is off just because it appears dim.
The radio or infotainment system can cause parasitic draws if its memory backup circuit malfunctions or if the unit itself has internal failures. Some aftermarket stereos are particularly prone to this issue. Similarly, security system modules may draw excessive current if their firmware glitches or if internal components fail.
Stuck relays represent another common cause. Relays are electromagnetic switches that control high-current circuits. When a relay’s internal contacts stick in the closed position, it keeps its circuit powered indefinitely. Common problem relays include cooling fan relays, fuel pump relays, and starter relays. Once you’ve identified the circuit, you can test the relay by removing it and measuring whether the draw stops.
Battery disconnect switches and remote start systems occasionally cause parasitic draws if they malfunction or aren’t properly installed. Aftermarket additions are more likely culprits than factory-installed components, though neither is immune. If you’ve recently had work done or added components, start your investigation there.
For comprehensive guidance on vehicle electrical repairs, consult our DIY car repairs beginner’s guide, which covers electrical troubleshooting alongside other common repairs.
Professional vs DIY Solutions
Many parasitic draw issues are perfectly suited for DIY diagnosis and repair. If you’ve identified a stuck interior light or found a faulty relay, replacing these components is straightforward and inexpensive. Interior light switches typically cost $10-30 and require only a screwdriver. Relays are similarly affordable and simple to replace—most plug directly into sockets without requiring any tools.
However, some parasitic draws require professional expertise. If your testing indicates the draw originates from a complex electronic module or the vehicle’s main computer, professional diagnosis is warranted. These components are expensive (sometimes $500-2000+), and misdiagnosis is costly. A professional technician has specialized diagnostic equipment and access to detailed wiring diagrams and technical service bulletins that may reveal known issues with your specific vehicle model.
Alternator failures warrant professional evaluation unless you’re comfortable with engine bay work. While alternator replacement is manageable for experienced DIYers, proper diagnosis requires specialized equipment to confirm the alternator is actually the problem. Misidentifying the issue and replacing a good alternator is wasteful.
Consider your comfort level and available resources. If you’ve systematically narrowed the problem to a specific circuit and identified a simple component like a relay or switch, DIY repair makes sense. If you’re still investigating after removing multiple fuses or if the problem involves complex modules, professional diagnosis saves time and money in the long run.
Most independent mechanics charge $100-150 per hour for diagnostic work, and parasitic draw diagnosis typically takes 1-3 hours. This is often less expensive than replacing multiple components hoping one fixes the problem. Get a detailed invoice showing exactly what was tested and what was found—this information guides your repair decisions.
FAQ
What’s considered normal parasitic draw?
Most vehicles have parasitic draws between 20-50 milliamps when properly functioning. Some luxury or technologically advanced vehicles may draw up to 100 mA due to multiple computers and comfort features. Anything exceeding 150 mA warrants investigation. Your vehicle’s service manual specifies the normal draw for your specific make and model.
Can parasitic draw damage my battery?
Excessive parasitic draw doesn’t damage the battery itself but will completely discharge it over time. A fully charged battery with a 200 mA parasitic draw will be dead in approximately 25 hours. However, repeatedly discharging a battery to zero can shorten its lifespan, as this stresses the battery’s chemistry. Fixing parasitic draw protects both your battery and your vehicle.
How do I test for parasitic draw without a multimeter?
Without a multimeter, you cannot accurately measure parasitic draw. However, you can perform visual inspections to find obvious culprits like stuck interior lights or corroded connections. For proper diagnosis, invest in a basic digital multimeter—quality models capable of measuring milliamps cost $20-40. This tool is essential for any DIY mechanic and has applications far beyond parasitic draw testing.
Will disconnecting the battery reset my vehicle’s computer?
Yes, disconnecting the negative battery terminal will clear the computer’s volatile memory, including any stored diagnostic trouble codes. This is why documenting any check engine lights or fault codes before disconnecting the battery is important. Many vehicles require driving specific patterns to relearn fuel trims and transmission shift points after battery disconnection. Consult your service manual for post-disconnect procedures.
Can a parasitic draw cause a slow crank?
A parasitic draw alone won’t cause slow cranking, but a battery that’s been partially discharged by parasitic draw will. If your vehicle cranks slowly, measure the battery voltage and parasitic draw. If voltage is below 12.4 volts and parasitic draw is high, the battery may be too discharged to crank properly. Charge the battery fully and retest to distinguish between battery problems and parasitic draw issues.
Should I disconnect my battery if I’m leaving my vehicle parked for extended periods?
If you’ve confirmed a parasitic draw you haven’t yet fixed, disconnecting the negative battery terminal is a practical temporary solution for vehicles stored for weeks or months. This prevents battery discharge but will clear any stored codes and require computer relearning when you reconnect it. Many experienced mechanics use this approach for vehicles undergoing repairs or long-term storage.
What’s the difference between parasitic draw and a dead alternator?
A parasitic draw keeps the battery discharged when the vehicle is off. A dead alternator fails to recharge the battery while the engine runs, so the battery drains during normal driving. To distinguish between these issues, check battery voltage while the engine is running—it should read 13.5-14.5 volts with a functioning alternator. If voltage drops below 12.5 volts while running, the alternator isn’t charging properly. For more details, read our guide on checking battery condition with a multimeter.


