
How to Build a Deck: Expert DIY Guide
Building a deck transforms your outdoor space into a functional entertainment area while adding significant value to your home. Whether you’re a seasoned DIYer or tackling your first major project, constructing a deck requires careful planning, proper materials, and adherence to building codes. This comprehensive guide walks you through every step of the process, from initial design to the final finishing touches, ensuring your deck is safe, durable, and built to last for decades.
A well-built deck serves as an extension of your living space, providing the perfect venue for family gatherings, outdoor dining, and relaxation. However, deck construction is not a project to rush. Taking time to understand local building requirements, select quality materials, and follow proven construction techniques will result in a structure that withstands weather, heavy use, and the test of time. This guide emphasizes safety throughout every phase, recognizing that improper construction can lead to structural failure and serious injury.
Planning and Permits
Before purchasing a single board, you must understand local building codes and obtain necessary permits. Deck construction falls under residential building standards enforced by your municipality. The International Code Council (ICC) establishes model building codes adopted by most jurisdictions, though specific requirements vary by location. Consulting your local building department prevents costly mistakes and ensures your deck meets safety standards.
Create a detailed design plan including deck dimensions, height, load capacity, and material specifications. Sketch your deck layout, noting the attachment point to your house, stairs, and any special features. Measure your yard carefully, accounting for drainage patterns, underground utilities, and tree locations. Most jurisdictions require deck plans showing post locations, footing depths, beam sizing, and railing specifications. Your building department may request these plans before issuing a permit.
Permit costs typically range from $50 to $500 depending on deck size and complexity. While obtaining permits requires time and expense, inspections ensure your deck meets safety codes. Unpermitted decks can create liability issues, complicate home sales, and result in costly removal orders. Many homeowners find that DIY home improvement projects benefit from professional guidance on regulatory compliance.

Materials and Tools
Selecting appropriate materials is crucial for deck longevity and safety. Pressure-treated lumber, composite decking, and tropical hardwoods each offer distinct advantages and disadvantages. Pressure-treated Southern Pine and lumber provide excellent rot resistance and cost-effectiveness, making them popular for structural components. Modern pressure treatment uses copper-based preservatives rather than arsenic, making them safer for residential applications.
Composite decking—made from wood fibers and plastic—resists rot, insects, and fading while requiring minimal maintenance. However, composite materials cost 2-3 times more than pressure-treated wood and can become slippery when wet. Tropical hardwoods like Cumaru and Ipe offer natural durability and beauty but command premium prices and raise environmental concerns.
Essential tools include a circular saw, miter saw, power drill, level, tape measure, and safety equipment. A post-hole digger or auger simplifies footing installation, while a pneumatic nailer speeds fastening. Rent specialized equipment like power augers rather than purchasing items used once.
Material checklist:
- Pressure-treated lumber for posts, beams, and joists
- Galvanized or stainless steel fasteners (never use regular nails)
- Deck screws rated for exterior use
- Concrete mix for footings
- Post bases and joist hangers rated for your load
- Flashing to prevent water intrusion
- Decking boards (pressure-treated, composite, or hardwood)
- Railing components meeting code specifications
Foundation and Footings
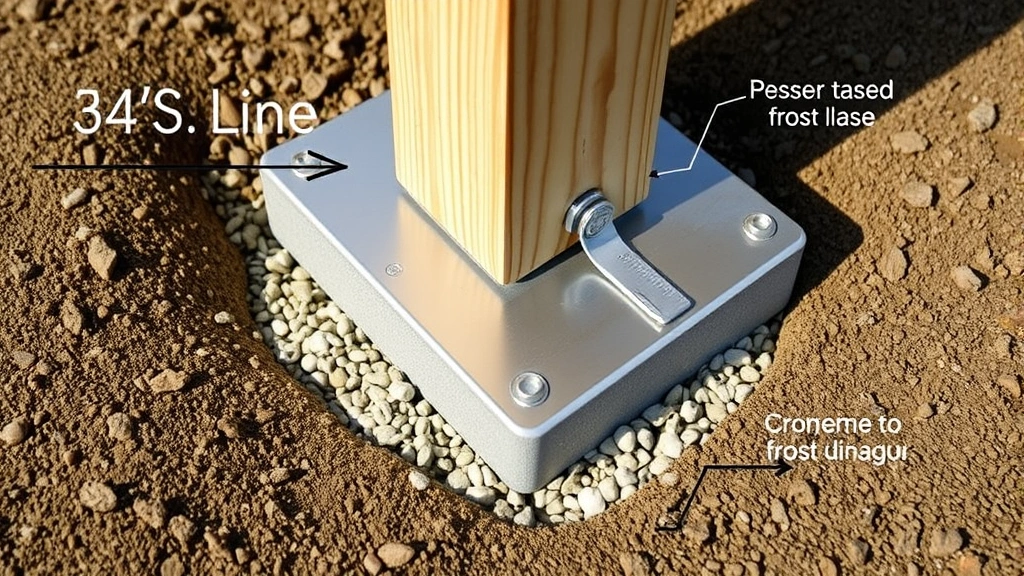
A deck’s foundation determines its longevity and safety. Posts must rest on footings that extend below the frost line—the depth at which soil freezes in winter. Frost heave occurs when frozen soil expands, pushing posts upward and compromising structural integrity. Frost line depths vary dramatically by geography, ranging from 12 inches in southern regions to 48 inches or more in northern climates. Consult local building codes or your extension office for your specific frost line depth.
Posts should be spaced 8 feet apart maximum, with additional posts supporting concentrated loads. Dig post holes slightly wider than your posts, then place a 4-6 inch gravel base to improve drainage. Set posts in concrete, ensuring they extend above grade and remain perfectly vertical. Use a level to verify plumb in both directions before concrete sets.
Never set posts directly on soil or concrete pads resting on grade—frost heave will lift them. Proper footings prevent settling, shifting, and the structural problems that lead to railing failures and surface collapse. This foundational step cannot be compromised without risking deck failure.
Framing the Deck
Once footings cure for 48 hours, install beams on top of posts using post bases rated for your load. Beams distribute the deck’s weight to posts, so sizing is critical. The American Wood Council provides span tables showing maximum beam spans based on species, grade, and load. Most residential decks use 2×10 or 2×12 beams supporting single-story decks.
Attach the ledger board—the frame member connecting to your house—using galvanized bolts spaced 16 inches apart. Install flashing above the ledger to redirect water away from your house foundation. This detail prevents water intrusion and wood rot at the critical house-deck junction. Many deck failures result from improper ledger attachment or missing flashing.
Install joists perpendicular to beams, spacing them 12 or 16 inches apart depending on decking thickness. Secure joists with joist hangers rated for your load, never simply nailing them to beams. Joist hangers distribute loads properly, preventing the gradual sagging that occurs with inadequate fastening. Ensure all joists are level and properly spaced for consistent decking installation.
Install blocking between joists over 12 feet to prevent lateral movement and improve safety. Crown your joists (install them with the slight curve facing up) so the deck naturally sheds water rather than ponding.
Installing Decking
Decking boards create the surface you walk on, so installation quality directly affects safety and longevity. Space boards 1/8 inch apart to allow water drainage and seasonal wood movement. Boards expand and contract with moisture and temperature changes; insufficient spacing causes cupping, buckling, and surface damage.
Start at the ledger board and work outward, fastening boards with two deck screws per joist. Use corrosion-resistant fasteners—galvanized, stainless steel, or coated screws. Regular nails will rust and fail within years. Pre-drill screw holes to prevent splitting, especially near board ends. Stagger board joints so they don’t align, improving strength and appearance.
Cut boards to length, leaving 1/4 inch gaps at walls and structures to allow water drainage and movement. Sand or route sharp edges to prevent splinters and improve appearance. For composite decking, follow manufacturer guidelines regarding fastening, spacing, and installation procedures, as these materials behave differently than wood.
Railings and Safety
Railings are non-negotiable safety features required by code on decks 30 inches or higher. Railings must prevent children from falling through and support 200 pounds of force applied horizontally. This means 4-inch sphere spacing (preventing a child’s head from passing through) and horizontal balusters spaced no more than 4 inches apart.
Build railings from pressure-treated lumber or composite materials that resist weather exposure. Posts should be 4×4 lumber extending from deck framing, with top and bottom rails connecting them. Balusters (vertical infill pieces) must meet spacing requirements—measure with a 4-inch sphere to verify compliance.
Handrails on stairs require 34-38 inch height and 1.25-2 inch diameter for comfortable gripping. Ensure railings are sturdy enough to support someone falling against them; weak railings create serious liability issues. Many deck failures and injuries result from inadequate railing construction, making this safety feature absolutely critical.
Finishing Touches
After structural completion, finishing protects your deck and enhances appearance. Sand the entire surface to remove splinters and rough spots, creating a safe walking surface. Apply exterior-grade stain or sealant to protect wood from UV damage and moisture infiltration.
Pressure-treated lumber benefits from staining after 3-6 months, allowing initial copper leaching to complete. Composite decking typically requires minimal maintenance but may benefit from periodic cleaning. Clear sealants preserve wood color, while stains provide color options and UV protection.
Install stairs with proper rise and run dimensions (7-inch maximum rise, 10-11 inch run). Stairs must have railings if more than three steps, and treads require the same slip-resistant surface as the deck. Ensure stairs are solidly fastened to the deck and rest on footings like deck posts.
Add finishing details like trim boards, under-deck lighting, and water management systems. Under-deck shade systems capture water runoff while creating usable space beneath elevated decks. These enhancements improve functionality and protect the area below your deck from excessive moisture.
FAQ
What’s the typical cost to build a deck?
Deck costs vary dramatically based on size, materials, and complexity. Pressure-treated wood decks typically cost $15-30 per square foot, while composite decking ranges from $25-50 per square foot. A 12×16 foot deck (192 square feet) might cost $3,000-$9,600 depending on material selection. This doesn’t include permits, professional labor, or specialized features like stairs and railings.
How long does a deck last?
Properly constructed pressure-treated wood decks last 15-20 years with regular maintenance. Composite decking lasts 25-30 years with minimal upkeep. Tropical hardwoods can last 20-25 years. Longevity depends on climate, maintenance, and construction quality. Regular cleaning, staining, and inspection extend deck life significantly.
Can I build a deck without permits?
While technically possible, unpermitted decks create serious problems. Building departments can order removal, creating expensive liability. Insurance may not cover damage to unpermitted structures. Home sales can be complicated by unpermitted improvements. Most jurisdictions require permits for decks, and the small cost of compliance prevents major headaches.
What fasteners should I use?
Use only exterior-grade fasteners: galvanized, stainless steel, or coated deck screws. Regular nails and fasteners will rust, staining wood and failing structurally. Fastener quality directly impacts deck longevity. Spend extra for quality fasteners—they’re a small portion of total cost but critical for durability.
How do I prevent deck rot?
Proper drainage and ventilation prevent rot. Ensure water sheds away from the deck rather than pooling. Install flashing at the ledger board connection. Space decking boards for water drainage. Maintain adequate airflow beneath the deck. Regular staining or sealing protects wood from moisture infiltration. Address any soft or discolored wood immediately—these indicate rot requiring replacement.
What’s the maximum deck span without posts?
Beam span depends on lumber size, species, and load. A 2×10 pressure-treated beam typically spans 8-10 feet, while 2×12 spans 10-12 feet. Consult American Wood Council span tables for specific load conditions. Never exceed recommended spans—undersized beams will sag and eventually fail.
Do I need a building permit for a small deck?
Most jurisdictions require permits for any deck structure. Some exceptions exist for very small platforms (often under 200 square feet and low height), but this varies significantly. Check with your local building department before assuming your project is exempt. Permitted decks provide safety assurance and avoid legal complications.
Building a deck requires patience, attention to detail, and commitment to safety standards. By following these guidelines and consulting your local building department, you’ll create an outdoor space that provides years of enjoyment while protecting your family and property investment. Start with thorough planning, use quality materials, and don’t compromise on structural elements—your deck will reward your effort with decades of reliable service.


