DIY Lectern Building: Woodworker Tips Inside
A lectern serves as a functional and elegant centerpiece for any speaking space, whether you’re outfitting a home office, classroom, church, or community center. Building your own lectern allows you to customize dimensions, wood selection, and design elements to match your specific needs and aesthetic preferences. This comprehensive guide will walk you through the entire process of crafting a professional-quality lectern, from initial planning through final finishing touches.
Unlike mass-produced lecterns that often feel generic and overpriced, a handcrafted version reflects your woodworking skills and provides superior functionality tailored to your space. Whether you’re a seasoned carpenter or exploring beginner woodworking projects, this guide covers everything you need to know about creating a sturdy, attractive lectern that will serve reliably for years to come.
Planning Your Lectern Design
Before you cut a single piece of wood, invest time in thorough planning. A well-designed lectern balances aesthetic appeal with practical functionality. Start by considering the intended use—will this lectern accommodate a laptop, thick binders, or primarily handwritten notes? The reading surface should tilt at approximately 15 to 25 degrees to reduce neck strain for the speaker and improve visibility for the audience.
Standard lectern dimensions typically range from 40 to 50 inches in height, with a reading surface measuring 24 to 30 inches wide and 18 to 24 inches deep. However, your specific space and user height may warrant adjustments. Create detailed sketches or use CAD software to visualize proportions before purchasing materials. Consider whether you want a closed base with storage, an open pedestal design, or something incorporating functional storage solutions into the structure.
Research lectern styles by examining professional models and architectural references. The Woodworking Institute provides design standards and safety considerations for elevated speaking platforms. Pay attention to weight distribution—a top-heavy lectern risks tipping if someone leans against it during presentations. Your design should incorporate a wider, lower center of gravity to ensure stability even under dynamic use.

Essential Tools and Materials
Successful lectern construction requires both hand tools and power equipment. Essential power tools include a table saw for ripping lumber, a miter saw for crosscutting, a drill-driver for fastening, and a random orbital sander for finishing surfaces. Hand tools should include a quality measuring tape, combination square, clamps (at least four), chisels, and a block plane for fine-tuning joinery.
Material selection significantly impacts your finished product. Hardwoods like oak, walnut, cherry, and maple offer superior durability and appearance compared to softwoods, though they require sharper blades and more careful handling. For a first-time lectern project, consider starting with premium pine or poplar, which are forgiving to work with while still producing attractive results when properly finished.
You’ll need quality wood glue rated for interior use, finishing nails or pocket hole screws (1.25 to 2.5 inches), sandpaper in multiple grits (80, 120, 150, and 220), wood filler, and your choice of finish—either stain with polyurethane, paint, or natural oil finishes. The Forest Products Laboratory offers comprehensive guidance on wood selection, moisture content, and finishing techniques for interior furniture projects.
Specialized equipment you might consider includes a pocket hole jig for creating invisible fasteners, a thickness planer for milling lumber to consistent dimensions, and a jointer for flattening wood surfaces. While not essential for basic lectern construction, these tools significantly improve result quality and reduce frustration during assembly.
Building the Base Structure
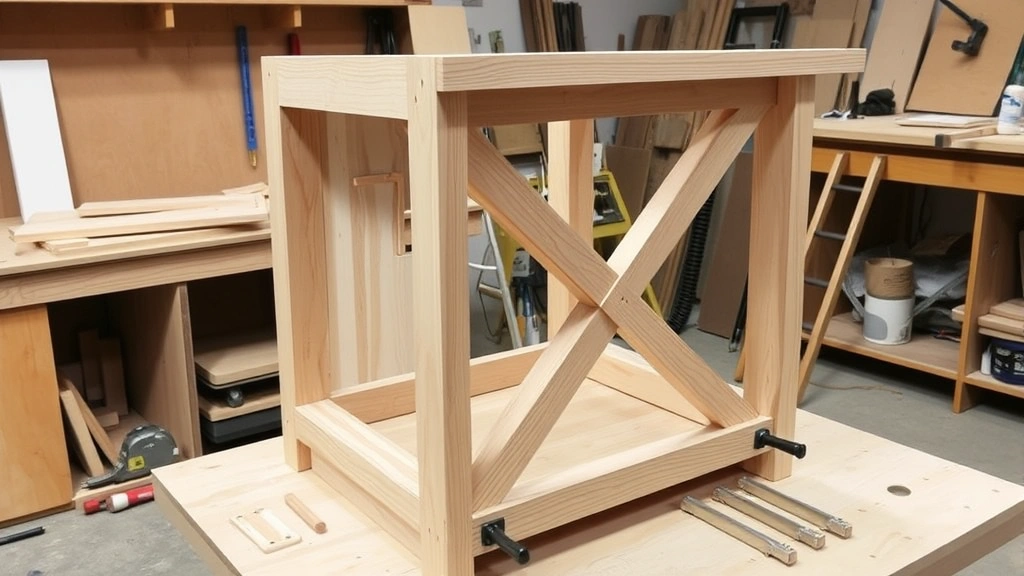
The base provides stability and visual balance for your entire lectern. Begin by constructing a rectangular frame using quality lumber, typically 2×4 or 2×6 stock depending on your design preferences. Cut four legs to your desired height, then join them with horizontal rails using either mortise-and-tenon joinery, pocket holes, or traditional dowel connections.
Layout your base frame carefully, ensuring all corners measure 90 degrees using a framing square. Assemble the base structure with wood glue and fasteners, checking for square and level throughout the process. Install diagonal cross-bracing if your design includes open sides—this dramatically increases rigidity and prevents racking (twisting) under stress.
If incorporating storage, install shelves or a cabinet box within the base frame before adding the upper structure. Ensure any shelving can support the anticipated weight load while maintaining overall stability. The International Code Council provides standards for furniture weight distribution and load-bearing requirements that apply to public-use lecterns.
Consider adding a footrest or kickplate at the base—this not only improves appearance but prevents feet from extending underneath where they might cause tipping. A footrest positioned 10 to 12 inches above floor level provides comfortable support for standing speakers during extended presentations.
Constructing the Reading Surface
The reading surface represents the most visible and frequently used component of your lectern. This angled platform must be smooth, stable, and sized appropriately for your intended documents or devices. Most reading surfaces measure between 24 and 30 inches wide, though you can customize dimensions based on your specific needs.
Build the reading surface from solid wood or quality plywood with hardwood veneer for a professional appearance. Create the angle using either a wedge-shaped support structure or adjustable brackets that allow tilt angle modification. A 15 to 25-degree angle works well for most applications, reducing neck strain while keeping papers visible from audience perspectives.
Install a lip or edge banding along the front of the reading surface to prevent papers from sliding off during presentations. This lip should be approximately 1 to 2 inches tall and can feature decorative routing or profiling to enhance the overall aesthetic. Sand all surfaces to at least 150-grit smoothness before final finishing—any rough spots will become irritating during extended use.
If you plan to use the lectern for electronic devices, consider routing cable management channels into the reading surface or support structure. These channels allow discreet power and audio cables to route from the platform to floor outlets or amplification equipment without creating hazardous tripping points.
Adding Support Columns and Frame
The vertical support structure connects your reading surface to the base while maintaining visual proportion and structural integrity. Many lecterns feature single or double columns that rise from the base to support the reading platform. These columns should measure 3 to 4 inches in diameter or width to provide adequate visual support without appearing clunky or disproportionate.
Construct columns from solid wood turned on a lathe for a refined appearance, or create them from four-square stock with decorative routing or edge details. Fluted columns—featuring vertical grooves—add visual interest and traditional elegance to your lectern design. Ensure all joinery between columns and base receives reinforcement through dowels, mortises, or pocket hole fasteners.
Consider incorporating a front panel between the columns to enhance visual unity and potentially add personalization through routed designs, inlays, or custom details. This panel can be purely decorative or functional, housing speakers, equipment, or storage compartments. The front panel should complement your overall design while maintaining proportional balance with the reading surface above.
Install any horizontal cross-bracing or decorative elements that enhance structural rigidity while contributing to the overall aesthetic. These elements should be carefully proportioned—too many details create visual clutter, while too few result in a sparse, unfinished appearance. Reference furniture design principles and examine high-quality lecterns to develop an eye for appropriate proportion and detail.
Finishing and Refinishing
Proper finishing transforms raw wood into a beautiful, protected surface that will withstand years of use. Begin by sanding the entire lectern systematically, progressing through grits from 80 to 220. Sand with the grain direction whenever possible, and pay special attention to edges and surfaces that will receive frequent contact.
Choose your finish based on the wood species, intended location, and desired appearance. Water-based polyurethane offers excellent protection with minimal odor and yellowing, making it ideal for interior spaces. Oil-based finishes provide deeper color development and a warmer appearance, though they require more drying time between coats. For natural wood aesthetics, consider penetrating oil finishes that enhance grain while providing modest protection.
Apply finish in thin, even coats using quality brushes or foam applicators. Most professional results require three to four coats with light sanding between applications. Allow adequate drying time per manufacturer specifications—rushing this process results in cloudy finishes or incomplete curing that leaves surfaces vulnerable to damage.
If painting your lectern, use high-quality furniture paint rather than wall paint, which lacks the durability needed for frequently-used pieces. Prime all surfaces before applying finish coats, ensuring even color coverage and superior adhesion. Painted lecterns benefit from polyurethane topcoats that provide protection against scuffs and wear while maintaining a professional appearance.
Installation and Stability
Proper installation ensures your lectern remains safe and stable throughout its lifespan. Place the completed lectern in its final location and check for level using a quality spirit level. Adjust feet or shims as necessary—even slight slopes can create stability issues or cause papers to slide unexpectedly.
If your lectern will be used in public spaces, consider securing it to the floor or wall using appropriate fasteners. The Occupational Safety and Health Administration recommends securing tall furniture in commercial settings to prevent tip-over accidents. Use heavy-duty L-brackets or cable anchors that distribute loads safely without damaging your finished surfaces.
Test stability by applying gentle pressure to all areas where users might lean or place weight. The lectern should not wobble, shift, or show any signs of movement under typical use conditions. If instability occurs, reinforce the base structure with additional cross-bracing or verify that all fasteners are properly tightened.
For lecterns used in educational or religious settings, review facility standards regarding furniture specifications and safety requirements. Some institutions maintain specific guidelines for podium and lectern construction that ensure consistency with facility aesthetics and safety protocols.
Perform regular maintenance to preserve your lectern’s appearance and functionality. Dust surfaces weekly with a soft cloth, address spills immediately to prevent staining, and periodically refresh the finish with appropriate cleaning products designed for your specific finish type. This preventive approach extends the life of your investment and maintains the professional appearance your careful craftsmanship created.
FAQ
What wood species works best for lectern construction?
Hardwoods like oak, walnut, and cherry provide superior durability and appearance. For beginners, pine or poplar offer excellent workability while still producing attractive results. Choose based on your budget, available tools, and desired final appearance. Avoid softwoods that dent easily or show wear quickly in high-use applications.
How much weight can a properly constructed lectern support?
A well-built lectern with adequate bracing can safely support 200 to 300 pounds distributed across the reading surface and base. This accommodates typical office equipment, binders, and moderate user leaning. For applications requiring higher weight capacity, increase cross-bracing and use larger diameter support columns.
Can I add a microphone stand or equipment shelf to my lectern?
Yes, many lecterns incorporate equipment shelves positioned below the reading surface or integrated into the front panel. Plan these features during the design phase to ensure proper weight distribution and cable management. Ensure any equipment shelf remains accessible and doesn’t interfere with speaker comfort or movement.
What angle works best for the reading surface?
A 15 to 25-degree angle accommodates most users and purposes. Steeper angles reduce neck strain for readers but may cause papers or devices to slide. Test different angles during your design phase to find the optimal balance for your intended use. Adjustable systems allow customization for different users or purposes.
How long does finishing typically take?
Plan for 2 to 3 weeks for complete finishing, including multiple coats with drying time between applications. Water-based finishes dry faster than oil-based products. Accelerate the process by using fast-drying polyurethane products, though this may compromise final appearance quality. Rushing finishing is a common mistake—allow adequate time for professional results.
Should I seal the bottom of my lectern?
Yes, sealing all surfaces including the bottom prevents moisture absorption that can cause warping or finish failure. This is especially important in humid environments or spaces with potential water exposure. Apply finish to hidden surfaces with the same care you give visible areas.
How do I prevent my lectern from tipping over?
Ensure your base is wider than the reading surface, creating a lower center of gravity. Install diagonal bracing in the base structure for rigidity. In public spaces, secure the lectern to the floor or wall. Test stability thoroughly before placing the lectern in service, and address any wobbling immediately.
Can I modify an existing lectern design I found online?
Absolutely—customizing designs to fit your specific space and needs is one of the benefits of building your own lectern. However, ensure any modifications maintain structural integrity and safety. Test proportions and weight distribution carefully, and consult woodworking associations if you’re uncertain about design changes affecting safety or stability.