How to Build a Shed: Pro Tips for DIY Success
Building a shed is one of the most rewarding DIY projects you can undertake. Whether you need extra storage for garden tools, create a workshop space, or simply want a backyard retreat, a well-constructed shed adds both functionality and value to your property. This comprehensive guide walks you through every step of the process, from initial planning through final touches, ensuring your shed stands strong for decades.
Many homeowners hesitate before starting a shed project, worrying about complexity or cost. The truth is, with proper planning, the right materials, and attention to detail, you can build a sturdy shed that rivals professional installations. This guide combines expert techniques with practical advice to help you succeed, whether you’re a seasoned builder or tackling your first major construction project.
Planning Your Shed Project
Before you purchase a single board or tool, invest time in thorough planning. This foundational step determines whether your project runs smoothly or encounters costly setbacks. Start by defining your shed’s purpose—will it store lawn equipment, serve as a workshop, or provide recreational space? Your answer directly influences size, ventilation, electrical needs, and structural requirements.
Next, check local building codes and zoning regulations. Most municipalities require permits for structures over a certain size (typically 100-200 square feet), and setback requirements determine how close your shed can be to property lines. Violating these regulations can result in fines or orders to demolish your completed structure. Contact your local building department or visit their website to obtain specific requirements for your area.
Create detailed plans including dimensions, materials list, and a budget. Many DIYers find success starting with DIY resources and guides that provide tested plans. Sketch your design, noting door placement, window locations, and any special features. Calculate material quantities carefully—underestimating leads to project delays, while overestimating wastes money.
Consider the shed’s size carefully. An 8×10 shed (80 square feet) works well for basic storage, while 10×12 or larger provides workshop space. Taller walls (8 feet minimum) prevent claustrophobia and allow standing room. Factor in future needs—it’s easier to build slightly larger initially than expand later.
Choosing the Right Location
Location dramatically impacts your shed’s longevity and usability. Select a spot with good drainage to prevent water accumulation and foundation problems. Avoid low-lying areas where rainwater collects or where ground stays perpetually damp. Sloped terrain actually works in your favor, allowing water to drain naturally away from the structure.
Sunlight exposure matters too. If you plan to work inside, position your shed where windows receive natural light during your typical working hours. However, excessive sun exposure can cause wood deterioration and interior heat buildup. A location with morning sun and afternoon shade often provides the ideal balance.
Check for underground utilities before digging. Call your local utility locating service (typically available free through a “Call Before You Dig” number) to mark gas lines, electrical cables, and water pipes. Hitting a utility line creates dangerous situations and expensive repairs.
Wind direction and surrounding obstacles influence comfort and structural integrity. Position your shed to minimize wind exposure if possible, or ensure your structure can withstand local wind speeds. Clear areas around your planned location of large rocks, roots, and debris that complicate foundation work.
Preparing the Foundation
A solid foundation prevents countless problems down the road. Your shed’s foundation options include concrete pads, gravel, treated skids, or a concrete slab. Each has advantages depending on your climate, soil conditions, and budget.
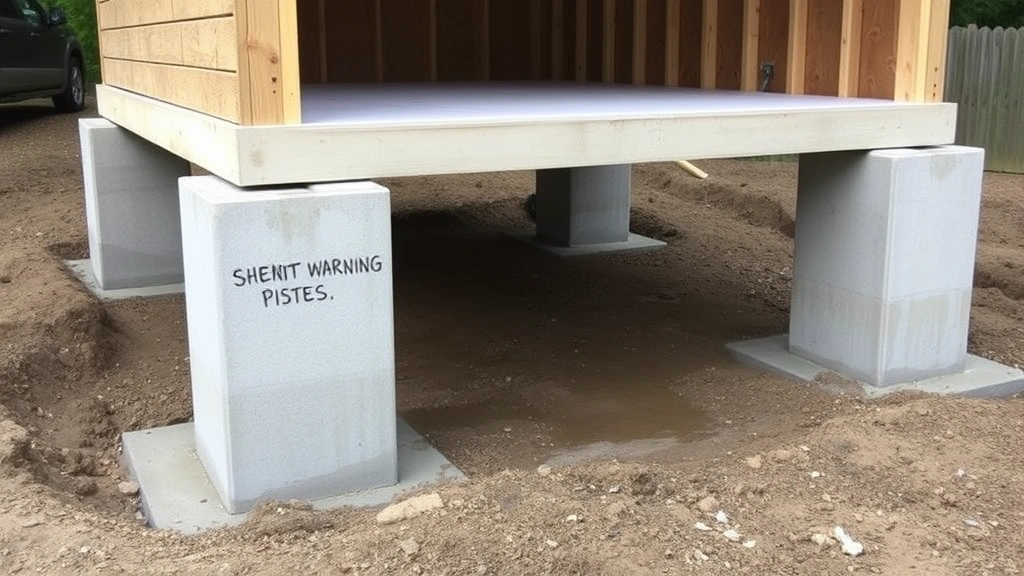
Concrete Pad Foundation: This popular choice involves pouring concrete piers at each corner and midpoints along the perimeter. Dig holes below your frost line (the depth where soil doesn’t freeze—typically 2-4 feet depending on climate) to prevent frost heave, which pushes structures upward during freeze-thaw cycles. Set concrete piers in these holes, leaving them 4-6 inches above ground. This elevated approach prevents water damage and pest entry while providing excellent stability.
Gravel Foundation: For smaller sheds in areas with good drainage, a compacted gravel base works adequately. Excavate 4-6 inches of soil, add landscape fabric, then layer 4 inches of compacted gravel. This budget-friendly option requires maintenance but suffices for temporary or lightweight structures.
Treated Skid Foundation: Pressure-treated 4×4 or 4×6 beams laid directly on the ground create a simple foundation. While economical, this method offers less protection against moisture and pest damage than elevated options. This approach works best in drier climates.
Ensure your foundation is level—even slight slopes cause door operation problems and structural stress. Use a laser level or transit to check elevation across the entire base, adjusting concrete piers or gravel as needed. A perfectly level foundation makes every subsequent step easier.
Building the Frame Structure
The frame provides your shed’s structural skeleton. Proper framing ensures your structure withstands weather, supports roofing loads, and maintains its shape for decades. Most sheds use 2×4 lumber for wall framing, with spacing every 16 inches (on-center), following standard American Wood Council building standards.
Start by installing rim joists—the perimeter beams that anchor your frame to the foundation. Use galvanized bolts or concrete anchors to secure these beams, spacing fasteners 4-6 feet apart. These critical connections prevent wind from lifting your structure.
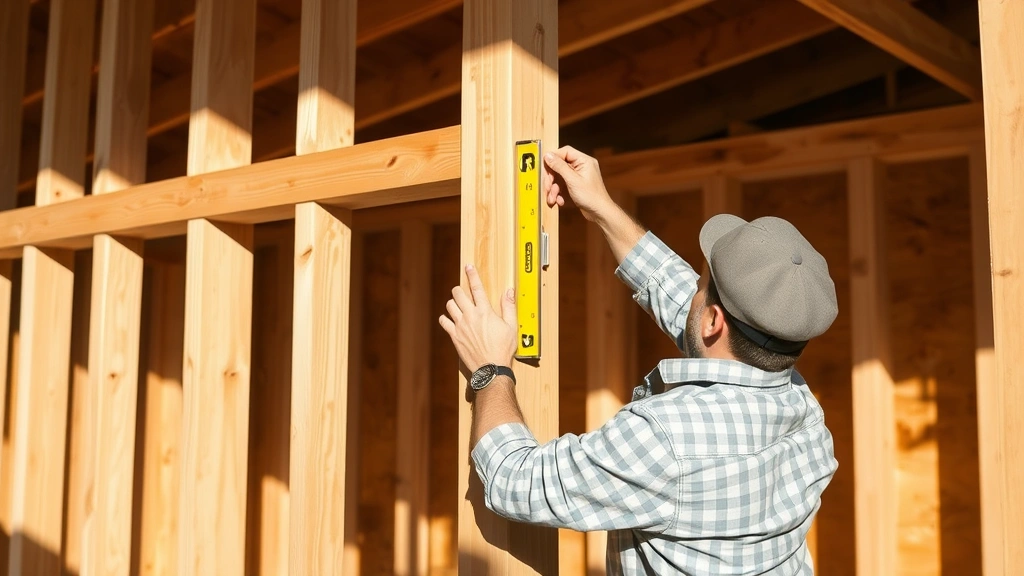
Build wall sections on the ground, then raise them into place. This approach proves safer and more efficient than building walls in position. For each wall, lay out two horizontal plates (top and bottom), then install vertical studs between them. Nail studs at angles to the plates using 16-penny nails, or better yet, use structural screws that provide superior holding power.
Include window and door openings in your framing. These openings require headers—horizontal beams that span above doors and windows, supporting roof loads. For openings up to 4 feet wide, a doubled 2×4 header suffices. Larger openings need deeper headers (2×6 or 2×8) or engineered solutions. Consult structural building industry standards for your specific opening size.
Brace your frame diagonally to prevent racking (parallelogram distortion). Temporary diagonal bracing during construction keeps walls plumb and square. Once sheathing is installed, the plywood or OSB provides permanent bracing.
Install ceiling joists or roof trusses depending on your roof design. Trusses, prefabricated triangular frames, arrive ready to install and save construction time. Joists work if you plan a simple roof. Space these every 16 or 24 inches, depending on your load calculations and local codes.
Installing Walls and Roof
With your frame standing, sheath walls and roof to create weathertight enclosure. Plywood or oriented strand board (OSB) sheathing provides structural bracing while creating a surface for siding attachment. Use 1/2-inch thickness for walls and 5/8-inch for roofs to handle loads. Fasten sheathing with nails or screws spaced 6 inches on edges and 12 inches in the field.
Before applying exterior siding, install house wrap—a breathable moisture barrier that allows interior vapor to escape while blocking external water. This layer prevents moisture accumulation that causes wood rot and mold. Overlap seams by 6 inches and seal with house-wrap-compatible tape.
Choose siding based on your climate, maintenance preferences, and budget. Wood siding offers classic aesthetics but requires regular maintenance. Metal siding provides durability and low maintenance. Vinyl offers affordability and comes in many colors. Whatever you choose, ensure proper installation with appropriate flashing around windows and doors to prevent water intrusion.
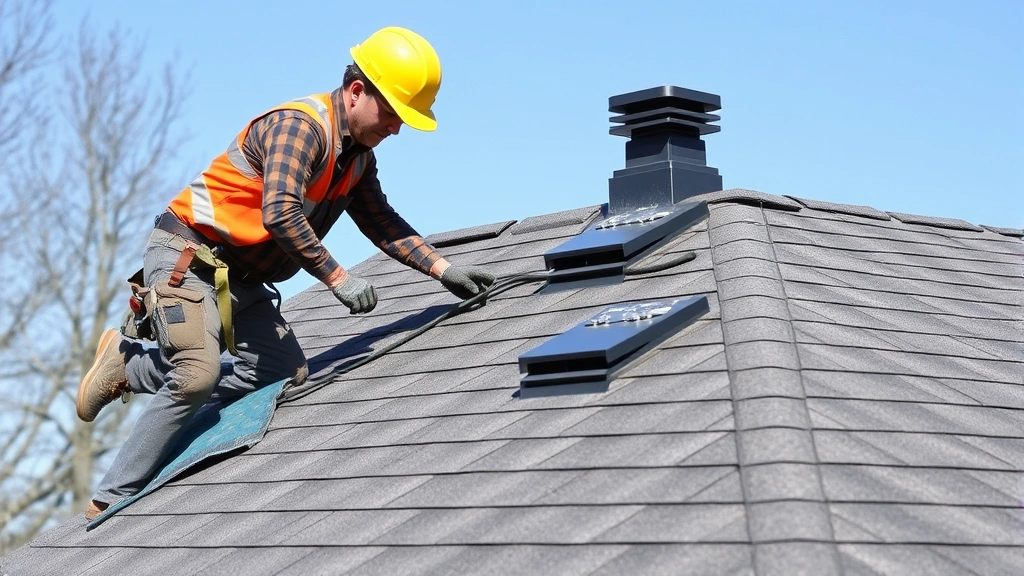
Your roof system protects everything inside. Asphalt shingles remain the most popular choice for DIY sheds due to cost and installation simplicity. Install underlayment first—a self-adhesive or nailed membrane that provides secondary water protection. Then attach shingles starting from the eaves, working upward toward the peak. Proper shingle overlap (typically 5 inches) ensures water sheds correctly.
Install flashing at the roof peak and where the roof meets walls. This metal or rubber material directs water away from vulnerable joints. Inadequate flashing causes leaks that compromise your entire structure, so don’t skimp here.
Consider woodworking techniques and proper fastening methods when installing trim and finishing touches. Quality installation makes the difference between a shed that lasts 10 years and one lasting 30 years.
Adding Doors and Windows
Doors and windows provide access, ventilation, and light. Choose door styles matching your shed’s purpose—double barn doors for equipment storage, single entry doors for workshops, or overhead garage doors for vehicle storage. Ensure door frames are properly shimmed and level before installation; crooked frames cause binding and drafts.
Install doors using heavy-duty hinges rated for outdoor use. Stainless steel or galvanized hardware resists rust better than standard steel. Add a ramp or threshold at ground level to ease equipment movement and prevent water entry.
Windows improve functionality and aesthetics. Shed windows don’t require expensive thermal glass—simple single-pane or double-hung models work fine. Position windows to capture natural light and provide ventilation. Proper flashing around window frames prevents leaks; use waterproof sealant around the perimeter.
Add ventilation for moisture control. Ridge vents or gable vents allow air circulation, preventing humidity buildup that promotes mold and wood decay. If you plan electrical service, consider exhaust fans for additional ventilation, especially if your home security and protection needs include climate control.
Finishing and Weatherproofing
Finishing transforms your shed from functional to beautiful while providing essential protection. Paint or stain exterior wood surfaces within the first year of construction. This coating protects wood from UV damage and moisture penetration, dramatically extending your shed’s lifespan.
Choose exterior-grade paint or stain formulated for wood. Pressure-treated lumber can be painted immediately, though waiting 3-6 months allows better paint adhesion. Apply quality primer before paint for superior coverage and durability. Plan for repainting every 5-7 years depending on climate and sun exposure.
Install gutters and downspouts to direct roof runoff away from the foundation. This simple addition prevents water from pooling around your structure, reducing foundation problems and landscaping damage. Downspouts should extend at least 4-6 feet from the foundation.
Seal gaps and cracks with exterior caulk to prevent pest entry and weather infiltration. Check where utilities enter, around door frames, and at roof penetrations. These small openings provide entry points for insects and water.
Add interior finishing based on your shed’s purpose. Insulation improves comfort if you spend time inside during cold weather. Vapor barriers prevent moisture problems. Electrical service requires hiring a licensed electrician to ensure safety and code compliance. Workbenches, shelving, and storage systems maximize functionality.
Your shed requires ongoing maintenance for longevity. Inspect roof condition annually, checking for missing or damaged shingles. Clear gutters of debris. Check siding and trim for damage or rot. Treat any wood damage immediately to prevent spread. This preventive maintenance catches small problems before they become expensive repairs.
FAQ
Do I need a building permit for my shed?
Most jurisdictions require permits for structures over 100-200 square feet or those within certain distances from property lines. Check with your local building department. Permits ensure your structure meets safety codes and can prevent legal issues if you sell your property. The permit cost is usually modest compared to potential problems from unpermitted construction.
What’s the best foundation for a shed?
Concrete pier foundations offer the best combination of durability, moisture protection, and pest resistance. They keep your structure elevated, allowing air circulation underneath and preventing rot. Gravel works for temporary structures in dry climates, while treated skids offer a middle ground. Your local climate and soil conditions should guide your choice.
How long does a shed take to build?
A typical 8×10 shed takes 40-80 hours for an experienced DIYer working part-time, or 1-2 weeks of full-time work. Larger structures or those with complex features take longer. Planning, material preparation, and foundation work consume significant time. Don’t rush—taking your time ensures quality workmanship.
Can I build a shed on my own?
Yes, though some tasks benefit from extra hands. Foundation work, raising walls, and installing roofing go faster with helpers. Many DIYers successfully complete sheds solo by breaking work into manageable phases. If you’re new to construction, consider taking a workshop or watching detailed video tutorials before starting.
What maintenance does my shed need?
Annual inspections catch problems early. Check roof condition, inspect siding for damage, clear gutters, and look for pest entry signs. Repaint siding every 5-7 years. Treat any wood damage immediately. Proper ventilation prevents moisture problems. These simple steps dramatically extend your shed’s lifespan.
Should I hire an electrician for shed wiring?
Yes. Electrical work requires proper grounding, circuit protection, and weatherproof outlets. Improper installation creates fire and shock hazards. A licensed electrician ensures your work meets code and functions safely. This investment protects your property and family.
Building a shed represents an achievable goal for dedicated DIYers. By following these pro tips, taking time with planning, and paying attention to detail, you’ll create a structure that provides decades of reliable service. Start with thorough planning, ensure your foundation is solid, frame carefully, and finish properly. Your effort transforms raw materials into a valuable addition to your property. Whether you’re storing equipment, creating workshop space, or building a backyard retreat, your new shed becomes a source of pride and functionality for years to come.


