
How to Build a Shed: Expert Tips Inside
Building a shed is one of the most rewarding DIY projects you can undertake. Whether you need additional storage for garden tools, lawn equipment, or seasonal items, constructing your own shed gives you complete control over the design, size, and functionality. This comprehensive guide will walk you through every step of the process, from initial planning and foundation preparation to framing, roofing, and finishing touches. By following these expert tips, you’ll create a durable structure that serves your needs for decades to come.
A well-built shed not only provides valuable storage space but also increases your property’s functionality and curb appeal. Unlike purchasing a prefabricated shed, building one yourself allows for customization and typically costs significantly less. Throughout this guide, we’ll cover essential aspects including material selection, local building code compliance, structural integrity, and weatherproofing techniques. Whether you’re a seasoned DIYer or tackling your first major project, understanding these fundamentals will set you up for success.

Planning and Permits
Before breaking ground on your shed project, invest time in thorough planning. Start by determining your shed’s purpose and required dimensions. Consider what you’ll store, how frequently you’ll access items, and whether you need additional features like windows for natural light or electricity for tools. Most residential sheds range from 8×10 feet to 12×16 feet, though your specific needs may differ.
Checking local building codes and regulations is absolutely critical. Many municipalities require permits for structures over a certain size, typically 100-120 square feet. Setback requirements dictate how far your shed must be from property lines, usually 5-10 feet depending on your location. Contact your local building department to obtain specific requirements for your area. Some jurisdictions also impose restrictions on shed appearance, materials, or permanent foundation requirements. Failing to secure proper permits can result in fines, forced removal, or complications when selling your property.
Create detailed plans or purchase pre-made shed blueprints. Your plans should include foundation specifications, framing layouts, roof pitch, door and window placements, and material lists. Construction publications offer excellent reference materials and design inspiration. If you’re unfamiliar with reading construction drawings, consider consulting with a local contractor or architect to review your plans before beginning construction.
Establish a realistic budget covering materials, hardware, tools, and permits. Quality materials cost more upfront but provide better longevity and weather resistance. Factor in contingencies for unexpected issues that often arise during construction. Research local material suppliers and compare prices for lumber, roofing materials, and hardware to maximize your budget efficiency.
Foundation Preparation
A solid foundation is the cornerstone of any durable shed. Poor foundation work leads to structural problems, water damage, and premature deterioration. Your foundation choice depends on your climate, soil conditions, and local building codes. The three primary options include concrete pads, concrete slabs, and gravel beds with treated skids.
Concrete pads involve digging holes below the frost line and setting concrete footers with concrete blocks or piers. This method works well in cold climates where ground freezing causes frost heave. The frost line depth varies by location—typically 12-48 inches depending on your region. Proper cement curing ensures your foundation reaches full strength before construction begins.
Concrete slabs provide excellent durability and level surfaces for equipment storage. Pour a 4-inch slab over properly compacted gravel base with drainage provisions. Concrete slabs require more initial investment but eliminate moisture wicking from ground contact and provide superior protection against pests.
Gravel beds with pressure-treated skids offer the most budget-friendly option. Excavate and level the site, add 4-6 inches of compacted gravel, then set pressure-treated 4×4 or 6×6 beams as the foundation base. While economical, this method requires regular maintenance and eventually needs skid replacement.
Ensure proper drainage around your shed foundation. Water pooling near the structure causes foundation erosion and interior moisture problems. Grade the surrounding ground to slope away from the shed, and consider installing a perimeter drain if your site has poor natural drainage. These foundation considerations prevent costly repairs and extend your shed’s lifespan significantly.
Framing the Structure
Framing creates your shed’s structural skeleton and determines its strength and longevity. Standard shed framing uses 2×4 lumber for walls, with spacing typically 16 inches on center. This spacing balances material efficiency with structural strength. For larger sheds or those in heavy snow regions, 12-inch spacing provides additional support.
Begin by constructing wall frames on level ground, then tilting them upright and securing them to the foundation. Accurate measurements and square corners are essential—use the 3-4-5 triangle method to verify square corners. Install permanent bracing before raising walls to prevent racking (diagonal distortion). Corner posts require reinforcement with diagonal bracing or metal corner brackets to resist lateral forces.
The roof structure typically uses either rafter or truss construction. Rafters require on-site cutting and assembly but offer flexibility for custom designs and attic space. Trusses are prefabricated triangular units that install quickly and provide excellent strength. Your roof pitch affects both appearance and functionality—steeper pitches shed snow better in cold climates but require more materials. Common residential pitches range from 4:12 to 12:12 (rise:run ratio).
Install proper ventilation during framing to prevent moisture accumulation. Ridge vents combined with soffit vents create air circulation that prevents mold and extends roofing material life. This passive ventilation system works continuously without mechanical components, making it reliable and maintenance-free.
Use structural fastening standards throughout framing. Nails, screws, and bolts must meet specifications for your climate zone and load requirements. Proper fastening prevents structural failure during high winds or heavy snow loads. Consider using structural screws instead of nails—they provide superior holding power and allow easier adjustments during construction.
Roofing Installation
Roofing protects your shed from weather damage and determines its overall durability. Material choices include asphalt shingles, metal roofing, or cedar shakes, each with distinct advantages and cost considerations.
Asphalt shingles remain the most popular choice due to affordability and ease of installation. Three-tab shingles cost less but last 15-20 years, while architectural shingles cost more but provide 25-30 year lifespans and superior appearance. Proper underlayment—typically roofing felt or synthetic material—provides critical moisture protection beneath shingles. Install underlayment before shingles to prevent ice dam damage and wind-driven rain penetration.
Metal roofing offers excellent durability, lasting 40-50 years with minimal maintenance. While installation costs more initially, the extended lifespan and energy efficiency provide long-term value. Metal roofing sheds snow and water effectively, making it ideal for wet climates. Ensure proper fastening and sealant application to prevent leaks at panel seams and fastener penetrations.
Regardless of material choice, proper flashing installation prevents water intrusion at roof penetrations, valleys, and edges. Flashing directs water away from vulnerable areas where roof sections meet walls or where vents penetrate the roof. Inadequate flashing causes interior leaks and structural damage—this detail deserves careful attention and quality materials.
Install gutters and downspouts to direct roof runoff away from the foundation. Water flowing directly from roof edges causes foundation erosion and basement moisture problems. Gutters should slope slightly toward downspouts and extend at least 4-6 feet away from the structure before dispersing water.
Exterior Finishing
Exterior finishing protects structural framing from weather exposure while enhancing appearance. Siding material choices include wood, vinyl, metal, or composite materials. Each option offers different aesthetics, maintenance requirements, and price points.
Wood siding provides classic appearance and natural insulation but requires regular maintenance including painting or staining every 5-7 years. Pressure-treated or naturally rot-resistant woods like cedar resist decay better than standard lumber. Proper installation with adequate drainage behind siding prevents moisture accumulation and premature failure.
Vinyl siding offers low maintenance and durability with minimal upkeep. It resists rot, insects, and fading better than wood. However, vinyl can crack in extreme cold and becomes brittle over time. Metal siding provides excellent durability and fire resistance, making it popular in rural areas.
Composite materials combine wood fibers with plastic polymers, offering wood-like appearance with superior weather resistance. These materials cost more than vinyl but require less maintenance than wood while providing better aesthetics than plastic alternatives.
Install house wrap or felt paper behind siding to provide additional moisture protection. This underlayment allows water vapor to escape while preventing liquid water from reaching framing. Proper installation with overlapped seams and sealed penetrations significantly improves weather resistance.
Paint or stain exterior surfaces within one year of construction. Bare wood exposed to sun and weather deteriorates rapidly. Quality exterior paint or stain protects wood from UV damage and moisture penetration while enhancing appearance. Reapply finish every 5-7 years depending on climate conditions and product quality.
Interior Organization
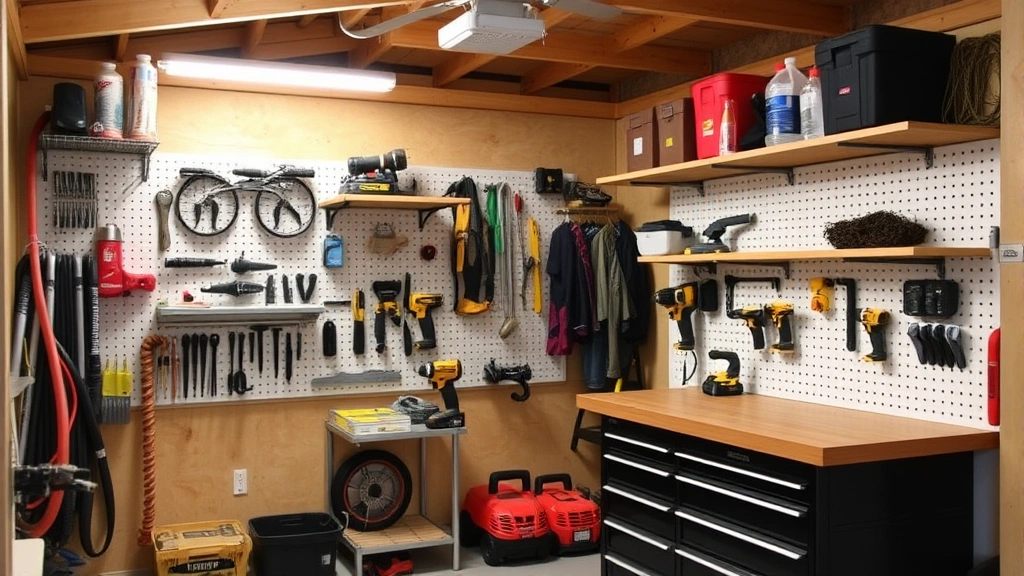
Thoughtful interior organization maximizes storage efficiency and accessibility. Install wall-mounted shelving, pegboards, and hooks to utilize vertical space effectively. Heavy items like power tools belong on lower shelves for safety and stability, while lighter seasonal decorations can occupy higher storage areas.
Consider woodworking projects for custom storage solutions that match your specific needs. Workbenches with tool storage provide dedicated workspace for projects and maintenance tasks. Wall-mounted tool racks keep frequently used items visible and accessible.
Proper lighting improves functionality and safety. Install bright LED fixtures powered by solar panels or electrical lines for reliable illumination. Motion-sensor lights activate automatically when entering, improving security and convenience. Adequate lighting prevents accidents when retrieving items and makes the space more inviting for extended use.
Climate control becomes important if storing temperature-sensitive items. Insulation reduces temperature fluctuations, while ventilation prevents moisture accumulation. In humid climates, consider a small dehumidifier to prevent mold and mildew growth on stored items.
Safety Considerations
Safety should guide every decision throughout your shed project. Always wear appropriate personal protective equipment including safety glasses, work gloves, and dust masks when cutting materials or working with power tools. Proper tool handling prevents injuries that can sideline your project or cause permanent damage.
Electrical safety requires attention if running power to your shed. Work with a licensed electrician to ensure proper installation meeting current building codes. National electrical codes specify requirements for outdoor installations including proper grounding, weatherproof outlets, and circuit protection. Improper electrical work creates fire and shock hazards.
Fall protection becomes critical when working at heights during roof installation. Use proper scaffolding, ladders, and safety harnesses to prevent falls. Never work alone on elevated surfaces, and ensure someone knows your location and expected completion time.
Proper ventilation when using adhesives, sealants, and finishes protects your respiratory system. These products release volatile organic compounds (VOCs) that cause health problems with prolonged exposure. Work outdoors when possible, and use respirators rated for specific chemicals when indoor work is necessary.
Store tools, fasteners, and materials safely to prevent accidents and loss. Secure power tools when not in use, and keep the work area organized and free of tripping hazards. Properly stored materials remain in usable condition and reduce waste from damage or deterioration.
FAQ
Do I need a permit to build a shed?
Most jurisdictions require permits for sheds over 100-120 square feet or those with permanent foundations. Contact your local building department to determine specific requirements for your property. Building without required permits can result in fines, forced removal, or complications when selling your home.
What’s the best foundation type for sheds?
Foundation choice depends on climate and soil conditions. Concrete pads work well in cold climates with frost heave concerns. Concrete slabs provide excellent durability and moisture protection. Gravel beds with treated skids offer budget-friendly options in temperate climates. Ensure proper drainage regardless of foundation type.
How long does a typical shed last?
Well-constructed sheds with quality materials last 20-40 years or longer. Longevity depends on material quality, maintenance, climate conditions, and construction techniques. Regular maintenance including roof inspection, siding touch-ups, and drainage maintenance extends shed lifespan significantly.
Can I build a shed on a concrete pad?
Yes, concrete pads provide excellent foundations. Ensure the pad is level, properly compacted, and has adequate drainage. Use anchor bolts or concrete fasteners to secure the shed structure to the concrete pad, preventing movement from wind or settling.
What roof pitch works best for sheds?
Roof pitch affects snow shedding, water drainage, and interior headroom. A 4:12 to 6:12 pitch works well for most climates, providing adequate drainage without excessive material costs. Higher pitches shed snow better in heavy snow regions but require more materials and complex framing.
How much does building a shed cost?
Shed construction costs vary based on size, materials, and local labor rates. Small basic sheds (8×10) might cost $1,500-$3,000 in materials, while larger or more finished structures cost $5,000-$15,000 or more. DIY construction saves significantly compared to purchasing prefabricated sheds or hiring contractors.
Should I insulate my shed?
Insulation benefits sheds storing temperature-sensitive items or used as workspace. In cold climates, insulation reduces interior temperature fluctuations and prevents moisture condensation. In hot climates, reflective barriers and ventilation control heat better than traditional insulation. Consider your specific needs and climate before deciding.
What tools do I need for shed construction?
Essential tools include circular saw, miter saw, power drill, level, tape measure, square, and hammer. A reciprocating saw handles larger cuts, while a nail gun speeds fastening. Rent specialized equipment like scaffolding or concrete mixers rather than purchasing if used infrequently.
For comprehensive home improvement guidance, explore our DIY Nests Hub Blog. Learn more about related projects like basement finishing and home security systems to enhance your property’s functionality and value.


