DIY Shed Roof? Pro Tips from Builders
Building a shed roof is one of the most rewarding DIY projects you can undertake, combining structural integrity with practical skill-building. Whether you’re constructing a new storage structure or replacing an aging roof, understanding the fundamentals from experienced builders will help you avoid costly mistakes and ensure your shed withstands years of weather exposure. This comprehensive guide draws on professional construction practices to guide you through every phase of shed roof installation.
A properly constructed shed roof protects your stored items, tools, and equipment from rain, snow, and UV damage. The difference between a amateur installation and a professional one often comes down to understanding load requirements, ventilation principles, and proper fastening techniques. By following these pro tips, you’ll gain confidence in tackling this essential building component.
Understanding Shed Roof Fundamentals
Before you pick up a hammer, comprehend the basic anatomy of a shed roof. The structure consists of rafters (the angled beams), a ridge board (the peak support), collar ties (horizontal bracing), and a soffit and fascia system. Builders emphasize that these components work together to distribute weight evenly across your shed walls. When learning about DIY home construction projects, understanding load distribution is foundational.
The pitch—or angle—of your roof determines how water runs off and how much snow load it can support. Local climate conditions heavily influence this decision. In areas receiving significant snowfall, steeper pitches (8:12 or higher) are preferred. In dry climates, gentler slopes (4:12 to 6:12) work effectively. Professionals always check International Building Code (ICC) requirements for their specific region to ensure compliance.
Shed roofs must account for dead load (the weight of materials) and live load (snow, wind, and temporary loads). Most residential sheds require roofing that handles 20-40 PSF (pounds per square foot) depending on location. This calculation guides your rafter spacing and material selection.
Choosing the Right Roofing Materials
Professional builders recommend several options for shed roofing, each with distinct advantages. Asphalt shingles remain the most popular choice because they’re affordable, relatively easy to install, and widely available. Three-tab shingles cost $75-150 per square (100 square feet), while architectural shingles range from $150-300 per square and offer superior durability.
Metal roofing has gained popularity among DIY builders in recent years. Standing seam metal roofing costs $200-500 per square but offers exceptional longevity (40-70 years) and excellent water shedding. For sheds in regions with extreme weather, metal provides superior performance. Corrugated metal panels are even more budget-friendly at $100-250 per square.
Rubber membrane roofing (EPDM) works well for flat or low-slope roofs. This single-ply system costs $150-300 per square and installs relatively quickly. Wood shingles provide aesthetic appeal but require regular maintenance and cost $300-500 per square. When comparing options for your DIY home building project, balance initial cost against longevity and maintenance requirements.
Builders consistently warn against cutting corners on materials. Buying premium-grade shingles or metal products prevents premature failure, roof leaks, and expensive repairs. Cheap materials often void warranties and require replacement within 10-15 years instead of the standard 20-30 year lifespan.

Calculating Roof Pitch and Load Requirements
Determining the correct pitch requires understanding both aesthetics and functionality. The pitch is expressed as a ratio—for example, 6:12 means the roof rises 6 inches for every 12 inches of horizontal run. To calculate this, measure the horizontal distance from the wall to the building’s center, then multiply by your desired pitch ratio to find the height difference.
Snow load calculations are critical in northern climates. Contact your local building department for ground snow load data specific to your area. The ground snow load must then be adjusted for roof pitch using conversion factors. A 6:12 pitch roof typically supports 75% of the ground load, while a 12:12 pitch supports only 50%. This means steeper roofs shed snow more effectively, reducing structural stress.
Wind resistance also factors into pitch selection. FEMA guidelines for residential construction specify that roofs must withstand wind speeds based on your geographic location. Steeper pitches generally handle wind better because they present less surface area to wind forces. Building inspectors often reference regional construction standards when evaluating shed designs.
Professionals use load calculators or consult span tables to determine proper rafter sizing. For a typical 12-foot wide shed with standard snow loads, 2×6 rafters spaced 24 inches apart usually suffice. However, wider sheds or high snow load areas may require 2×8 or 2×10 rafters. Never guess on structural sizing—consult published span tables or hire an engineer if uncertain.
Framing Your Shed Roof Structure
Quality framing creates the foundation for a leak-free, durable roof. Start by installing a rim board or top plate around the perimeter of your shed walls. This must be level and securely fastened to the walls using appropriate fasteners for your wall construction type. Builders emphasize that this step cannot be rushed—a level frame prevents water from pooling and ensures shingles lay flat.
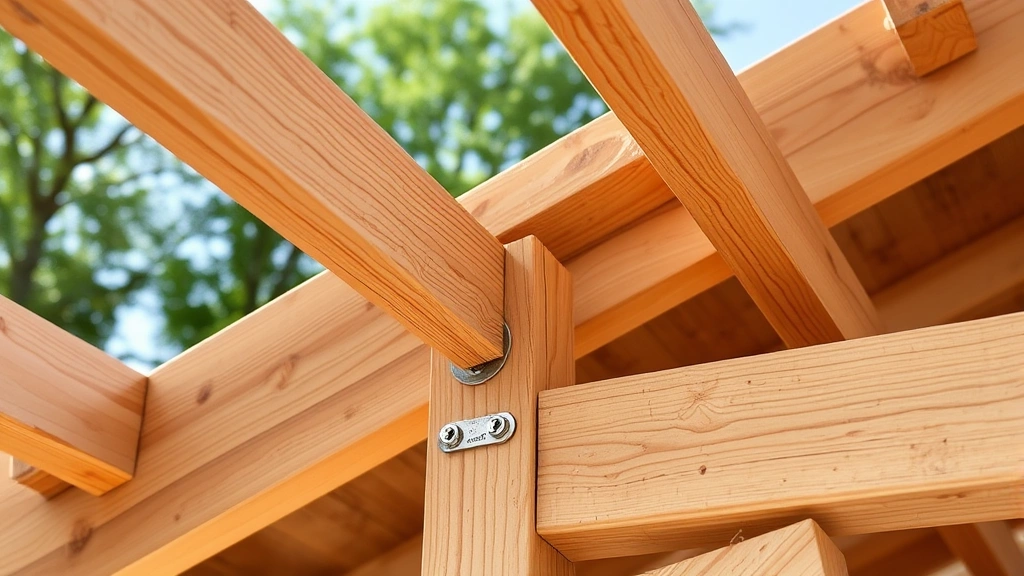
The ridge board runs horizontally along the peak and serves as the central attachment point for rafters. For a typical shed, a 2×8 or 2×10 ridge board works well. Position it so that rafters meet at the center, creating a symmetrical peak. Some builders prefer a ridge board; others use the rafter-to-rafter method where opposing rafters connect directly. Both methods work when installed correctly.
Rafter installation requires precision. Cut bird’s mouth notches where rafters meet the top plate—this creates a solid bearing surface and prevents slipping. The notch depth should be no more than one-third of the rafter width to maintain structural integrity. Mark rafter locations with chalk lines to ensure even spacing, typically 16 or 24 inches on center.
Collar ties—horizontal boards connecting opposite rafters—prevent rafter thrust from pushing outward on your shed walls. Install these at the upper third of the rafter height, spacing them every 4 feet along the roof. Properly installed collar ties are essential for structural stability, particularly in windy areas. When exploring DIY woodworking plans, understanding structural connections like these is fundamental.
Ventilation requirements influence framing design. Install soffit vents at the bottom of the roof overhang and ridge vents at the peak to create continuous airflow. This prevents moisture accumulation and extends roof lifespan. Many builders install a vent baffle between rafters to direct air from soffit to ridge, ensuring unobstructed ventilation paths.
Ventilation and Moisture Control
Proper ventilation is where many DIY builders falter, yet it’s absolutely critical for roof longevity. Moisture trapped inside your roof structure causes wood rot, mold growth, and premature shingle failure. Building science research shows that ventilated attics remain 10-15 degrees cooler than unventilated spaces, reducing ice dam formation in winter and heat buildup in summer.
The 1/150 rule guides ventilation sizing: for every 150 square feet of ceiling area, you need 1 square foot of ventilation. This assumes balanced intake (soffit) and exhaust (ridge) vents. If using one-way vents only, the ratio increases to 1/75. Calculate your shed’s ceiling area, then divide by 150 to determine total vent area needed.
Install soffit vents continuously along the shed’s lower edges. These intake vents draw in cool, dry air. Ridge vents or roof vents near the peak serve as exhaust, allowing warm, moist air to escape. The temperature difference creates natural convection, drawing air through the ventilation system. In areas with high humidity, mechanical ventilation fans may be necessary.
Moisture barriers and underlayment materials also contribute to moisture control. Quality roofing underlayment (synthetic or felt) provides a secondary water barrier beneath shingles. Ice and water shield, applied in leak-prone areas like valleys and along eaves, adds extra protection. These materials cost $50-200 for a typical shed but prevent thousands in water damage.
Builders recommend installing a continuous air gap between the roof sheathing and insulation (if your shed is heated). This air gap allows moisture to escape before it causes damage. Proper ventilation is especially important in climates with significant temperature swings or high humidity levels.
Installation Step-by-Step
Phase 1: Preparation and Inspection
Before beginning installation, inspect the shed structure for plumb, level, and square. Use a 4-foot level on multiple walls, checking both directions. Measure diagonals—they should be equal if the structure is square. Address any structural issues before roof installation; correcting framing problems later is exponentially more difficult.
Verify that all fasteners connecting walls to the foundation are secure and that wall plates are properly sealed. Check that all necessary openings for ventilation are framed and ready for vent installation. Prepare your materials on-site, organizing them logically to minimize carrying distances and protect them from weather.
Phase 2: Sheathing Installation
Install roof sheathing (typically ½-inch plywood or OSB) perpendicular to rafters, starting at the eaves and working toward the ridge. Stagger joints so they don’t align vertically between rows. Leave ⅛-inch gaps between sheets to allow for wood movement. Fasten sheathing with 8-penny nails spaced 6 inches on edges and 12 inches in field areas, or use 1¼-inch screws for superior holding power.
Ensure sheathing extends evenly beyond the rafter tails to create the desired overhang (typically 12-18 inches for sheds). Snap chalk lines along the overhang edge to guide your trim cut, then use a circular saw to create clean edges. This step determines your roof’s appearance and affects water drainage patterns.
Phase 3: Underlayment Application
Roll out roofing underlayment horizontally, starting at the lowest edge. Overlap each course by 4-6 inches, creating a shingle-like pattern that sheds water downward. Fasten with cap nails spaced every 12-16 inches. In valleys (interior roof angles), install ice and water shield in addition to standard underlayment for enhanced protection.
Phase 4: Trim and Flashing Installation
Install drip edge along the eaves before shingle installation. This metal flange directs water away from fascia boards. Install flashing around any roof penetrations (vents, chimneys, skylights) before shingling the surrounding area. Proper flashing installation prevents 80% of residential roof leaks, so builders take this step seriously.
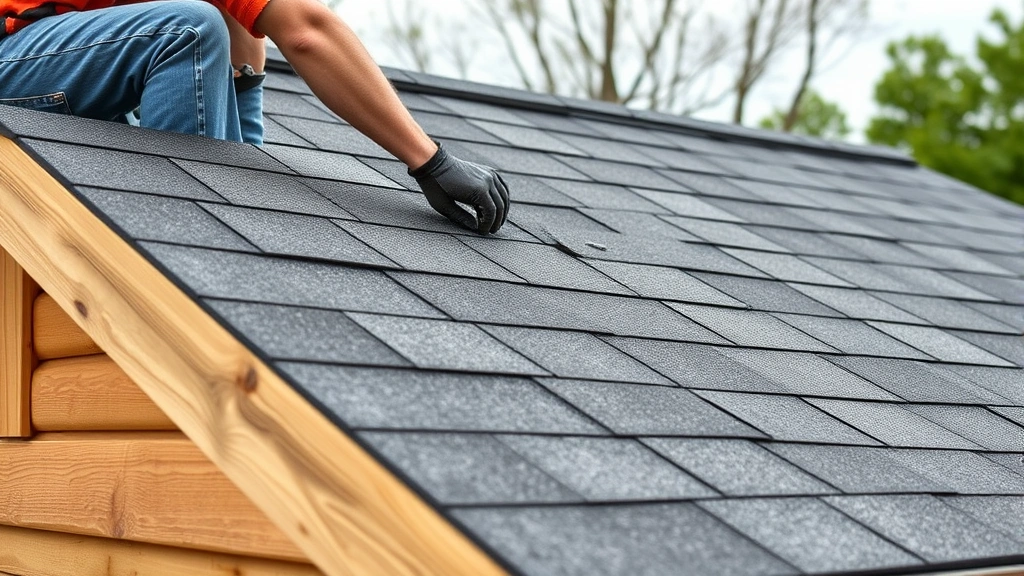
Phase 5: Shingle Application
Start shingle installation at the lowest point of the roof. Asphalt shingles typically come in three-tab or architectural styles. Position the first course so that shingles overhang the drip edge by ¼ to ½ inch. Secure each shingle with four nails placed in the designated nail strip. Nail placement is critical—too high and nails will miss the next course; too low and they may penetrate into the exposed portion of the shingle below.
Offset each subsequent course so that vertical joints don’t align. Most shingles are designed with offset patterns—follow the manufacturer’s instructions carefully. Stagger the first shingle of every other course by cutting it in half to create the proper offset pattern. Continue working upward toward the ridge.
Phase 6: Ridge Cap Installation
At the ridge, install ridge cap shingles (special three-tab shingles cut into individual tabs). These cover the seam where opposing roof planes meet, preventing wind-driven rain from entering. Nail ridge caps with two nails per side, positioned to be covered by the next cap. The final ridge cap receives one extra nail for security.
Phase 7: Final Inspection and Touch-ups
Inspect the entire roof from the ground and from up close. Check for lifted shingles, improper nailing, or gaps. Verify that all flashing is properly sealed and that no nails are exposed. Touch up any areas where nails penetrated exposed shingle surfaces—these should be sealed with roofing cement.
Common Mistakes and How to Avoid Them
Inadequate Ventilation
The most common error is installing insufficient ventilation. Many builders focus on keeping rain out while neglecting moisture management. This leads to premature shingle deterioration, wood rot, and mold. Calculate ventilation requirements before framing and install proper soffit and ridge vents. Your roof will last 5-10 years longer with adequate ventilation.
Improper Fastening
Using too few nails, nailing in wrong locations, or driving nails at angles causes shingles to blow off during wind events. Follow manufacturer specifications exactly—typically four nails per shingle, placed in the designated nail strip. Use roofing nails (not general-purpose nails), which have larger heads that hold shingles better. When installing DIY home security features or other projects, attention to fastener specifications matters equally.
Inadequate Flashing
Flashing around valleys, vents, and penetrations prevents leaks but is often installed improperly. Ensure flashing extends at least 4 inches up the roof plane and is properly sealed with roofing cement. Flashing should never rely on shingles alone for water-tightness; the metal flashing must be the primary water barrier.
Incorrect Pitch Calculation
Installing a roof pitch too shallow for your climate causes water pooling and premature deterioration. Research local recommendations and building codes before finalizing pitch. When in doubt, choose a steeper pitch—it costs slightly more but provides superior performance and durability.
Poor Material Storage
Storing roofing materials in direct sunlight or extreme temperatures degrades their quality. Keep asphalt shingles in a cool, shaded location. Don’t stack them too high (maximum 20 bundles), as weight can crush lower shingles. Protect underlayment and flashing from moisture before installation.
Skipping Structural Calculations
Using rafter sizes that are too small for your roof’s span and load requirements is dangerous. The roof may sag or fail under heavy snow loads. Consult span tables or hire an engineer to verify proper sizing. This investment in expertise prevents catastrophic failure and potential injury.
Inadequate Overhang
Insufficient roof overhang allows rain to run down shed walls, causing siding and foundation damage. Maintain at least 12 inches of overhang, 18 inches if possible. This protects walls and extends siding lifespan significantly.
Improper Water Shedding Slope
Ensure the roof sheathing slopes consistently toward the eaves. High spots or valleys in the sheathing can trap water, leading to leaks. Check sheathing flatness after installation and before applying underlayment. Use shims to correct any irregularities.
Frequently Asked Questions
What’s the best roofing material for a DIY shed roof?
Asphalt shingles offer the best balance of cost, ease of installation, and durability for DIY projects. They’re forgiving of minor installation errors and widely available. Metal roofing is an excellent long-term investment if you’re willing to learn proper installation techniques. Avoid materials requiring specialized equipment or skills unless you have experience.
How often should a shed roof be replaced?
Asphalt shingles typically last 15-25 years; metal roofing lasts 40-70 years. Factors like climate, ventilation, and maintenance affect lifespan. Inspect your roof annually, especially after severe weather, and address any damage immediately to extend its life.
Can I install a shed roof in winter?
Most roofing materials become brittle in cold temperatures. Asphalt shingles require 50+ degree temperatures for proper sealing. Underlayment becomes difficult to apply in cold weather. Schedule major roof work for mild seasons when possible. If winter installation is necessary, use cold-weather underlayment and shingles designed for low-temperature application.
Do I need building permits for a shed roof?
Most jurisdictions require permits for new shed construction, including roof installation. Permits ensure your structure meets local building codes and load requirements. Permits typically cost $50-200 but provide essential oversight. Never skip this step—unpermitted work can affect property insurance and create liability issues.
How do I prevent ice dams on my shed roof?
Ice dams form when warm air from inside melts snow on the roof, which then refreezes at the cold eaves. Proper ventilation prevents warm air from reaching the roof surface. Install adequate soffit and ridge vents, and ensure attic insulation doesn’t block ventilation paths. In severe climates, ice and water shield along the eaves provides additional protection.
What’s the proper rafter spacing for a shed roof?
Standard rafter spacing is 16 or 24 inches on center. Closer spacing (16 inches) provides additional strength and supports heavier roofing materials. Wider spacing (24 inches) reduces material costs but requires larger rafter dimensions. Consult span tables based on your specific conditions and rafter size.
Should I hire a professional for shed roof installation?
If you have roofing experience, proper tools, and comfort working at heights, DIY installation is feasible. However, if this is your first roofing project, consider hiring professionals for the sheathing and underlayment phases, then handling shingle installation yourself to save money while ensuring quality. Falls from roofs cause serious injuries—safety must be the priority.
How can I improve my shed roof’s energy efficiency?
Add insulation below the roof sheathing, ensuring proper ventilation above it. Install light-colored or reflective roofing materials to reduce heat absorption. Ensure all air leaks are sealed to prevent conditioned air from escaping. These measures reduce heating and cooling costs for insulated sheds.


