
How to Build a Shed: Expert Tips Inside
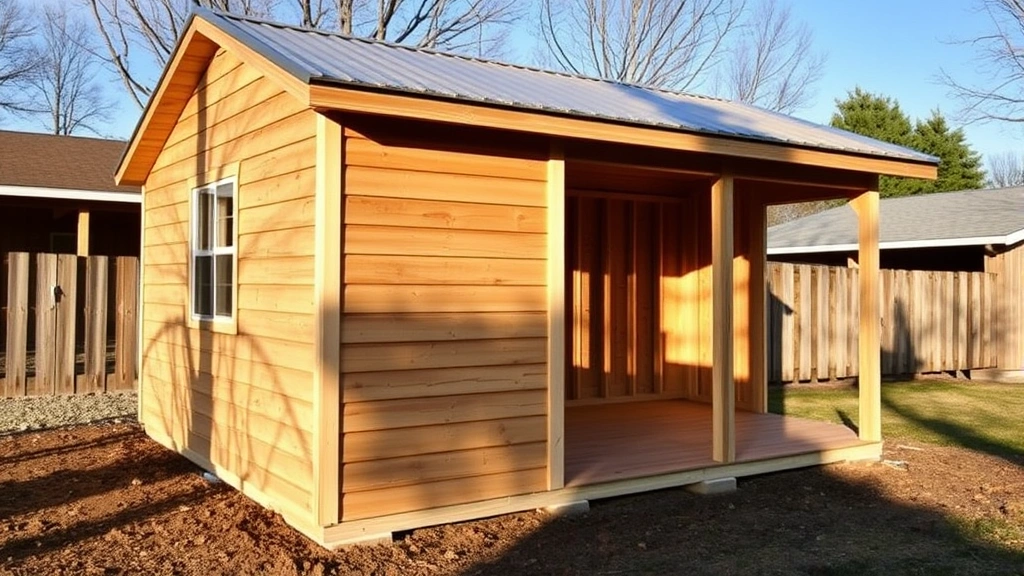
Building a shed is one of the most rewarding DIY projects you can undertake. Whether you need extra storage space, a workshop, or a retreat from the daily grind, a well-constructed shed adds both functionality and value to your property. This comprehensive guide walks you through every step of the process, from initial planning through final touches, ensuring your shed stands strong for decades.
A shed project typically takes 2-4 weeks for beginners, depending on size and complexity. However, proper planning and understanding the fundamentals can significantly reduce construction time and prevent costly mistakes. We’ll cover everything from foundation work to roofing, with practical advice that works whether you’re building a 4×6 storage box or a 12×16 workshop.
Planning and Permits
Before breaking ground, invest time in meticulous planning. Your shed’s success depends on decisions made during this phase. Start by determining your exact needs: will this be a storage shed, garden workshop, or hobby space? This dictates size, ventilation, and internal layout requirements.
Check local building codes through your city or county’s International Code Council (ICC) resources. Most jurisdictions require permits for structures over 120 square feet, though some require them for any permanent structure. Permit costs typically range from $50-$300 but protect you legally and ensure structural compliance. Contact your local National Association of Home Builders (NAHB) chapter for jurisdiction-specific requirements.
Sketch your design to scale, marking door and window locations, roof pitch, and materials. Consider utility placement—will you need electricity or water? Plan pathways and ensure the shed doesn’t violate setback requirements from property lines. Most areas require 5-10 feet from boundaries. Review our DIY Home Security guide for considerations if your shed will house valuable tools or equipment.
Foundation Types and Installation
A solid foundation prevents settling, rot, and structural failure. Choose from three primary options based on budget and soil conditions:
- Concrete Pad: Most durable and weather-resistant. Pour a 4-6 inch slab on compacted gravel. Best for permanent structures and wet climates.
- Concrete Blocks: Cost-effective for smaller sheds. Place blocks on tamped soil at corners and midpoints. Allows airflow underneath, reducing moisture issues.
- Gravel Base: Budget option requiring landscape fabric and 4-6 inches of compacted gravel. Least durable but adequate for temporary structures in dry climates.
Regardless of type, ensure proper drainage sloping away from the structure at 1 inch per 8 feet. For concrete work, follow American Concrete Institute (ACI) standards for mixing and curing. Allow concrete minimum 7 days curing before framing. Use a level to verify your foundation is flat within ¼ inch across 10 feet.
Attach pressure-treated rim joists to concrete using concrete anchors spaced every 6 feet. Never use untreated wood directly on concrete, as moisture causes rapid decay. Pressure-treated lumber should be rated for ground contact (UC3B rating minimum).
Framing the Walls
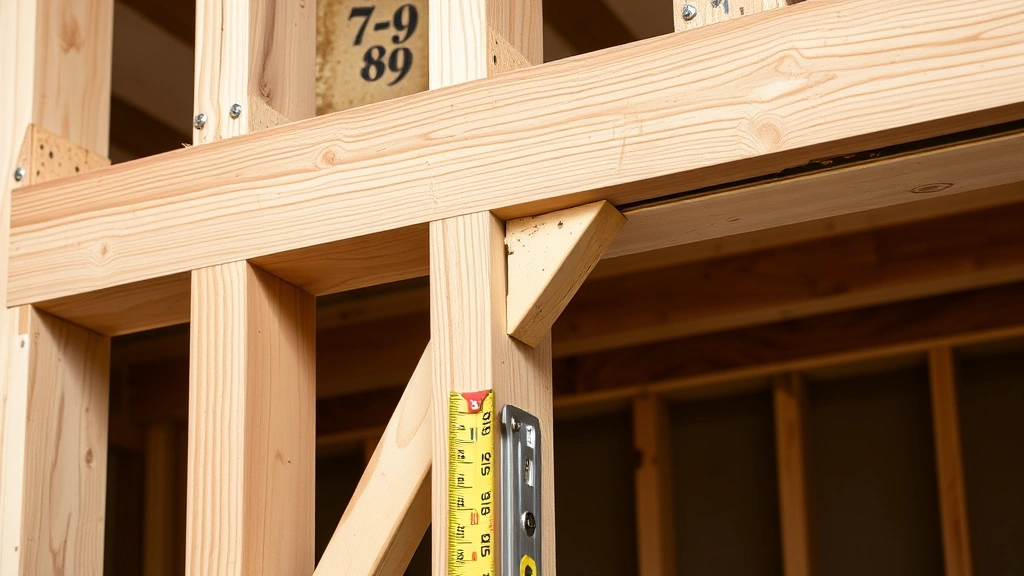
Wall framing creates your shed’s structural skeleton. Use 2×4 lumber for standard construction, spacing studs 16 inches on center. This spacing balances material efficiency with structural strength and simplifies siding installation.
Cut wall sections on the ground, then stand and brace them. For an 8-foot wall, frame consists of: bottom plate, studs, top plate, and header over door/window openings. Headers prevent sagging and should span 12 inches beyond openings on each side. Use double 2×4 headers for openings wider than 4 feet.
Here’s the wall-framing sequence:
- Lay bottom plate on rim joist, secure with 16d nails every 16 inches
- Measure and mark stud locations on both plates before assembly
- Nail studs between plates using three 16d nails per connection
- Nail top plates to studs, ensuring corners are square (measure diagonals—they should match within ½ inch)
- Install temporary diagonal braces to hold walls plumb during standing
- Tilt wall up, brace securely, then nail to rim joist and adjacent walls
Check plumb with a 4-foot level on each wall. Diagonal bracing should hold walls within 1/8 inch of vertical. Once all walls stand, install permanent diagonal bracing or plywood sheathing on exterior corners for racking resistance.
Install window and door frames before sheathing. Rough opening sizes should be ½ inch larger than frame dimensions to allow shimming and leveling. Shim frames level and plumb, then nail through flanges into framing studs.
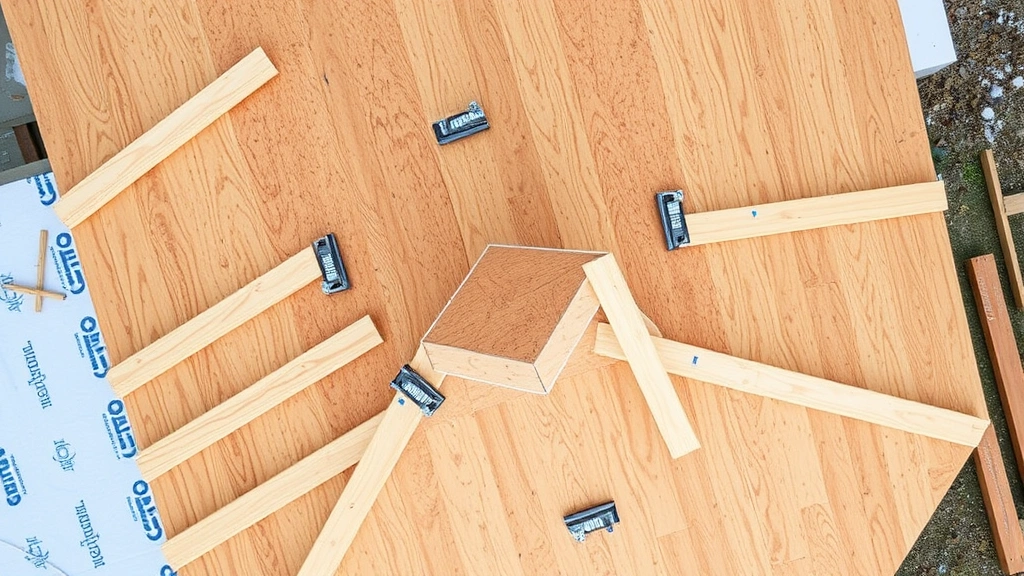
Roof Installation
Roof design affects longevity and water management. Most DIY sheds use simple gable or single-slope roofs. A 4/12 pitch (4 inches rise per 12 inches run) suits most climates, providing adequate drainage while remaining manageable for DIYers.
Calculate rafter length using the Pythagorean theorem or rafter tables. For a 12-foot wide shed with 4/12 pitch, rafters measure approximately 7.3 feet from wall top plate to ridge. Cut bird’s mouth notches where rafters meet plates, allowing 1.5 inches bearing on the plate.
Rafter installation steps:
- Snap chalk lines on top plates indicating rafter locations (typically 24 inches on center)
- Cut pattern rafter, test fit, then use as template for remaining rafters
- Install opposing rafters simultaneously, securing at ridge with 16d nails
- Space collar ties every other rafter pair, 4 feet below ridge, to prevent spreading
- Install blocking between rafters at eaves for nailing siding and vents
Plywood sheathing (½ inch minimum) goes over rafters, creating the base for roofing material. Space nails every 6 inches around perimeter and 12 inches in field. Leave ⅛ inch gaps between sheets for expansion.
Asphalt shingles offer the best value for DIY projects. Install underlayment first (30-pound felt or synthetic equivalent), starting at eave and overlapping 2 inches between courses. Shingles nail at specified locations (typically four nails per shingle), driven flush but not overdriven. Proper nailing prevents blow-offs in high winds.
Install drip edge along eaves and gable ends, positioned under underlayment at eaves but over it at gables. This prevents water from running behind trim. Ensure proper overhang (12-18 inches typical) to keep water away from walls.
Siding and Weatherproofing
Siding protects framing from weather while defining your shed’s appearance. Popular options include:
- Plywood or OSB: Budget-friendly, fast installation. Paint or stain for protection. Requires maintenance every 3-5 years.
- Vinyl Siding: Low maintenance, durable 20-30 years. Higher initial cost but minimal upkeep.
- Wood Siding: Traditional aesthetic, but requires regular staining/painting. Cedar resists rot naturally but costs more.
- Metal: Extremely durable, fire-resistant. Modern corrugated panels offer contemporary look.
Before siding, install house wrap or felt underlayment over sheathing. This breathable barrier prevents moisture infiltration while allowing interior vapor escape. Overlap horizontal courses 2 inches, and seal all penetrations with flashing.
For plywood siding, use ½ inch exterior-grade material rated for exposure. Space fasteners 8 inches on perimeter and 12 inches in field. Caulk all seams and paint immediately after installation. Consider your climate when selecting paint—high-quality exterior paint resists UV damage and moisture better than budget options.
Protect the foundation with a moisture barrier. Install perforated drain tile around the base if your site has poor drainage. This prevents water accumulation that causes wood rot and foundation damage. Your basement finishing knowledge regarding moisture control applies equally to sheds.
Ventilation prevents moisture and heat buildup. Install soffit vents at eaves and ridge vents at the peak, creating continuous airflow. Inadequate ventilation causes premature roofing failure and condensation damage. For sheds over 100 square feet, aim for 1 square foot of ventilation per 150 square feet of space.
Finishing Touches
With structure complete, finishing work makes your shed functional and attractive. Install gutters and downspouts directing water at least 4 feet away from the foundation. Half-round gutters suit traditional sheds, while K-style gutters work with modern designs.
Interior work depends on your shed’s purpose. Storage sheds benefit from wall-mounted shelving and pegboards. Workshop sheds need proper lighting (LED shop lights work well) and electrical outlets. Always hire licensed electricians for permanent wiring—this isn’t a DIY area worth risking.
If you’re building a hobby space, review our beginner woodworking projects guide for ideas on utilizing your new workspace. Many DIYers use sheds for creative projects, making proper lighting and climate control essential.
Install doors and windows with proper weatherstripping. Gaps allow weather infiltration and reduce energy efficiency. Caulk all exterior trim connections. Paint or stain exterior wood within six months of installation—exposed wood weathers quickly and becomes harder to finish.
For security, consider a quality lock if storing valuable tools. Our home security guide discusses options for protecting storage structures. Motion-activated lighting deters unauthorized access and improves nighttime functionality.
Landscaping around your shed improves aesthetics and drainage. Plant vegetation at least 3 feet away to maintain airflow and prevent pest harboring. Grade soil away from the foundation, sloping 1 inch per foot for the first 10 feet.
FAQ
How long does building a shed typically take?
Simple 8×10 sheds take 2-3 weeks for experienced DIYers, 3-4 weeks for beginners. Larger or more complex designs take proportionally longer. Weather delays are common—plan for 6-8 weeks total including material procurement and waiting for concrete to cure.
Do I need a building permit?
Most jurisdictions require permits for structures over 120 square feet. Even if not required, permits ensure your build meets code requirements and protect your property value. Check with your local building department before starting.
What’s the best shed foundation?
Concrete slabs offer maximum durability and prevent rot. For budget-conscious builders, concrete blocks work well in dry climates. Gravel bases suit temporary structures only. Your climate and soil conditions should guide this decision.
Can I build a shed myself?
Yes, if you have basic carpentry skills and proper tools. Start with a simple design. If you’ve completed other DIY pallet projects or home improvements, you’re likely ready for shed construction. Complex designs might warrant professional help.
How much does a DIY shed cost?
Materials for a basic 8×10 shed range $800-$2,000 depending on siding choice and finishes. Larger sheds or premium materials cost more. Building it yourself saves 40-60% compared to prefabricated or professionally built sheds.
What tools do I need?
Essential tools include circular saw, drill, level, tape measure, framing square, hammer, and nail gun. A reciprocating saw simplifies cutting, while a table saw improves accuracy. Rent specialized equipment rather than purchasing if you’re a one-time builder.
Should I hire professionals for any part?
Consider hiring professionals for electrical work (required in most areas), roofing if your pitch exceeds 8/12, and foundation work if your site has poor drainage. These specialties require expertise and safety knowledge worth the investment.