Hatch an Egg DIY: Expert Tips on Timing
Incubating and hatching eggs at home is one of the most rewarding DIY projects you can undertake, whether you’re raising chickens, quail, or other poultry. Understanding how long it takes to hatch an egg is crucial to your success. The timeline varies significantly depending on the species, incubator conditions, and your dedication to proper egg care. Most chicken eggs require approximately 21 days of consistent incubation, but this period demands precise temperature control, humidity management, and regular egg turning to achieve optimal hatch rates.
The journey from fertile egg to hatched chick is a fascinating biological process that requires patience, attention to detail, and a solid understanding of avian reproduction. Whether you’re setting up your first DIY incubator setup or refining your existing techniques, mastering the timing and environmental conditions will dramatically improve your success rate. This comprehensive guide will walk you through every stage of the egg-hatching process, providing expert tips and troubleshooting advice to help you achieve healthy, viable chicks.

Understanding Egg Incubation Periods by Species
The incubation period is the specific number of days required for an embryo to develop fully inside an egg before hatching. This timeline is species-specific and cannot be rushed or significantly altered without compromising the chick’s development. Chicken eggs are the most commonly incubated eggs in DIY settings and require exactly 21 days from the start of incubation to hatch. However, this timeline assumes consistent conditions throughout the entire period.
Different poultry species have varying incubation requirements. Duck eggs typically require 28 days, making them a longer commitment than chickens. Goose eggs need approximately 30 days, while quail eggs hatch in just 16-17 days, offering a quicker project for beginners. Turkey eggs require 28 days similar to ducks. Guinea fowl eggs need about 26-28 days. Understanding these differences helps you plan your egg hatching timeline and manage multiple species if desired. The countdown begins from day one of incubation, so accurate record-keeping is essential.
Several factors can slightly extend or compress these timelines. Cooler incubation temperatures may lengthen the process by a day or two, while consistently warmer conditions might shorten it slightly. However, extreme deviations from optimal temperatures typically result in failed hatches rather than expedited ones. The breed of your birds can also introduce minor variations—some heritage breeds may take 22 days rather than the standard 21.

Setting Up Your DIY Incubator
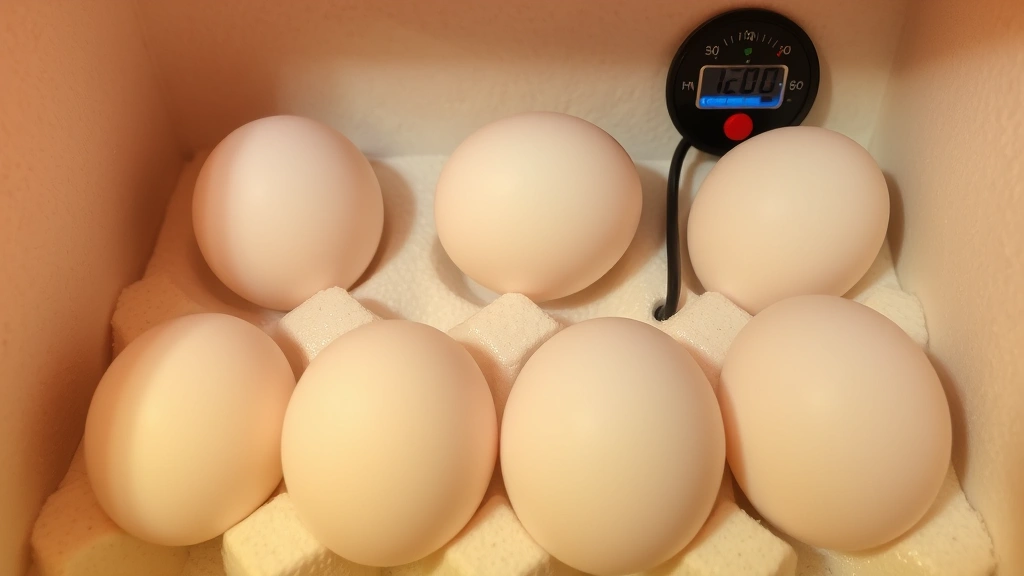
Creating an effective DIY incubator is the foundation of successful egg hatching. Many experienced breeders construct their own incubators using simple materials like coolers, aquariums, or wooden boxes. Your incubator must maintain precise environmental conditions continuously, which is why selecting the right container and heating method is critical. A well-insulated container helps maintain stable temperatures with minimal fluctuation.
The most common DIY approach involves using a still-air incubator or a forced-air incubator. Still-air incubators rely on natural convection and are simpler to construct but require careful temperature monitoring at the proper height. Forced-air incubators use a fan to circulate warm air evenly throughout the chamber, resulting in more consistent conditions and typically higher hatch rates. For your incubator construction project, you’ll need heating elements (heat tape or light bulbs), thermostats for temperature control, humidity sources, and proper ventilation.
Ventilation holes are essential but often overlooked in DIY designs. Too few holes restrict oxygen flow to developing embryos, while too many allow excessive moisture loss. Most effective designs include small ventilation holes near the bottom and larger ones near the top, creating natural airflow. Temperature stability is paramount—fluctuations greater than 2°F from your target temperature significantly reduce hatch rates. Install your heating element with a reliable thermostat to maintain consistent warmth throughout the incubation period.
Material selection impacts your incubator’s performance. Styrofoam coolers provide excellent insulation and are affordable, making them popular for DIY projects. Wooden boxes work well if properly insulated with foam or fiberglass. Avoid metal containers without insulation, as they conduct heat too efficiently and create temperature instability. Your container should be large enough to accommodate your eggs with proper spacing while remaining manageable for daily maintenance.
Temperature and Humidity Requirements
Maintaining precise temperature is the single most important factor in successful egg incubation. For chicken eggs in a still-air incubator, the temperature at the level of the eggs should be 101.5°F (38.6°C). In a forced-air incubator, the air temperature should be 99.5°F (37.5°C) due to more even heat distribution. These specific temperatures allow embryos to develop at the correct rate—any deviation compromises development and reduces viability.
Humidity levels are equally critical and change throughout the incubation period. During the first 18 days, maintain a relative humidity of 40-50% for chicken eggs, which corresponds to a wet-bulb temperature of 86-88°F (30-31°C). During the final three days (lockdown), increase humidity to 65-75% with a wet-bulb temperature of 88-90°F (31-32°C). This increase helps soften the shell membrane, allowing chicks to break through more easily during hatching. Humidity that’s too low causes excessive moisture loss and failed hatches, while excessive humidity promotes bacterial growth and poor hatch timing.
Measuring humidity accurately requires either a wet-bulb thermometer or a digital hygrometer. Many DIYers use the simpler wet-bulb method: place a thermometer with a wet cloth wrapped around the bulb and compare it to a dry-bulb thermometer. The difference between readings indicates humidity levels. Water sources in your incubator—whether shallow pans, sponges, or trays—should be adjusted based on humidity readings. Start with minimal water and increase it gradually if humidity drops below target ranges.
Temperature fluctuations during the first week are particularly damaging, as embryos are most sensitive during early development stages. Once development is underway, embryos become more resilient to minor temperature variations. However, maintaining stability throughout all 21 days remains critical for consistent results. Many successful breeders use redundant thermostats and backup heating to prevent catastrophic failures from equipment malfunction.
Environmental temperature in your incubator location also affects performance. An incubator in a cold basement requires more heating energy and struggles to maintain stability compared to one in a climate-controlled room. Position your incubator away from windows, drafts, and direct sunlight, which can cause temperature spikes. A stable room temperature of 65-75°F (18-24°C) provides the ideal environment for your incubator to maintain consistent conditions.
Egg Turning and Positioning
Regular egg turning is essential for proper embryonic development and prevents the embryo from sticking to the shell membrane. In natural conditions, mother birds turn eggs multiple times daily. In your DIY incubator operation, you must replicate this behavior. Eggs should be turned at least 5-7 times daily, with an odd number of turns ensuring the egg doesn’t rest on the same side overnight. Automated turning systems can handle this task, but manual turning works equally well with consistent effort.
The turning process is simple but requires dedication. Gently rotate eggs from one side to the other, ensuring they roll across the bottom of the incubator. Mark one side with an X and the other with an O using a pencil to track which side is facing up. This visual system prevents confusion and ensures you’re actually turning eggs rather than just checking them. Many breeders set phone reminders for turning schedules to maintain consistency, especially when managing multiple batches.
Turning continues until day 18 of incubation, when you enter the lockdown period. At this point, stop all turning and increase humidity. The embryo has positioned itself for hatching, and further turning can disrupt this critical positioning. Eggs should be positioned with the pointed end slightly downward during incubation, mimicking natural positioning in the nest. This orientation facilitates proper embryo development and positioning for hatching.
Automated turning systems using rollers or tilting mechanisms remove the daily manual labor but require proper setup and monitoring. Whether using automation or manual turning, the principle remains identical: consistent, gentle rotation prevents embryonic adhesion and promotes even development. Some DIY designs incorporate simple timer-controlled tilting mechanisms that automatically rock eggs back and forth, providing excellent results with minimal daily intervention.
Candling Eggs: Monitoring Development
Candling is the process of shining a bright light through an egg to observe embryonic development. This non-invasive technique allows you to monitor progress, identify infertile eggs, and detect developmental problems without opening the incubator. Candling at specific intervals provides valuable information about hatch viability and helps you make informed decisions about problem eggs.
First candling occurs around day 7, when blood vessels become visible and the embryo appears as a dark mass with radiating blood vessels. This is an ideal time to remove clearly infertile eggs, which appear as clear eggs with no development. Infertile eggs don’t develop and should be discarded to prevent bacterial contamination. Remove any eggs with cracks or obvious contamination at this stage.
Second candling at day 14 shows significant embryonic development—the air cell has enlarged and the embryo occupies much of the egg. The embryo appears as a dark mass with less clear space around it. At this stage, you can identify eggs with developmental problems, though many will still hatch successfully. Eggs with excessive air cells or unusual positioning may not hatch, but judgment here requires experience.
Final candling at day 18 (before lockdown) shows a nearly full egg with just the air cell visible at the large end. At this point, you should see significant embryonic development with minimal clear space. Stop turning immediately after this candling and prepare for lockdown. Any eggs that appear underdeveloped at day 18 are unlikely to hatch and can be removed, though some may surprise you with late hatches.
Candling requires a bright light source and a darkened room for visibility. Commercial candlers are available, but DIY options like high-powered flashlights or homemade cardboard tubes with light bulbs work effectively. Handle eggs gently during candling and minimize exposure time to prevent temperature loss. Candling takes practice—don’t be discouraged if your first attempts feel uncertain. With experience, you’ll develop confidence identifying normal development patterns.
The Lockdown Period and Hatching Process
Lockdown begins on day 18 of incubation and continues through hatch day (day 21). During lockdown, stop all egg turning and increase humidity to 65-75%. The embryo has positioned itself head-up beneath the air cell, preparing to break through the shell membrane and pip the internal pip (air cell). This critical period determines hatching success and requires different conditions than the first 18 days.
Pipping occurs when the embryo breaks through the air cell membrane, allowing it to breathe air for the first time. Internal pip typically happens around day 19, though you won’t see external evidence. External pip (pipping the shell) occurs when the embryo uses its egg tooth to break through the shell, creating a small hole. This process begins around day 20 and you’ll see tiny holes appearing on the shell.
The hatching process itself can take 12-24 hours from first pip to complete emergence. Chicks absorb the remaining yolk during this time, which provides nutrition for the first few days of life. Resist the urge to assist hatching—chicks need this time to absorb yolk, develop lung capacity, and gather strength. Assisted hatching typically results in weak chicks with poor survival rates unless the chick is genuinely stuck or has been pipping for more than 24 hours without progress.
During lockdown, maintain strict hands-off protocols except for essential humidity monitoring. Avoid opening the incubator unnecessarily, as this causes temperature and humidity fluctuations that disrupt the hatching process. Monitor humidity carefully—too low causes chicks to become shrink-wrapped in the shell membrane, while excessive humidity delays pipping and creates wet chicks prone to infection.
Hatching is messy and sometimes involves blood from breaking blood vessels. This is normal and concerning only if bleeding is excessive or continues for extended periods. Some chicks hatch easily while others struggle for hours—this variation is normal. Once chicks have dried, they become fluffy and mobile. Move them to a brooder setup with appropriate heat, water, and starter feed within 12-24 hours of hatch.
Troubleshooting Common Hatching Problems
Despite careful management, hatching problems occasionally occur. Understanding common issues helps you identify problems early and adjust your approach for future batches. Low hatch rates—fewer than 50% of eggs hatching—typically indicate temperature, humidity, or turning problems during the first 18 days. Review your records to identify which variable may have deviated.
Chicks hatching early (before day 21) indicate consistently warm temperatures, while late hatches suggest cooler conditions. Adjust your thermostat accordingly for the next batch. Chicks that pip but fail to hatch (sticky chicks, shrink-wrapped chicks) usually result from humidity problems. Sticky chicks indicate excessive humidity during lockdown, while shrink-wrapped chicks result from insufficient humidity. Track your humidity readings carefully and adjust water sources accordingly.
Embryos dying at different stages provide clues about specific problems. Deaths before day 7 often indicate infertile eggs or temperature fluctuations during early development. Deaths around day 10-14 frequently result from improper turning or humidity issues. Late-stage deaths (day 18-20) often indicate positioning problems or inadequate humidity during lockdown. Candling records help correlate deaths with specific development stages.
Contaminated eggs produce foul odors and may explode in the incubator, contaminating other eggs. Prevent this by starting with clean eggs and maintaining proper humidity to prevent bacterial growth. Remove any cracked or visibly contaminated eggs immediately. If an egg explodes, remove remaining eggs, clean the incubator thoroughly with dilute bleach solution, and restart with fresh eggs.
Poor air circulation in forced-air incubators can cause uneven temperature and humidity. Verify your fan is operating correctly and check that air pathways aren’t blocked by eggs or debris. In still-air incubators, ensure ventilation holes are open and unobstructed. Temperature stratification (warmer at top, cooler at bottom) is normal in still-air systems but should be minimal in properly designed forced-air incubators.
Embryonic malpositions sometimes occur despite proper egg positioning. Some chicks have difficulty hatching due to incorrect orientation inside the shell. While you cannot correct this during incubation, noting malpositioned chicks helps identify systemic issues for future batches. If multiple chicks hatch in malposition, review your egg positioning technique and ensure eggs are tilted slightly with pointed end down.
Post-Hatch Care and Chick Management
Once chicks hatch and dry completely, they require immediate transfer to a brooder setup with proper heat, ventilation, and access to food and water. The brooder should maintain 95°F (35°C) at chick level during the first week, decreasing 5°F per week until reaching ambient temperature around week 6. Heat lamps, heat plates, or radiant heaters all work effectively when properly positioned and monitored with thermometers.
Brooder bedding should be absorbent and non-toxic—pine shavings or aspen shavings work well, while cedar and walnut are toxic to chicks and should be avoided. Provide 0.5 square feet of brooder space per chick initially, increasing to 1 square foot by week 6. Overcrowding promotes disease and cannibalism, so adequate space is essential. Ensure adequate ventilation without creating drafts that chill chicks.
Water and food access is critical from day one. Chicks can survive several days on their yolk reserves but begin eating and drinking within hours of hatch. Provide chick starter feed (20-24% protein) and fresh water in shallow containers where chicks can access without drowning. Some breeders add electrolytes to water for the first few days to support hydration and recovery from hatching stress.
Monitor chicks closely for signs of problems. Healthy chicks are active, alert, and eating well. Weak chicks, those with labored breathing, or those unable to eat may not survive despite intervention. Some chicks with serious developmental problems may be best humanely euthanized rather than subjected to prolonged suffering. Isolation of weak or sick chicks prevents disease spread and reduces bullying from stronger flock mates.
As chicks grow, gradually transition from heat lamp to ambient temperature by raising the lamp or reducing heat over several weeks. By week 6-8, most chicks no longer require supplemental heat if ambient temperatures are above 60°F (15°C). Provide increasingly larger brooder space and transition to grower feed (16-18% protein) around week 6. Outdoor access and socialization depend on breed, climate, and your management goals.
Successful hatching extends beyond the incubator—proper post-hatch care determines whether your investment in the hatching process translates to thriving adult birds. Many DIY incubator projects fail not because eggs don’t hatch, but because chicks don’t survive post-hatch. Dedicate as much attention to brooder setup and chick care as you invested in incubation, and your success rates will improve dramatically.
FAQ
How long does it take to hatch a chicken egg?
Chicken eggs require exactly 21 days of incubation from the start of the process to hatching. This timeline assumes consistent conditions including 99.5°F (37.5°C) in a forced-air incubator or 101.5°F (38.6°C) in a still-air incubator, proper humidity levels, and regular egg turning until day 18. Minor variations of a day or two can occur due to temperature fluctuations or breed differences, but 21 days is the standard timeline.
Can I open the incubator during hatching?
Avoid opening the incubator during lockdown (days 18-21) and especially during active hatching. Opening the incubator causes temperature and humidity fluctuations that disrupt the hatching process and can cause chicks to become shrink-wrapped or fail to pip properly. If you must check on progress, open briefly and minimize heat loss. Most hatching problems are worsened rather than helped by opening the incubator during this critical period.
What temperature should my incubator be?
For forced-air incubators, maintain 99.5°F (37.5°C). For still-air incubators, maintain 101.5°F (38.6°C) at egg level. These temperatures are specific and cannot be significantly altered without compromising embryonic development. Use accurate thermometers and reliable thermostats to maintain these precise temperatures throughout the entire incubation period.
Why didn’t my eggs hatch?
Non-hatching eggs typically result from temperature instability, inadequate humidity, improper turning, or infertile eggs. Review your incubation records to identify which variable may have deviated. Candling records help correlate failures with specific development stages, indicating whether the problem occurred early, mid-stage, or late in incubation. Multiple failed hatches in succession suggest a systematic problem rather than random infertility.
How do I know if my eggs are fertile?
Fertile eggs appear normal externally but show blood vessels and embryonic development when candled at day 7. Infertile eggs remain clear when candled, with no visible development. Only candling can definitively determine fertility—external appearance provides no reliable indication. Some infertile eggs result from insufficient breeding activity, inadequate nutrition in breeding birds, or genetic factors.
Should I help chicks hatch?
Avoid assisting hatching unless a chick has been pipping for more than 24 hours without progress or shows signs of being stuck. Most chicks that need assistance have serious developmental problems and rarely survive long-term. The hatching process is essential for chick development—absorbing yolk, developing lung capacity, and gathering strength. Assisted hatching typically results in weak chicks prone to infection and early death.
What humidity should I use during lockdown?
Increase humidity to 65-75% during lockdown (days 18-21). This corresponds to a wet-bulb temperature of 88-90°F (31-32°C). This elevated humidity softens the shell membrane, allowing chicks to break through more easily. Humidity that’s too low causes shrink-wrapped chicks, while excessive humidity delays pipping. Adjust water sources based on hygrometer readings to achieve target humidity levels.
How long can eggs be stored before incubation?
Eggs can be stored for up to 10 days before incubation begins, though hatch rates decline with longer storage periods. Store eggs at 55-65°F (13-18°C) with 75-80% humidity, pointed end down. Avoid temperature fluctuations and turning during storage. Eggs stored more than 10 days have significantly reduced hatch rates, so begin incubation as soon as possible after collection.


