How to Build a Shed: Expert Tips Inside
Building a shed is one of the most rewarding DIY projects you can undertake. Whether you need additional storage space, a workshop, or a backyard retreat, constructing your own shed gives you complete control over the design, materials, and functionality. This comprehensive guide walks you through every step of the process, from initial planning and site preparation to final finishing touches, ensuring your shed is structurally sound, weather-resistant, and built to last for decades.
A properly constructed shed requires careful attention to foundation work, framing techniques, roofing installation, and weatherproofing. The timeline for completing a shed project typically ranges from two to six weeks, depending on size, complexity, and your experience level. Unlike other long-term building projects, shed construction is manageable for dedicated DIY enthusiasts and offers immediate practical benefits for your property.
Planning and Permits
Before you purchase a single board or nail, invest time in thorough planning. Start by determining your shed’s purpose, size, and location on your property. Most residential sheds range from 8×10 feet to 12×16 feet, though your needs may vary. Check local zoning regulations and International Code Council (ICC) building codes to understand setback requirements—these typically mandate minimum distances from property lines, usually 5 to 10 feet depending on your municipality.
Obtaining proper permits is not optional; it’s essential for legal compliance and future property sales. Contact your local building department to determine what permits are required. Most jurisdictions require permits for structures over 100 square feet or those with permanent foundations. The permit process ensures your shed meets electrical codes, structural standards, and safety requirements. Budget 2-4 weeks for permit approval and plan your construction timeline accordingly. Costs typically range from $50 to $300, a small investment compared to potential fines for unpermitted construction.
Create detailed plans or purchase pre-made shed plans from reputable sources. Your plans should include dimensions, material specifications, foundation details, and roof pitch. If you’re designing custom plans, ensure they account for snow load capacity in your climate zone. Document everything with sketches and measurements—this becomes invaluable during construction and inspections.
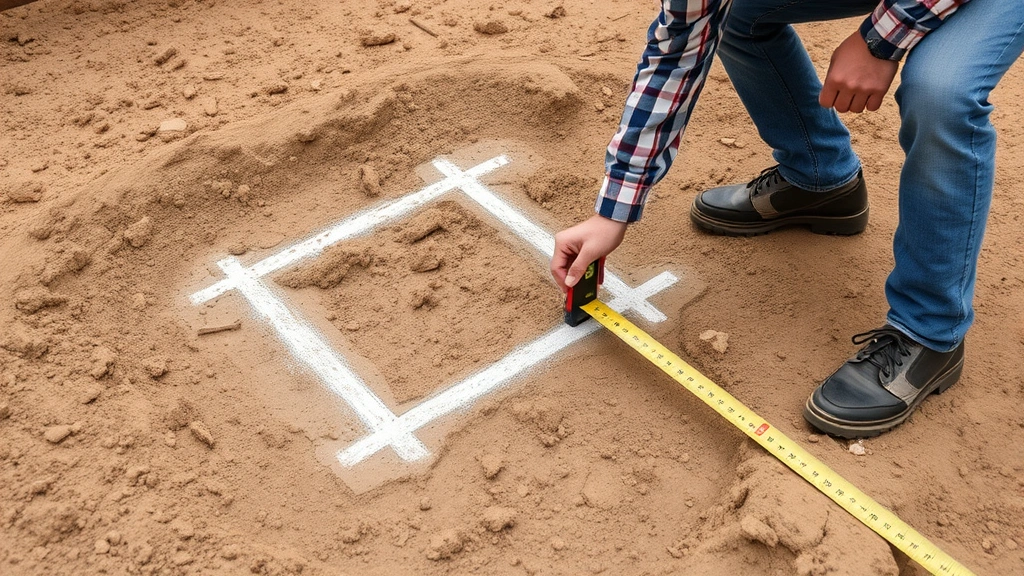
Site Preparation and Foundation
Proper site preparation determines your shed’s longevity and structural integrity. Select a location with good drainage to prevent water accumulation around the foundation. Avoid low-lying areas where water pools during rain. Clear the area of vegetation, rocks, and debris, removing at least 6 inches of topsoil. This prevents future settling and pest problems.
Choose an appropriate foundation type based on your climate and shed size. The three primary options are concrete piers, concrete slabs, and treated wood skids. Concrete piers (frost-proof footings) are ideal for cold climates where frost heave occurs—they extend below the frost line (typically 3-4 feet deep in northern regions) to prevent ground movement. A concrete slab provides excellent protection against moisture and pests but requires more initial work. Treated wood skids work for smaller sheds in moderate climates but require annual inspection.
For a typical 10×12 shed on concrete piers, you’ll need 8-12 piers spaced 4 feet apart. Dig holes below your local frost line, set concrete piers, and verify they’re level using a 4-foot level. Allow concrete to cure for 48 hours before proceeding. This foundation work is non-negotiable—poor foundation preparation leads to structural problems, twisted frames, and water infiltration that compromise your entire project.
Ensure proper drainage around the foundation by grading soil away from the structure at a slope of at least 1 inch per 4 feet. Install a perimeter drain or swale if your site has poor natural drainage. This seemingly minor detail prevents costly water damage and foundation deterioration.
Building the Frame Structure
Frame construction begins after your foundation is complete and cured. Use pressure-treated lumber for the floor frame, standard framing lumber (2×4 or 2×6) for walls, and appropriate sizing for rafters. The floor frame typically sits on the foundation with rim joists and floor joists spaced 16 inches on center.
Construct wall sections on the ground, then raise them into position. This method is safer and more efficient than building walls in place. Build wall frames with vertical studs spaced 16 inches on center, top and bottom plates, and appropriate openings for windows and doors. Use hurricane ties and proper nailing patterns (3 nails per connection) to ensure structural strength. Your walls must resist wind loads—consult your local National Frame Builders Association guidelines for your specific wind zone requirements.
Install bracing or sheathing to prevent racking (diagonal distortion). Exterior sheathing (plywood or oriented strand board) serves this purpose while providing a nailing surface for siding. Ensure all connections are properly fastened with nails or screws rated for structural use—avoid undersized fasteners that compromise strength.
Roof framing requires careful calculation of rafter size, spacing, and pitch. A 4:12 pitch (4 inches rise per 12 inches run) works well for most climates, providing adequate snow shedding and interior headroom. Calculate rafter size based on snow load requirements from your local American Society of Home Inspectors or building department. Common rafter sizes range from 2×6 to 2×8 depending on span and snow load. Space rafters 16 inches on center and use collar ties to prevent spreading.
Install ridge ventilation and soffit vents to promote attic airflow, preventing moisture accumulation and extending roof life. Proper ventilation reduces heat buildup in summer and moisture problems in winter, significantly extending shingle and structural longevity.
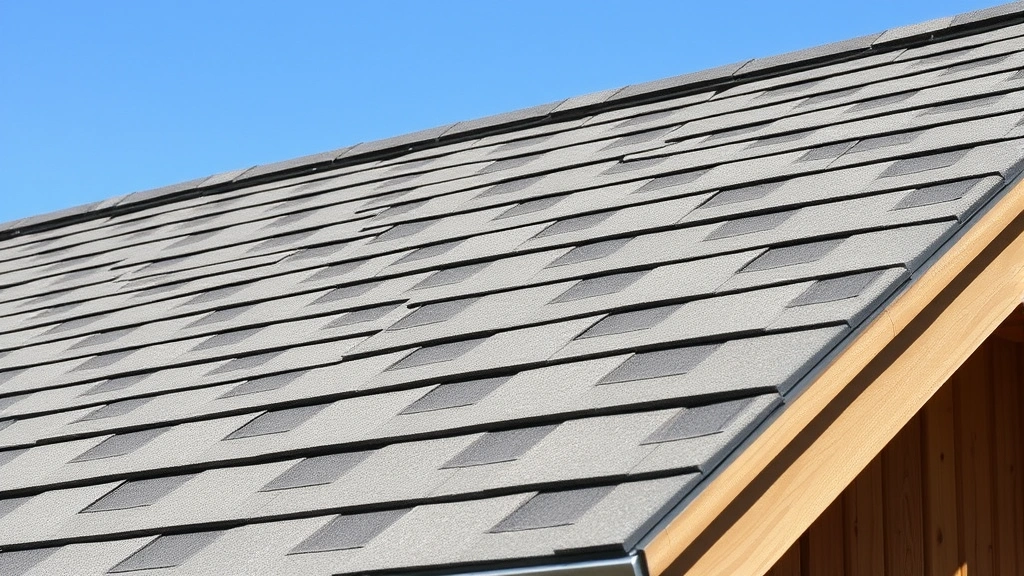
Roofing Installation
Roofing is critical for weather protection and represents one of the most important investments in your shed. Begin by installing roofing underlayment (ice and water shield in cold climates, standard underlayment elsewhere) over the decking. This secondary barrier prevents water penetration if shingles are compromised. Overlap underlayment courses by 4-6 inches, running upslope to shed water downward.
Install drip edge along all roof edges before shingles, ensuring water runs into gutters rather than behind them. This detail prevents fascia rot and water damage to wall frames. Secure drip edge with roofing nails spaced 12 inches apart.
Install roofing shingles according to manufacturer specifications, typically with 4-6 nails per shingle. Start at the eave and work upward, ensuring proper overlap and nail placement. Poor nailing causes premature failure—nails must penetrate at least 1.25 inches into decking. Use quality roofing nails (hot-dipped galvanized or stainless steel) to prevent rust staining and fastener failure.
Install flashing around any penetrations (vents, chimneys) using approved flashing materials and sealants. Improper flashing causes the majority of roof leaks, so this detail deserves careful attention. Seal all nail holes and seams with roofing cement rated for your climate.
Consider the climate zone when selecting shingle type and color. Architectural shingles provide superior wind resistance and longevity compared to standard three-tab shingles. In hot climates, light-colored shingles reduce heat absorption and interior temperatures.
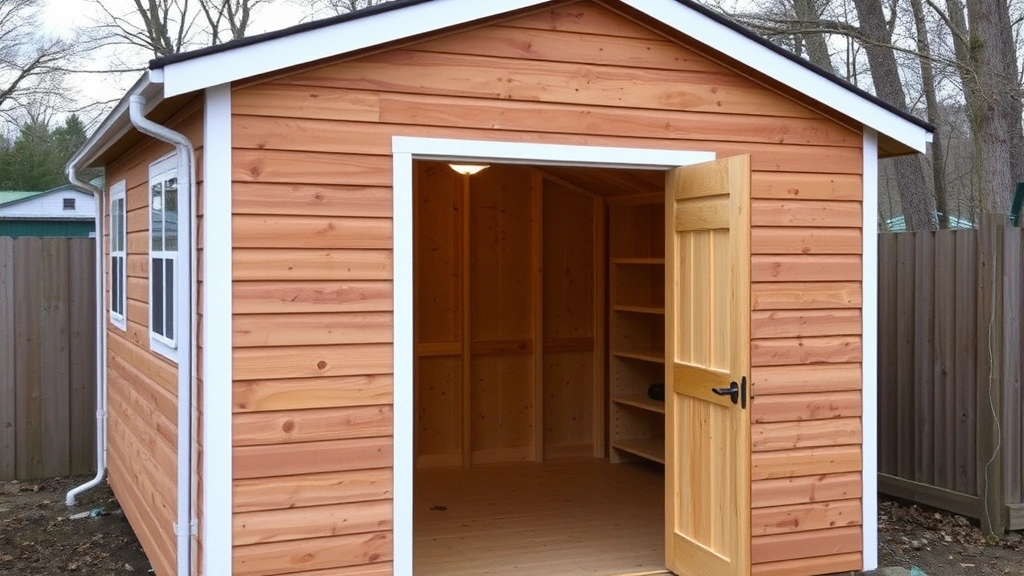
Weatherproofing and Finishing
Weatherproofing transforms your frame into a functional, protected structure. Install windows and doors after wall framing is complete but before final siding. Ensure windows and doors are properly flashed and sealed to prevent water infiltration. Use quality caulk and sealant rated for exterior use—avoid latex products that fail prematurely.
Choose siding material based on durability and maintenance preferences. Common options include vinyl, metal, fiber cement, or wood. Vinyl is low-maintenance but less durable; fiber cement offers excellent longevity; wood requires regular maintenance but provides classic aesthetics. Install siding with proper overlap, starting at the bottom and working upward. Ensure J-channel trim around windows and doors directs water away from openings.
Install gutters and downspouts to manage roof runoff. Gutters should slope slightly toward downspouts (1/4 inch per 10 feet) to prevent standing water. Downspouts should extend at least 4-6 feet from the foundation to prevent water from pooling near the structure. Gutter maintenance is essential—clean gutters at least twice yearly to prevent clogs and water damage.
Seal all gaps and penetrations with caulk or weatherstripping to prevent air infiltration and pest entry. Pay special attention to utility penetrations, foundation transitions, and corner details. Proper sealing reduces energy costs and prevents rodent and insect problems. Use silicone or polyurethane caulk for superior durability—avoid acrylic products that crack and fail within a few years.
Paint or stain exterior surfaces to protect wood and enhance appearance. Quality exterior paint or stain repels water and provides UV protection, extending wood life significantly. Plan to repaint every 5-10 years depending on climate and product quality. Interior finishes depend on your intended use—a storage shed may need only basic protection, while a workshop or studio benefits from drywall, insulation, and finished surfaces.
Interior Setup and Organization
Once your structure is weathertight, focus on interior setup. Install shelving systems for organized storage—wall-mounted shelves maximize vertical space. Use heavy-duty brackets rated for your load expectations. Pegboard walls provide flexible storage for tools and equipment, allowing easy reconfiguration as needs change.
Consider electrical installation if you need lighting or power tools. Hire a licensed electrician to ensure proper installation meeting National Electrical Code (NEC) requirements. Outdoor-rated outlets and weatherproof fixtures are essential. A subpanel circuit dedicated to shed power prevents overloading your home’s main panel.
Insulation and climate control depend on intended use. Storage sheds need minimal insulation; workshops and studios benefit from wall and ceiling insulation (R-15 to R-30) for temperature stability and energy efficiency. Vapor barriers prevent moisture accumulation in cold climates. Ventilation fans or small heaters/coolers provide year-round comfort in conditioned spaces.
Flooring options range from bare concrete to finished wood. Concrete is economical and durable for storage; plywood or vinyl flooring offers comfort and warmth for workshops or studios. Ensure floors are properly sealed and maintained to prevent moisture absorption and deterioration.
Organization systems transform your shed into a functional space. Implement vertical storage, magnetic strips for metal tools, and labeled containers for small items. A well-organized shed makes projects more efficient and maximizes usable space. Review your home security setup if your shed contains valuable equipment.
Long-Term Maintenance
Shed longevity depends on consistent maintenance. Inspect your shed annually, checking for roof damage, siding deterioration, and foundation movement. Replace damaged shingles immediately to prevent water penetration. Clean gutters seasonally to prevent overflow and water damage. Inspect and repair caulking around windows and doors as needed.
Check for pest entry points and seal any gaps larger than 1/4 inch. Rodents and insects cause structural damage and contamination—prevention is far easier than remediation. Maintain proper grading around the foundation to ensure water drains away.
Paint or stain exterior surfaces every 5-10 years depending on climate and product quality. This protects wood and prevents deterioration. Keep interior spaces dry—use dehumidifiers if moisture becomes problematic. Proper ventilation prevents mold and mildew that compromise structure and stored items.
Monitor for structural issues like settling, wall bowing, or roof sagging. Small problems become catastrophic if ignored. Address any concerns immediately to prevent costly repairs. Document maintenance activities and keep records—this supports property value and demonstrates proper stewardship.
FAQ
How long does it take to build a shed?
Timeline varies based on size, complexity, and experience. A basic 8×10 shed typically requires 3-4 weeks for an experienced builder; 6-8 weeks for DIY enthusiasts. Larger or more complex structures may require 8-12 weeks. Weather delays and permit processing add additional time. Plan conservatively and adjust expectations based on your skill level and available time.
What’s the minimum foundation requirement for a shed?
Check your local building codes—requirements vary by jurisdiction. Most areas require concrete piers below the frost line for permanent structures. Some municipalities allow treated wood skids for smaller sheds. Concrete slabs provide excellent protection but require more initial work. Your building department provides specific requirements for your location.
Do I need a permit to build a shed?
Most jurisdictions require permits for sheds over 100-120 square feet or those with permanent foundations. Some areas require permits regardless of size. Unpermitted construction risks fines, difficulty selling your property, and insurance claim denial. Always check with your local building department—the permit cost is minimal compared to potential problems.
What’s the best roofing material for a shed?
Asphalt shingles are most common and affordable. Architectural shingles offer superior wind resistance and longevity. Metal roofing provides excellent durability and reflects heat in hot climates. Standing seam metal offers premium appearance and performance. Choose based on budget, climate, and aesthetic preferences. Proper installation matters more than material selection.
Can I add utilities to my shed?
Yes, but hire licensed professionals for electrical work. Plumbing is possible but adds complexity and cost. Ensure any utilities meet local codes and are properly installed. A dedicated electrical circuit prevents overloading. Gas lines require special expertise and safety considerations—hire professionals for any gas work.
How much does shed construction cost?
Basic 8×10 sheds range from $2,000-$5,000 for materials; larger or more complex structures cost $5,000-$15,000+. Material costs dominate—framing lumber, roofing, and siding represent the largest expenses. Permits, tools, and professional services (if needed) add to total cost. Building yourself saves labor costs compared to hiring contractors, typically reducing total cost by 40-60%.
What should I store in my shed?
Sheds accommodate tools, equipment, seasonal items, outdoor furniture, lawn care equipment, and general storage. Avoid storing hazardous materials, propane, or gasoline without proper ventilation and safety measures. Keep moisture-sensitive items elevated off the floor on shelving. Ensure proper organization for easy access and item protection from damage.
How do I prevent moisture problems in my shed?
Proper ventilation is essential—install soffit and ridge vents in the roof. Ensure good foundation drainage with grading away from the structure. Use a dehumidifier in humid climates. Seal all penetrations and gaps to prevent water infiltration. Maintain gutters and downspouts to direct water away from the foundation. Regular inspections catch moisture problems early before they cause damage.


