
How to Build a Deck: Expert Tips Inside
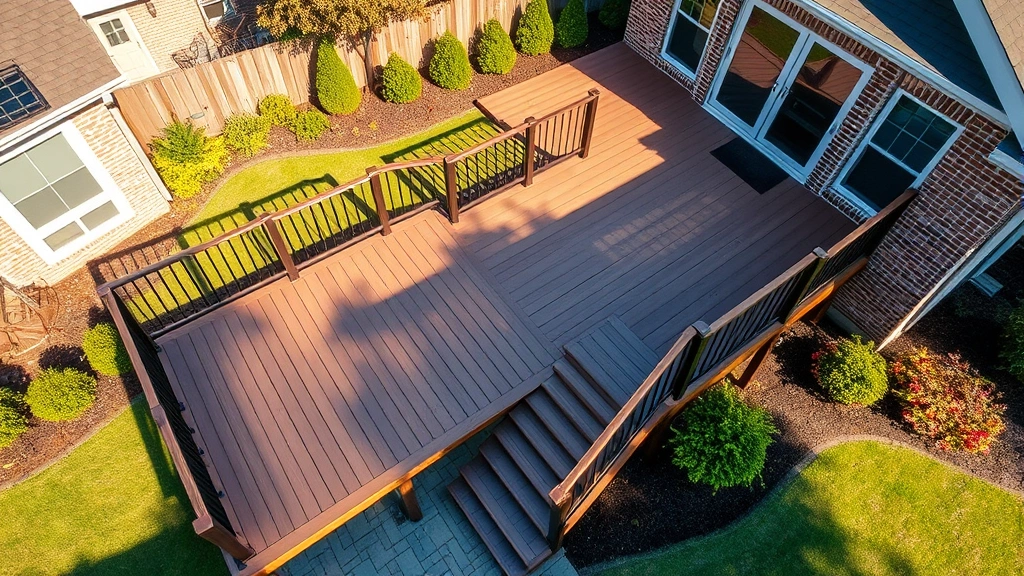
Building a deck is one of the most rewarding DIY projects you can undertake to enhance your outdoor living space. Whether you’re planning a small platform for entertaining or a multi-level structure with built-in seating, understanding the fundamentals of deck construction is essential for creating a safe, durable, and beautiful addition to your home. This comprehensive guide walks you through every step of the process, from initial planning and material selection to finishing touches that will make your deck the envy of the neighborhood.
A well-built deck not only increases your home’s property value but also extends your living space into the outdoors. However, deck construction requires careful attention to building codes, structural integrity, and proper installation techniques. Before you hire contractors or rent equipment, it’s crucial to understand what’s involved in the process. Throughout this guide, we’ll cover everything you need to know to build a deck that stands the test of time, withstands weather conditions, and provides a safe gathering place for family and friends.
Planning and Permits
Before you drive a single nail, proper planning is essential. Start by determining the size and location of your deck. Measure your available space carefully and consider how the deck will connect to your home. Will it be ground-level, elevated, or multi-tiered? What’s the primary purpose—dining, lounging, or entertaining? These decisions will influence every aspect of your project.
One of the most critical steps that many DIYers overlook is obtaining proper building permits. Most jurisdictions require permits for deck construction, especially for decks higher than 30 inches off the ground or those larger than 200 square feet. Contact your local building department to understand the specific requirements in your area. The International Code Council (ICC) provides the model codes that most municipalities follow for deck construction standards.
Verify setback requirements from property lines, easements, and neighboring structures. Check with utility companies to locate underground cables, gas lines, and water pipes before excavating for posts. This simple step prevents dangerous and expensive mistakes. Additionally, review your homeowner’s association rules if applicable, as some communities have specific guidelines regarding deck size, materials, and appearance.
Create detailed sketches or use deck design software to visualize your project. Include measurements, post locations, and any special features like built-in benches or pergolas. Share these plans with your building inspector before beginning work. This preliminary review can identify potential issues and ensure your design complies with local codes.
Materials Selection
Your choice of materials significantly impacts your deck’s durability, maintenance requirements, and overall cost. The three primary categories of decking materials are pressure-treated lumber, composite materials, and exotic hardwoods.
Pressure-treated wood remains the most popular and affordable option. Modern treatments are safe for residential use and provide excellent protection against rot and insect damage. Look for lumber treated with alkaline copper quaternary (ACQ) or copper azole, which are environmentally safer than older arsenical treatments. Ensure all lumber is kiln-dried after treatment (KDAT) to minimize warping and checking.
Composite decking combines wood fibers with plastic polymers, offering low maintenance and excellent longevity. These materials resist fading, staining, and mold growth, making them ideal for humid climates. While composite materials cost more initially, they require minimal maintenance compared to wood, potentially saving money over the deck’s lifetime. Popular brands offer warranties ranging from 25 to 30 years.
Tropical hardwoods like ipe and cumaru offer natural beauty and exceptional durability but come with premium pricing and environmental considerations. These dense woods resist decay and insects without chemical treatment, making them suitable for coastal environments where salt spray is a concern.
For structural components—posts, beams, and joists—use pressure-treated lumber rated for ground contact. Never use untreated wood for components that contact soil or concrete. When building a deck near your home, ensure all materials meet or exceed local building codes. The American Wood Council provides technical guidance on lumber grades, sizing, and installation.
Consider the climate in your region when selecting materials. In areas with freeze-thaw cycles, composite materials often perform better than wood. In extremely hot climates, lighter-colored materials reduce surface temperatures and make barefoot walking more comfortable.
Tools and Equipment
Gathering the right tools before starting ensures efficiency and safety throughout your project. Essential hand tools include a circular saw, reciprocating saw, power drill, level, tape measure, carpenter’s square, and hammer. A miter saw proves invaluable for making precise angled cuts on railings and trim pieces. Invest in quality tools—they’re safer, more accurate, and easier to use than budget alternatives.
For larger projects, consider renting or purchasing a post hole digger or power auger. These tools make excavating post holes significantly faster and less physically demanding than manual digging. A concrete mixer, if you’re mixing your own concrete for posts, saves considerable time and effort.
Safety equipment is non-negotiable. Wear safety glasses, hearing protection, work gloves, and steel-toed boots throughout the project. Use a dust mask when cutting pressure-treated lumber, as the wood preservatives can irritate respiratory passages. A fall protection harness becomes essential when working on elevated decks.
Invest in accurate measuring instruments. A 25-foot tape measure with a locking mechanism prevents measurement errors that could compound throughout your project. A laser level simplifies checking multiple posts and beams for proper elevation.
Foundation and Posts
The foundation is your deck’s most critical component. Posts must rest on frost-protected footings that extend below your region’s frost line—typically 36 to 48 inches in northern climates. Frost heave, caused by freezing and thawing of soil moisture, can shift improperly supported posts, compromising your entire structure.
Dig holes using a post hole digger or power auger. Make holes at least 12 inches in diameter and 6 inches deeper than your frost line. Add 6 inches of gravel to the bottom for drainage. Install a post pier or concrete footing that elevates the wooden post above ground level, preventing direct soil contact that promotes rot.
For ground-level decks, some builders use adjustable post supports that sit on concrete pads rather than digging deep holes. While this method is faster, it’s not suitable for elevated decks or areas with significant frost heave. Check your local building code to determine which method is acceptable in your jurisdiction.
Use 6×6 or 4×4 pressure-treated posts depending on your deck height and span. Posts should be set perfectly plumb—use a level to check both directions. Many builders use temporary braces to hold posts in position while concrete cures. Allow concrete to fully cure (typically 48 hours) before removing braces or applying any load to the structure.
Space posts according to beam span and joist configuration. Typical spacing is 8 to 12 feet apart, though your specific design depends on local codes and material specifications. The National Fire Protection Association provides additional guidelines for deck safety and construction standards.
Framing the Structure
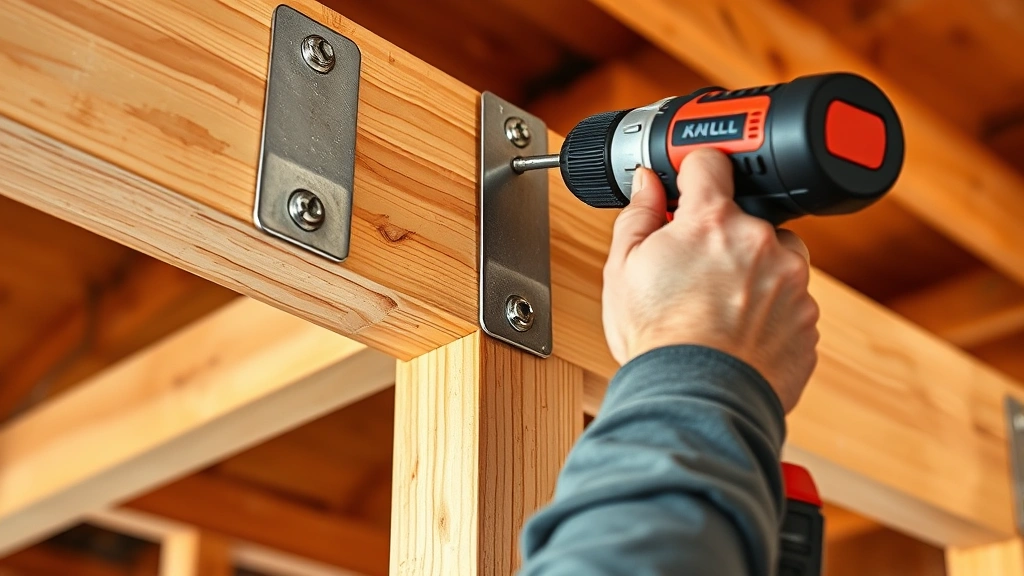
Once posts are set, install the beams that will support your joists. Beams are typically doubled 2×10 or 2×12 lumber, depending on your span and post spacing. Beams should be bolted to posts using lag bolts or through-bolts, never nailed. Proper fastening prevents beams from lifting off posts during high winds or lateral stress.
Install a ledger board where your deck connects to your house. This board transfers half your deck’s weight to your home’s foundation. Use galvanized or stainless steel flashing above the ledger to redirect water away from your home’s rim board and band board. This detail prevents water infiltration that causes rot in your home’s structure—a common source of costly damage.
Space joists 16 inches on center for most decking materials, though some composite products allow 24-inch spacing. Use galvanized joist hangers to connect joists to beams and rim joists. Joist hangers are far superior to nailing or bolting, as they distribute loads more effectively and prevent joists from twisting or pulling loose.
Install blocking between joists at mid-span for longer joist runs to prevent bounce and improve lateral stability. Blocking also provides a secure attachment point for railings. All structural connections should use galvanized or stainless steel fasteners to prevent rust staining and corrosion.
For decks with stairs or complex shapes, carefully calculate joist sizing using span tables provided by lumber suppliers and industry resources. Undersized joists lead to bouncy, unsafe decks that may fail under load.
Decking Installation
With framing complete, installing the actual decking boards begins. Leave a 1/16-inch gap between boards for expansion and contraction caused by moisture and temperature changes. This spacing allows water to drain and prevents cupping and warping that occurs when boards swell unevenly.
Use deck screws rather than nails—they’re less likely to back out as wood shrinks and provides superior holding power. Stainless steel or galvanized screws resist corrosion and won’t leave rust streaks on your decking. Drill pilot holes to prevent splitting, especially near board ends.
For composite decking, follow manufacturer specifications exactly. Some products require specific fastener types, spacing, and installation techniques. Improper installation can void warranties and compromise performance. Composite materials expand and contract differently than wood, so spacing recommendations differ.
Install decking boards perpendicular to joists, starting at the house and working outward. Stagger board seams across different joists to avoid stress points. Trim the final board to width if necessary, ensuring it’s still at least 6 inches wide.
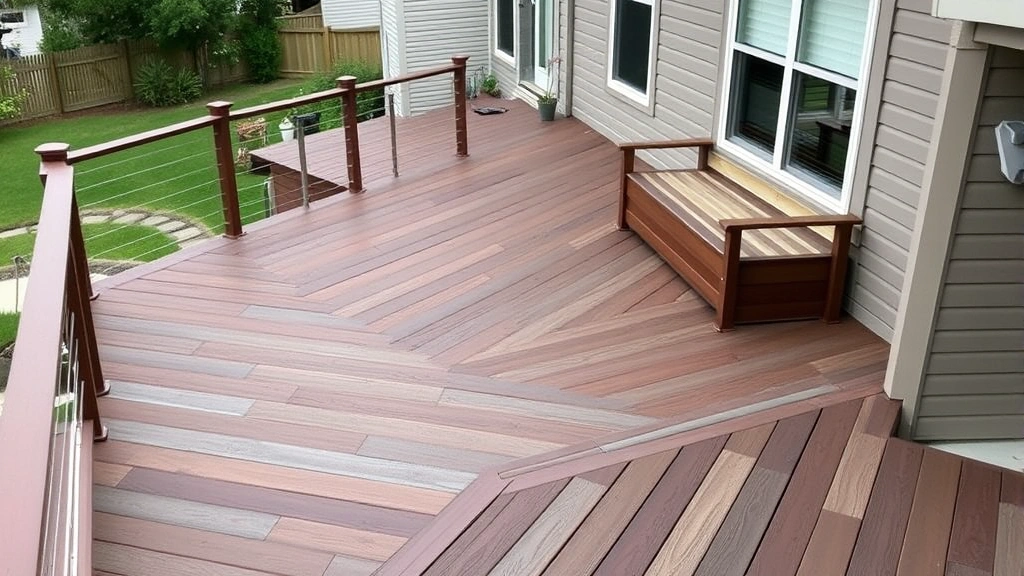
For diagonal or herringbone patterns, carefully plan your layout and cut many boards at angles. These patterns are visually striking but require more material and labor. Calculate material needs carefully, as waste is higher with complex patterns.
Sand any rough spots or splinters after installation. For wood decking, apply a protective stain or sealant within three months of installation. This step significantly extends your deck’s life by preventing UV damage and water infiltration. Reapply sealant every 2-3 years depending on climate and foot traffic.
Railings and Stairs
Building code requires railings on any deck more than 30 inches above grade. Railings must be at least 36 inches high and capable of withstanding 200 pounds of force applied horizontally. Balusters (vertical spindles) must be spaced no more than 4 inches apart—this prevents a 4-inch sphere from passing through, protecting small children.
Construct railings from pressure-treated lumber, composite materials, or aluminum. Wood railings offer traditional aesthetics and can be stained or painted to match your deck. Composite and aluminum railings require minimal maintenance but cost more initially. Whatever material you choose, ensure all fasteners are corrosion-resistant.
Stairs require careful calculation of rise and run. Each step should have a consistent rise (typically 7 to 8 inches) and run (typically 10 to 11 inches). Inconsistent steps are dangerous and often cause falls. Build stairs with sturdy stringers—the angled supports that hold treads in place—using pressure-treated 2×12 lumber.
Stair treads must be non-slip and drain water effectively. Space stair treads to prevent water pooling. Install railings on at least one side of stairs, and both sides if your stairs are wider than 36 inches. Handrails must be 34 to 38 inches above stair treads and should extend at least 12 inches beyond the top and bottom of stairs.
Consider adding a landing at the bottom of stairs if your deck is very high. Landings improve safety and provide a transition to ground level. Local building codes specify landing size and construction requirements, so verify these before building.
Finishing and Maintenance
After construction is complete, finishing touches enhance both appearance and longevity. Sand any rough spots, fill nail holes with exterior wood filler, and apply a protective finish. For wood decks, choose between stains that highlight wood grain or solid-color paints. Semi-transparent stains typically require reapplication every 2-3 years, while solid stains last longer but require more frequent maintenance.
Install trim boards around the deck perimeter and under the deck to complete the finished appearance. These boards hide the underside framing and provide a polished look. Trim also helps prevent debris accumulation under the deck.
Consider adding a skirt—a partial wall or lattice structure around the deck’s perimeter. Skirting improves aesthetics, prevents animals from nesting under the deck, and reduces air circulation that can make the deck uncomfortably cold in winter.
Establish a regular maintenance routine to keep your deck in excellent condition. Sweep regularly to remove debris that traps moisture. Pressure wash annually to remove algae and mold, though use caution not to damage wood or composite surfaces. Check fasteners periodically and tighten any that have loosened.
Inspect your deck annually for signs of damage. Look for soft spots indicating rot, especially on posts and under railings where water tends to collect. Replace any damaged boards or fasteners promptly to prevent problems from spreading. For wood decks, reapply sealant every 2-3 years as part of your regular maintenance schedule.
Consider your deck an investment in your home and outdoor lifestyle. Proper construction and maintenance ensures your deck remains safe, beautiful, and functional for 20 to 30 years or more. If you’re uncertain about any aspect of construction, consult with a professional contractor or building inspector. The cost of expert advice is minimal compared to the expense of correcting mistakes or dealing with safety issues.
FAQ
How much does it cost to build a deck?
Deck costs vary dramatically based on size, materials, and complexity. Pressure-treated wood decks typically cost $15-30 per square foot, while composite decks run $25-50 per square foot. A 12×16-foot deck (192 square feet) might cost $3,000-$9,600 depending on materials and whether you hire contractors or do the work yourself. Adding stairs, railings, or special features increases costs accordingly.
Do I need a permit to build a deck?
Most jurisdictions require permits for decks higher than 30 inches or larger than 200 square feet. Permits ensure your deck meets local building codes and safety standards. Contact your local building department to determine requirements in your area. Building without required permits can result in fines and complications when selling your home.
How long does it take to build a deck?
A simple ground-level deck takes 2-4 weekends for experienced DIYers. Elevated decks with stairs and railings require 4-8 weekends depending on complexity. Professional contractors typically complete decks faster, often finishing in 1-2 weeks. Weather delays can extend timelines, so plan accordingly and avoid major construction during rainy seasons.
What’s the best decking material?
The best material depends on your climate, budget, and maintenance preferences. Pressure-treated wood is affordable and classic-looking but requires regular maintenance. Composite materials offer superior durability and minimal maintenance but cost more upfront. Tropical hardwoods provide natural beauty and exceptional longevity for premium budgets. Consider your climate, lifestyle, and long-term maintenance commitment when deciding.
How often should I seal my wood deck?
Seal wood decks every 2-3 years, or whenever water stops beading on the surface. In harsh climates with significant sun exposure or moisture, annual sealing may be necessary. Composite decks rarely require sealing, though some manufacturers recommend occasional cleaning and protective treatments. Check manufacturer recommendations for specific guidance.
Can I build a deck myself?
Many homeowners successfully build decks themselves, though it requires careful planning, proper tools, and attention to building codes. If you’re comfortable with power tools and can follow detailed plans, a simple ground-level deck is achievable. Elevated decks and those with complex features are more challenging and may warrant professional help. When in doubt, consult professionals—safety should always be the priority.
How do I prevent my deck from rotting?
Prevent rot by using pressure-treated lumber for structural components, installing proper flashing where the deck connects to your house, ensuring adequate drainage, and applying protective sealant to wood surfaces. Maintain good air circulation under the deck, keep the surface clean, and address any water pooling or moisture issues promptly. Regular inspections help identify early signs of rot before problems become severe.
What’s the frost line depth in my area?
Frost line depth varies by location, typically ranging from 12 inches in southern regions to 48 inches in northern climates. Contact your local building department or extension office to learn the frost line depth for your specific area. This information is essential for determining proper post footing depth and ensures your deck foundation remains stable through freeze-thaw cycles.