How to Add Oil to Car: Mechanic-Approved Method
Adding oil to your car is one of the most fundamental maintenance tasks you can perform as a vehicle owner. Whether you’re a seasoned DIY enthusiast tackling home improvement projects or someone new to vehicle maintenance, understanding how to properly add oil will save you money and extend your engine’s lifespan. Regular oil changes and top-ups are critical to preventing engine damage, reducing friction between moving parts, and maintaining optimal engine performance. This guide walks you through the entire process using mechanic-approved techniques that prioritize safety and accuracy.
Your engine’s oil serves as the lifeblood of your vehicle’s most critical system. It lubricates pistons, cylinders, and other moving components while also helping to cool the engine and remove contaminants. When oil levels drop below the minimum threshold, your engine faces increased wear, reduced efficiency, and potential catastrophic failure. Most modern vehicles require an oil top-up every 1,000 to 3,000 miles, depending on driving conditions and oil type. By learning to add oil correctly, you’re taking an active role in vehicle maintenance—much like how homeowners invest in securing their properties and protecting their investments.
Gather Your Materials and Tools
Before you begin adding oil to your car, assemble all necessary materials in one convenient location. This preparation prevents interruptions and ensures you work efficiently and safely. You’ll need the correct type of oil for your vehicle—consult your owner’s manual or check the oil cap, which typically displays the recommended viscosity (such as 5W-30 or 10W-40). Using the wrong oil type can compromise engine performance and void warranties.
Essential materials include:
- Motor oil in the correct grade and quantity for your vehicle
- Oil filter wrench if performing a full oil change (not required for top-ups)
- Oil drain pan to catch old oil during changes
- Clean rags or paper towels for wiping the dipstick and cap
- Funnel with a diameter matching your oil fill opening
- Jack and jack stands if accessing the undercarriage (optional for top-ups)
- Work gloves to protect your hands from hot oil and dirt
- Safety glasses to shield your eyes from splashes
Having these items ready before starting mirrors the preparation required for successful home renovation projects—proper planning prevents problems. Store materials on a clean, flat surface near your vehicle for easy access throughout the process.

Check Your Oil Level Accurately
The first critical step is determining your current oil level. An accurate reading ensures you add exactly the right amount without overfilling, which can damage seals and create pressure problems. Always check oil when the engine is cold or has been off for at least five minutes—checking immediately after running the engine produces false high readings because hot oil expands and coats internal surfaces.
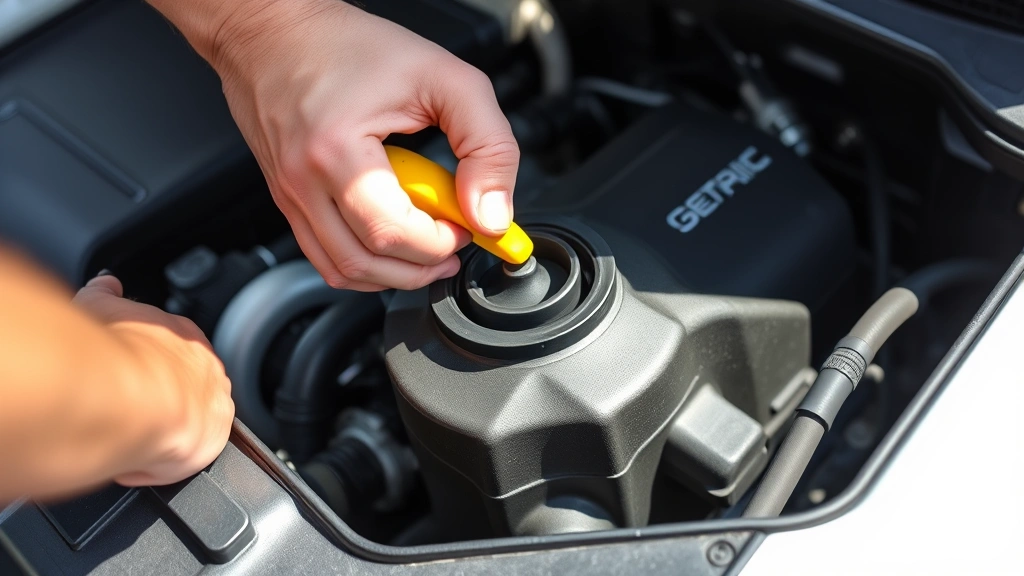
Locate the dipstick, typically identified by a bright yellow or orange handle near the engine. Pull it straight out with steady pressure. You may encounter resistance; this is normal. Once fully extracted, wipe the dipstick clean using a lint-free rag or paper towel. This removes old oil residue that obscures the true level. Reinsert the dipstick completely until it seats firmly, then remove it again to check the level.
The dipstick displays two marks: minimum (low) and maximum (full). Your oil level should rest between these marks, ideally near the maximum line. If the level approaches or falls below the minimum mark, add oil immediately. Most engines require between 4 to 6 quarts for a complete oil change, but top-ups typically involve adding 1 to 2 quarts. The owner’s manual specifies your vehicle’s exact capacity.
Locate the Oil Fill Cap
Once you’ve confirmed the oil level, identify the oil fill cap—the point where you’ll introduce new oil into the engine. On most vehicles, this cap sits atop the valve cover and displays an oil can symbol. The cap typically features a threaded opening and a handle or ribbed design for easy gripping. Consult your owner’s manual if you cannot locate it; newer vehicles sometimes position it in less obvious locations.
Before removing the cap, ensure your engine is cool. Hot engine oil can cause severe burns. The cap may feel warm even after the engine cools, so handle it cautiously. Turn the cap counterclockwise slowly—do not force it. Some caps feature a spring-loaded mechanism that releases internal pressure; turning slowly allows pressure to dissipate safely. If resistance persists after a quarter turn, stop and allow additional cooling time.
Once removed, inspect the cap’s interior for debris or damage. A damaged cap can allow dirt to enter the engine, compromising oil quality and engine longevity. Place the cap on a clean surface where it won’t roll away or accumulate dirt. Never set it directly on the engine block, as heat can damage the rubber seal.
Add Oil in the Correct Increments
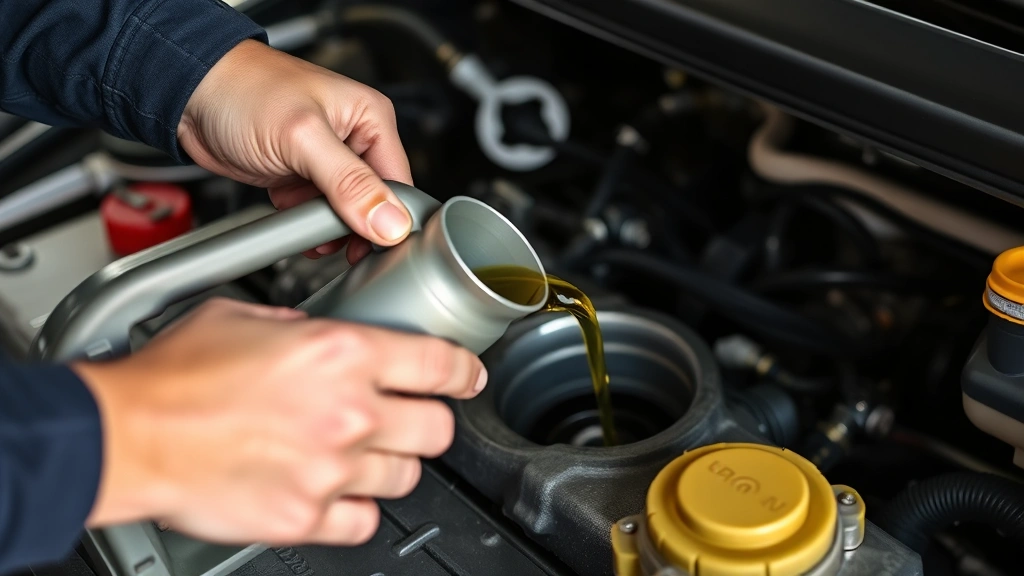
Position your funnel in the oil fill opening, ensuring it sits securely without forcing. The funnel prevents spills that create fire hazards and messy cleanup. Slowly pour oil into the funnel, watching the stream carefully. Add approximately half a quart, then pause to allow the oil to flow into the pan. This incremental approach prevents overfilling, which is more problematic than underfilling.
Work deliberately and avoid rushing. Many DIY mistakes occur when people add oil too quickly, misjudging the amount needed. If oil begins backing up in the funnel, stop immediately and allow gravity to assist the flow. Never leave the funnel unattended while oil flows; stay present to monitor progress and catch any spills.
After adding each increment, replace the dipstick to verify the level. This prevents the common error of adding too much oil. Once the level reaches the maximum mark, stop adding oil. Even a quarter quart over capacity can cause issues. Think of this precision like proper measurement in woodworking projects—accuracy ensures success.
Verify Your Work
After adding oil and achieving the correct level, perform a final verification to ensure proper completion. Remove the dipstick once more, wipe it clean, reinsert it fully, and check the level a third time. This triple-check method eliminates doubt and confirms you’ve added the precise amount needed. The oil should rest at or very slightly below the maximum mark.
Reinstall the oil fill cap by turning it clockwise until snug. Do not overtighten—excessive force can strip threads or crack the cap. The cap should seal firmly but require only moderate turning pressure. Wipe away any oil spills using clean rags, as oil residue attracts dirt and can obscure future problems.
Start the engine and allow it to run for 30 seconds to one minute. This circulates the new oil throughout the engine, ensuring proper distribution and allowing you to verify the oil pressure warning light extinguishes. The light should illuminate briefly during startup, then turn off once oil pressure builds. If the light remains on after the engine warms, turn off the engine and investigate before driving further.
Check under the vehicle for leaks using a clean rag. While some minor seepage is normal during the first few minutes, significant dripping indicates a problem requiring attention. Allow the engine to cool for five minutes, then perform a final dipstick check to confirm the level remains correct. Oil naturally circulates and settles; the level may drop slightly after the first run.
Common Mistakes to Avoid
Understanding frequent errors helps you execute the process flawlessly. The most common mistake is adding oil without checking the current level first. Many people assume they need a full quart or more, resulting in overfilled engines that experience pressure problems and seal damage. Always verify the starting level before adding anything.
Another widespread error involves checking oil immediately after running the engine. Hot oil expands significantly, producing false high readings that lead to underfilling. Always wait at least five minutes after shutdown before checking. Similarly, some people check oil on uneven surfaces where the vehicle tilts, causing inaccurate readings. Park on level ground for reliable results.
Using the wrong oil type represents a critical mistake with long-term consequences. Synthetic, conventional, and blend oils have different properties affecting engine performance and longevity. Mixing types is generally acceptable in emergencies, but always use the manufacturer-recommended grade for your specific vehicle. Your owner’s manual specifies the exact requirements.
Overfilling poses more danger than underfilling. Excess oil creates pressure that forces oil past seals into the combustion chamber, causing blue smoke from the exhaust, fouled spark plugs, and reduced engine performance. If you overfill, remove excess oil using a turkey baster or by loosening the drain plug slightly to let oil escape into a pan.
Never add oil while the engine runs, as the cap removal can cause hot oil to splash out and burn your skin. Similarly, avoid working on a hot engine immediately after driving. The cooling system contains pressurized hot liquid that can cause severe burns if disturbed. Always prioritize safety by allowing adequate cooling time.
Safety Considerations
Vehicle maintenance involves hazards that demand respect and caution. Engine oil reaches extreme temperatures during operation—easily exceeding 200 degrees Fahrenheit. Contact with hot oil causes severe burns requiring immediate medical attention. Always allow engines to cool completely before beginning work, and wear protective gloves even when working on cooled engines, as old oil contains contaminants and abrasive particles.
Work in well-ventilated areas away from open flames or sparks. Motor oil is flammable, and fumes can accumulate in enclosed spaces, creating fire hazards and health risks. If working in a garage, ensure proper ventilation by opening doors and windows or using exhaust fans. Never smoke while handling oil or working near the engine.
Dispose of used oil properly according to local regulations. Many automotive retailers and service stations accept used oil for free or charge minimal fees. Never pour oil down drains or onto the ground—it contaminates soil and water supplies, causing environmental damage and legal violations. Check with your local EPA guidelines on proper oil disposal for specific requirements in your area.
If you’re uncomfortable performing this task or your vehicle requires special procedures, consult a professional mechanic. Some modern vehicles feature electronic oil level sensors that require specific procedures for accuracy. Attempting work beyond your skill level can cause damage exceeding the cost of professional service. This mirrors the wisdom of knowing when to hire professionals for complex home electrical work rather than risking safety hazards.
Keep a fire extinguisher rated for flammable liquids nearby when working with oil. While serious incidents are rare, preparedness prevents minor problems from becoming major emergencies. Familiarize yourself with the extinguisher’s operation before you need it. If oil ignites, never use water—it spreads burning oil. Use only a Class B fire extinguisher designed for liquid fires.
Reference your vehicle’s specific maintenance requirements through the Automotive Aftermarket Industry Association for detailed guidance on your make and model. Different manufacturers sometimes employ unique procedures or specifications that deviate from general guidelines.
FAQ
How often should I check my oil level?
Check your oil level monthly or before long trips. Most vehicles lose oil naturally through normal operation—typically a quart every 1,000 to 3,000 miles depending on engine condition, driving style, and oil type. Regular checks catch problems early before they cause engine damage.
Can I add oil while the engine is warm?
Avoid checking or adding oil immediately after running the engine. Wait at least five minutes for the engine to cool, allowing oil to settle and return to the pan. Checking warm engines produces false high readings because expanded oil coats internal surfaces. For accurate measurements, always check on a cold engine.
What happens if I overfill the oil?
Overfilled engines experience excessive oil pressure that forces oil past seals into the combustion chamber. This causes blue smoke from the exhaust, fouled spark plugs, reduced fuel economy, and potential engine damage. If you overfill, remove excess oil immediately using a turkey baster or by opening the drain plug slightly to release oil into a pan.
Is synthetic oil better than conventional oil?
Synthetic oils offer superior performance at extreme temperatures, better protection for high-performance engines, and extended drain intervals—sometimes reaching 10,000 miles or more. Conventional oils cost less but require more frequent changes. Your owner’s manual specifies which type your vehicle requires. Consult the Society of Automotive Engineers for detailed specifications on oil grades and standards.
What should I do if the oil pressure warning light stays on?
Turn off the engine immediately and check the oil level. If the level is low, add oil and restart. If the light persists after adding oil, or if the level was already correct, do not drive the vehicle. The warning light indicates insufficient oil pressure—a serious problem requiring professional diagnosis. Low oil pressure can mean a failing oil pump, clogged filter, or engine damage requiring immediate attention.
Can I mix different oil types?
Mixing conventional, synthetic, and blend oils is generally acceptable in emergencies but not recommended as a regular practice. Each type has different properties affecting performance and protection. Always use the manufacturer-recommended grade specified in your owner’s manual. If you must mix types temporarily, plan to perform a complete oil change at your next service interval to restore proper specifications.
How do I know what oil type my car needs?
Check your owner’s manual for the exact oil specification, including viscosity grade and whether synthetic, conventional, or blend oil is required. The oil fill cap often displays this information as well. You can also consult the manufacturer’s website or contact a dealership with your vehicle’s year, make, and model. Using the correct oil is essential for warranty coverage and engine longevity.


