
Applying Cooling Paste: Technician’s Proven Guide
Cooling paste, commonly known as thermal paste or thermal compound, is a critical component in any electronics assembly or maintenance project. Whether you’re building a custom PC, replacing a CPU cooler, or performing thermal management upgrades, understanding how to apply cooling paste correctly can mean the difference between optimal performance and catastrophic hardware failure. This guide walks you through every step of the process with professional-grade techniques that technicians have refined over decades.
The importance of proper cooling paste application cannot be overstated. Poor application leads to inadequate heat transfer between processors and coolers, resulting in thermal throttling, reduced lifespan of components, and potential system shutdowns. By following this comprehensive guide, you’ll master the application techniques that ensure your cooling systems operate at peak efficiency while maintaining the longevity of your expensive hardware investments.
Understanding Thermal Paste Fundamentals
Thermal paste serves as a bridge between two surfaces—typically a CPU or GPU and its cooler. Despite its name, paste doesn’t actually conduct electricity; rather, it fills microscopic imperfections on metal surfaces that would otherwise trap air pockets. Air is an insulator, so these gaps significantly reduce heat transfer efficiency. Quality thermal compounds contain ceramic particles, metal oxides, or even diamond particles suspended in a silicone or synthetic oil base, creating a medium that conducts heat far better than air while remaining electrically non-conductive in most formulations.
Different thermal pastes have varying properties. Some are designed for extreme overclocking and demand frequent reapplication, while others maintain effectiveness for years under normal operating conditions. The thermal conductivity rating, measured in watts per meter-kelvin (W/mK), indicates how efficiently a paste transfers heat. Premium pastes typically range from 3 to 12 W/mK, while budget options may only offer 1 to 3 W/mK. Understanding your specific hardware requirements—whether you’re working on a DIY car repairs project involving engine thermal management or building a gaming workstation—helps determine which paste meets your needs.
Viscosity also matters significantly. Thicker pastes require more pressure to spread adequately, while thinner pastes may flow excessively and create messy applications. Consistency affects both the ease of application and the final thermal interface quality. Most professional-grade pastes balance these properties to remain manageable during installation while providing adequate coverage once compressed between surfaces.
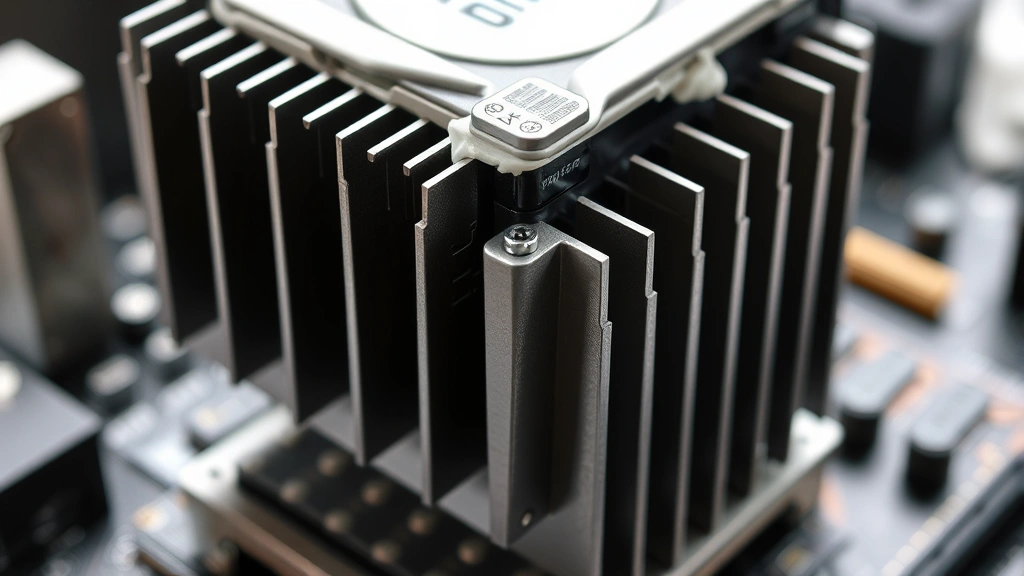
Preparation and Surface Cleaning
Before applying any cooling paste, you must prepare the surfaces that will contact it. This preparation phase determines whether your application succeeds or fails. Begin by removing any existing thermal compound from previous installations. Use isopropyl alcohol—preferably 90% concentration or higher—and lint-free wipes or coffee filters. Avoid paper towels, which shed fibers that contaminate the thermal interface and reduce efficiency.
For CPU surfaces, gently wipe in circular motions until the surface appears completely clean and shiny. Inspect under good lighting to confirm no residue remains. The contact surface of your cooler requires equal attention. If your cooler is brand new, it may have a protective coating that needs removal. Check the manufacturer’s documentation; some coolers ship with pre-applied thermal paste that requires peeling away a plastic film, while others arrive completely bare and ready for fresh application.
The quality of surface preparation directly impacts thermal conductivity. Intel’s thermal interface guidelines emphasize that surface cleanliness reduces contact resistance by up to 15%. After cleaning, allow all surfaces to air dry completely—isopropyl alcohol evaporates quickly, but any remaining moisture compromises the paste’s effectiveness. Some technicians wait 2-3 minutes after the final wipe to ensure complete dryness.
Temperature considerations matter during preparation. Work in a room-temperature environment if possible. Applying paste in extremely cold conditions can affect its viscosity, making it difficult to spread evenly. Conversely, working in excessive heat may cause paste to flow before the cooler is fully mounted. Ideal working conditions range from 65-75°F (18-24°C), though most home environments fall within acceptable ranges.
Choosing the Right Application Method
Professional technicians employ several proven application methods, each with specific advantages. The most common approaches include the pea-sized dot, the line method, the X-pattern, and the spread method. Each technique serves different scenarios and hardware configurations.
The Pea-Sized Dot Method remains the most popular approach for modern CPUs. Place a single small amount—roughly the size of a grain of rice to a small pea—in the center of the processor. When you mount the cooler and apply clamping pressure, the paste spreads naturally to fill the contact area. This method minimizes excess paste, reduces the risk of spillover onto surrounding components, and works reliably across various processor sizes. Most CPU manufacturers, including AMD’s official support documentation, recommend this technique for standard installations.
The Line Method involves drawing a thin line of paste across the processor’s center. This approach works well for rectangular processors and ensures even distribution along the length. However, it requires more careful application to avoid creating too thick a line, which would result in excess paste squeezing out during mounting.
The X-Pattern Method uses two diagonal lines intersecting in the center. While visually satisfying, this technique offers no thermal advantage over simpler methods and can actually create air pockets at intersection points. Many technicians avoid this approach despite its popularity among enthusiasts.
The Spread Method involves applying paste directly to the cooler’s contact surface rather than the CPU, then spreading it evenly with a plastic spreader or old credit card. This method provides excellent control and ensures consistent thickness but requires more skill to execute properly. It’s particularly useful when working with large-surface coolers or when dealing with highly viscous pastes.
Your choice depends on cooler type, CPU size, and personal preference. Liquid metal compounds—which offer superior thermal conductivity but conduct electricity and can corrode certain metals—demand extra caution and typically require the spread method with careful containment to prevent spillage.

Step-by-Step Application Process
Now that you understand the fundamentals and have prepared your surfaces, follow this detailed application sequence:
- Gather Your Materials: Assemble isopropyl alcohol, lint-free wipes, thermal paste, your processor, and cooler. Having everything within arm’s reach prevents interruptions mid-application.
- Final Surface Inspection: Perform one last visual check of both the CPU and cooler contact surfaces under bright lighting. Any dust particles or residue will compromise results.
- Apply the Paste: Using the pea-sized dot method, dispense a small amount of paste onto the processor’s center. Hold the syringe or applicator perpendicular to the surface for better control. Avoid excessive pressure, which can force paste out prematurely.
- Position the Cooler: Carefully align the cooler’s mounting bracket with the CPU socket. Most modern coolers include guide pins or alignment marks. Position the cooler so it will rest evenly on the processor when fully seated.
- Apply Mounting Pressure: Gradually tighten mounting screws or clamps in a cross-pattern (if using four mounting points, tighten opposite corners alternately). This distributes pressure evenly and prevents tilting. Apply firm but not excessive force—the goal is to compress the paste into a thin, even layer, not to crush components.
- Verify Mounting: Once fully secured, check that the cooler sits flush against the processor with no gaps or tilting. Any rocking indicates improper seating that requires remounting and fresh paste application.
- Clean Excess Paste: If paste squeezed out around the cooler’s edges, gently wipe it away with an isopropyl-soaked wipe. This prevents accidental contact with electrical components and maintains a clean installation.
- Allow Curing Time: Some thermal compounds benefit from a brief curing period before powering on. Check your paste’s documentation—most modern formulations reach full effectiveness within minutes, but some recommend 24 hours for optimal performance.
Common Mistakes to Avoid
Even experienced technicians occasionally make application errors. Recognizing and avoiding these mistakes separates successful installations from problematic ones:
Applying Too Much Paste: Excess thermal compound creates a thicker thermal interface, which paradoxically reduces heat transfer. More paste means more material for heat to travel through, and the paste itself conducts heat far less efficiently than direct metal-to-metal contact. A thin, even layer performs better than a thick one. When in doubt, use less—you can always remount with fresh paste if temperatures are suboptimal.
Uneven Pressure During Mounting: Tightening mounting hardware unevenly creates high-pressure zones and low-pressure zones across the thermal interface. This results in inconsistent paste thickness and poor contact in certain areas. Always use a cross-tightening pattern and apply pressure gradually in multiple passes rather than fully tightening one screw before moving to the next.
Mixing Paste Types: Never combine different thermal paste formulations. Different compounds have different properties, cure times, and chemical compositions. Mixing can result in unpredictable thermal performance and potential chemical reactions. If you need to switch paste types, completely remove the old compound and clean the surfaces thoroughly.
Ignoring Temperature Specifications: Some thermal pastes have operating temperature limits. High-end pastes designed for overclocking may degrade under sustained high temperatures, while budget pastes might separate or lose effectiveness in cooler environments. Match your paste to your intended use case.
Neglecting Cooler Cleanliness: A cooler with accumulated dust and debris cannot make proper contact with the thermal paste. Clean cooler fins regularly during system maintenance. Blocked cooling fins reduce airflow and increase temperatures regardless of paste quality.
Applying Paste to Already-Mounted Coolers: Never attempt to apply thermal paste after a cooler is installed. This creates air pockets and uneven distribution. Always apply paste before mounting the cooler, and if you must remount, completely remove and clean the old paste first.
Maintenance and Reapplication
Thermal paste isn’t permanent. Over time, it can dry out, separate, or lose effectiveness. Understanding when and how to reapply paste keeps your systems running optimally. Most quality thermal compounds remain effective for 3-5 years under normal operating conditions. High-performance systems, extreme overclocking scenarios, or prolonged high-temperature operation may require reapplication every 1-2 years.
Signs that reapplication is needed include gradually increasing temperatures despite clean coolers, thermal throttling during normal workloads, or system shutdowns despite adequate cooling capacity. If temperatures suddenly spike after months of stable operation, thermal paste degradation is a likely culprit. Compare current temperatures to your baseline measurements—an increase of 10-15°C suggests paste replacement is warranted.
Reapplication follows the same process as initial installation: power down completely, allow the system to cool, remove the cooler, clean away old paste with isopropyl alcohol, inspect surfaces for damage, apply fresh paste, and remount the cooler. Document your baseline temperatures before and after reapplication to verify improvement. This data helps predict future reapplication timing.
Consider keeping a small syringe of the same thermal paste you originally used for future touch-ups. This ensures consistency and prevents compatibility issues. Store paste in a cool, dry location—extreme temperatures or humidity can affect viscosity and effectiveness.
For systems that receive heavy use, implementing a maintenance schedule prevents unexpected failures. Many data center operators and professional builders reapply thermal paste every 2 years as preventive maintenance, similar to how you might maintain other critical components. This proactive approach is far less expensive than emergency troubleshooting or component replacement.
FAQ
Can I use thermal paste multiple times?
No. Once thermal paste is applied and compressed between surfaces, it cannot be reused. Remove it completely and apply fresh paste during remounting. Reused paste loses its optimal consistency and may contain contaminants.
What’s the difference between thermal paste and thermal pads?
Thermal paste is a viscous compound that fills microscopic surface imperfections and must be applied manually. Thermal pads are pre-cut, solid materials with adhesive backing that stick to surfaces. Pads are convenient for RAM, VRM, or other non-critical components but generally offer lower thermal conductivity than quality paste. For CPUs and GPUs, paste provides superior heat transfer. Check your thermal interface material specifications to determine which is appropriate for your application.
Is liquid metal better than traditional thermal paste?
Liquid metal compounds offer superior thermal conductivity—typically 3-4°C lower temperatures than traditional paste—but introduce significant complications. Liquid metal conducts electricity and can corrode aluminum coolers. It requires careful application to prevent spillage and may void warranties. For most users, quality traditional paste provides excellent results without these risks. Liquid metal suits extreme overclockers willing to accept the additional maintenance burden.
How do I know if I applied too much paste?
Excess paste typically squeezes out around the cooler’s edges during mounting. A small amount of overflow is normal, but if paste runs across the motherboard or contacts adjacent components, you applied too much. During remounting, use less paste and verify that the cooler sits flush without excessive paste extrusion.
Can thermal paste go bad?
Yes. Thermal paste has a shelf life, typically 2-3 years when stored properly in cool, dry conditions. Check the manufacturing date on your paste container. Expired paste may have separated, become too thick or thin, or lost thermal conductivity. Always use fresh paste for critical applications. If you’re unsure about paste age, purchase new material rather than risk installation problems.
What temperature should I apply thermal paste at?
Apply thermal paste in a room-temperature environment, ideally 65-75°F (18-24°C). Avoid applying paste in extremely cold conditions, which increase viscosity and make spreading difficult. Don’t apply paste to warm processors—allow systems to cool completely before disassembly and reapplication.
Should I spread thermal paste or let the cooler spread it?
Modern CPUs and coolers are designed for the paste to spread naturally under mounting pressure. The pea-sized dot method—allowing the cooler to spread paste—produces optimal results in most scenarios. Manual spreading works well for experienced technicians but risks creating uneven layers or applying excessive paste. Start with the natural spreading method and only graduate to manual spreading after gaining experience.
Can I apply thermal paste to a GPU?
Yes, GPUs benefit from thermal paste application just like CPUs. Follow identical procedures: clean existing paste, apply a small amount to the GPU core, mount the cooler with even pressure, and allow proper curing time. GPU thermal management is equally important for performance and longevity. If you’re interested in comprehensive system maintenance guides, thermal management should be part of your regular maintenance routine.
What happens if thermal paste gets on the motherboard?
Most thermal paste is non-conductive and won’t damage the motherboard if small amounts contact it. However, large quantities can attract dust, reduce component clearance, or cause problems during future maintenance. If paste spills, allow it to dry completely, then carefully scrape it away with a plastic tool. For difficult cleanup, use isopropyl alcohol on a cotton swab. Prevent spills by applying paste conservatively and mounting coolers carefully.
How often should I replace thermal paste?
Replace thermal paste every 3-5 years under normal operating conditions, or sooner if temperatures increase noticeably. High-performance systems, overclocked hardware, or systems operating at sustained high temperatures may require reapplication every 1-2 years. Monitor your system temperatures and establish a baseline—significant increases indicate paste degradation. As part of your broader DIY projects and maintenance efforts, thermal management deserves attention alongside other system care.


