
DIY Shed Roof: Architect’s Guide to Success
Building a shed roof requires precision, planning, and proper understanding of structural principles that architects use in professional construction. Whether you’re constructing a small garden storage structure or a larger workshop, mastering roof installation techniques will ensure your shed withstands weather, time, and use. This comprehensive guide walks you through every stage of the process, from initial design considerations to final shingle installation.
A well-built shed roof protects your investment and provides years of reliable service. The difference between a mediocre roof and an excellent one often comes down to understanding load calculations, proper ventilation, and quality material selection. In this guide, we’ll explore architectural principles that professionals use, adapted for the DIY builder who wants results that match professional standards.
Understanding Roof Pitch and Load Requirements
Roof pitch—the angle of your roof—is one of the most critical architectural decisions you’ll make. Pitch is expressed as a ratio, typically written as rise-over-run (for example, 6:12 means the roof rises 6 inches for every 12 inches of horizontal distance). This seemingly simple number determines water drainage efficiency, structural load distribution, and even your shed’s overall appearance.
Before finalizing your pitch, consult local International Building Code (ICC) standards for your region. Most jurisdictions require a minimum 4:12 pitch for asphalt shingles to ensure adequate water runoff and prevent pooling. Flat roofs (under 2:12) require special membrane systems and more frequent maintenance. If you live in an area with heavy snow load, architects typically recommend steeper pitches—6:12 or higher—to help snow slide off rather than accumulate.
Load calculations involve understanding both dead loads (the weight of materials) and live loads (snow, wind, and temporary loads). A typical residential roof must support 20-40 pounds per square foot of dead load, plus live loads that vary by region. You can find ASCE 7 wind and snow load data specific to your location. For a 10×12 shed with a 6:12 pitch in a moderate climate, expect to work with approximately 1,200-1,500 pounds of total roof load.
Understanding these calculations helps you determine proper rafter sizing, spacing, and support structures. Undersized rafters are a leading cause of roof failure and costly repairs.
Materials and Tools You’ll Need
Gathering the right materials before starting prevents mid-project delays and ensures code compliance. Here’s what professional architects specify for quality shed roofs:
- Lumber: 2×6 or 2×8 rafters (depending on span and load), 2×4 collar ties and bracing, kiln-dried spruce or pressure-treated options
- Fasteners: Galvanized or stainless steel nails (3-inch for rafter connections), structural screws for additional support
- Sheathing: 1/2-inch or 5/8-inch CDX plywood, oriented strand board (OSB), or tongue-and-groove boards
- Underlayment: Synthetic or asphalt-saturated felt (minimum 15-pound), or premium ice-and-water shield for vulnerable areas
- Roofing material: Asphalt shingles (3-tab or architectural), metal panels, cedar shakes, or composite materials
- Flashing: Galvanized steel, aluminum, or copper around vents, chimneys, and roof penetrations
- Ventilation: Soffit vents, ridge vents, or gable vents depending on your design
Essential tools include a framing square, speed square, level (4-6 foot), circular saw, reciprocating saw, pneumatic nailer, roofing nailer, tape measure, and safety equipment (harness, roof brackets). When learning DIY woodworking plans and techniques, proper tool investment pays dividends in accuracy and safety.
Framing Your Roof Structure
Roof framing is where architectural knowledge becomes hands-on construction. The two primary framing methods are rafter-and-joist (traditional) and truss systems (pre-manufactured).
Rafter and Joist Method: This traditional approach gives you complete design control. Begin by determining rafter length using the Pythagorean theorem or a rafter calculator. For a 12-foot-wide shed with a 6:12 pitch, your rafters will be approximately 9.5 feet long. Mark your bird’s-mouth cut (the notch where the rafter sits on the top plate) carefully—this connection bears tremendous load and must be precise.
Space rafters 16 or 24 inches on-center, depending on your load calculations and local codes. Install collar ties every third rafter pair, positioned in the upper third of the roof space. These horizontal members prevent rafter thrust (the outward push that can collapse your shed walls) and significantly strengthen your structure. Many DIY builders skip collar ties, which is a critical mistake that can cause catastrophic failure under snow load.
Install a ridge board at the peak where rafters meet. The ridge board serves as a reference line during installation and provides a nailing surface, though it carries no structural load in properly designed systems. Ensure all rafter connections use proper fastening—minimum three 3-inch galvanized nails per connection, or consider structural screws for superior holding power.
Truss Systems: Pre-engineered trusses offer advantages: faster installation, built-in engineering, and integrated bracing. However, trusses limit attic space and interior modifications. If selecting trusses, ensure they’re engineered for your specific span, pitch, and load requirements. Improper truss installation causes more failures than any other roofing component.
After framing is complete and before sheathing, verify that your structure is square and level. Measure diagonals—they should be equal. Check that the ridge runs true and level along its entire length. These steps prevent problems downstream.
Sheathing and Underlayment Installation
Roof sheathing provides the base for your roofing material and distributes loads across your rafter system. CDX plywood and OSB are standard choices, though some architects prefer tongue-and-groove boards for superior racking resistance and traditional aesthetics.
Install sheathing perpendicular to rafters, staggering seams so they don’t align across multiple sheets. This staggering dramatically improves structural integrity. Leave 1/8-inch gaps between sheets to allow for wood movement—wood expands and contracts with moisture and temperature changes. Fastening is critical: use 8-penny nails every 6 inches along rafters and every 12 inches at intermediate supports. Alternatively, pneumatic staples (1.5-inch, 16-gauge) work well if you maintain proper spacing.
Underlayment serves as a secondary weather barrier, protecting sheathing from moisture until shingles are installed. Synthetic underlayment (often called roof wrap) offers advantages over traditional felt: superior durability, better traction for installers, and longer shelf life. For premium protection, install ice-and-water shield along eaves, valleys, and any low-slope areas where water might back up under shingles during heavy rain or freeze-thaw cycles.
Proper underlayment installation prevents costly water damage. Overlap courses 4-6 inches, and secure with cap nails every 12-18 inches. In valleys, run underlayment 36 inches wide to provide maximum protection where water concentrates.
Roofing Material Selection and Installation
Your roofing material choice balances cost, durability, appearance, and maintenance requirements. Understanding material characteristics helps you select the right option for your climate and intended shed use.
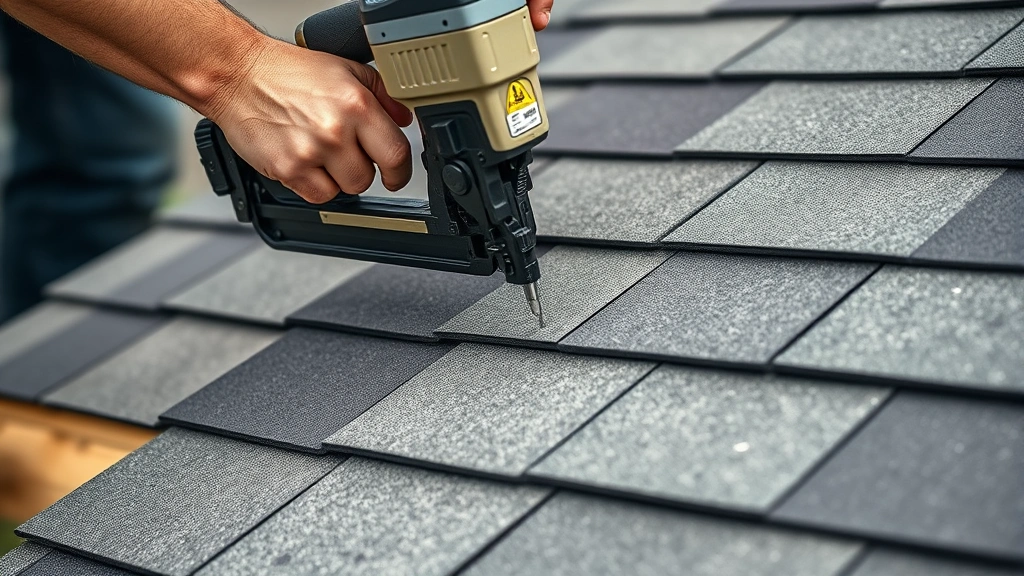
Asphalt Shingles: The most common choice for residential and shed roofing. Three-tab shingles cost less but last 15-20 years. Architectural (laminate) shingles cost more but provide superior aesthetics and 25-30 year lifespans. Both types require proper ventilation to prevent premature aging and cupping. Install shingles beginning at the eave, working upward. Starter shingles (inverted regular shingles) along the bottom edge provide proper water shedding. Use roofing nails (1.25-inch, 11-gauge) in the manufacturer’s specified nail line—typically four nails per shingle, sometimes six in high-wind areas. Overdriving nails creates leaks; underdriving leaves them vulnerable to wind.
When installing shingles in cold weather (below 50°F), materials become brittle. Warm shingles in the sun or indoors before installation. In hot weather (above 85°F), shingles soften and adhesive activates prematurely—be gentle when handling to avoid permanent creasing.
Metal Roofing: Standing seam and corrugated panels offer 40-70 year lifespans and superior wind resistance. Metal roofing requires underlayment and proper fastening into rafters (not sheathing). Thermal movement is significant with metal—panels expand and contract substantially with temperature changes. Follow manufacturer guidelines meticulously. Metal Roofing Alliance resources provide detailed installation specifications.
Cedar Shakes: Offer natural beauty and excellent insulation but require specialized installation and significant maintenance. Cedar must be treated to resist rot and insects. Installation spacing (typically 7.5-10 inches) allows for wood movement. Cedar roofing costs significantly more and demands expertise—consider professional installation.
Regardless of material chosen, proper ventilation is essential. When learning about home improvement projects like comprehensive home security installation, you develop the methodical mindset necessary for complex roof work.
Ventilation and Moisture Management
Attic ventilation prevents moisture accumulation and extends roof life by 10+ years. Without ventilation, moisture condenses on sheathing and rafters, promoting rot, mold, and structural failure. Professional architects always specify balanced ventilation systems combining intake and exhaust.
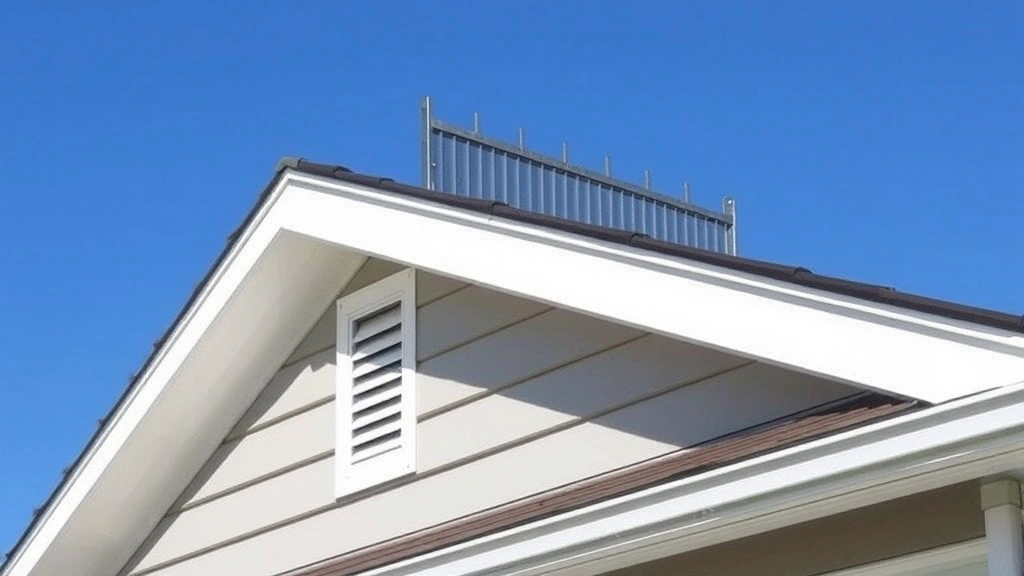
Soffit vents provide intake ventilation along the eaves, allowing air to flow into the attic space. Ridge vents provide exhaust ventilation at the peak, allowing moist air to escape. For optimal performance, soffit vents should equal 50% of ridge vent area—this creates pressure differential that drives air movement. A 12×20 shed might use 20-30 square feet of soffit venting and 10-15 square feet of ridge venting.
Gable vents work but are less effective than ridge vents. Turbine or powered vents provide excellent exhaust but require electricity and maintenance. For small sheds, properly sized passive ventilation (soffit and ridge) usually suffices.
Install ventilation baffles between rafters if you plan attic insulation. These maintain airflow channels and prevent insulation from blocking vents—a common mistake that defeats the ventilation system.
Moisture management extends beyond ventilation. Ensure gutters and downspouts direct water away from shed foundations. Sloped ground around the shed (minimum 5% grade) prevents water pooling. Proper grading is often overlooked but prevents foundation rot and settling.
Common Mistakes and How to Avoid Them
Learning from others’ mistakes accelerates your success. Here are critical errors that compromise shed roofs:
Undersized Rafters: Many DIY builders use 2×4 rafters when codes require 2×6 or larger. Undersized framing sags under load, causing shingles to crack and water to pool. Always verify rafter sizing against your local code and load calculations.
Skipped Collar Ties: These horizontal members prevent rafter thrust and lateral movement. Omitting them is a leading cause of roof failure. Install collar ties every third rafter pair, positioned in the upper third of the roof space.
Improper Fastening: Using insufficient nails, wrong nail types, or improper spacing causes shingles to blow off and underlayment to separate. Follow manufacturer specifications exactly. Four nails per shingle is minimum; some areas require six.
No Ventilation: Moisture buildup causes premature aging and rot. Even small sheds benefit from soffit and ridge vents. Budget $200-400 for ventilation—it’s the best investment you’ll make.
Inadequate Flashing: Water leaks around vents, chimneys, and penetrations cause interior damage. Use quality galvanized or copper flashing, and seal all penetrations with roofing cement and caulk.
Overlooking Local Codes: Building codes exist for safety. Snow load requirements, wind resistance ratings, and material specifications vary by region. Check with your local building department before starting—permits often cost $50-200 but prevent costly code violations.
When undertaking larger construction projects, understanding basement finishing techniques teaches you about moisture barriers and ventilation principles applicable to roof systems.
FAQ
What’s the best roof pitch for a shed?
A 6:12 pitch provides excellent water drainage, snow shedding, and usable interior space. The 4:12 minimum (required by most codes for asphalt shingles) works for moderate climates. Steeper pitches (8:12 or higher) are best in heavy snow regions.
How often should I inspect my shed roof?
Inspect twice yearly—spring and fall. Look for missing or damaged shingles, flashing separation, moss or algae growth, and sagging. After storms, check for wind damage. Early detection prevents small problems from becoming expensive repairs.
Can I install roofing in winter?
Asphalt shingles become brittle below 50°F and don’t seal properly. Metal roofing is weather-independent but expand-contract issues are more pronounced in temperature extremes. Spring and fall offer ideal conditions. Winter installation requires warming shingles and accepting reduced seal quality.
What’s the difference between felt and synthetic underlayment?
Synthetic underlayment lasts longer (5+ years vs. 2-3 years for felt), provides better traction, resists tearing, and handles temperature extremes better. It costs more initially but offers superior protection and easier installation. Professional roofers increasingly prefer synthetics.
Do I need ice-and-water shield?
In cold climates with freeze-thaw cycles, ice dams cause water backup under shingles. Ice-and-water shield (self-adhesive membrane) along eaves and valleys prevents this damage. Cost is $0.50-1.00 per square foot—a worthwhile investment in snowy regions.
How do I calculate how many shingles I need?
One bundle of shingles covers approximately 33 square feet (one-third of a 100-square-foot roofing square). Calculate your roof area in square feet, divide by 100 to get squares, then multiply by 3 for bundles needed. Add 10% for waste and future repairs.
What’s the most common roof leak cause?
Improper flashing around penetrations (vents, chimneys) causes 90% of roof leaks. Water doesn’t leak through shingles—it leaks where materials meet and at valleys where water concentrates. Quality flashing and sealant are critical investments.
Should I hire a professional or DIY?
Small shed roofs (under 200 square feet) are manageable for experienced DIY builders. Larger projects, steep pitches, or complex designs benefit from professional installation. Professionals work faster, carry liability insurance, and typically warranty their work. If unsure about your abilities, consult a professional roofer for estimates.


