Build a Shed: Expert Tips for Beginners
Building a shed is one of the most rewarding DIY projects you can undertake. Whether you need extra storage for garden tools, a workshop space, or a retreat from the daily grind, a well-constructed shed adds both functionality and value to your property. This comprehensive guide walks you through every step of the process, from planning and preparation to finishing touches, ensuring your shed stands strong for decades.
The beauty of shed construction lies in its accessibility for beginners. Unlike complex home renovations, shed building combines straightforward carpentry skills with manageable timelines and budgets. By following established building principles and local codes, you’ll create a structure that’s safe, durable, and perfectly suited to your needs. Throughout this guide, we’ll emphasize proper techniques that prevent costly mistakes and ensure your shed meets all safety standards.
Planning Your Shed Project
Before breaking ground, invest time in thorough planning. Your vision becomes reality through careful consideration of size, location, purpose, and budget. Start by sketching your ideal shed layout and dimensions. Consider what you’ll store or create inside—this determines your square footage needs. A 8×10 foot shed provides excellent versatility for most homeowners, offering roughly 80 square feet of usable space without overwhelming your yard.
Location matters enormously for shed success. Choose a spot with proper drainage to prevent water accumulation around the structure. Avoid low-lying areas where rain collects or where snow slides from roof edges. Position your shed where it receives adequate sunlight to prevent moisture and mold issues. Ensure the location allows easy access for deliveries and maintenance. Check that your chosen spot doesn’t interfere with utility lines—contact your local utility locating service before digging.
Budget planning prevents mid-project financial stress. Materials typically consume 60-70% of your total shed budget. Labor, if hiring professionals, comprises the remainder. A basic 8×10 wooden shed costs $2,000-$4,000 in materials for beginners building independently. Factor in tool rental if you don’t own essential equipment. Create a detailed materials list and obtain quotes from multiple suppliers. Building during off-season (late fall or early winter) often yields better prices.
Timeline expectations help you stay motivated. Most beginners complete an 8×10 shed in 4-6 weekends of dedicated work, assuming favorable weather. Complex roofing or finishing work extends this timeline. Plan your project for seasons with stable weather—spring and fall typically offer ideal conditions. Avoid building during rainy seasons when ground conditions deteriorate and lumber absorbs excess moisture.
Understanding Local Building Codes
Building codes exist to protect you, your neighbors, and future property owners. These regulations ensure structures withstand environmental stresses and maintain community standards. Before purchasing materials, contact your local building department to understand shed requirements in your area. Many jurisdictions allow small sheds (under 200 square feet) without permits, but regulations vary significantly by location.
Common code requirements include setback distances from property lines, height restrictions, and foundation specifications. Most areas require sheds positioned at least 5-10 feet from property boundaries. Height limitations typically cap residential sheds at 15-20 feet measured to the peak. Foundation codes specify minimum frost depth—this prevents ground heave from freezing cycles that shift structures and cause damage.
The International Code Council (ICC) publishes the International Building Code (IBC), which many jurisdictions adopt or reference. Your local building department can explain which codes apply to your shed. Some areas require professional inspections at specific stages: foundation, framing, and final completion. These inspections catch problems early when corrections are easier and less expensive.
Obtaining permits, while requiring paperwork and fees, protects your investment. Permitted structures are documented with your property, facilitating future sales or insurance claims. Unpermitted structures can trigger code enforcement actions requiring removal or expensive corrections. When selling your property, undisclosed unpermitted structures create serious legal and financial complications. Invest the modest permit cost upfront for peace of mind.
Selecting Materials and Tools
Material selection directly impacts your shed’s longevity, appearance, and maintenance requirements. Pressure-treated lumber resists rot and insect damage, making it ideal for framing and any wood contacting soil or concrete. Cedar or redwood offer superior aesthetics and natural rot resistance but cost significantly more. For budget-conscious builders, pressure-treated framing with painted exterior siding provides excellent durability at reasonable cost.
Roofing material choices range from asphalt shingles (most economical), metal panels (durable and long-lasting), to wood shakes (aesthetically pleasing but high-maintenance). Asphalt shingles cost $1-3 per square foot installed and last 15-25 years. Metal roofing costs $3-8 per square foot but lasts 40-70 years with minimal maintenance. Consider your climate—metal roofing excels in snowy regions where it sheds precipitation efficiently.
Essential tools for shed building include a circular saw, power drill, level, tape measure, and safety equipment. If you lack these tools, rental costs run $50-150 for a weekend. A pneumatic nail gun ($30-50 rental) dramatically speeds framing work. Invest in quality safety gear: work gloves, safety glasses, dust mask, and steel-toed boots. Proper footwear prevents injuries when carrying heavy materials or operating machinery.
Building permits and construction associations often provide material specification guides. These resources detail lumber grades, fastener types, and connection methods appropriate for your region’s climate and soil conditions. Following these specifications ensures your shed withstands wind, snow, and seismic forces relevant to your location.
Foundation Installation
A proper foundation prevents structural failure and extends your shed’s lifespan dramatically. Three foundation types suit residential sheds: concrete piers, concrete slabs, and gravel beds with pressure-treated runners. Concrete piers offer excellent drainage and frost protection, making them ideal for most climates. They involve digging holes below frost depth (typically 2-4 feet depending on region), setting concrete footings, and placing concrete blocks or piers above grade.
Concrete slabs provide a level, finished surface ideal for sheds with interior activities or equipment. Slabs require proper site preparation, including soil compaction and gravel base layers. A 4-inch concrete slab with reinforcement mesh handles typical shed loads. Slabs in freeze-thaw climates need perimeter insulation to prevent frost heave. The American Society of Civil Engineers publishes guidelines for foundation design in various climates.
Frost depth varies dramatically by location—consult your local building department for your area’s specific requirement. Building on frozen ground or inadequate foundations causes settling, wall cracks, and door misalignment. Frost heave forces foundations upward as soil freezes, creating dangerous structural stress. Proper depth placement prevents these expensive problems entirely.
Level foundation work is absolutely critical. Uneven foundations create sloping floors, roof stress, and door/window misalignment. Use a transit level or laser level to ensure your foundation sits perfectly level. This investment in precision prevents cascading problems throughout construction. Check diagonal measurements to ensure square corners—measure corner-to-corner diagonally; both measurements should be identical.
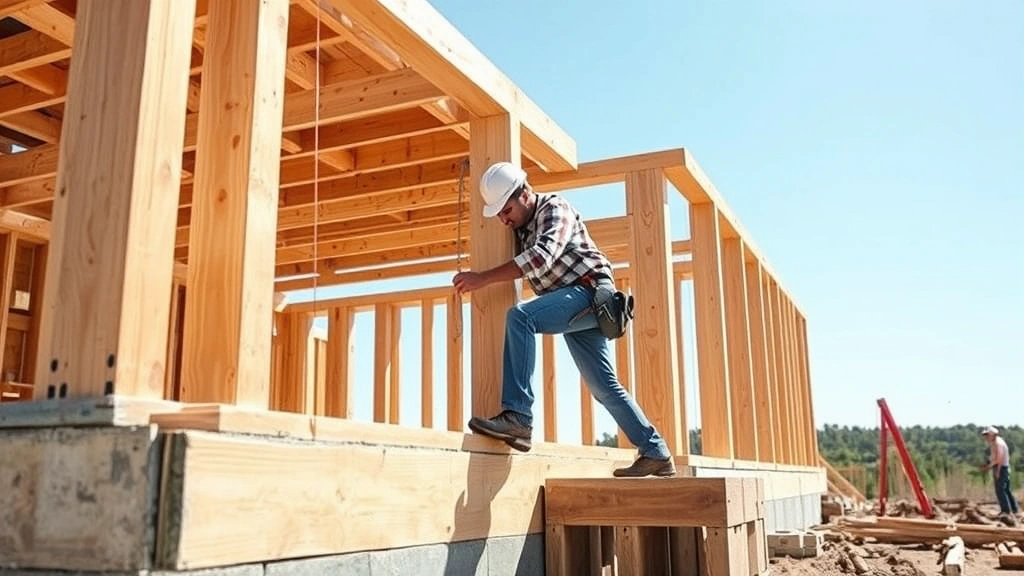
Framing the Structure
Framing creates your shed’s skeleton, determining structural integrity and longevity. Begin by installing the rim board (perimeter frame) directly on your prepared foundation. Use pressure-treated lumber for all framing members contacting the foundation. Secure the rim board with concrete anchors spaced 4-6 feet apart, embedded at least 7 inches into concrete. This prevents uplift during high winds.
Wall framing typically uses 2×4 lumber on 16-inch centers for residential sheds. This spacing balances material economy with structural strength. Studs should be straight, knot-free lumber graded for framing use. As you construct wall panels, ensure perfect squareness by checking diagonal measurements. Install temporary diagonal bracing to hold walls square during assembly.
Roof framing design significantly impacts your shed’s appearance and weather resistance. Simple gable roofs work well for beginners—they’re straightforward to frame and shed water efficiently. Calculate roof pitch (typically 4:12 to 6:12 for sheds) based on your climate. Steeper pitches shed snow better in heavy-snow regions. Shallower pitches reduce wind resistance in hurricane-prone areas. Your local building department can recommend appropriate pitch for your region.
Proper fastening prevents structural failure. Use galvanized or stainless steel fasteners to resist rust. Nail connections require proper spacing—typically 16 inches on center for studs. Bolted connections at critical joints provide superior strength. The National Frame Builders Association publishes connection specifications ensuring structural adequacy. When in doubt, consult professional guidance rather than improvising fastening methods.
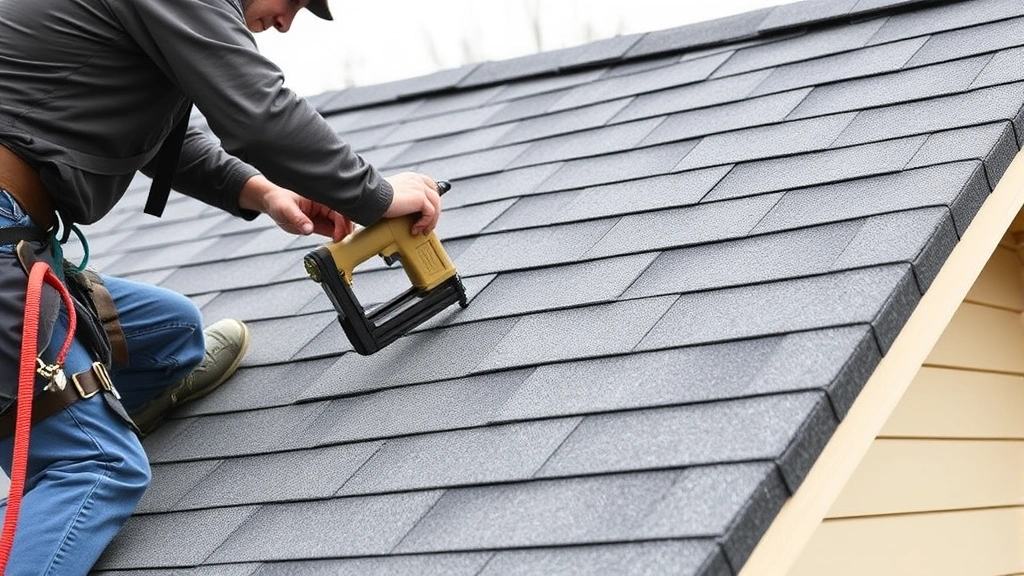
Roofing Your Shed
Roofing protects your shed from weather and represents one of the most critical components. Begin roofing work by installing plywood sheathing over roof framing, securing it with nails spaced 6-8 inches apart. Ensure sheathing is fully supported—gaps cause sagging and water damage. Install drip edge along eaves and rakes before adding underlayment, directing water away from fascia boards.
Underlayment provides secondary water protection, essential in any climate. Traditional felt underlayment costs less but requires careful installation to prevent wrinkles. Synthetic underlayment costs more but resists moisture better and handles foot traffic during installation. Both types overlap 4-6 inches with each course, creating shingle-like water shedding. Underlayment prevents wind-driven rain from reaching framing during storms.
Asphalt shingle installation requires proper technique for longevity. Shingles must be nailed with 4 nails per shingle, positioned in manufacturer-specified locations. Improper nail placement allows shingles to slip during wind gusts. Nail heads should sit flush with shingle surface without tearing the material. Start at the eave with a starter course, then work upward, staggering shingle seams for water shedding.
Flashing at roof penetrations prevents water intrusion around vents and chimneys. Metal flashing directs water down and away from openings. Seal flashing with roofing cement and maintain watertight connections. Roof leaks often originate at penetrations rather than the shingles themselves. Quality flashing installation prevents expensive interior damage and mold growth.

Siding and Weatherproofing
Siding protects framing from weather and completes your shed’s appearance. Popular options include plywood siding, fiber cement boards, metal panels, or traditional wood boards. Plywood siding offers economy and rapid installation—a 4×8 sheet covers large areas quickly. Fiber cement boards provide superior rot resistance and durability but require specialized cutting tools. Metal siding resists pest damage and never rots, ideal for long-term maintenance reduction.
Install siding with proper fastening—nails or screws spaced 12-16 inches apart prevent buckling. Leave 1/8-inch expansion gaps at corners and edges to accommodate wood movement from moisture changes. Improper spacing causes siding to buckle and crack as humidity fluctuates. Seal all fastener heads with caulk to prevent water intrusion around nail holes.
Weatherproofing extends your shed’s lifespan significantly. Seal all wood surfaces with exterior-grade paint, stain, or sealant. Paint protects wood from UV damage and moisture absorption. Two coats provide superior protection—the first coat seals the wood, the second provides color and UV protection. Plan repainting every 5-7 years depending on climate and exposure.
Caulking gaps around doors, windows, and corners prevents air and water infiltration. Use paintable, exterior-grade caulk rated for your climate. Quality caulking prevents drafts, improves energy efficiency, and prevents water damage. Recaulk annually if you notice cracking or separation—this minimal maintenance prevents major problems.
Gutters and downspouts direct roof water away from your shed’s foundation and siding. Install gutters along all eaves, sloping slightly toward downspouts. Downspouts should extend at least 4-6 feet from the foundation to prevent water saturation around the perimeter. Clean gutters annually to prevent clogs that cause water backup and damage.
Interior Finishing
Interior finishing transforms your shed from basic shelter to functional workspace or storage area. Insulation becomes important if you’ll use your shed year-round or store temperature-sensitive items. Fiberglass batts offer economy, while spray foam provides superior air sealing. Install vapor barriers on the warm side of insulation to prevent moisture accumulation. Proper insulation also reduces noise transmission if your shed borders neighbors’ properties.
Wall and ceiling finishes protect insulation and improve appearance. Plywood sheathing provides economy and durability. Drywall offers a finished appearance but requires moisture-resistant types in humid climates. Leave gaps at the top of walls for air circulation to prevent moisture buildup. Consider ventilation through soffit and ridge vents or wall-mounted vents if you’re insulating.
Flooring options range from bare concrete to finished wood systems. Concrete provides durability for storage sheds but feels cold and hard. Plywood subflooring with vinyl or wood finish offers comfort and protection from moisture. Ensure adequate ventilation under wood floors to prevent rot. Install floor joists on proper spacing to prevent sagging under loads.
Electrical systems require careful planning and professional installation if you’re uncertain. Basic shed wiring for lights and outlets is straightforward—surface-mounted conduit and fixtures simplify installation without extensive framing modifications. Install a ground-fault circuit interrupter (GFCI) outlet for any receptacles near potential moisture sources. Consult the National Fire Protection Association’s electrical code or hire a licensed electrician to ensure safety.
Doors and windows complete your shed’s functionality. Standard exterior doors work well for shed entrances—ensure proper threshold and weatherstripping to prevent water infiltration. Windows improve natural lighting and ventilation. Install windows with proper flashing to prevent leaks. Operable windows provide cooling during warm months without requiring electricity.
Storage solutions maximize your shed’s utility. Wall-mounted shelving, pegboards, and hooks organize tools and supplies efficiently. Plan storage during the design phase—dedicated wall space for shelving prevents clutter. Heavy items should mount low to prevent tipping. Secure large items to walls to prevent accidents if someone brushes against them.
Frequently Asked Questions
Do I need a building permit for my shed?
Permit requirements vary by jurisdiction. Many areas exempt sheds under 200 square feet, but setback distances, height limits, and foundation specifications still apply. Contact your local building department before starting—a brief conversation clarifies requirements and prevents expensive corrections later. Permits typically cost $50-200 and protect your investment through documentation and inspections.
What’s the best foundation type for my climate?
Frost depth determines foundation requirements. Consult your local building department for your area’s frost depth—this prevents settling and structural damage. Concrete piers work well in most climates, providing excellent drainage and frost protection. Concrete slabs suit temperate climates with minimal freeze-thaw cycles. Gravel beds with pressure-treated runners work for temporary structures but don’t provide long-term protection in harsh climates.
How long does a shed typically last?
Well-constructed sheds last 20-50 years depending on materials and maintenance. Pressure-treated framing resists rot for 25-40 years. Metal roofing lasts 40-70 years. Asphalt shingles last 15-25 years and require replacement at the end of their lifespan. Regular maintenance—repainting every 5-7 years, gutter cleaning, and roof inspections—dramatically extends longevity. Address small problems immediately before they become expensive repairs.
Can I build a shed myself without experience?
Yes, shed building is very achievable for beginners. Start with a simple design—rectangular gable roof sheds are forgiving and straightforward. Take your time learning each step. Watch instructional videos, consult online resources, and don’t hesitate to ask experienced builders for guidance. Most importantly, prioritize safety—use proper protective equipment and follow all tool manufacturer instructions. Consider hiring professionals for specialized work like electrical installation if you’re uncomfortable with that aspect.
What tools do I absolutely need to own versus rent?
Invest in a quality circular saw, power drill, level, and tape measure—these tools pay for themselves across multiple projects. Rent specialized equipment like scaffolding, pneumatic nail guns, and roofing nailers. Rental costs typically run $20-50 per item for a weekend, making rentals economical compared to purchase prices. Calculate whether you’ll use tools on future projects before buying expensive equipment.
How do I prevent moisture and mold in my shed?
Proper ventilation prevents moisture accumulation. Install soffit vents at the eave and ridge vents at the roof peak, allowing air circulation through the attic space. Wall vents near the floor improve ground-level ventilation. Ensure your foundation and roof prevent water entry—water infiltration creates ideal mold conditions. If storing items, use moisture-absorbing products like silica gel or calcium chloride dehumidifiers. Inspect regularly for signs of moisture or mold growth.
What’s the most common shed building mistake?
Inadequate foundation preparation causes more problems than any other single factor. Uneven, improperly compacted, or frost-vulnerable foundations create cascading structural problems throughout the project. Invest time and resources in proper foundation work—this prevents settling, wall cracks, door misalignment, and roof stress. A level, solid foundation is worth every penny and hour invested.
Building your own shed represents an investment in self-reliance, property value, and personal satisfaction. By following established building practices, respecting local codes, and prioritizing quality over speed, you’ll create a structure that serves reliably for decades. Your shed becomes a testament to careful planning, honest work, and attention to detail. Start your project with confidence, knowing that thousands of first-time builders have successfully completed sheds using these same methods and principles.


