How to Build a Shed: Expert-Backed Guide
Building a shed is one of the most rewarding DIY projects you can undertake. Whether you need extra storage for garden tools, a workshop space, or a backyard retreat, constructing your own shed gives you complete control over design, layout, and functionality. This comprehensive guide walks you through every stage of the process, from initial planning and site preparation to framing, roofing, and finishing touches.
Unlike hiring a contractor, building a shed yourself saves thousands of dollars while developing valuable construction skills. You’ll learn proper building techniques, understand structural principles, and gain confidence in tackling future home improvement projects. With careful planning, the right materials, and attention to detail, you can create a durable structure that serves your needs for decades.
Planning Your Shed Project
Successful shed construction begins with thorough planning. Before you purchase a single board, determine your project’s scope, budget, and timeline. Start by asking yourself what you’ll use the shed for—storage, workspace, hobby room, or recreational space. This decision directly impacts your design choices, ventilation requirements, and interior layout.
Create detailed sketches or use free design software to visualize your shed. Consider your local climate, prevailing wind patterns, and seasonal weather conditions. These factors influence roof pitch, wall thickness, and material selection. Check your area’s building codes and zoning regulations; many municipalities require permits for structures over a certain size, typically 120-200 square feet depending on jurisdiction.
Consult your local building department or visit the International Code Council (ICC) website for regional building code requirements. You may also need to verify property line setbacks and obtain written permission from neighbors if the shed will be near shared boundaries. Investing time in planning prevents costly mistakes and ensures compliance with local regulations.
Establish a realistic budget by researching material costs in your area. A basic 10×12 foot shed typically costs $2,000-$5,000 in materials, while premium finishes can exceed $10,000. Factor in tool rental, permits, and unexpected expenses. Create a detailed material list and timeline—most amateur builders spend 40-80 hours on a standard shed.
Choosing the Right Location and Size
Location determines your shed’s functionality, accessibility, and longevity. Choose a spot with good drainage to prevent water accumulation around the foundation. Avoid low-lying areas where rainwater collects or where snowmelt pools. The ideal location should be relatively level, though slight slopes aid drainage.
Consider sunlight exposure and proximity to your home. If you’re building a workshop, position it where you can easily access utilities and run electrical service. For storage sheds, place them conveniently near the areas where you’ll retrieve items most frequently. Think about aesthetics too—your shed should complement your home’s appearance and landscaping.
Size depends on your needs and available space. Small sheds (8×10 feet) work for basic tool storage. Medium sheds (10×12 or 10×14 feet) accommodate workshop activities or recreational equipment. Larger structures (12×16 feet or bigger) provide room for hobbies, vehicles, or multiple storage zones. Remember that larger buildings require more robust framing, stronger foundations, and potentially additional permits.
Measure your lot carefully and verify setback requirements. Most codes require sheds to be positioned at least 5-10 feet from property lines and 10-15 feet from dwelling units. Check for underground utilities before selecting your site. Call your local utility locating service (typically “Call Before You Dig”) to identify buried gas lines, electrical conduits, and water pipes.
Foundation and Site Preparation
A proper foundation is absolutely critical for shed longevity. Poor foundation work causes structural settling, water damage, and premature deterioration. Your foundation options include concrete slabs, pier blocks, treated skids, and concrete footings. Each has advantages and limitations depending on climate and ground conditions.
Concrete Slab Foundation: The most durable option for permanent structures. Excavate 4-6 inches deep, add gravel base for drainage, install perimeter frost walls below the frost line (typically 2-4 feet deep in cold climates), and pour 4-6 inches of reinforced concrete. This method requires more labor but provides excellent longevity.
Concrete Pier Blocks: Affordable and suitable for warmer climates with stable soil. Space blocks 4 feet apart on a level, compacted gravel base. This method allows air circulation underneath, reducing moisture problems. Verify frost line depth in your area—blocks must sit below the frost line to prevent frost heave.
Pressure-Treated Skids: Budget-friendly option using 4×6 or 6×6 treated timber runners. Place them on gravel or concrete blocks, ensuring level installation. This method works well for temporary or portable structures but requires periodic inspection for rot and insect damage.
Before construction, clear vegetation and debris from the site. Remove topsoil and grass over the foundation area. Establish a level, compacted base—use a laser level or transit to ensure proper drainage slope (1/8 inch per foot away from the structure). Poor site preparation leads to uneven settling and structural problems, so take time to get this right.
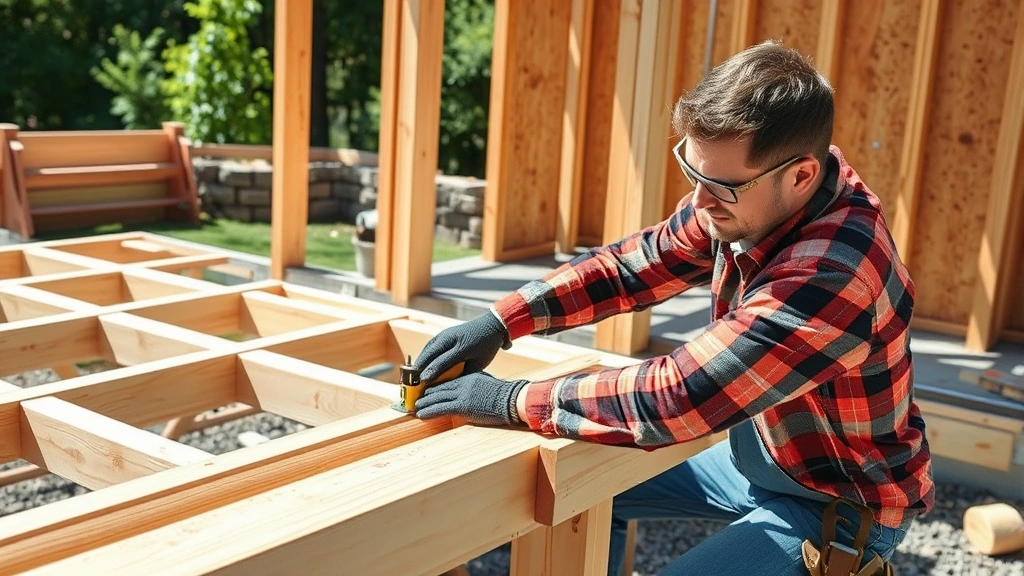
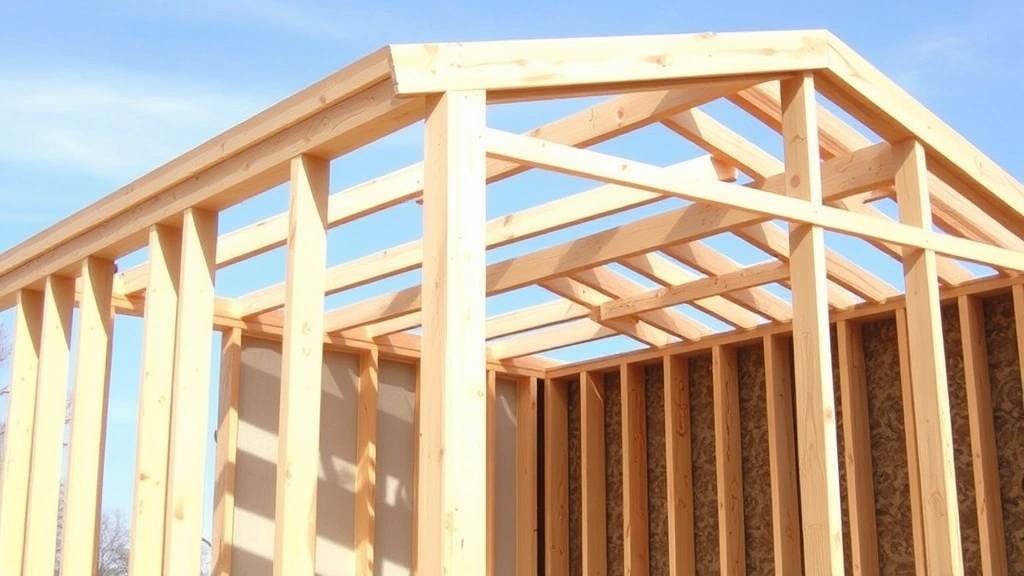
Building the Frame Structure
Framing creates your shed’s structural skeleton. Standard construction uses 2×4 lumber for walls, though colder climates may require 2×6 lumber for better insulation. Roof rafters are typically 2×4 or 2×6 depending on span and snow load requirements.
Wall Frame Assembly: Construct wall sections on the ground, then raise them into position. Each wall consists of vertical studs (usually 16 inches on center), top and bottom plates, and horizontal blocking. Cut studs to length—typically 92 5/8 inches for 8-foot walls accounting for plate thickness. Use a framing nailer or 3-inch nails to secure studs to plates.
Install corner bracing to prevent racking (diagonal shifting). Traditional methods use 1×4 diagonal bracing or 1×8 let-in bracing notched into studs. Modern construction often uses metal bracing or plywood sheathing for lateral support. Ensure all corners are perfectly square by measuring diagonals—they should be equal length.
Roof Framing: Rafters transfer roof weight to walls and must be properly sized for your snow load. Consult American Wood Council span tables to determine proper rafter dimensions and spacing. Common roof pitches are 4/12 (moderate slope) or 6/12 (steeper slope). Steeper roofs shed snow better but require taller walls and more materials.
Install collar ties between opposing rafters to prevent spreading. Space collar ties in the upper third of the roof triangle. Add ceiling joists if you’re creating a finished interior; these also prevent rafter spreading. Verify all framing connections are secure before proceeding to roofing.
Installing Walls and Roofing
Once framing is complete and square, install wall sheathing. Exterior plywood or oriented strand board (OSB) provides structural bracing and a base for siding. Use 7/16-inch minimum thickness and space nails 6 inches on edges and 12 inches in field. Leave 1/8-inch gaps between sheets for expansion.
Install house wrap or building paper over sheathing before adding siding. This creates a weather-resistant barrier that allows interior moisture to escape while blocking external water infiltration. Staple paper with 6-inch overlap and seal seams with appropriate tape.
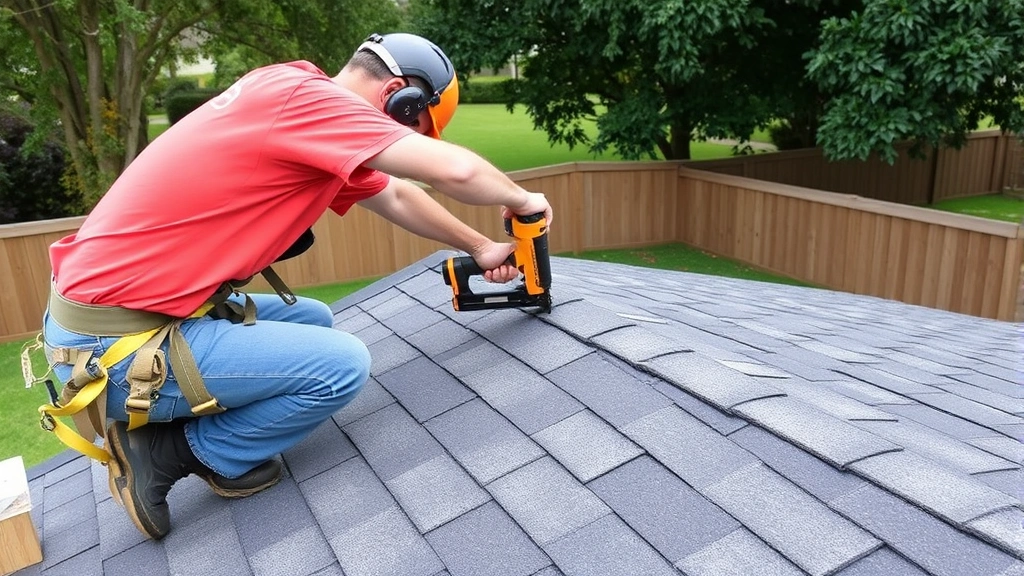
Roofing Installation: Start with underlayment—either traditional roofing felt or modern synthetic underlayment. Synthetic options offer better durability and are easier to install. Staple underlayment with 6-inch overlap, starting at the eaves and working upward.
Install drip edge along eaves and gables before adding shingles. Drip edge directs water away from fascia and prevents rot. For asphalt shingles, nail them with 4 nails per shingle, positioned per manufacturer specifications. Start at the eave line and work upward, offsetting shingle joints. Ensure proper ventilation by installing soffit vents and roof vents to prevent moisture accumulation in the attic space.
Refer to National Roofing Contractors Association guidelines for proper installation techniques. Metal roofing requires different fastening methods—use rubber-washered fasteners and follow manufacturer specifications precisely. Poor roofing installation leads to leaks, the most common shed failure mode.
Doors, Windows, and Finishing
Doors and windows add functionality and character to your shed. Standard shed doors are 36 inches wide for single doors or 72 inches for double doors. Frame door openings with doubled headers to support roof weight above. Headers must span the opening plus 12 inches on each side minimum.
Install prehung doors from quality manufacturers—they come already hung in frames, simplifying installation. Shim frames level and plumb, then secure with shims and fasteners. Ensure doors swing freely and latch securely. Add weatherstripping and a threshold to prevent water infiltration at the base.
Windows improve ventilation, natural light, and aesthetics. Position windows on walls opposite each other to enable cross-ventilation. Install them at least 6 feet above grade to reduce accidental breakage. Use caulk and weatherstripping around window frames to seal gaps.
Interior finishing depends on your shed’s purpose. For storage, simply stain or paint the framing and add shelving. For workshops, consider insulation, drywall, flooring, and electrical service. DIY basement finishing techniques often apply to shed interiors. Add adequate lighting—at least one overhead fixture plus task lighting for work areas.
Exterior finishing protects wood from weathering. Paint or stain all exposed wood within the first year of construction. Quality exterior paint extends wood life significantly. For siding, consider durable options like metal, vinyl, or composite materials that require minimal maintenance compared to wood.
Install gutters and downspouts to direct roof water away from the foundation. Gutters prevent water damage to siding and foundation while protecting soil around the structure. Ensure downspouts extend at least 4 feet from the building or direct water to drainage systems.
Frequently Asked Questions
Do I need a permit to build a shed?
Most jurisdictions require permits for sheds over 120-200 square feet or those with electrical service. Check your local building department’s requirements. Permits ensure your structure meets safety codes and zoning regulations. Unpermitted structures can complicate future property sales and may be ordered removed.
What’s the best foundation for a shed in cold climates?
Concrete frost footings are essential in cold climates where frost heave occurs. Footings must extend below the frost line—typically 3-4 feet in northern regions. Concrete piers on grade without below-frost-line support will shift as soil freezes and thaws, causing structural damage.
How much does it cost to build a basic 10×12 shed?
Material costs typically range $2,000-$4,000 for a basic shed with standard framing and asphalt shingles. Premium finishes, insulation, and electrical service increase costs to $5,000-$10,000 or more. Labor costs depend on whether you hire contractors or complete the project yourself.
Can I build a shed on my property line?
No, building codes require setbacks—typically 5-10 feet from property lines. Some jurisdictions allow reduced setbacks with neighbor written consent. Always verify your specific local requirements before breaking ground. Violating setback requirements can result in fines or orders to remove the structure.
What roof pitch should I use?
A 4/12 pitch (4 inches rise per 12 inches run) works for moderate climates with reasonable snow loads. Steeper pitches (6/12 or 8/12) are better for snowy regions and shed snow more readily. Flatter pitches are acceptable in warm, dry climates. Consider your local snow load requirements—consult building code resources for your region’s specifications.
Should I insulate my shed?
Insulation depends on your shed’s purpose and climate. Storage sheds don’t require insulation. Workshop or hobby spaces benefit from insulation for temperature control and comfort. Cold climates need insulation to prevent moisture condensation and frost accumulation. Use 3.5-inch fiberglass batts (R-13) or spray foam (R-6 per inch) between studs.
What’s the best siding material for a shed?
Wood siding offers attractive appearance but requires regular maintenance. Vinyl siding is affordable and maintenance-free. Metal siding is durable and reflects heat well. Composite materials combine appearance with low maintenance. Choose based on your climate, budget, and aesthetic preferences. Like other DIY projects, material selection impacts long-term satisfaction.
How do I prevent moisture problems in my shed?
Proper drainage is essential—ensure the foundation slopes away from the structure and gutters direct water away. Install soffit and roof vents for air circulation. Use building paper or house wrap as a weather barrier. Avoid storing items directly on the floor; use shelving to allow air circulation. In humid climates, consider a vapor barrier under flooring and dehumidification.
Building a shed transforms your property while developing valuable construction skills. Whether you’re creating storage space or a personal retreat, following these expert-backed guidelines ensures a structurally sound, long-lasting structure. Take time during planning and site preparation—these early stages determine your project’s success. With proper execution, your shed will provide years of reliable service and become a source of pride in your home improvement journey.


