Canning Jalapenos: Safe Steps from a Master Preserver
Canning jalapeno peppers at home transforms your harvest into shelf-stable condiments that deliver authentic flavor year-round. Whether you’re preserving peppers from your garden or sourcing fresh jalapenos from local farmers markets, mastering the canning process ensures food safety while capturing that perfect heat and tang. This comprehensive guide walks you through every step, from selecting the right peppers to sealing your jars with confidence.
Jalapenos are ideal candidates for home canning because their natural acidity and firm flesh create an environment where harmful bacteria struggle to survive. Unlike low-acid vegetables that require pressure canning, jalapenos thrive with water bath canning methods, making this project accessible to beginners while maintaining professional-quality results. Understanding proper techniques protects your family’s health while delivering restaurant-quality preserved peppers for tacos, nachos, pizza, and countless other dishes.
Essential Equipment and Supplies
Success in canning jalapenos begins with gathering proper equipment that meets food safety standards. You’ll need a large stainless steel pot for your water bath canner—typically 21-23 quarts with a fitted rack that holds jars above the boiling water. The rack prevents direct contact between glass jars and the hot pot bottom, which could cause thermal shock and breakage. A quality canning pot should have handles for safe transport and a lid for efficient heating.
Mason jars are the standard choice for home canning, available in various sizes from half-pint (8 oz) to quart (32 oz) capacities. For jalapenos, half-pint and pint jars work exceptionally well, offering convenient portions for most households. You’ll also need two-piece canning lids—a flat metal lid with a rubber compound that creates the seal, plus a threaded metal band that holds the lid in place during processing. Purchase new lids each season, as the rubber compound loses effectiveness after one use. Bands can be reused indefinitely if undamaged.
Additional essential tools include a jar lifter (specialized tongs that safely grip hot jars), a bubble remover and headspace measuring tool combo, a wide-mouth funnel for filling jars, and a clean kitchen towel. Many retailers sell complete canning kits containing these basics. You’ll also need quality vinegar (5% acidity), pickling salt or kosher salt, fresh garlic, spices, and fresh jalapeno peppers. Visit the National Center for Home Food Preservation for comprehensive equipment guidance and safety protocols.
Selecting and Preparing Jalapeno Peppers
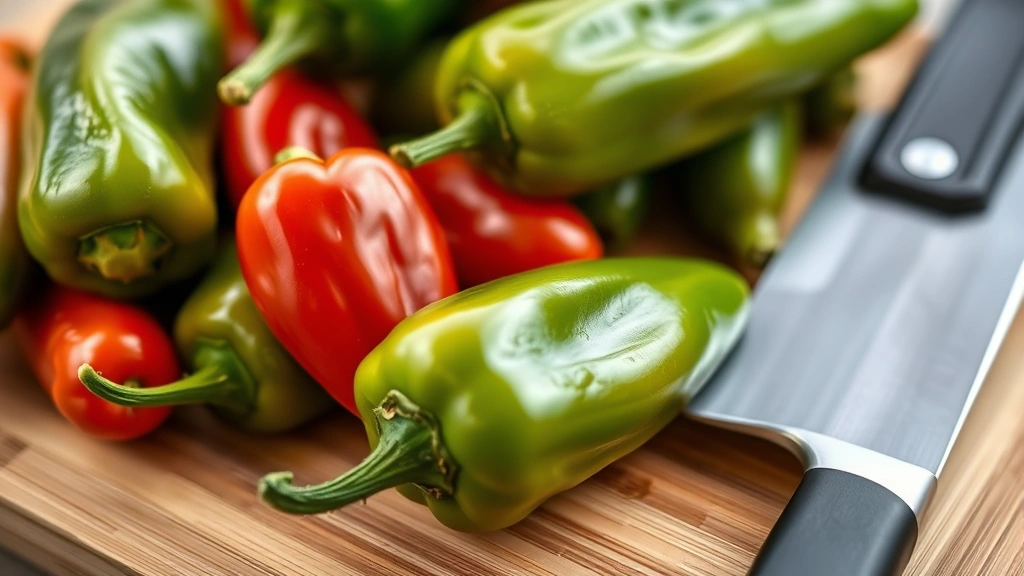
Choosing the right peppers establishes the foundation for your canning success. Select firm, unblemished jalapenos with vibrant green or red coloring, depending on your preference. Green jalapenos offer classic spicy heat, while red jalapenos (fully ripened specimens) deliver slightly sweeter undertones with comparable heat levels. Avoid soft, wrinkled, or discolored peppers, as these indicate deterioration that compromises both flavor and safety.
Wash all peppers thoroughly under cool running water, using a soft brush to remove dirt and debris. Pat them dry with clean towels to prevent excess moisture in your jars. Decide whether you’ll leave peppers whole, halved, or sliced—whole peppers create impressive presentation and remain firmer during processing, while halved or sliced peppers maximize flavor extraction and fit better in smaller jars. If leaving whole, poke each pepper 2-3 times with a sterilized needle or skewer to allow brine penetration and prevent floating.
For whole peppers, trim the stem end carefully, leaving just a small portion for visual appeal. Remove seeds only if you prefer milder results, though most canning enthusiasts keep seeds intact for authentic jalapeno heat. Work with clean hands or wear disposable gloves when handling peppers—the capsaicin oils can irritate skin and eyes. Wash hands thoroughly after handling, and avoid touching your face. Prepare peppers just before filling jars to maintain freshness and prevent oxidation that dulls their vibrant color.
Consider canning dill pickles using similar water bath methods if you want to expand your preserved vegetable collection. The techniques transfer beautifully across different vegetables.
Creating the Perfect Pickling Brine
The brine—a carefully balanced mixture of vinegar, water, salt, and spices—creates the acidic environment essential for safe canning. The standard ratio combines 5% acidity vinegar with water in proportions that maintain pH levels below 3.8, preventing botulism growth. Most recipes use equal parts vinegar and water, though some prefer slightly more vinegar for tangier results.
For a basic brine yielding approximately 4 cups (enough for 4-5 pint jars), combine 2 cups white vinegar or apple cider vinegar, 2 cups water, and 2 tablespoons pickling salt in a large stainless steel pot. Heat the mixture to a rolling boil, then reduce heat to maintain a gentle simmer. The salt dissolves completely, creating a clear brine that won’t cloud your jars. Some preservers add sugar (1-2 tablespoons) to balance vinegar’s sharp acidity, creating a subtle sweetness that complements the jalapeno’s natural heat.
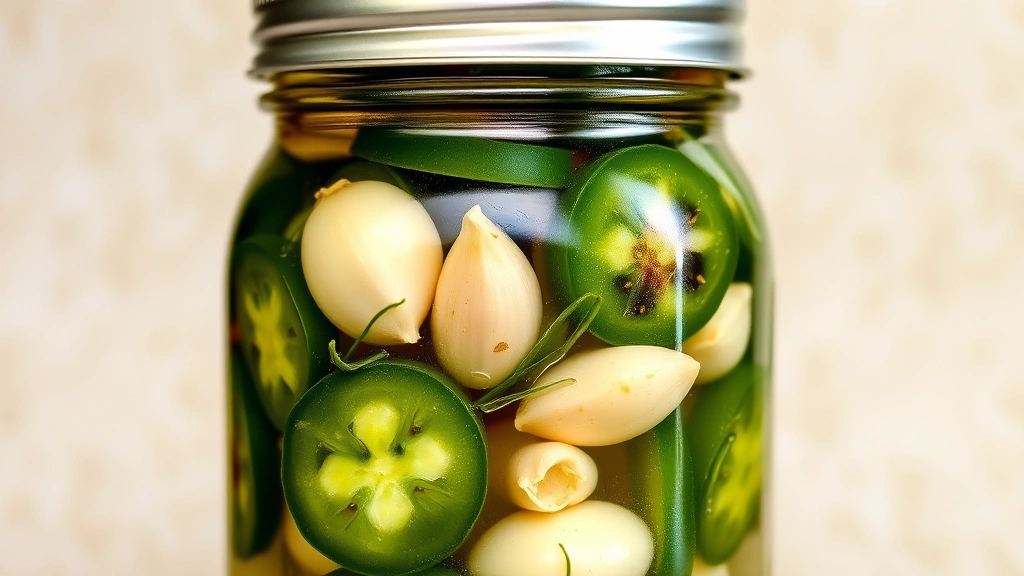
Aromatic additions transform basic brine into signature preserves. Garlic cloves (4-6 per jar) add savory depth, while mustard seeds, coriander seeds, and black peppercorns contribute complexity. Fresh dill, cilantro, or oregano provide herbal notes—add fresh herbs directly to jars before filling with peppers. Red pepper flakes intensify heat, while bay leaves add subtle earthiness. Prepare these additions before beginning the filling process, arranging them within easy reach. Keep your prepared brine simmering gently throughout the filling and processing stages to ensure proper jar temperatures.
Water Bath Canning Process
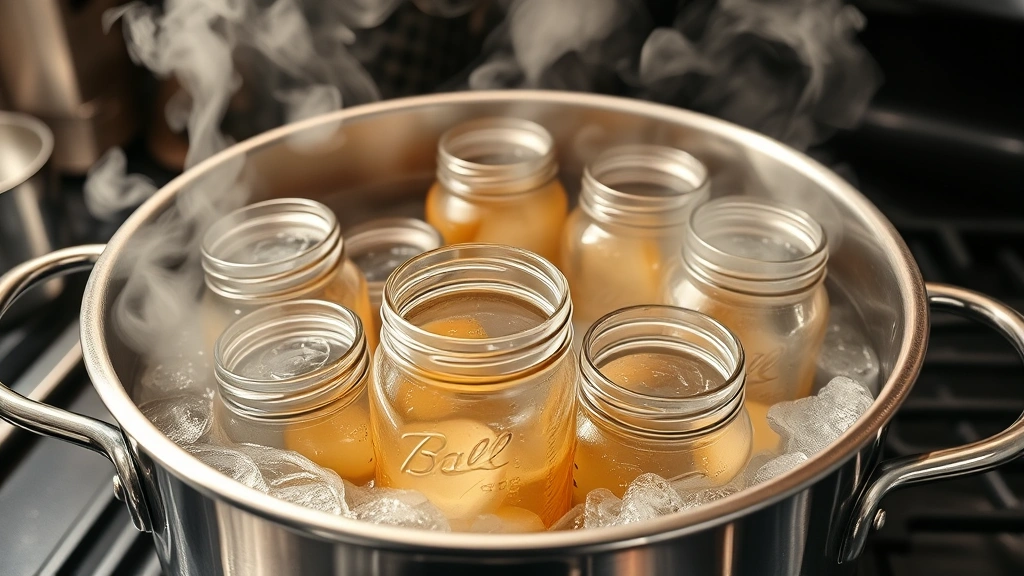
Water bath canning relies on sustained heat application to destroy microorganisms and create vacuum seals that preserve food safely. Begin by filling your canning pot with enough water to cover jars by 1-2 inches when loaded—typically 3-4 gallons. Heat this water to a rolling boil before adding jars, allowing adequate processing time at temperature.
Sterilize jars by running them through a hot dishwasher cycle or boiling them for 10 minutes before use. Prepare lids by placing them in a small pot of hot (not boiling) water—this softens the rubber compound, ensuring proper sealing. Remove jars from the dishwasher or boiling water using your jar lifter, placing them on a clean towel. They should remain hot during filling to prevent thermal shock when filled with hot brine.
Working quickly, place your wide-mouth funnel in the first jar and add your chosen aromatics (garlic, spices, herbs). Pack peppers tightly but not crushed into the jar, filling to approximately half-full. Top with remaining peppers until reaching proper headspace—the gap between jar contents and the rim. For jalapenos, maintain ½-inch headspace, which allows room for expansion during processing without forcing contents through the seal.
Using a bubble remover tool, gently slide it around the jar’s interior to release trapped air bubbles that could compromise sealing. Remove the funnel and wipe the jar’s rim thoroughly with a clean, damp cloth—any residue prevents proper seal formation. Place your prepared lid on the jar, then hand-tighten the band until snug but not forcefully tight. The band should be fingertip-tight, allowing steam to escape during processing. Overtigthening prevents air release and causes seal failures.
Using your jar lifter, carefully place filled jars onto the rack in your boiling water bath, ensuring jars don’t touch each other or the pot sides. Once all jars are positioned, the water should return to a rolling boil. Begin timing your processing at this point—jalapeno peppers typically require 10 minutes at a rolling boil for pint jars (add 5 additional minutes for quarts). Maintain a vigorous boil throughout processing; if water stops boiling, restart your timer. Consult the University of Georgia Extension for detailed processing time adjustments based on your altitude.
Cooling, Sealing, and Storage
After completing your processing time, turn off the heat and allow jars to rest in the hot water for 5 minutes before removal. This prevents sudden temperature changes that cause lid failures. Using your jar lifter, carefully remove jars and place them upright on a clean towel, spacing them several inches apart to allow air circulation and proper cooling. Resist the urge to tighten bands or move jars during cooling—this interferes with seal formation.
As jars cool (typically 12-24 hours), you’ll hear the characteristic “ping” or “pop” sound as lids seal. This acoustic signal indicates successful vacuum formation—the cooling contents create negative pressure that pulls the lid down firmly onto the jar. After complete cooling, test seals by pressing the lid center. Properly sealed lids remain flat and don’t flex when pressed; any movement indicates seal failure requiring immediate refrigeration and prompt consumption.
Store sealed jars in a cool, dark location—a basement, pantry, or cabinet works perfectly. Avoid direct sunlight, which fades pepper color and degrades quality. Properly sealed and stored jalapenos maintain peak quality for 12-18 months, though they remain safe indefinitely if seals remain intact. Label each jar with contents and canning date using waterproof markers or adhesive labels. This practice prevents confusion and helps you rotate stock using the first-in, first-out principle.
If you’re interested in expanding your preservation skills, explore how to can corn or review our DIY Nest Hub blog for additional food preservation techniques.
Unsealed jars should be refrigerated immediately and consumed within 3-4 weeks. Never attempt to reprocess failed jars using the same lids—instead, refrigerate and use within a short timeframe. Some preservers prefer this outcome anyway, creating fresh-tasting refrigerated preserves with slightly different characteristics than shelf-stable versions.
Troubleshooting Common Problems
Understanding common canning challenges helps you identify and prevent problems in future batches. If jars fail to seal, potential causes include improper headspace (too much or too little), insufficient processing time, contaminated jar rims, or defective lids. Always use new lids each season and inspect them for damage before use. Verify your processing time matches your altitude—USDA guidelines provide altitude adjustment charts essential for accurate processing.
Floating peppers occur when whole peppers remain less dense than surrounding brine. Poking steam vents in whole peppers allows air escape, reducing buoyancy. Alternatively, slice peppers or pack them more densely to minimize floating. While floating doesn’t indicate spoilage, many people prefer the aesthetic of peppers remaining submerged throughout storage.
Cloudy brine typically results from mineral content in water or salt additives. Use distilled water if your tap water is particularly hard, and select pickling salt specifically formulated without anti-caking agents. Cloudiness doesn’t affect safety or taste but may concern some preservers. Cloudiness caused by harmless sediment settles over time, leaving clear brine above.
Soft peppers indicate insufficient processing time or improper heat application. Ensure your water bath maintains a vigorous rolling boil throughout the entire processing period. Some softening is natural due to heat exposure, but properly processed peppers should retain firmness and crispness. If peppers consistently soften excessively, increase processing time slightly in future batches.
Off-flavors or fermentation signs suggest contamination or seal failure. Discard any jars exhibiting cloudiness within the peppers themselves, mold growth, spurting liquid upon opening, or unpleasant odors. These signs indicate bacterial growth and potential toxin development, making contents unsafe for consumption. Proper technique prevents these issues—maintain cleanliness throughout the process and follow established guidelines precisely.
Frequently Asked Questions
Can I use fresh jalapenos that haven’t been refrigerated?
Yes, room-temperature peppers work fine for canning. However, recently harvested or chilled peppers generally produce superior results with better color retention and texture. If using peppers that have been sitting out, simply wash and prepare them normally. Temperature doesn’t significantly affect the canning process, though very warm peppers may cook slightly faster.
What’s the difference between water bath and pressure canning for jalapenos?
Jalapenos are acidic enough (pH below 4.0) to safely preserve using water bath canning, which heats jars to 212°F. Pressure canning reaches 240°F and is unnecessary for high-acid foods like jalapenos. Water bath canning is simpler, requires less equipment, and works perfectly for peppers. Reserve pressure canning for low-acid vegetables like beans or corn.
How do I adjust processing times for high altitudes?
At altitudes above 1,000 feet, water boils at lower temperatures, requiring increased processing times. For every 1,000 feet above sea level, add 1 minute to processing times (round up for partial thousands). At 3,000 feet, for example, add 3 minutes to the standard 10-minute processing time. The National Center for Home Food Preservation provides detailed altitude charts.
Can I reuse canning lids?
No—never reuse flat metal lids, as the rubber compound loses its sealing ability after one use. Metal bands are reusable indefinitely if undamaged. Always purchase new lids before each canning season. This minor expense ensures reliable seals and food safety.
What vinegar should I use for canning jalapenos?
Use only vinegars with 5% acidity—white distilled vinegar and apple cider vinegar both work excellently. Avoid specialty vinegars (balsamic, rice vinegar) unless specifically formulated for canning with verified 5% acidity. Lower-acidity vinegars don’t create sufficiently acidic environments for safe preservation.
How long do canned jalapenos last?
Properly sealed and stored canned jalapenos remain safe indefinitely, though quality peaks within 12-18 months. After this period, flavor may fade and texture may soften, but the product remains safe if seals remain intact. Store in cool, dark conditions away from temperature fluctuations and direct sunlight.
Can I add fresh herbs directly to jars before canning?
Yes—fresh dill, cilantro, oregano, and other herbs add wonderful flavor. Add them directly to jars before filling with peppers. Avoid excessive quantities, which may cloud brine or introduce unwanted flavors. Generally, 1-2 sprigs per pint jar provides optimal flavor enhancement.
What should I do if my jars don’t seal?
Unsealed jars must be refrigerated immediately and consumed within 3-4 weeks. Don’t attempt to reprocess using the same lids—instead, either refrigerate the jar or transfer contents to a new jar with a fresh lid and reprocess. Many people prefer refrigerated versions anyway for their fresher taste.


