How to Carve a Rib Roast: Chef’s Expert Tips Inside
Carving a rib roast is both an art and a practical skill that transforms a beautiful centerpiece into perfectly portioned slices for your guests. Whether you’re preparing a holiday dinner or a special family gathering, mastering the technique of carving a rib roast elevates your hosting abilities and ensures each guest receives an evenly cut, professionally presented portion. This comprehensive guide will walk you through every step of the process, from selecting the right tools to executing precise cuts with confidence.
A properly carved rib roast isn’t just about aesthetics—it affects how your guests experience the meat’s tenderness, juiciness, and flavor. When you cut correctly, you preserve the natural juices within each slice and maintain the structural integrity of the roast. The difference between a haphazardly sliced roast and one carved with precision is immediately apparent on the plate and in every bite.
Essential Tools for Carving
The foundation of successful carving begins with having the right equipment. Unlike general kitchen knives, carving requires specialized tools designed specifically for slicing cooked meat. Your toolkit should include a sharp carving knife, a carving fork, a cutting board with a well to catch juices, and a sharpening steel to maintain your blade throughout the process.
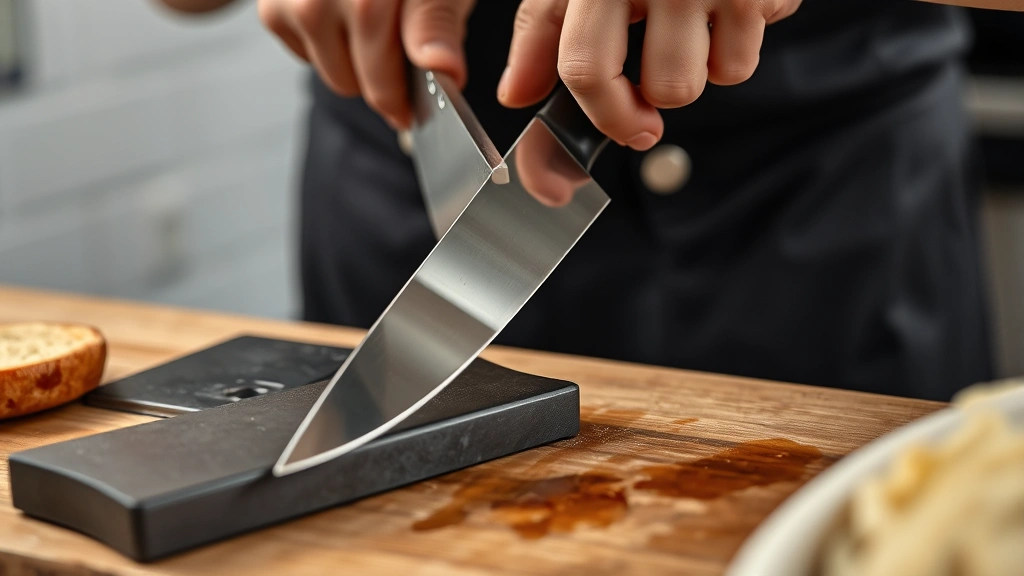
A quality carving knife is your most important investment. Look for a blade between 8 to 10 inches long with a narrow, sharp edge that tapers to a fine point. The blade should be flexible enough to follow the natural contours of the roast but rigid enough to make clean cuts without bending excessively. High-carbon stainless steel offers an excellent balance of sharpness retention and ease of maintenance. According to USDA food safety guidelines, keeping your carving knife sharp actually promotes safer food handling by reducing the risk of slips and accidents.
The carving fork serves a critical function—it stabilizes the roast while you slice, preventing movement that could cause uneven cuts or accidents. A two-pronged fork with a sturdy handle allows you to maintain firm control over the meat while your knife works. The fork’s prongs should be long enough to penetrate the roast securely without damaging the surface you’ve worked hard to achieve during cooking.
Your cutting surface matters considerably. A dedicated carving board with a well or moat around the perimeter catches valuable meat juices that you can later use for gravy or sauce. The board should have a non-slip base to prevent sliding during carving. Many professional boards include a groove system that channels liquids directly into a collection area, making cleanup easier and waste reduction possible.
A sharpening steel is your maintenance tool. Unlike a sharpener that removes metal, a steel realigns the knife’s edge between uses. Before carving, spend 30 seconds drawing your blade along the steel at approximately 15-degree angles on each side. This simple step dramatically improves cutting performance and ensures each slice is clean rather than torn.
Preparation and Resting
Before you even approach the carving board, your roast needs proper preparation and adequate resting time. This step is absolutely non-negotiable for achieving the best results. After removing your rib roast from the oven, resist the urge to carve immediately—this is when most home cooks make their biggest mistake.
Resting allows the meat’s muscle fibers to relax and reabsorb the juices that have been driven toward the surface during cooking. A rib roast should rest for at least 15 to 20 minutes, depending on its size. A larger roast—say, 8 pounds or more—benefits from 20 to 30 minutes of resting. During this time, wrap the roast loosely with foil to maintain warmth without trapping excessive steam, which could soften the exterior crust you’ve developed.
Temperature control during resting is important. Keep your roast in a warm location, away from cold drafts or open windows. A warming drawer set to 140 degrees Fahrenheit is ideal, though a turned-off oven with the door cracked open works perfectly well. The goal is to maintain the roast’s temperature while allowing internal redistribution of juices.
While your roast rests, prepare your carving station. Ensure your knife is sharp, your fork is within reach, and your cutting board is in place. Arrange your serving platter nearby so you can transfer slices immediately after cutting. This preparation phase also gives you time to mentally rehearse the carving technique, which builds confidence and reduces hesitation during the actual process.
Examine your roast before beginning. Identify the rib bones, the meat grain direction, and any fat caps. Understanding your roast’s anatomy helps you make intentional cuts rather than uncertain ones. The ribs run perpendicular to the meat grain on most rib roasts, which is important information for your cutting strategy.
Step-by-Step Carving Technique
Now that your roast has rested and your tools are ready, you’re prepared for the actual carving. This process involves several distinct steps that work together to produce professional-quality slices.
Step One: Position and Stabilize
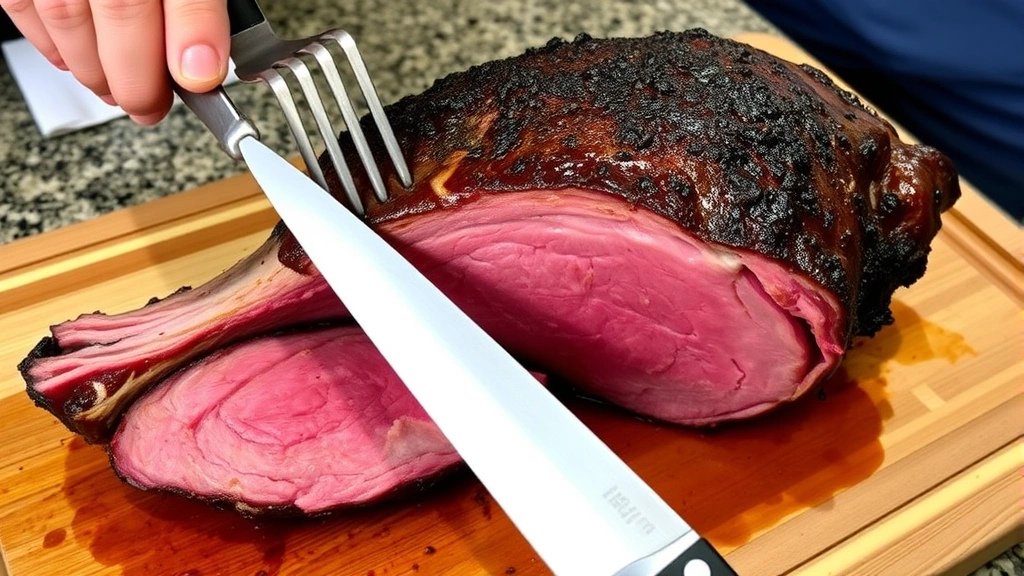
Place your roast on the carving board with the ribs facing you. This positioning gives you the best access to the meat and allows gravity to assist with juice drainage. Insert your carving fork firmly into the upper portion of the roast, positioning it between the ribs if possible. The fork should be deep enough to provide solid control but not so deep that it damages the meat you’re about to slice.
Step Two: Remove the Meat from the Bones
Begin by making a cut along the outer edge of the ribs, where the meat meets the bone. This cut should be about a quarter-inch away from the bone surface, running parallel to the rib structure. Use long, smooth strokes rather than sawing motions—this produces cleaner cuts and better-looking slices. The knife should do the work; don’t force it through the meat with excessive pressure.
Once you’ve made the initial cut along the ribs, carefully separate the entire meat section from the bone structure. This creates a large boneless piece that’s much easier to slice than trying to work around individual ribs. Place this meat section on your cutting board with the grain running left to right (perpendicular to your body).
Step Three: Slice Against the Grain
This is the crucial step that separates professional carving from amateur attempts. Always cut perpendicular to the meat grain—never parallel to it. Cutting against the grain shortens the muscle fibers, making each slice more tender. If you cut parallel to the grain, you’re serving long muscle fibers that can feel chewy, regardless of how well the roast was cooked.
For a rib roast, this typically means slicing from top to bottom, creating slices roughly half to three-quarters of an inch thick. Use smooth, deliberate strokes with your entire arm, not just your wrist. Your carving fork should maintain constant pressure on the meat to prevent movement. Each slice should require just one or two passes of the knife—if you’re sawing back and forth repeatedly, your knife needs sharpening.
Step Four: Maintain Consistent Thickness
Consistency in slice thickness is what distinguishes professional carving. Each slice should be approximately the same width, which requires developing a feel for the knife’s position and movement. Many chefs use the knife’s width as a guide, moving the blade forward by approximately the width of the previous slice before making the next cut. This creates a visual rhythm and ensures even cooking on the plate.
Step Five: Handle the Bones
After removing the main meat section, you’re left with the bone structure. Many chefs carve individual bones for presentation or guests who prefer them. Using your knife, carefully separate each rib bone, leaving a small amount of meat attached for visual appeal and additional flavor. These individual bones can be arranged artistically on the serving platter alongside the sliced meat.
Common Mistakes to Avoid
Understanding what not to do is just as valuable as knowing the correct technique. Avoiding these common pitfalls ensures your carving efforts produce excellent results.
Carving Too Soon
This is the number one mistake that ruins otherwise perfectly cooked roasts. Carving immediately after removing from the oven causes juices to run all over the carving board instead of remaining in the meat. These juices are flavor and moisture that should be in every slice. Patience during resting is non-negotiable.
Using a Dull Knife
A dull blade tears meat rather than slicing it cleanly. This creates an unappealing appearance and can affect how the meat feels in your mouth. Invest in a quality knife and maintain it properly. A quick pass with a sharpening steel before carving takes 30 seconds and makes an enormous difference.
Cutting With the Grain
Slicing parallel to the muscle fibers creates tough, chewy pieces. Always identify the grain direction before you start and commit to cutting perpendicular to it. If you’re unsure, examine the meat’s surface—the grain lines run in one direction and should be at a 90-degree angle to your knife’s path.
Inconsistent Slice Thickness
Varying slice thickness affects cooking on the plate and presentation. Thicker slices stay warmer longer while thin slices cool quickly. Aim for consistency, typically between half and three-quarters of an inch. Consistency also looks more professional and intentional.
Insufficient Stabilization
A roast that moves during carving produces uneven cuts and increases accident risk. Use your carving fork with firm pressure to prevent any shifting. The meat should be completely stable before your knife touches it.
Improper Tool Maintenance
Neglecting to sharpen or steel your knife before carving compounds every other mistake. A sharp knife is essential to every aspect of successful carving. This is one of the easiest problems to prevent—simply establish a routine of steeling your blade before you begin.
Serving and Presentation
How you present your carved roast influences your guests’ perception of the entire meal. Professional presentation doesn’t require complicated techniques—it simply requires thoughtful arrangement and attention to detail.
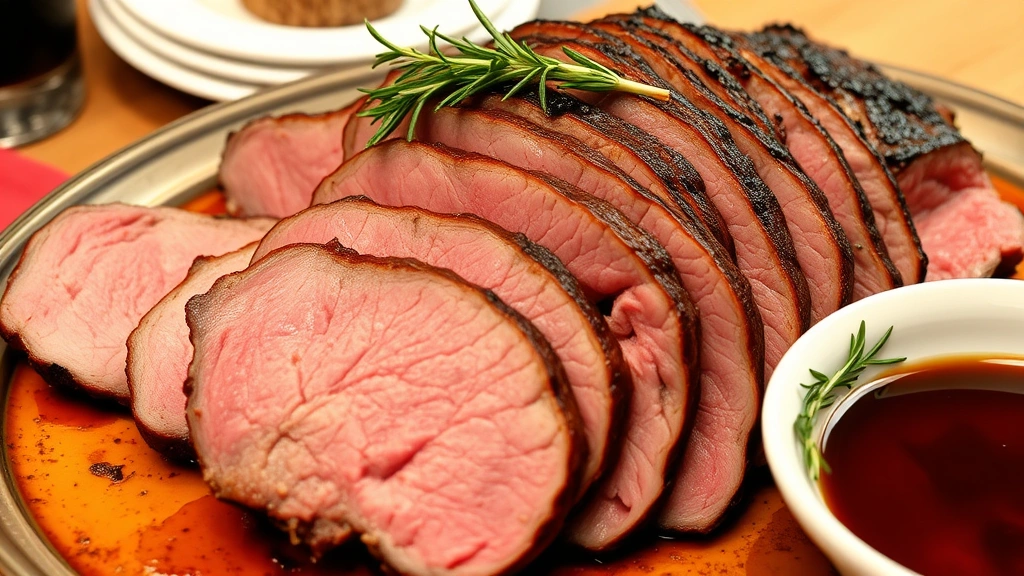
Arrange your slices on a warmed serving platter, slightly overlapping them in a fan-like pattern. This arrangement is visually appealing and makes serving easier for your guests. If you’ve carved individual bones, position them strategically around the platter to add visual interest and height variation.
Don’t discard the juices that accumulated during carving. Strain them through a fine-mesh sieve and serve them alongside the roast, either in a small gravy boat or drizzled over individual plates. These meat juices are liquid gold—they’re concentrated flavor that enhances every bite. Many chefs prefer serving them separately so guests can control how much they use.
Temperature maintenance is crucial for serving. Keep your serving platter warm by placing it in a 200-degree oven for a few minutes before arranging the meat. Alternatively, warm it with hot water, then dry it thoroughly before adding slices. Warm plates for individual servings as well—cold plates cool hot food rapidly and diminish the dining experience.
Garnish thoughtfully but simply. Fresh herbs like rosemary or thyme sprigs add color and aroma without overwhelming the roast’s natural beauty. A light dusting of fleur de sel (finishing salt) enhances flavor and adds visual texture. Avoid heavy sauces that obscure the meat’s color and your carving work.
Serve immediately after plating. A perfectly carved rib roast is best enjoyed while the meat is hot and the juices are flowing. Timing your carving to finish just as guests are seated ensures optimal temperature and freshness.
FAQ
How long should a rib roast rest before carving?
A rib roast should rest for 15 to 30 minutes depending on size. Smaller roasts (4-6 pounds) need 15 minutes, while larger ones (8+ pounds) benefit from 25-30 minutes. Resting allows muscle fibers to relax and reabsorb juices, ensuring moist, tender slices.
What angle should I hold my carving knife?
Hold your knife at approximately 90 degrees to the meat grain. If you’re uncertain about grain direction, look at the meat’s surface—the grain lines run in one direction and your knife should move perpendicular to these lines. This creates tender slices by shortening muscle fibers.
Can I carve a rib roast ahead of time?
While possible, carving just before serving is ideal for maintaining temperature and juice retention. If you must carve ahead, do so no more than 15-20 minutes early, and keep the slices covered loosely with foil in a warm location. Avoid refrigerating carved slices as this affects texture and temperature when reheated.
What’s the ideal thickness for rib roast slices?
Most chefs recommend slicing between half and three-quarters of an inch thick. This thickness provides a good balance between tenderness and structural integrity. Thinner slices are more tender but can feel fragile, while thicker slices are heartier but may feel less refined.
Should I remove the bones before or after carving?
Remove the meat from the bones first by making a cut along the rib edge, then separate the entire meat section. This boneless piece is much easier to slice uniformly. After slicing, you can carve individual bones from the rib structure for attractive plating.
How do I keep my carving knife sharp during the process?
Use a sharpening steel before you begin carving. During carving, if you notice the knife requiring more pressure or tearing meat, use the steel again for 20-30 seconds. A steel realigns the blade edge rather than removing metal, making it perfect for maintenance during use.
What should I do with the meat juices that accumulate?
Strain the juices through a fine-mesh sieve to remove any bone fragments or debris. Serve these concentrated meat juices separately in a gravy boat, allowing guests to drizzle them over their slices. These juices are flavorful and shouldn’t be wasted.
Is there a specific carving fork style I should use?
A traditional carving fork has two long prongs and a sturdy handle. The prongs should be long enough to penetrate the roast securely without damaging the meat surface. Ensure the handle is comfortable and provides good grip control, as you’ll be applying significant pressure to stabilize the meat.
Mastering the art of carving a rib roast transforms your entertaining abilities and impresses your guests with professional technique. By investing in quality tools, understanding proper technique, and avoiding common mistakes, you’ll consistently produce beautifully carved roasts that taste as good as they look. Practice makes perfect—each roast you carve builds confidence and muscle memory that makes the process easier and more enjoyable. Remember that proper preparation in your kitchen extends to all aspects of food preparation, and carving is no exception. With these expert tips, you’re ready to impress your family and friends with restaurant-quality presentation and perfectly sliced rib roast.
For additional information on food safety and meat handling, consult The North American Meat Institute and American Cooking Trends Association for comprehensive guidelines on preparation and service standards.


