How to Change a Bicycle Tire: A Mechanic’s Step-by-Step Guide
A flat tire is one of the most common bicycle maintenance issues you’ll encounter, whether you’re a casual rider or a serious cyclist. The good news? Learning how to change a bicycle tire is a fundamental skill that takes just 15-20 minutes once you understand the process. Unlike more complex home repairs like changing a bathroom fan or caulking a tub, tire changes require minimal tools and can be mastered by anyone willing to follow proper procedures.
This comprehensive guide walks you through every step of removing a damaged tire and installing a new one, covering everything from preparation to final pressure checks. Whether your tire has a puncture, sidewall damage, or simply won’t hold air, this mechanic-approved approach ensures you’ll get back on the road safely and confidently. We’ll cover both traditional clincher tires and tubeless systems, addressing the specific challenges each presents.
Tools and Materials You’ll Need
Before starting any tire change, gather your supplies. Having everything within arm’s reach prevents frustration and keeps the process efficient. You’ll need tire levers (also called tire spoons)—these plastic or metal tools slip between the tire bead and rim to help pry the tire off. Most mechanics recommend having at least two, preferably three, as this speeds up removal significantly.
A reliable floor pump or hand pump is essential for reinflation. Floor pumps offer better leverage and speed, while hand pumps work in emergencies. You’ll also need the replacement tire or inner tube, depending on your bike type. For clincher tires, you may only need to replace the tube if the tire itself isn’t damaged. Tubeless systems require more careful handling and may need tubeless sealant.
Additional items include a cloth or rag for cleaning, a valve tool if your bike uses Presta valves, and potentially tire repair patches for emergency fixes. Keep your bike’s recommended tire pressure written down—this information appears on the tire sidewall and in your owner’s manual. Many riders also benefit from having a repair stand, though you can work on the ground if needed.
Removing the Wheel from Your Bike
Start by securing your bike. If you have a repair stand, clamp the frame securely. Without one, flip the bike upside down so it rests on the handlebars and seat—this provides stability while keeping the wheel accessible. For the front wheel, open the quick-release lever (or unscrew the axle nuts on older bikes) and pull the wheel straight out of the fork. The brake may need slight adjustment; on rim brakes, you might need to spread the brake arms apart slightly.
For the rear wheel, shift to the smallest chainring and smallest cog first—this provides slack in the chain. Open the quick-release and pull the derailleur back while lifting the wheel up and out of the chain. The chain should fall away naturally. If you have disc brakes, be careful not to squeeze the brake lever while the wheel is removed, as this can damage the brake system.
Once the wheel is free, lay it flat on a clean surface. Inspect the rim for debris, spoke damage, or sharp objects that might have caused the flat. Remove any thorns, glass, or metal fragments you find. These objects often cause repeat flats if left unaddressed.
Dismounting the Old Tire
Begin by completely deflating the tire if it isn’t already flat. For Presta valves, unscrew the valve cap and the small locking nut, then press the valve to release remaining air. For Schrader valves (like car tires), simply press the valve stem. This step prevents the tire from re-inflating as you work.
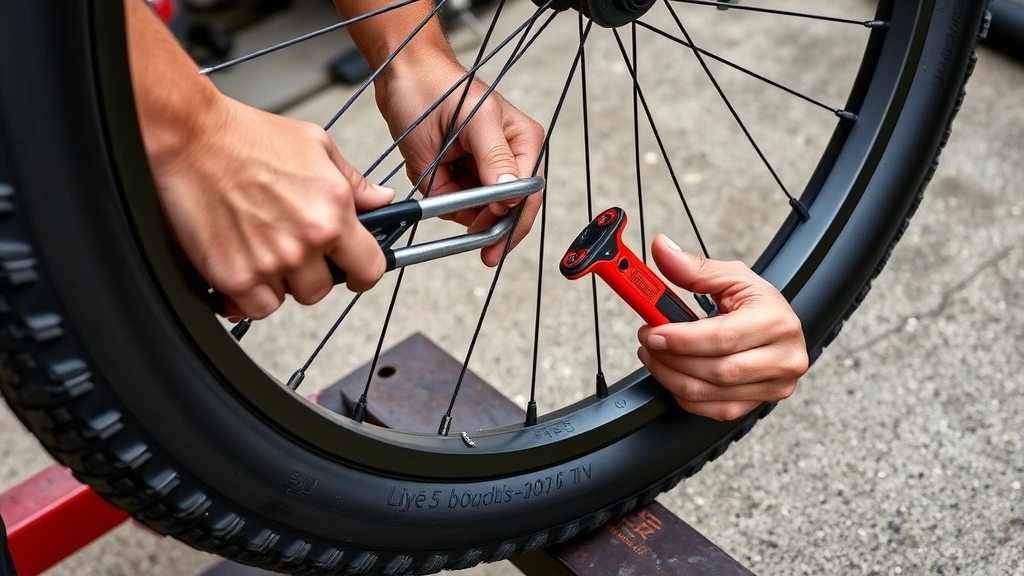
Insert your first tire lever under the tire bead—the inner edge that sits on the rim. Slide it around the rim about 6 inches, then hook it to a spoke. This creates a pivot point. Insert your second lever about 12 inches away and slide it around to remove about one-third of the tire. Once you have enough slack, you can usually peel the remaining tire off by hand without additional levers.
With most of the tire removed, you can now extract the inner tube. Check the tube for punctures by inflating it slightly and listening for hissing or feeling for escaping air. This helps determine whether the tube needs replacement or if the tire itself is damaged. A small puncture in the tube can sometimes be patched, but larger damage or sidewall tears warrant replacement.
Now inspect the tire’s interior carefully. Run your hand slowly inside the tire, checking for sharp objects, cracks, or embedded debris. This is critical—many flats recur because riders miss the cause. If you find a thorn or glass, mark its location and examine the tire exterior at that spot. Small embedded objects may push through the tire, creating slow leaks.
Assess the tire’s overall condition. Check for sidewall damage, which indicates the tire needs replacement. Look for uneven wear patterns, bulges, or areas where the rubber has separated from the carcass. According to bicycle rolling resistance testing, worn tires significantly impact performance and safety.
Installing the New Tire
Before installing a new tire or tube, inspect the rim carefully. Ensure the rim tape covers all spoke holes completely—exposed spokes can puncture tubes instantly. If rim tape is damaged or missing, replace it before proceeding. Sheldon Brown’s tire guide provides excellent details on rim preparation.
If you’re replacing the inner tube, partially inflate the new tube—just enough so it holds its shape. This prevents twisting during installation. For the tire, check that the direction arrow on the sidewall points the direction the wheel will rotate. Most tires don’t have directional requirements, but some specialized tires do, and road-facing arrows should point forward.
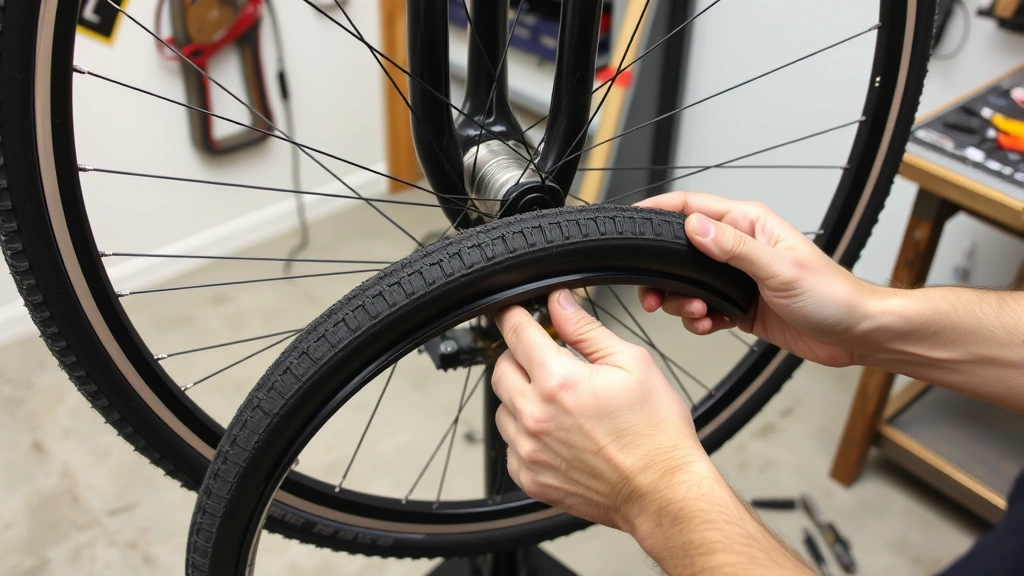
Start by inserting the valve stem through the rim hole. Then work the tire bead onto the rim, starting opposite the valve. Push the tire bead down into the rim well—this creates slack and makes installation easier. Work your way around, feeding the tire onto the rim gradually. Avoid pinching the tube between the tire and rim.
As you approach completing the circle, the tire becomes increasingly difficult to mount. Use your palms rather than fingers to avoid pinching the tube. If the final section resists, deflate the tube slightly to create more slack. Once the tire seats completely on the rim, you’ve successfully mounted it. Inspect around the entire circumference to ensure the bead sits evenly on both sides of the rim.
For tubeless tires, the process is similar, but you’ll need to ensure a complete seal. Apply tubeless sealant according to manufacturer instructions, typically by injecting it through the valve stem. The tire bead must seat firmly against the rim for the system to work properly.
Inflating and Testing
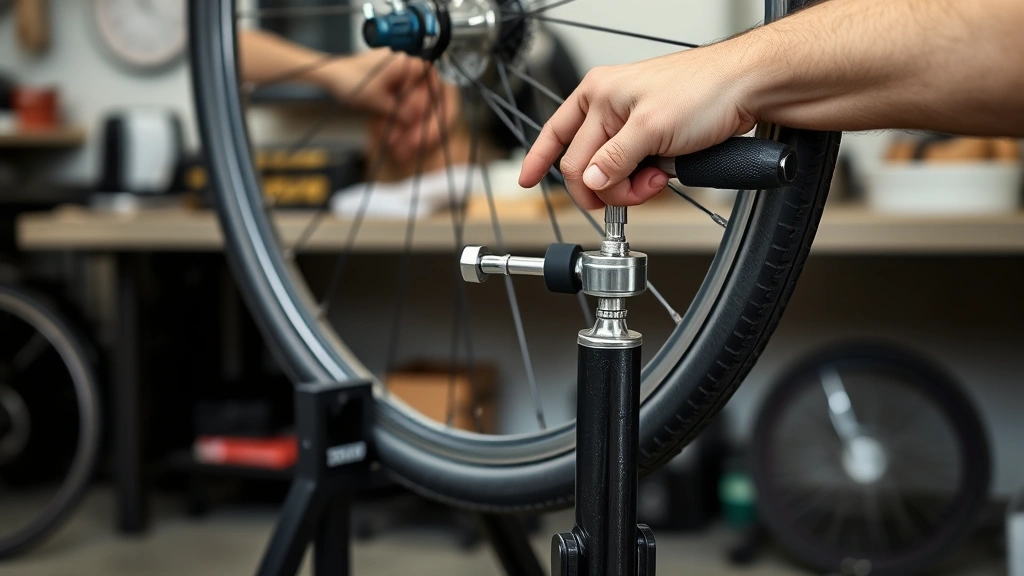
Begin inflating slowly, watching the tire bead seat onto the rim. You should see the bead line move outward as pressure increases. Stop at about 20-30 PSI and verify the bead is seated evenly on both sides. If it isn’t, deflate slightly, adjust, and try again. Once the bead is seated properly, continue inflating to the recommended pressure.
Check your tire’s sidewall for the pressure range—typically something like 80-130 PSI for road bikes or 30-50 PSI for mountain bikes. Never exceed the maximum listed pressure. Under-inflated tires cause pinch flats and poor handling, while over-inflation reduces grip and increases the risk of blowouts. Most riders should aim for the middle to upper-middle of the recommended range.
After inflating, perform a safety check. Spin the wheel and listen for any rubbing against the frame or brakes. Squeeze the tire to ensure it feels properly inflated and has no soft spots. Check that the valve is tight and the valve cap is secure. Inspect the tire bead one final time to confirm it hasn’t shifted during inflation.
Reinstall the wheel on your bike, ensuring it’s centered in the frame or fork. For the rear wheel, thread the chain onto the smallest cog and guide the wheel into the dropouts carefully. Tighten the quick-release or axle nuts firmly. Before riding, squeeze the brake levers to verify they’re adjusted correctly and that the wheel doesn’t rub.
Common Mistakes to Avoid
One frequent error is failing to identify what caused the original flat. If you don’t remove the offending object or repair the tire damage, you’ll experience another flat within days. Always take time to inspect thoroughly before reinstalling the wheel.
Another common mistake involves pinching the new tube during installation. This happens when the tire bead isn’t seated properly in the rim well before you start mounting. Always push the tire down into the rim’s center before working it onto the bead. Some mechanics use a small amount of talcum powder inside the tire to help the tube slide freely and reduce pinching risk.
Over-inflating is surprisingly common, especially among riders who think higher pressure improves performance. Excessive pressure can cause the tire to bulge, creating a dangerous blowout risk. Conversely, under-inflation causes the tire to flex excessively, generating heat and leading to failure. Always use a reliable pressure gauge and inflate to the recommended range specified on your tire’s sidewall.
Don’t neglect rim tape inspection. Exposed spoke holes create instant flat tires by puncturing tubes. If your rim tape is damaged, cracked, or peeling, replace it immediately. This preventive maintenance takes five minutes and saves you from repeated flats.
Finally, avoid rushing the process. Tire changes done hastily often result in improper bead seating, which causes slow leaks or immediate flats. Take your time, work methodically, and verify each step before moving forward. The few extra minutes spent on careful installation prevent roadside emergencies.
FAQ
How often should I replace my bike tires?
Most bike tires last 1,500-3,000 miles depending on riding conditions, rider weight, and tire quality. Check regularly for wear indicators—many tires have wear lines that disappear as the tire wears. Replace tires showing significant wear, sidewall damage, or repeated flats. Road tires typically wear faster than mountain bike tires due to their thinner construction.
Can I repair a punctured tube, or should I always replace it?
Small punctures (less than 1/4 inch) can be patched using a quality patch kit. Larger holes, valve damage, or sidewall punctures warrant replacement. Patches are excellent for emergency roadside repairs but provide only temporary solutions. Many mechanics recommend replacing tubes rather than patching them for reliability and safety.
What’s the difference between clincher and tubeless tires?
Clincher tires use a separate inner tube that holds air, while tubeless tires seal directly to the rim and use liquid sealant to seal small punctures. Tubeless systems offer lower rolling resistance and better puncture resistance but require special rims and more careful installation. For most casual riders, clincher tires are simpler and more affordable.
Why does my tire keep going flat?
Repeated flats usually indicate you missed an embedded object during inspection, your rim tape is damaged, or the tire itself has a persistent defect. Less commonly, the rim could be bent or cracked. Thoroughly inspect the tire interior and rim before assuming the new tire will work. If flats continue, consider having a bike shop inspect the wheel.
Should I carry a spare tube while riding?
Yes, carrying a spare tube is highly recommended for any ride longer than a few miles from home. Tubes are lightweight and inexpensive compared to being stranded. Many riders also carry tire levers and a hand pump as part of their emergency repair kit. This setup has saved countless cyclists from long walks home.
How do I know the correct tire pressure for my bike?
The recommended pressure range appears on your tire’s sidewall, printed in both PSI (pounds per square inch) and BAR. This range accounts for different rider weights and riding styles. Heavier riders should use higher pressure within the range, while lighter riders can use lower pressure for better comfort and grip. Your bike’s manual may also specify recommended pressures.


