How to Change a Sprinkler Head: Pro Gardener’s Complete Guide
Replacing sprinkler heads is one of the most satisfying and cost-effective irrigation maintenance tasks you can master as a homeowner. Whether your current heads are clogged, damaged, or simply underperforming, learning how to change a sprinkler head takes less than an hour and requires only basic tools. This comprehensive guide walks you through every step, from identifying problem heads to selecting replacements and installation techniques used by professional landscapers.
A well-maintained irrigation system keeps your lawn and garden thriving while conserving water. When sprinkler heads wear out or malfunction, they waste water, create dry patches, and increase utility costs. The good news: you don’t need to call an expensive professional. With the right knowledge and approach, anyone can swap sprinkler heads confidently and correctly.
Why Replace Sprinkler Heads
Sprinkler heads endure constant exposure to soil, debris, temperature fluctuations, and water pressure. Over time, internal components wear down, nozzles crack, and seals degrade. Understanding when and why to replace heads helps you maintain an efficient irrigation system that delivers consistent water coverage across your landscape.
Common reasons for replacement include:
- Clogged or stuck nozzles preventing proper spray patterns
- Cracked or damaged casings allowing water to leak sideways
- Broken pop-up mechanisms that fail to retract
- Uneven spray coverage creating dry or over-watered zones
- Outdated heads incompatible with modern water-efficient standards
- Rusted or corroded internal components affecting performance
Regular inspection of your irrigation system components prevents larger problems. A single malfunctioning head can waste hundreds of gallons monthly and damage nearby plants through over-watering or create brown patches through under-watering. Replacing heads promptly maintains landscape health and reduces water bills significantly.
Tools and Materials You’ll Need
Gathering supplies before starting ensures smooth, uninterrupted work. Most homeowners already possess these basic tools in their garages.
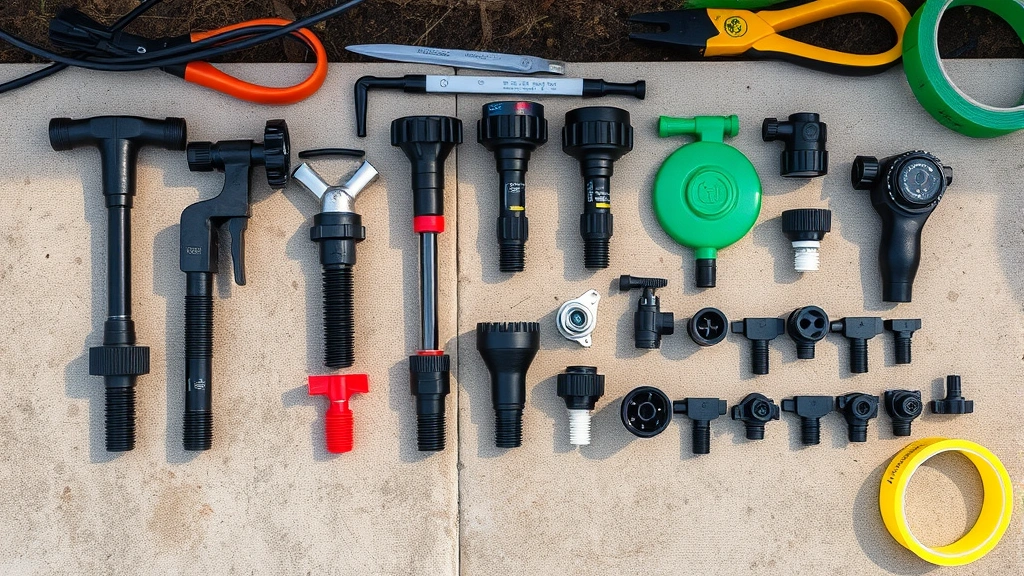
Essential Tools:
- Adjustable wrench or socket wrench set (for underground connections)
- Flathead and Phillips screwdrivers (for nozzle adjustments)
- Needle-nose pliers (for removing small clips and springs)
- Digging spade or garden shovel (for accessing buried heads)
- Bucket or container (for catching residual water)
- Teflon tape or plumber’s thread seal tape (for threaded connections)
- Flashlight or headlamp (for seeing underground components)
- Work gloves (for protection and grip)
Materials to Purchase:
- Replacement sprinkler heads matching your system type
- Replacement nozzles or spray patterns if applicable
- Pipe dope or silicone-based sealant (for threaded fittings)
- Extra washers or o-rings (inexpensive backup parts)
Before purchasing replacements, identify your current system type. Sprinkler heads come in several categories: pop-up spray heads, rotary heads, gear-driven rotors, and impact sprinklers. Your replacement must match your existing system’s connection type and water pressure requirements. Check your system’s documentation or consult the Irrigation Association for specific product recommendations.
Identifying Problem Sprinkler Heads
Before replacing heads, confirm they actually need replacement rather than simple cleaning or adjustment. Visual inspection and functional testing pinpoint problem areas.
Visual Inspection Steps:
- Walk your entire lawn during watering cycles, observing spray patterns
- Look for heads that don’t pop up completely or stay partially submerged
- Check for water leaking from the head body or connection point
- Examine nozzles for visible cracks, discoloration, or debris buildup
- Identify areas receiving uneven water coverage compared to surrounding zones
Mark problem heads with small flags or spray paint so you remember their locations during replacement. Test each head by hand, gently pushing the pop-up mechanism up and down. Resistance or grinding sounds indicate internal damage requiring replacement. Smooth operation suggests cleaning might resolve the issue instead.
Clogged nozzles often appear to be broken heads. Before replacing, try this troubleshooting method: turn off your system, dig around the head carefully, and remove the nozzle by turning counterclockwise. Soak nozzles in white vinegar for 30 minutes to dissolve mineral deposits, then rinse thoroughly with clean water. Reattach and test. Many “broken” heads work perfectly after cleaning.
Step-by-Step Removal Process
Proper removal prevents damage to underground pipes and connections. Rushing this stage causes problems that complicate installation.
Step 1: Shut Off Water Supply
Before touching anything, turn off your irrigation system at the main valve. This prevents water from spraying unexpectedly and protects against water pressure forcing the head deeper into the ground. Allow residual pressure to release—turn on a nearby faucet briefly to depressurize the system.
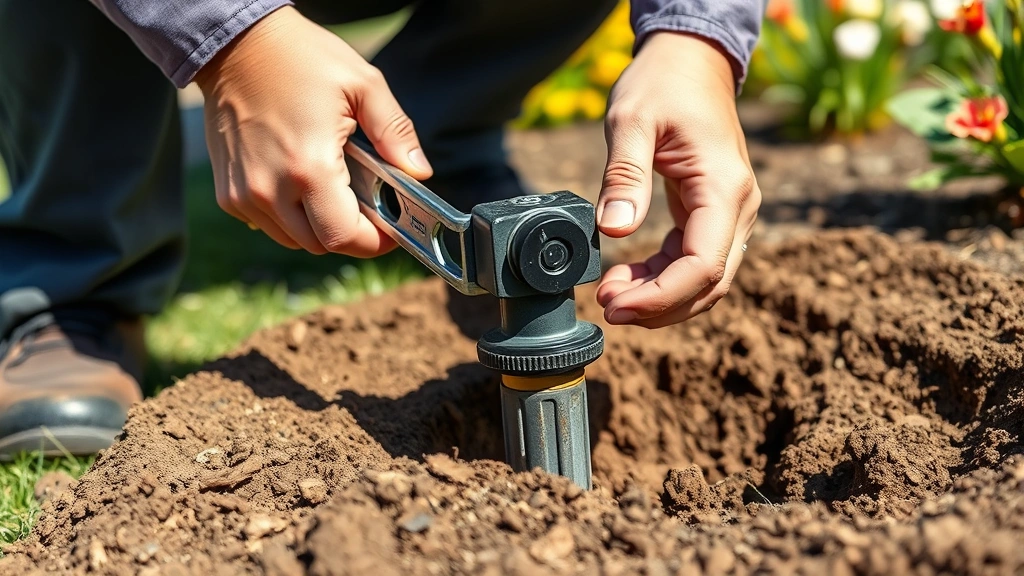
Step 2: Excavate Around the Head
Using a small spade, carefully dig around the sprinkler head in a 6-8 inch radius. Work slowly to avoid damaging the underground riser pipe or lateral lines. Remove soil until you can see the connection point between the head and the riser clearly. Place excavated soil on a tarp for easy refilling.
Step 3: Disconnect the Head
Most pop-up heads connect via a threaded fitting to the riser pipe. Grip the riser pipe firmly with one hand to prevent twisting the underground line. Using an adjustable wrench, turn the head counterclockwise to unscrew it. If resistance is extreme, apply penetrating oil and wait 15 minutes before attempting again. Forcing stuck connections breaks buried pipes.
Some heads use compression fittings or barbed connections instead of threads. For compression fittings, unscrew the retaining nut while holding the fitting body steady. For barbed connections, twist gently while pulling upward—these connections sometimes require careful wiggling to break free.
Step 4: Inspect the Riser Connection
Once the head is removed, examine the male threads or fitting on the riser. Look for corrosion, damaged threads, or mineral buildup. If threads are intact and clean, no additional work is needed. Corroded or damaged threads require filing smooth with a metal file or replacing the entire riser section—a more advanced task beyond basic head replacement.
Selecting the Right Replacement Head
Choosing compatible replacements ensures proper function and water efficiency. Mismatched heads create coverage gaps and waste water.
Key Specifications to Match:
- Connection Type: Verify whether your riser uses male threads (most common), compression fittings, or barbed connections
- Riser Size: Standard risers are 1/2 inch or 3/4 inch diameter—measure yours carefully
- Spray Pattern: Identify whether you need full-circle, half-circle, quarter-circle, or rectangular spray patterns
- Throw Distance: Match the distance water travels to your lawn’s layout (typically 4-15 feet for residential systems)
- Pressure Requirements: Check your system’s water pressure; most residential systems operate at 40-60 PSI
- Head Type: Replace pop-up spray heads with similar types; don’t mix spray and rotary heads in the same zone
Modern water-efficient sprinkler head options include pressure-regulated heads that maintain consistent performance across varying water pressures, and matched-precipitation-rate designs that deliver water uniformly. These upgrades reduce water consumption by 15-30% compared to older models while improving coverage uniformity.
Popular reliable manufacturers include Hunter Industries, Toro, Rainbird, and Orbit. These brands offer products at various price points suitable for home improvement projects. Avoid extremely cheap generic heads; they typically fail within one season. Mid-range quality heads balance affordability with durability, lasting 5-7 years under normal conditions.
If you’re uncertain about specifications, bring the old head to your local garden center or irrigation supply store. Staff can match it visually and recommend compatible upgrades. This consultation is free and prevents costly mistakes.
Installation and Testing
Proper installation ensures reliable performance and prevents leaks. Take time with this critical stage.
Step 1: Prepare the Riser
Clean the male threads thoroughly using a dry cloth or soft brush. Remove any debris, mineral deposits, or old thread seal material. Apply 2-3 wraps of Teflon tape clockwise around the male threads. This tape prevents leaks and makes future removal easier. Wrap tightly but not excessively—over-wrapping creates difficulties during future maintenance.
Step 2: Install the New Head
Carefully thread the new head onto the riser by hand first. Hand-threading prevents cross-threading that strips connections. Once hand-tight, use your wrench to turn clockwise an additional 1-1.5 turns. Over-tightening cracks plastic heads or damages threads. The connection should be snug but not cranked with full force.
Step 3: Adjust Spray Pattern and Distance
Most replacement heads allow nozzle adjustment without removing the head. Rotate the nozzle to select your desired spray pattern (full circle, half, quarter, etc.). Some models feature adjustable distance screws that control throw distance—consult the manufacturer’s instructions for specific adjustment procedures. Make these adjustments before burying the head.
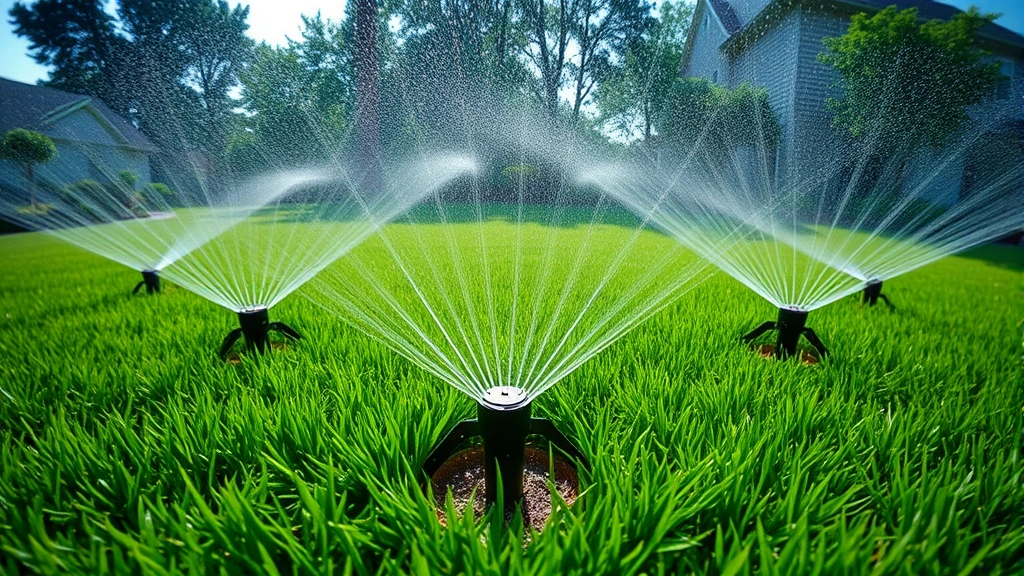
Step 4: Test Before Backfilling
Turn the system back on at the main valve. Observe the new head’s spray pattern from multiple angles. Check that water sprays evenly without dead spots or excessive overlap. If spray patterns look wrong, turn off the system, make nozzle adjustments, and test again. Never backfill soil until you’re satisfied with performance.
Step 5: Backfill and Compact Soil
Once testing confirms proper operation, carefully refill the excavation hole with the removed soil. Compact soil gently around the head—don’t pack it so tightly that you crush the head or prevent future access. Leave a slight depression around the head to facilitate water infiltration. The head should sit level with the surrounding lawn surface.
Common Mistakes to Avoid
Learning from others’ mistakes prevents frustrating complications and damage.
Over-Tightening Connections
The most common error is tightening connections excessively. Plastic heads crack under excessive torque, and metal threads strip. Hand-tight plus 1-1.5 wrench turns is sufficient. If a connection leaks at this tightness, the threads are damaged and require professional riser replacement.
Mismatching Head Types
Installing rotary heads in zones designed for spray heads (or vice versa) creates uneven coverage. Rotary heads deliver water more slowly over larger areas, while spray heads provide quick coverage in smaller zones. Mixing types in a single zone wastes water and leaves some areas dry.
Forgetting to Depressurize the System
Turning off the valve at the controller isn’t the same as depressurizing the system. Water trapped in pressurized lines can spray forcefully when you disconnect heads, wasting water and potentially causing injury. Always open a downstream faucet to release pressure.
Installing Heads at Wrong Height
Heads must sit level with the lawn surface to function properly. Heads installed too deep become buried over time and fail to pop up. Heads installed too high create trip hazards and poor spray patterns. Use a straightedge to verify level installation.
Skipping the Test Cycle
Testing before backfilling prevents wasted water and unnecessary re-excavation. A five-minute test reveals problems that would otherwise go unnoticed until your next watering cycle.
Maintenance Tips for Longevity
Proper maintenance extends sprinkler head lifespan and maintains peak performance. These simple practices prevent premature failure.
Seasonal Inspection
Each spring before peak watering season, inspect all heads visually. Look for cracks, debris accumulation, or misalignment. Clear any soil or mulch covering nozzles. This 15-minute inspection catches problems early.
Clean Nozzles Regularly
Mineral deposits and debris gradually clog nozzles, reducing spray efficiency. Every 2-3 months during growing season, remove and soak nozzles in vinegar for 30 minutes. This simple maintenance prevents clogs and maintains optimal water delivery.
Monitor Water Pressure
Excessive water pressure damages heads prematurely. Install a pressure gauge at an outdoor faucet to verify system pressure stays between 40-60 PSI. If pressure exceeds this range, install a pressure regulator—a $20-30 investment that protects your entire system.
Winterize Before Freezing
In cold climates, drain your irrigation system completely before the first frost. Water trapped inside heads expands as it freezes, cracking plastic components. Follow manufacturer winterization guidelines specific to your system type.
Just as you’d maintain other home systems, consistent sprinkler maintenance prevents expensive replacements. A few minutes of preventive care each season keeps your system operating efficiently for years.
Consider implementing smart irrigation controllers that adjust watering based on weather conditions. These systems reduce water waste and minimize stress on sprinkler components. Many municipalities offer rebates for water-efficient upgrades, making smart controllers affordable investments.
FAQ
How long does it take to replace a sprinkler head?
A single head replacement typically takes 20-30 minutes including excavation, removal, and installation. Replacing multiple heads in one session takes about 15-20 minutes per head once you develop a rhythm. Budget extra time if connections are corroded or stuck.
Can I replace sprinkler heads myself or do I need a professional?
You can absolutely replace sprinkler heads yourself. This is one of the most DIY-friendly irrigation tasks. It requires no special licensing and minimal tools. Professionals charge $50-150 per head for this simple service, making DIY replacement a significant money-saver for multiple heads.
What’s the difference between spray heads and rotary heads?
Spray heads deliver water in a fixed pattern (full circle, half-circle, etc.) over a small area (4-8 feet radius) with quick coverage. Rotary heads slowly rotate while delivering water in a stream over larger areas (8-15 feet radius). Each type serves different landscape needs—use spray heads for small foundation plantings and rotary heads for large lawn areas.
How do I know what size connection my riser has?
Measure the diameter of your riser pipe. Standard residential systems use 1/2 inch or 3/4 inch diameter risers. You can also bring the old head to an irrigation supply store and they’ll identify the size visually. Taking a photo and emailing it also works.
Why is my new sprinkler head leaking?
Leaks usually result from insufficient thread wrapping, cross-threaded connections, or damaged threads. Turn off the system, unscrew the head, add 2-3 more wraps of Teflon tape, and reinstall. If leaking persists, the riser threads are damaged and require professional replacement.
Can I use any brand head on my system?
Yes, any brand head with matching connection size and type will work. However, stick with reputable manufacturers for reliability. Mixing brands is fine—for example, you might replace a failed Rainbird head with a Hunter equivalent. Just match specifications carefully.
How often should I replace sprinkler heads?
Quality heads last 5-7 years under normal conditions. Harsh conditions (high water pressure, sandy soil, extreme temperature swings) reduce lifespan to 3-4 years. Replace heads as they fail rather than on a fixed schedule, unless your system is very old and heads are failing frequently.
What pressure should my irrigation system operate at?
Most residential systems operate optimally at 40-60 PSI. Check your system’s pressure with an inexpensive gauge available at garden centers. Pressure below 30 PSI reduces coverage distance; pressure above 80 PSI damages heads and wastes water through misting.
Should I use adjustable or fixed spray heads?
Adjustable heads allow you to change spray patterns without replacing the head—useful if your landscape design changes. Fixed heads cost slightly less but offer no flexibility. For most homeowners, adjustable heads justify the small price difference through long-term flexibility.
What’s the best way to prevent mineral buildup in heads?
Install a water filter in your main irrigation line—even inexpensive 100-mesh filters significantly reduce mineral deposits. In hard water areas, consider water softening systems specifically designed for irrigation use. Regular nozzle cleaning (every 2-3 months) is the simplest maintenance approach.


