Change Hyundai Key Fob Battery: Expert Tips
Your Hyundai key fob is one of the most frequently used accessories in your vehicle ownership experience, yet many drivers overlook its maintenance until it stops working. The battery inside your key fob gradually depletes over time through regular use, and when it finally dies, you’re left fumbling with your physical key or making an expensive trip to the dealership. The good news is that replacing your Hyundai key fob battery is a straightforward task that requires no special tools and takes only a few minutes to complete.
Whether you drive a Hyundai Elantra, Santa Fe, Tucson, or any other model in the lineup, the battery replacement process follows similar principles across most Hyundai vehicles. Understanding how to perform this simple maintenance task yourself can save you money and keep your key fob functioning optimally. This comprehensive guide will walk you through every step of the process, from identifying the correct battery type to reassembling your key fob with confidence.
Identifying Your Hyundai Key Fob Type
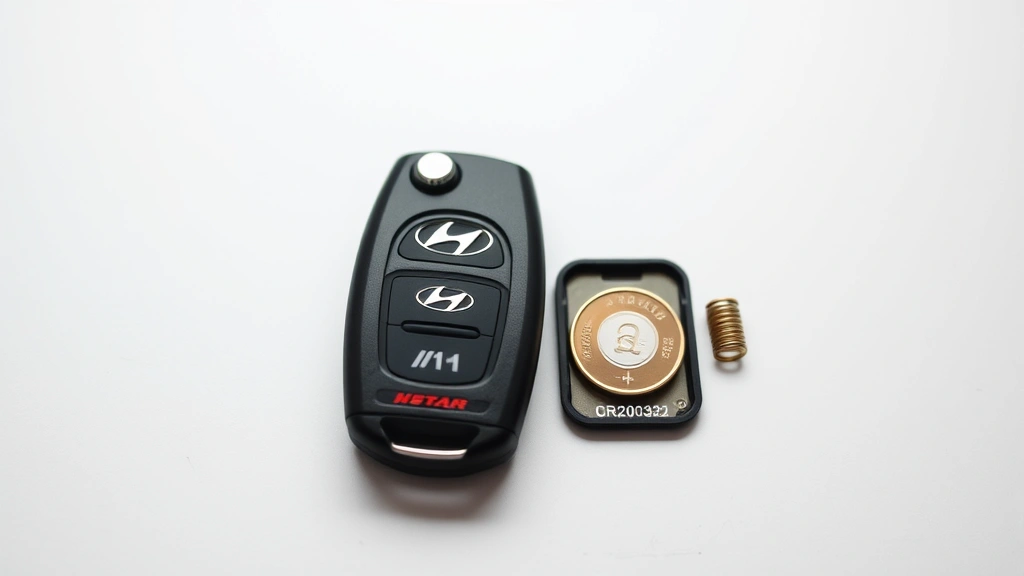
Hyundai has manufactured several different key fob designs over the years, and identifying which type you have is the crucial first step in this process. Most modern Hyundai vehicles use one of two primary key fob designs: the flip-style fob or the standard rectangular fob. The flip-style fobs feature a physical key blade that extends from the bottom, while rectangular fobs maintain a consistent shape without a deployable key.
To identify your specific model, examine your key fob closely. Look at the shape, the button layout, and whether it has any special features like a trunk release button or panic button. The battery compartment location varies slightly between designs, so knowing your exact model helps you understand where to look for the battery cover. You can also check your vehicle’s owner’s manual, which typically includes a diagram of your specific key fob type and battery specifications.
Additionally, check the age of your Hyundai vehicle. Older models from the 2000s and early 2010s may have different fob designs compared to newer vehicles manufactured after 2015. This information helps you anticipate what you’ll find when you begin disassembling your key fob and ensures you purchase the correct replacement battery.
Tools and Materials You’ll Need
One of the best aspects of changing your Hyundai key fob battery is that you need minimal tools and materials. Unlike more complex DIY car repairs, this task is genuinely accessible to anyone with basic household items. Here’s everything you should gather before starting:
- Replacement battery (typically CR2032, CR2025, or CR2016 depending on your model)
- Flathead screwdriver or coin (for opening the battery compartment)
- Small container (to hold screws and small parts during disassembly)
- Dry cloth or paper towel (for cleaning battery contacts)
- Flashlight or headlamp (optional but helpful for seeing inside the compartment)
Having these items ready before you start prevents frustration and keeps the process moving smoothly. The flathead screwdriver is particularly important—many key fobs have a small slot designed specifically for opening the battery compartment, and using the correct tool prevents damage to the plastic casing. If you don’t have a flathead screwdriver, a coin works equally well for most Hyundai key fobs.
Store your screws and any small parts in a dedicated container throughout the process. This simple precaution prevents losing critical components that could prevent your key fob from functioning properly once reassembled. A small bowl, cup, or even a piece of tape on your work surface can serve this purpose effectively.
Finding the Correct Battery Replacement
Selecting the correct battery is absolutely critical to your key fob’s performance. Using an incorrect battery type can result in poor range, unreliable operation, or potential damage to the internal circuitry. Most Hyundai key fobs use coin-cell batteries, which are small, round, and readily available at pharmacies, electronics stores, and online retailers.
The most common battery types for Hyundai key fobs are CR2032, CR2025, and CR2016. These designations indicate the battery’s chemical composition (CR stands for Lithium Manganese Dioxide) and its physical dimensions. The CR2032 is 20mm in diameter and 3.2mm thick, while the CR2025 is 20mm in diameter and 2.5mm thick. Using the wrong thickness can cause the battery compartment to close improperly or create a poor electrical connection.
Your vehicle’s owner’s manual is the most reliable source for determining which battery your specific Hyundai model requires. If you don’t have access to the manual, you can contact your local Hyundai dealership with your vehicle’s year, make, and model. Many auto parts stores also offer free battery identification if you bring your key fob in person. When purchasing replacement batteries, buy high-quality brands from reputable manufacturers to ensure longevity and reliable performance.
Battery prices vary minimally between retailers, typically ranging from $3 to $8 per battery. Purchasing in bulk is economical if you have multiple key fobs or want to stock extras for future use. Always check the manufacturing date on the battery package—fresher batteries provide longer service life.
Step-by-Step Battery Replacement Process
Now that you’ve gathered your materials and identified your battery type, it’s time to proceed with the actual replacement. This section breaks down the process into manageable steps that work for most Hyundai key fob designs.
Step 1: Locate the Battery Compartment
Examine your key fob carefully to find the battery compartment. Most Hyundai fobs have a small slot or seam running along the edge of the casing. This seam indicates where the two halves of the fob separate. For flip-style fobs, the compartment is typically on the back of the unit. For rectangular fobs, look along the sides or bottom edge.
Some models have a small indentation or arrow indicating where to insert your flathead screwdriver. This mark shows the exact location for opening the compartment. Insert your flathead screwdriver or coin gently into the slot and apply light pressure. Never force the tool into the slot, as excessive pressure can crack the plastic casing.
Step 2: Open the Key Fob Casing
Once you’ve located the slot, gently twist your flathead screwdriver or coin to apply leverage. The two halves of the key fob should begin separating. Continue applying gentle pressure until you can fit your fingernail into the gap and pry the halves apart. Some fobs separate completely into two pieces, while others have a hinge that keeps them connected.
If the fob resists opening, don’t force it. Instead, try inserting your tool at a different point along the seam. Sometimes the compartment design makes certain spots easier to open than others. Take your time with this step—rushing can result in cracked plastic or broken clips inside the casing.
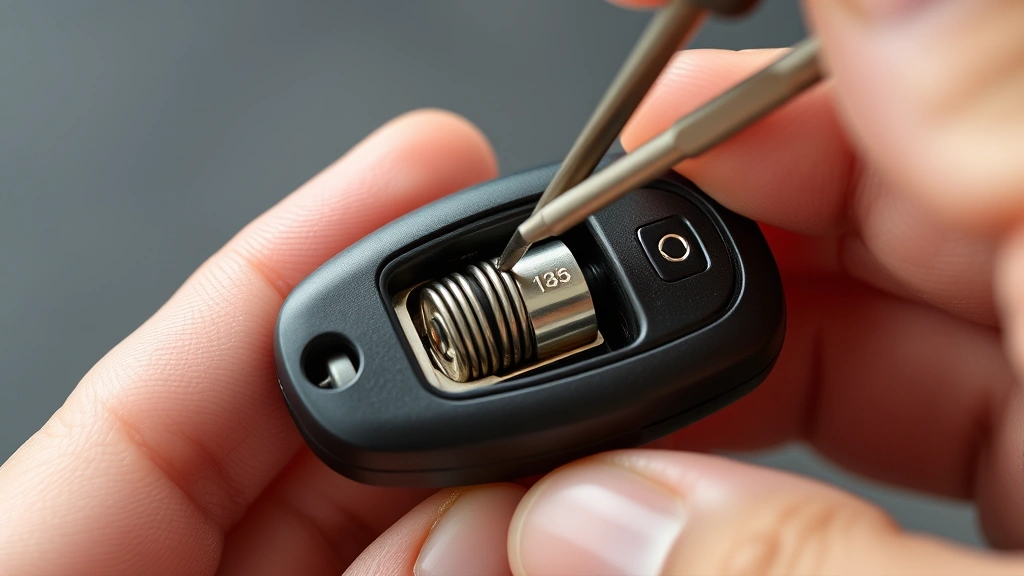
Step 3: Remove the Old Battery
Once the casing is open, you’ll see the battery mounted in a small compartment, usually held in place by metal contact springs. Note the battery’s orientation—the positive side typically faces upward. Gently lift or pry the battery out using your flathead screwdriver or fingernail. Be careful not to damage the contact springs during removal.
Examine the battery compartment while it’s open. Look for any corrosion, debris, or moisture that might affect performance. If you notice any white or green oxidation on the metal contacts, this indicates corrosion that should be cleaned before installing the new battery.
Step 4: Clean the Battery Contacts
Using your dry cloth or paper towel, gently wipe the metal contact springs inside the battery compartment. This removes any dust, corrosion, or residue that accumulated over time. Clean contact surfaces ensure optimal electrical connection and maximum battery performance. If you notice significant corrosion, you can use a small amount of rubbing alcohol on your cloth for more thorough cleaning, but allow it to dry completely before installing the new battery.
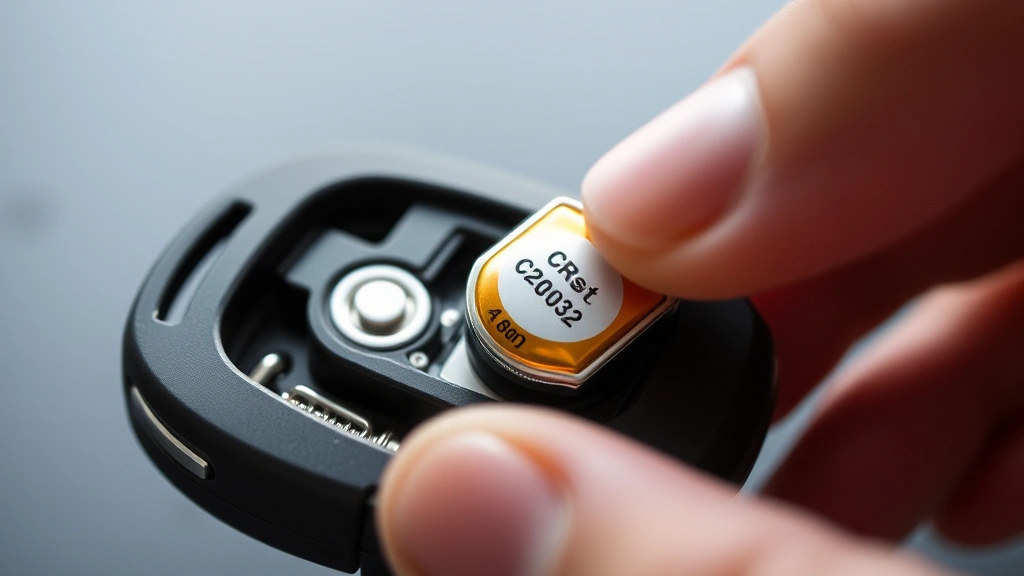
Step 5: Install the New Battery
Take your new battery and carefully insert it into the compartment with the positive side facing upward, matching the orientation of the old battery you removed. Gently press the battery down until it sits flush in the compartment and the metal contact springs press against it. You should feel slight resistance as the springs make contact with the battery surface.
Ensure the battery is properly seated before closing the fob. A battery that isn’t fully inserted can cause intermittent operation or complete failure. The battery should not move when you gently shake the open fob.
Step 6: Reassemble the Key Fob
Carefully align the two halves of your key fob and press them together firmly. Start at one end and work your way along the seam, ensuring both halves close evenly. You should hear or feel a slight click as the fob snaps shut, indicating proper closure. Don’t force the halves together—if they resist, check that the battery is properly seated and not protruding from the compartment.
For flip-style fobs with a key blade, ensure the blade mechanism moves freely after reassembly. Test the flip action several times to confirm nothing is obstructing the mechanism. If the key blade feels stiff or doesn’t extend smoothly, the fob may not be closed properly.
Testing Your Key Fob After Battery Replacement
After completing the reassembly, testing your key fob ensures the battery replacement was successful and everything functions correctly. Proper testing prevents you from discovering problems after leaving your vehicle or when you’re in a situation where you need the fob urgently.
Visual and Physical Testing
First, examine the exterior of your key fob for any cracks, gaps, or misalignment between the two halves. The casing should appear seamless with no visible separation. Press gently on various points around the perimeter to confirm both halves are securely connected. If you notice gaps or the halves feel loose, reopen the fob and check that the battery is properly seated.
Functional Testing
Stand near your Hyundai vehicle and press each button on your key fob while observing the vehicle. The locks should engage and disengage smoothly when you press the lock and unlock buttons. Press the trunk release button if your fob has one and confirm the trunk opens. If your fob has a panic button, test it in a safe location away from others.
Pay attention to the responsiveness of your vehicle. Each button press should result in immediate action—no delay or multiple presses required. If your vehicle doesn’t respond to the first button press, the battery may not be making proper contact, or it might be defective. Return to the battery compartment and verify the battery is properly seated.
Range Testing
Test your key fob’s range by standing progressively farther from your vehicle and pressing the buttons. A properly functioning key fob with a fresh battery should work reliably from 30 to 50 feet away under normal conditions. If the range is significantly shorter, the battery may be defective, or the fob’s antenna may require cleaning.
If your key fob still doesn’t function after battery replacement, proceed to the troubleshooting section before assuming the fob is permanently damaged.
Troubleshooting Common Issues
Even after following these steps carefully, you might encounter issues with your key fob. Understanding common problems and their solutions helps you resolve most issues without professional assistance.
Key Fob Not Responding After Battery Replacement
If your vehicle doesn’t respond to any button presses, the battery may not be making proper electrical contact. Reopen the fob and verify the battery is fully inserted with the positive side facing upward. Check that the metal contact springs aren’t bent or damaged. If the springs appear deformed, they may need gentle straightening with a flathead screwdriver.
Another common cause is a defective replacement battery. Coin-cell batteries occasionally have manufacturing defects that prevent them from holding a charge. Try installing a different battery from a different package or manufacturer. If a second battery works, your original battery was likely defective.
Intermittent or Delayed Response
Intermittent operation usually indicates a poor electrical connection between the battery and contacts. Remove the battery and inspect both the battery itself and the contact springs for debris, corrosion, or damage. Clean both thoroughly with a dry cloth. If the problem persists, the contact springs may be worn and require replacement, which typically requires professional service.
Reduced Range or Weak Signal
A new battery should restore full range to your key fob. If you notice the range is still limited, the issue likely isn’t battery-related. Check that the antenna area on your fob (usually the top edge) isn’t obstructed by dirt or damage. Gently clean the exterior of the fob with a dry cloth, paying special attention to the antenna area.
If range problems persist, the internal circuitry may be damaged, or the fob’s transmitter may be failing. This situation typically requires professional repair or replacement.
Physical Damage to the Casing
If you accidentally cracked the plastic casing while opening the fob, the damage may allow moisture to enter the internal components. While small cracks don’t always cause immediate problems, they can lead to corrosion and failure over time. Consider replacing the fob if significant cracks are present, especially if the crack is near the battery compartment.
Preventive Maintenance Tips
Extending your key fob’s lifespan requires minimal effort and attention. These preventive measures help ensure your fob continues functioning reliably for years.
Avoid Extreme Conditions
Protect your key fob from excessive heat, cold, and moisture. Don’t leave your fob in direct sunlight for extended periods, as heat can damage internal components and drain the battery faster. Similarly, avoid exposing your fob to water or humid environments. If your fob gets wet, allow it to dry completely before using it.
Replace Batteries Proactively
Don’t wait until your key fob stops working completely to replace the battery. If you notice reduced range or delayed response, the battery is likely depleting. Replacing the battery at the first sign of weakness prevents you from being stranded with a non-functional fob. Most key fob batteries last 3 to 4 years with normal use.
Minimize Physical Stress
Avoid dropping your key fob or subjecting it to excessive pressure. The internal components are delicate and can be damaged by impact. Store your fob in a protective case or pouch if you’re concerned about accidental damage. Keep your fob separate from your physical key blade to prevent scratching or damage to the casing.
Keep the Casing Clean
Regularly wipe your key fob with a soft, dry cloth to remove dust and debris. This simple maintenance prevents particles from entering the battery compartment and causing corrosion. If your fob accumulates sticky residue, use a slightly damp cloth with a small amount of rubbing alcohol, but ensure it dries completely afterward.
For comprehensive information about vehicle maintenance beyond key fobs, explore our DIY car repairs guide, which covers essential maintenance tasks that keep your Hyundai running smoothly. You might also find it helpful to review our tire changing guide for other practical vehicle maintenance skills.
FAQ
How often should I replace my Hyundai key fob battery?
Most key fob batteries last between 3 and 4 years with normal use. However, factors like frequency of use, climate conditions, and battery quality affect lifespan. Replace your battery as soon as you notice reduced range or delayed response rather than waiting for complete failure.
Can I use any CR2032 battery in my Hyundai key fob?
While most Hyundai key fobs use CR2032 batteries, some models use CR2025 or CR2016 instead. Always verify your vehicle’s specific battery requirement in the owner’s manual. Using an incorrect battery type can cause poor performance or damage to the fob. Quality matters too—premium batteries from established manufacturers provide better reliability than generic alternatives.
Why is my key fob still not working after I replaced the battery?
Several issues could cause continued malfunction: the battery may not be properly seated, the contact springs may be damaged or corroded, you may have installed an incorrect battery type, or the replacement battery itself could be defective. Try reinstalling the battery ensuring proper orientation, clean the contacts thoroughly, and test with a different battery. If problems persist, professional service may be necessary.
Is it dangerous to replace a key fob battery myself?
Replacing a key fob battery is completely safe. The voltage and amperage in coin-cell batteries are far too low to cause electrical shock. The only risk is physical damage to the fob if you apply excessive force while opening the casing. Use gentle, steady pressure with appropriate tools and you’ll have no issues.
Can moisture damage my key fob after battery replacement?
Yes, moisture can damage the internal circuitry even after successful battery replacement. If your fob gets wet, allow it to dry completely in a warm, dry location for 24 to 48 hours before using it. If moisture enters the battery compartment, you may need to clean the contacts and replace the battery again. Persistent moisture problems may require professional service.
What should I do with my old key fob battery?
Coin-cell batteries should be disposed of properly as they contain hazardous materials. Many retailers that sell batteries, including pharmacies and electronics stores, accept used batteries for recycling. Some municipalities have hazardous waste collection programs. Never throw batteries in regular trash.
Can I reprogram my key fob after changing the battery?
In most cases, reprogramming isn’t necessary after a simple battery replacement. The fob’s programming remains intact in the internal memory even when the battery is removed. However, if your fob doesn’t function after battery replacement, you may need to reprogram it. Consult your owner’s manual for programming instructions specific to your Hyundai model.


