How to Change Fire Alarm Battery: Expert Tips Inside
Fire alarms are critical safety devices that protect your home and family from the devastating consequences of fire. However, many homeowners neglect one of the simplest yet most important maintenance tasks: changing the fire alarm battery. A dead or dying battery renders your fire alarm completely useless, leaving your household vulnerable during a fire emergency. This comprehensive guide will walk you through the process of safely and effectively changing your fire alarm battery, ensuring your home remains protected around the clock.
Whether you’re dealing with a chirping smoke detector or replacing batteries as part of routine maintenance, understanding the proper procedure is essential. We’ll cover everything from identifying the correct battery type to troubleshooting common issues, plus expert safety recommendations that go beyond basic battery replacement. By following these professional guidelines, you’ll maintain optimal fire detection performance and peace of mind knowing your family is safeguarded.
Understanding Your Fire Alarm System
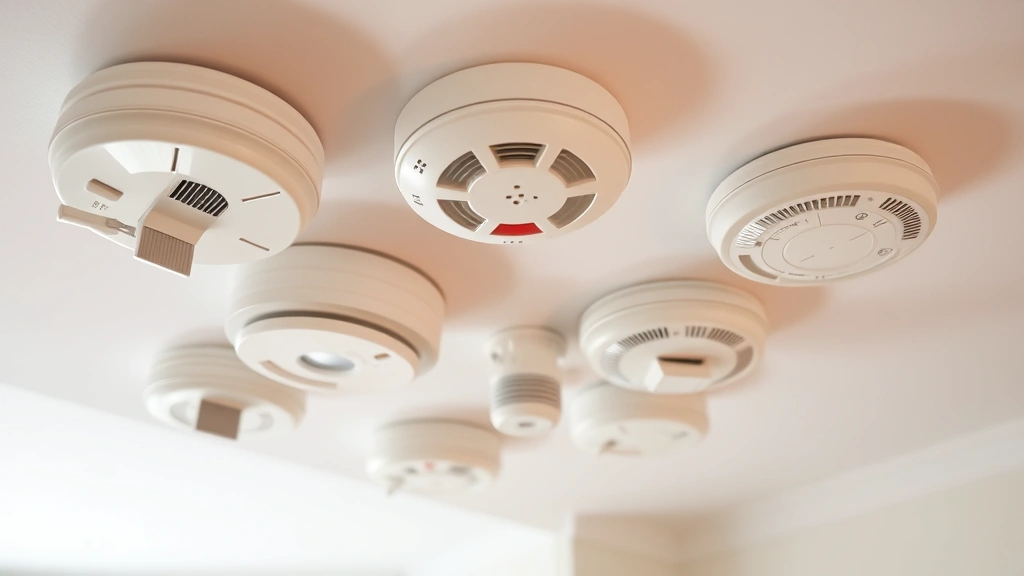
Before you begin changing your fire alarm battery, it’s important to understand the different types of fire detection systems in residential buildings. Most homes contain either ionization smoke detectors, photoelectric smoke detectors, or dual-sensor models that combine both technologies. Each type serves a specific purpose in detecting different fire conditions, and all require regular battery maintenance to function properly.
Fire alarms typically use either 9-volt batteries or AA/AAA batteries, depending on the model. The battery serves as a backup power source in case of electrical outages, ensuring your alarm continues to detect smoke even when your home’s main power is compromised. According to the National Fire Protection Association (NFPA), battery-powered and hardwired detectors with battery backup should have their batteries replaced at least once per year, or whenever the alarm begins chirping—which is the universal signal that the battery is running low.
Understanding your specific fire alarm model is crucial because different manufacturers design their units differently. Some models have easily accessible battery compartments on the front, while others require you to remove the entire detector from the ceiling or wall. Check your user manual or the manufacturer’s instructions printed on the back of your detector to identify which type you have. If you’ve lost your manual, most manufacturers provide downloadable versions on their websites.
Tools and Materials Needed
Gathering the right tools before you start makes the battery replacement process safer and more efficient. Here’s what you’ll need:
- Replacement batteries – Confirm the correct type (9V, AA, or AAA) before purchasing. Keep extras on hand for future replacements.
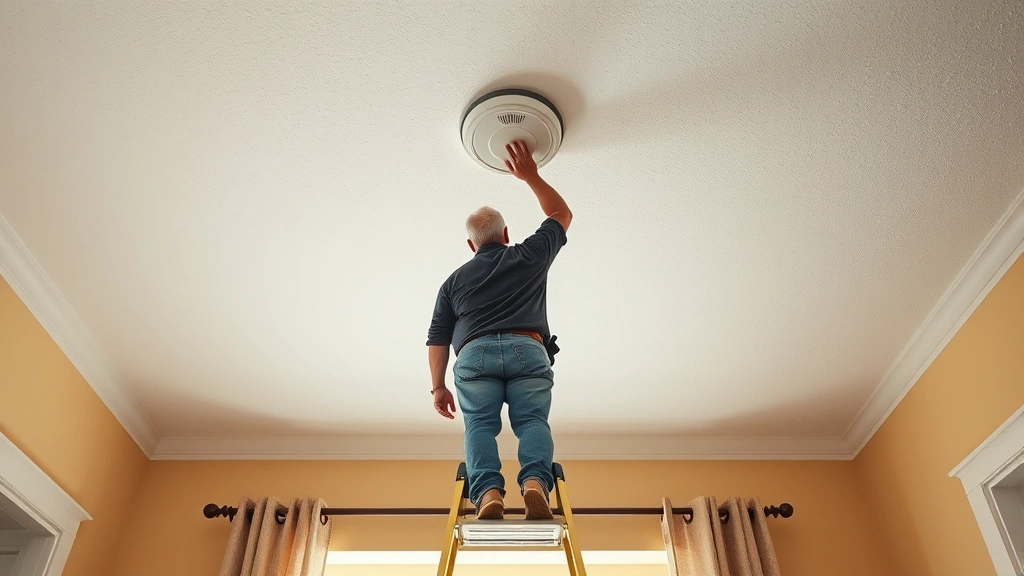
- Ladder or step stool – Most fire alarms are mounted on ceilings or high walls. A sturdy ladder ensures safe access without straining or losing balance.
- Flashlight – Helpful for seeing the battery compartment clearly, especially if your detector is in a dimly lit area.
- Soft cloth – Use this to gently clean the detector while you have it accessible, removing dust and debris that can interfere with smoke detection.
- User manual – Keep this nearby for reference, particularly if you’re unsure about your specific model’s procedures.
Safety should always be your top priority when working at heights. Ensure your ladder is on level ground, positioned directly under the detector, and that you have a clear view of the work area. Never stand on the very top rung of a ladder, and consider having someone spot you while you work.
Step-by-Step Battery Replacement
Now let’s walk through the actual process of changing your fire alarm battery. These steps apply to most standard residential detectors, though you should always verify against your specific model’s instructions.
Step 1: Prepare Your Work Area
Before climbing your ladder, gather all materials within arm’s reach. Position your ladder directly beneath the detector, ensuring it’s on a flat, stable surface. Turn off any ceiling fans or other overhead hazards that might interfere with your work. If you have a family member nearby, ask them to help stabilize the ladder.
Step 2: Access the Battery Compartment
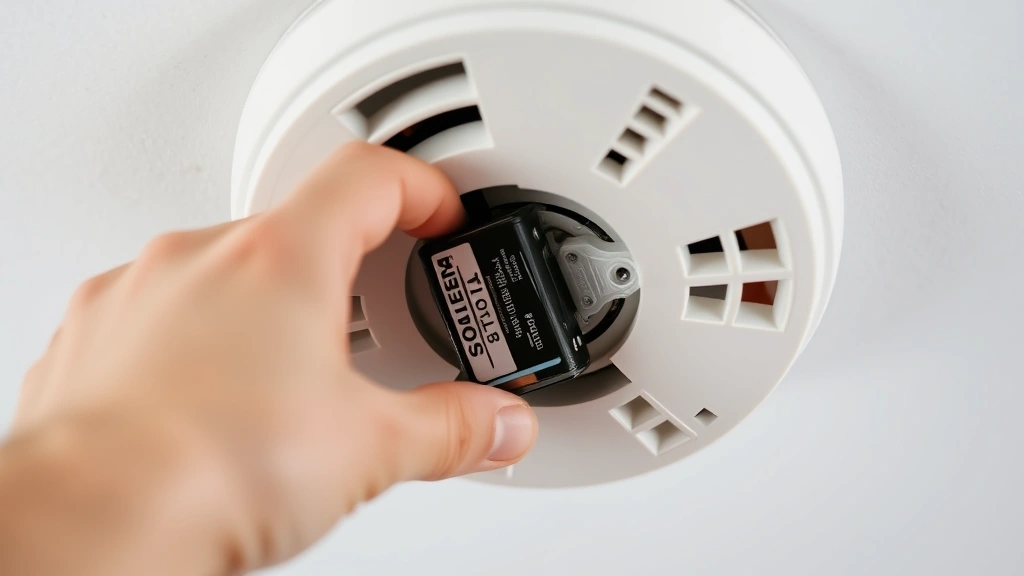
Once you’re safely positioned, locate the battery compartment on your fire alarm. Most detectors have a clearly marked compartment on the front or back. Some models require you to twist or slide the detector to remove it from its mounting bracket. Others have a hinged door that opens to reveal the battery. Gently manipulate the detector according to your model’s design—never force any components, as this can damage the unit.
Step 3: Remove the Old Battery
Carefully pull the old battery out of its slot. Note the orientation of the battery terminals—the positive side typically faces either up or toward the front of the detector. This is crucial information you’ll need when installing the new battery. If the old battery appears damaged, leaking, or corroded, clean the compartment gently with your soft cloth before inserting the new battery.
Step 4: Insert the New Battery
Take your new battery and insert it into the compartment, matching the orientation of the old battery. The battery should fit snugly without requiring excessive force. For 9-volt batteries, align the terminals properly—this is critical for proper function. For AA or AAA batteries, ensure the positive terminal faces the correct direction as indicated by the compartment design.
Step 5: Reseal the Compartment and Reinstall
Close the battery compartment door or cover, ensuring it’s fully secured. If your detector was removed from its mounting bracket, carefully replace it now, twisting or sliding it back into position until you hear a click or feel it lock securely. Never leave a detector partially installed, as this can cause false alarms or detection failures.
Testing After Replacement
After you’ve replaced the battery, testing your fire alarm is absolutely essential. This confirms that the new battery is functioning properly and that the detector itself is working as intended. Most detectors have a test button located on the front or back of the unit. Press and hold this button for several seconds—you should hear a loud, continuous alarm sound. If you don’t hear anything, or if the alarm sounds weak or intermittent, the battery may not be properly installed or may be defective.
According to safety guidelines from the CDC, you should test your fire alarms monthly to ensure they’re functioning properly. This simple monthly test takes only seconds but can make a critical difference in detecting a real fire. Create a reminder on your calendar to test all detectors in your home on the first of each month, or align it with daylight saving time changes, which is a common recommendation from fire safety experts.
If your detector continues to chirp after battery replacement, try these troubleshooting steps: first, ensure the battery is fully inserted and properly oriented; second, try a different new battery from a different package, as occasionally defective batteries reach consumers; third, clean the battery contacts gently with a dry cloth to remove any dust or corrosion that might prevent proper electrical connection.
Maintenance Schedule
Creating a consistent maintenance schedule ensures your fire alarms remain functional year-round. The Consumer Product Safety Commission (CPSC) recommends the following maintenance protocol for residential fire detection systems:
- Monthly Testing – Press the test button on each detector to verify the alarm sounds properly. This takes less than a minute per detector.
- Annual Battery Replacement – Replace batteries every year, even if they haven’t started chirping yet. Spring forward and fall back with daylight saving time are excellent reminders.
- Detector Replacement – Replace entire detectors every 10 years. Over time, the sensors become less sensitive and may fail to detect smoke effectively.
- Cleaning – Gently vacuum or dust around detectors quarterly to prevent dust accumulation, which can block smoke from reaching the sensors.
Document your maintenance activities in a simple notebook or phone app. Record the date you replaced batteries, tested detectors, and performed cleaning. This documentation can be valuable for insurance purposes and helps you stay accountable to your safety schedule. If you’re managing a rental property or commercial building, this documentation becomes even more important for compliance with International Building Code (IBC) standards.
Common Problems and Solutions
Detector Still Chirps After Battery Replacement
A persistent chirping sound after battery replacement usually indicates one of three issues: the battery isn’t fully seated, you’re using a defective battery, or the detector itself is reaching the end of its operational life (typically 10 years). Try reseating the battery first, then test with a different new battery. If the chirping continues, the detector likely needs replacement.
Battery Won’t Fit Into Compartment
If you’re struggling to insert the battery, verify you have the correct type and size. Never force a battery into a compartment, as this can damage the detector’s internal components. Check your manual to confirm the correct battery specification. If you have the right battery and it still won’t fit, the detector may be damaged and should be replaced.
Detector Won’t Test or Sounds Weak
A weak alarm sound or failure to sound during testing suggests either a defective new battery or a failing detector. Start by trying a battery from a different package or brand. If the problem persists, the detector’s internal components may be degraded, and replacement is necessary. Never assume a detector is working if you’re unsure—replace it immediately for safety.
Multiple Detectors Chirping Simultaneously
If several detectors throughout your home are chirping at once, you likely have a power issue affecting hardwired detectors, or multiple battery-powered detectors reaching end-of-life simultaneously. Replace all batteries in battery-powered detectors. For hardwired detectors, consult your breaker panel to ensure the circuit isn’t tripped, or contact a licensed electrician if you’re unsure about the wiring.
Detector Appears Corroded or Damaged
If your detector shows signs of water damage, corrosion, or physical damage, do not attempt to repair it. Replace the detector immediately. Water damage compromises the sensor’s ability to detect smoke, and physical damage may have affected internal components. This is not a situation to delay on—fire safety depends on fully functional detectors.
For more information about maintaining your home’s safety systems, visit our DIY Nests Hub Blog where we cover comprehensive home maintenance topics. If you’re interested in learning other essential home maintenance skills, check out our guides on how to change a tire on a car and how to change coolant in car for vehicles. We also offer broader guidance in our DIY car repairs beginner’s guide and how to add oil to car tutorial.
FAQ
How often should I change fire alarm batteries?
Replace fire alarm batteries at least once per year, or immediately when you hear a chirping sound indicating low battery. Many experts recommend replacing batteries when you change your clocks for daylight saving time, which happens twice yearly in most regions.
What type of battery does my fire alarm use?
Check the back or sides of your detector for printed specifications, consult your user manual, or contact the manufacturer directly. Most residential detectors use either 9-volt batteries or AA/AAA batteries. Never guess—using the wrong battery type can prevent proper operation.
Can I use rechargeable batteries in my fire alarm?
Most fire alarm manufacturers recommend against using rechargeable batteries because they may not provide consistent voltage throughout their discharge cycle. Always use the battery type specified in your detector’s manual. Using non-recommended batteries may violate the manufacturer’s warranty.
Why does my detector keep chirping even after I replaced the battery?
Try these solutions in order: reseat the battery to ensure proper contact, replace it with a battery from a different package, clean the battery contacts with a dry cloth, and finally, consider whether the detector itself is 10 or more years old and may need replacement.
Is it safe to use a ladder to reach ceiling-mounted detectors?
Yes, when proper precautions are taken. Use a sturdy, stable ladder positioned directly under the detector, never stand on the top rung, and have someone spot you if possible. If you’re uncomfortable working at heights, ask a family member or professional to perform the task.
What should I do if my detector is hardwired to electrical power?
Hardwired detectors still have battery backup. Replace the battery following the same procedures outlined in this guide. If the detector chirps continuously even after battery replacement, check your home’s electrical breaker panel to ensure the circuit isn’t tripped, or contact a licensed electrician.
How long do fire alarm batteries typically last?
Most fire alarm batteries last approximately one year under normal usage conditions. However, factors like temperature fluctuations, detector age, and environmental conditions can affect battery life. This is why annual replacement is recommended rather than waiting for the alarm to chirp.
Can I mix old and new batteries in multi-battery detectors?
No. Always replace all batteries in a detector at the same time with new batteries of the same brand and type if possible. Mixing old and new batteries can cause uneven discharge rates and potential malfunction.


