How to Change SIM Card iPhone: Expert-Approved Guide
Swapping your iPhone SIM card is one of the most straightforward mobile device tasks you can perform, yet many users feel uncertain about the process. Whether you’re upgrading to a new carrier, traveling internationally, or switching between devices, knowing how to change SIM card iPhone properly protects your device and ensures seamless connectivity. This comprehensive guide walks you through every step with expert-approved techniques that prevent damage and common mistakes.
Your SIM (Subscriber Identity Module) card is the tiny chip that connects your iPhone to your cellular network provider. Modern iPhones use nano-SIM cards or eSIM technology, both of which require specific handling procedures. Understanding the correct method ensures you maintain your phone’s integrity while activating your new service without complications or unnecessary downtime.
iPhone Models and SIM Card Types
Apple has progressively evolved its SIM card technology across iPhone generations. Understanding which type your device uses prevents frustration and ensures compatibility. iPhone XS, XR, and newer models support both nano-SIM physical cards and eSIM digital technology, offering flexibility for users who need dual connectivity or prefer entirely digital activation.
The nano-SIM card measures just 12.3mm × 8.8mm, making it significantly smaller than previous micro-SIM versions. If you’re upgrading from an older iPhone model, verify that your new SIM card is the correct nano-SIM format before attempting installation. Using an incompatible SIM card size can damage your device’s SIM slot, requiring professional repair.
eSIM technology represents the future of mobile connectivity, eliminating the physical card entirely. iPhones from iPhone XS onward support eSIM, allowing you to activate service through your carrier’s app or website without visiting a physical location. This innovation proves particularly valuable for travelers and those who switch carriers frequently.

Tools and Materials You’ll Need
Proper preparation prevents unnecessary complications when changing your iPhone SIM card. Gather these essential items before beginning the process:
- SIM ejector tool – Apple includes this with new iPhones; it’s a small metal pin with a distinctive shape
- Your new nano-SIM card – obtained from your carrier or provider
- Carrier activation documentation – includes activation codes and instructions
- Soft, lint-free cloth – for cleaning the SIM card and slot
- Steady, well-lit workspace – prevents dropping small components
- Your iPhone’s original packaging – if you lost the ejector tool, Apple’s packaging typically includes one
If you cannot locate your SIM ejector tool, alternative options exist. A thin paperclip, small sewing needle, or earring post can function as a makeshift ejector in emergency situations. However, use extreme caution with improvised tools, as applying excessive force or using tools that are too thick can crack the SIM slot and cause permanent damage requiring expensive repairs.
Step-by-Step Physical SIM Removal
The process for removing your current SIM card varies slightly depending on your iPhone model, but the fundamental technique remains consistent. Before beginning, ensure your iPhone is powered off completely. This precaution protects both your device and the SIM card during the removal process.
Locate the SIM slot on your device. The position varies by model: on iPhone 14 and newer, it’s typically on the bottom edge; on iPhone 13 and earlier, it may be on the side or bottom depending on the specific generation. Consult your iPhone’s manual or Apple’s official specifications if you’re uncertain about your model’s SIM slot location.
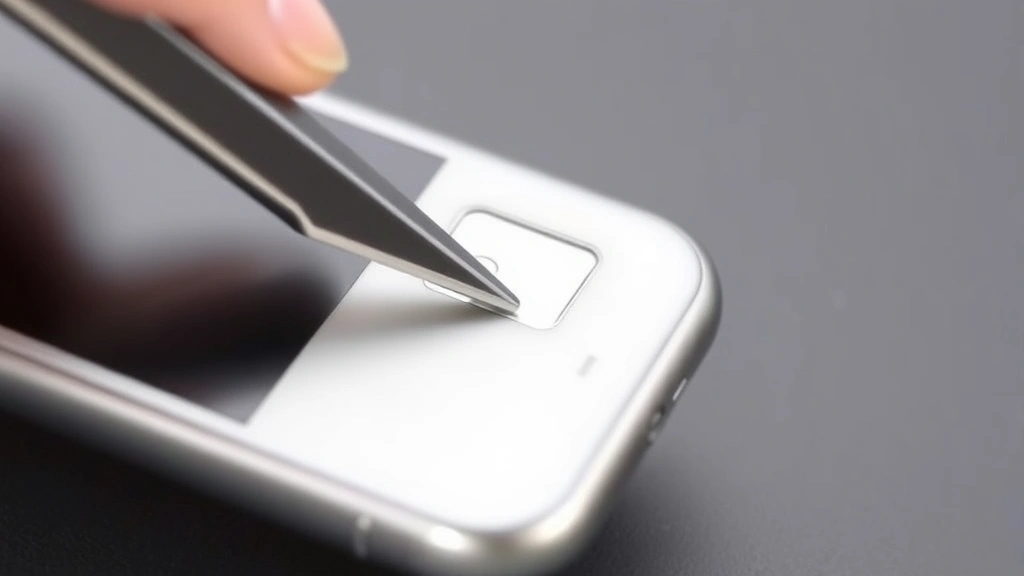
Hold your iPhone firmly in one hand, ensuring it won’t slip during the ejection process. Position your SIM ejector tool at a 90-degree angle to the small hole next to the SIM slot. Apply gentle, steady pressure – never force the tool. You should feel minimal resistance as the internal spring mechanism ejects the SIM tray. If resistance is significant, stop immediately and reassess your approach.
Once the SIM tray begins emerging, carefully remove it completely by hand. The nano-SIM card sits in a small compartment within this tray. Gently remove the card by sliding it out of its slot; never pry or twist it. Examine the card for any visible damage, dust, or debris before setting it aside safely.
Installing Your New SIM Card
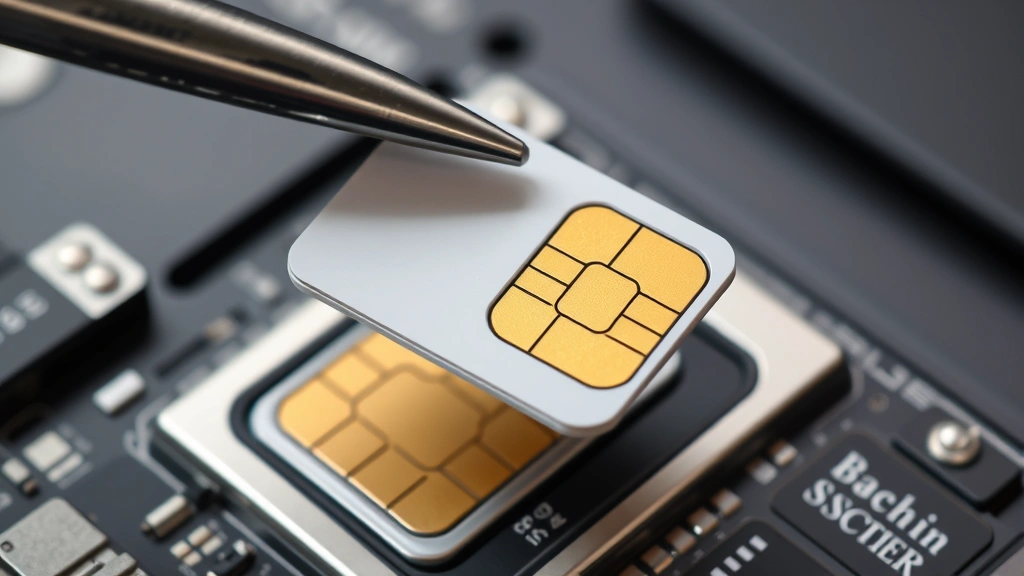
Before inserting your new SIM card, inspect it thoroughly. The card should have clean gold contact areas with no visible scratches or corrosion. If your SIM card appears damaged or worn, contact your carrier for a replacement before proceeding.
Position your new nano-SIM card in the SIM tray with the gold contacts facing downward and the beveled corner oriented correctly – it should only fit one way due to its distinctive cut. Never force the card into the tray; if it doesn’t slide smoothly into place, verify the orientation and try again.
Reinsert the SIM tray into your iPhone by aligning it with the slot and gently pushing until you hear or feel a soft click indicating it’s fully seated. The tray should sit flush with your device’s edge. Verify the tray isn’t protruding, which would indicate improper installation.
Power on your iPhone and wait for it to fully boot. Your device should automatically recognize the new SIM card and begin searching for the associated network. Activation typically completes within minutes, though some carriers require additional steps through their apps or websites. Check your carrier’s documentation for specific activation procedures.
For comprehensive guidance on other device modifications, review our article on how to change out a light switch, which demonstrates similar precision-based installation techniques that apply to delicate device modifications.
eSIM Setup Instructions
eSIM technology eliminates the need for physical SIM cards entirely, offering a modern alternative for compatible iPhones. Setting up eSIM requires your carrier’s eSIM profile, which they provide digitally rather than as a physical card.
Navigate to Settings > Cellular > Add Cellular Plan on your iPhone. Your device displays a QR code that you’ll scan using your carrier’s app or your iPhone’s camera. The carrier provides this QR code through email or their customer portal. Ensure you have a stable Wi-Fi or cellular connection before beginning the eSIM activation process.
Scan the QR code provided by your carrier using your iPhone’s camera app or the QR code scanner within Settings. Your device automatically recognizes the eSIM profile and initiates download and installation. Follow your carrier’s specific instructions, as activation procedures vary between providers. Some require verification through the carrier’s app, while others activate automatically upon profile installation.
eSIM setup typically completes within five to ten minutes. Your iPhone displays a confirmation message once the cellular plan is active. You can verify activation by checking your carrier’s app or attempting a test call or text message.
The advantage of eSIM extends beyond convenience. Traveling internationally becomes simpler, as you can activate local carrier plans without purchasing physical SIM cards. Business users benefit from managing multiple plans on a single device, switching between personal and work numbers seamlessly.
Troubleshooting Common Issues
Despite following proper procedures, occasionally issues arise during SIM card changes. Understanding common problems and their solutions prevents unnecessary carrier visits or technical support calls.
“No Service” or “No Signal” Messages – If your iPhone displays these messages after SIM installation, first verify the SIM card is fully seated in its tray. Power off your device, remove and reinsert the SIM tray, then restart. If the issue persists, contact your carrier to confirm the SIM card is properly activated. Some carriers require activation codes or verification before service becomes available.
SIM Card Not Recognized – Your iPhone may not recognize a new SIM card if it’s damaged or incompatible. Verify your carrier provided a nano-SIM, not a micro-SIM or standard SIM. If you’re certain the card is correct, gently clean the gold contacts using a soft, lint-free cloth. Dirt or oxidation on contact surfaces prevents proper device recognition.
SIM Tray Won’t Eject – Forcing a stuck SIM tray risks permanent damage. If the tray won’t eject with gentle pressure from your ejector tool, stop immediately. Visit an authorized Apple Service Provider, as internal debris or mechanical issues require professional assistance. Attempting to force the tray can crack the SIM slot mechanism, requiring expensive motherboard repairs.
Activation Delays – Some carriers require 24 hours to fully activate new SIM cards. If you’ve followed all setup steps and activation hasn’t completed, wait 24 hours before contacting support. Ensure your device has internet connectivity during the waiting period, as your carrier may send activation confirmations via email or text.
Dual SIM Issues – iPhones supporting both nano-SIM and eSIM sometimes experience conflicts. If you’re using both SIM types simultaneously, ensure both are activated through your carriers. Deactivate one plan temporarily if you experience connectivity issues, then reactivate once the device stabilizes.
Safety Precautions and Best Practices
Protecting your iPhone and ensuring successful SIM card changes requires understanding critical safety practices. These precautions prevent device damage and service disruptions.
Always power off your iPhone before removing the SIM card. Removing the SIM while the device is active can cause data corruption or connectivity errors. Powering down ensures a clean separation between your device and the network, allowing safe hardware removal.
Handle your SIM card and SIM tray with dry hands in a clean environment. Moisture, dust, and debris on contact surfaces prevent proper electrical connection. If your SIM card becomes wet, allow it to dry completely before reinsertion. Never attempt to dry it with heat sources like hair dryers, which can damage the card’s internal components.
Store removed SIM cards safely in a protective case or envelope to prevent physical damage. SIM cards are robust but can crack or bend if dropped on hard surfaces or stepped on. Keep your old SIM card until you’ve confirmed your new one functions properly, as you may need to revert temporarily if activation issues arise.
Avoid touching the gold contact areas on your SIM card. Oils from your skin can create a thin film that interferes with electrical connections. If you accidentally touch the contacts, clean them gently with a soft, dry cloth before reinserting.
When inserting the SIM tray, apply only gentle pressure. The tray should slide smoothly into place with minimal force. Excessive pressure indicates improper alignment or orientation. Stop and reassess rather than forcing the tray, which can bend internal components or crack the slot.
For related guidance on careful device handling and modification, explore our comprehensive article on DIY home security, which emphasizes precision techniques applicable to delicate electronic installations.
Document your carrier’s activation information before beginning the SIM swap. Write down your account number, activation code, and customer service contact information. Having this information readily available accelerates troubleshooting if issues arise during or after the SIM change.
FAQ
Can I change my iPhone SIM card without powering it off?
While your iPhone may continue functioning if you remove the SIM while it’s powered on, this practice risks data corruption and connectivity errors. Always power off your device before SIM removal to ensure a clean separation from the network. This precaution protects your device’s operating system and prevents potential service disruptions.
What happens to my data when I change my SIM card?
Changing your SIM card does not affect your iPhone’s stored data, including contacts, photos, messages, or apps. Your data remains on your device’s internal storage regardless of SIM changes. However, contacts stored specifically on your SIM card (an older practice rarely used today) may not transfer automatically. Modern iPhones store contacts in iCloud or locally on the device, so data loss is unlikely.
How long does SIM card activation take?
Most carriers activate new SIM cards within minutes to a few hours. Some carriers require 24 hours for full activation. During the waiting period, you may experience intermittent service. Ensure your device maintains internet connectivity through Wi-Fi during the activation window, as your carrier may send activation confirmations or updates.
Can I use an old SIM card in a new iPhone?
Yes, if your old SIM card is a nano-SIM and is still active with your carrier. Older micro-SIM or standard SIM cards won’t fit in modern iPhone SIM slots. Contact your carrier if you’re unsure about your SIM card’s age or type. Many carriers offer free nano-SIM replacements for customers upgrading to newer devices.
What should I do if my SIM card is damaged?
If your SIM card shows visible cracks, corrosion, or if the gold contacts appear scratched or discolored, contact your carrier for a replacement. Damaged SIM cards may not function reliably, causing intermittent service issues. Most carriers replace damaged SIM cards at no charge, either by mail or through retail locations.
Is eSIM better than physical SIM cards?
eSIM offers advantages including easier carrier switching, dual-plan capability, and international travel convenience. However, physical SIM cards provide reliability and compatibility with all carriers. The choice depends on your needs. Frequent travelers benefit from eSIM flexibility, while those who rarely switch carriers may prefer the simplicity of physical SIM cards.
Can I have two SIM cards active simultaneously?
Yes, iPhones supporting both nano-SIM and eSIM can maintain two active plans simultaneously. This dual-SIM capability allows you to keep separate work and personal numbers on a single device, or maintain local and international plans while traveling. Each SIM card requires separate activation through its respective carrier.


