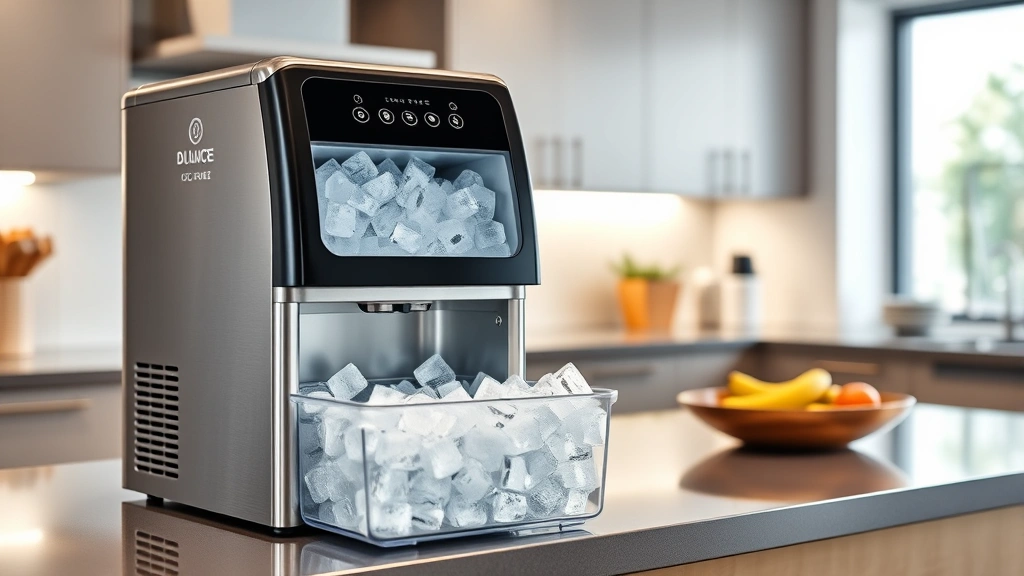
How to Clean a Countertop Ice Maker: Expert Tips for Optimal Performance
A countertop ice maker is a convenient kitchen appliance that delivers fresh ice on demand, but like any appliance that produces consumable items, it requires regular cleaning and maintenance to function properly and safely. Over time, mineral deposits, mold, and bacteria can accumulate inside the machine, affecting ice quality and potentially compromising food safety. Whether you’re dealing with cloudy ice, slower production rates, or simply want to maintain peak performance, understanding the proper cleaning techniques is essential for every ice maker owner.
This comprehensive guide walks you through every step of the cleaning process, from routine daily maintenance to deep cleaning procedures that eliminate stubborn mineral buildup. We’ll cover the tools you’ll need, the cleaning solutions that work best, and the specific techniques that manufacturers recommend. By following these expert tips, you’ll extend your ice maker’s lifespan, improve ice quality, and ensure your machine operates at maximum efficiency.
Understanding Your Countertop Ice Maker
Countertop ice makers are compact appliances that freeze water into ice cubes using a refrigeration cycle. Unlike built-in ice makers, these portable units sit on your counter and require a water supply connection and electrical outlet. The machine contains several critical components: a water reservoir, an evaporator plate where freezing occurs, a heating element that releases finished ice, and a collection bin where cubes accumulate.
Water quality directly impacts how often you’ll need to clean your machine. Hard water—water with high mineral content like calcium and magnesium—causes buildup much faster than soft water. If you live in an area with hard water, you may need to descale your ice maker every month rather than every three months. Understanding your water quality helps you establish an appropriate cleaning schedule and prevents performance degradation.
Regular cleaning prevents several problems: mineral scale that reduces freezing efficiency, mold and mildew growth that affects ice taste and safety, bacterial contamination that poses health risks, and mechanical failures caused by buildup blocking water flow. Most manufacturers recommend cleaning at least monthly, though usage patterns and water quality may necessitate more frequent attention.

Essential Cleaning Supplies and Tools
Before starting any cleaning project, gather the proper supplies. Having everything on hand prevents interruptions and ensures you can complete the job thoroughly. Here’s what you’ll need for effective ice maker maintenance:
- White vinegar – The primary descaling agent for mineral removal. Similar to how you’d clean a coffee maker with vinegar, this natural acid dissolves calcium deposits safely
- Commercial ice maker cleaner – Products specifically formulated for ice machines, often containing citric acid or other safe descaling agents
- Soft-bristled brushes – For scrubbing without scratching internal components
- Lint-free cloths – Microfiber cloths prevent fiber residue from contaminating ice
- Small containers – For mixing cleaning solutions and holding supplies during disassembly
- Distilled water – For rinsing to avoid introducing new minerals
- Rubber gloves – Protects hands from cleaning solutions and cold surfaces
- Small screwdriver set – For removing access panels and components (check your manual first)
Always consult your ice maker’s manual before using any cleaning products, as some machines have specific recommendations or restrictions. Avoid abrasive scrubbers, harsh chemicals, or bleach unless explicitly approved by the manufacturer, as these can damage seals, plastic components, and internal mechanisms.
Daily Maintenance Routine
Establishing a simple daily habit prevents major cleaning problems from developing. Each day, spend just five minutes on basic maintenance that keeps your machine running smoothly and ensures ice quality remains high throughout its lifespan.
Empty the ice bin regularly. Don’t let ice sit in the collection bin for extended periods. Stagnant ice can absorb odors from your freezer or refrigerator, develop freezer burn, and potentially harbor bacteria. Empty the bin daily, especially if you’re not using the ice regularly. Store harvested ice in a sealed freezer bag for better preservation and flavor.
Wipe the exterior and bin opening. Use a damp, lint-free cloth to wipe down the outside of the machine and around the ice dispensing area. This removes dust, fingerprints, and any splashed water that could promote mold growth. Pay special attention to crevices where moisture accumulates.
Check the water supply line. Inspect the inlet tube connection for leaks or cracks. A small leak can cause water damage to your countertop and surrounding cabinetry. If you notice any issues, address them immediately.
Listen for unusual sounds. Familiarize yourself with normal operating sounds. If you hear grinding, squealing, or other unusual noises, the machine may need servicing or descaling.
Monthly Deep Cleaning Process
Every month, dedicate 30-45 minutes to a thorough cleaning that addresses both visible and hidden areas. This process removes accumulated mineral deposits, mold spores, and bacteria before they compromise ice quality or machine function.
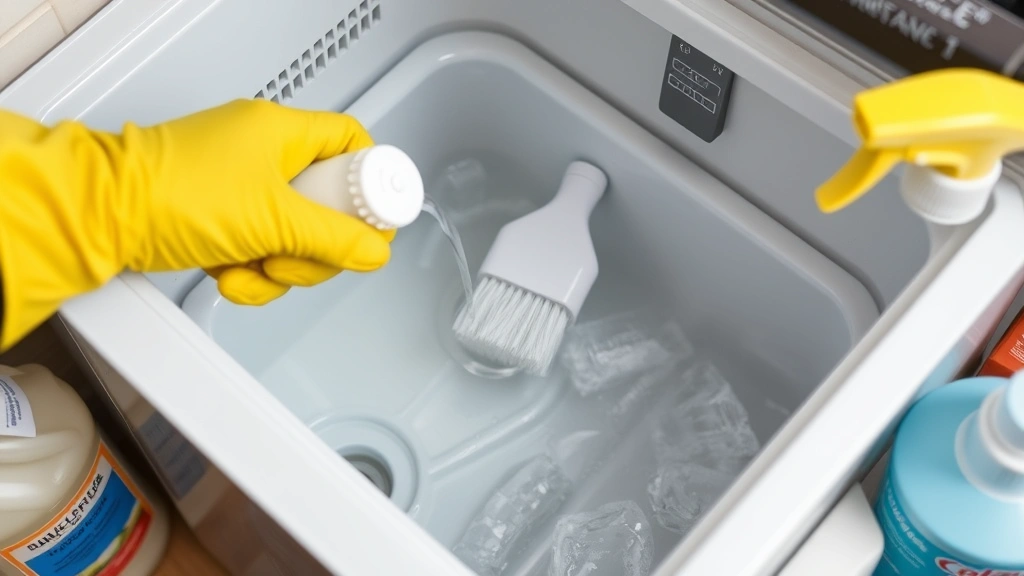
Step 1: Unplug and prepare the machine. Always disconnect the power supply before cleaning. Wait at least 10 minutes for internal components to warm slightly, making mineral deposits easier to remove. Have your cleaning supplies organized and accessible.
Step 2: Remove and clean the ice bin. Take out the collection bin and wash it with warm soapy water. Use a soft brush to scrub interior surfaces, paying attention to corners where mold likes to grow. Rinse thoroughly with distilled water and dry completely with a lint-free cloth. Set aside to air dry while you clean the machine itself.
Step 3: Clean the water reservoir. Most countertop ice makers have a removable water tank. Empty any remaining water and fill the tank halfway with a 50/50 mixture of white vinegar and distilled water. Let this solution sit for 15 minutes to break down mineral deposits. Use a soft brush to scrub the interior, paying special attention to corners and the fill line area where mineral buildup concentrates. Empty the vinegar solution and rinse multiple times with distilled water until no vinegar smell remains.
Step 4: Run a cleaning cycle. Fill the clean reservoir with your ice maker’s recommended cleaning solution or a 50/50 vinegar and water mixture. Insert the reservoir and run one complete ice-making cycle, allowing the cleaning solution to flow through all internal pathways. Discard the ice produced during this cycle—do not consume it. This ensures the cleaning solution reaches the evaporator plate and all water lines.
Step 5: Flush the system. After the cleaning cycle completes, empty the remaining solution. Refill the reservoir with distilled water only and run 2-3 complete ice-making cycles, discarding all ice produced. This thorough rinsing removes all traces of cleaning solution from internal components.
Step 6: Clean accessible external components. If your machine allows access to the condenser coils or fan area, use a soft brush or vacuum with a brush attachment to remove dust and debris. Restricted airflow reduces cooling efficiency and forces the compressor to work harder.
Descaling and Mineral Removal
Hard water buildup requires aggressive descaling beyond routine cleaning. If you notice slower ice production, thinner ice cubes, or longer cycle times, mineral scale likely restricts water flow or reduces heat transfer efficiency in the evaporator.
Identifying scale buildup. Open any accessible panels or covers and look for white, chalky deposits on internal surfaces. These deposits are primarily calcium carbonate and magnesium compounds that accumulate over time. The more you see, the more aggressively you need to descale.
Citric acid descaling method. Many manufacturers recommend citric acid as a gentler alternative to vinegar. Mix citric acid powder according to package directions—typically 1-2 tablespoons per gallon of water—and use this solution in place of vinegar for your cleaning cycle. Citric acid is less corrosive than vinegar while remaining effective against mineral deposits. Run the cleaning cycle twice with citric acid solution, then flush with 3-4 cycles of distilled water.
Vinegar descaling for heavy buildup. For stubborn deposits, use white vinegar undiluted or in a 75/25 vinegar-to-water ratio. This stronger solution penetrates mineral scale more effectively. Run one cycle with undiluted vinegar, let the machine sit for 30 minutes with vinegar solution in the reservoir, then run another cycle. Flush thoroughly with at least 4-5 cycles of distilled water to ensure all vinegar is removed.
Professional descaling service. If your machine shows signs of severe scaling—ice production drops by 50% or more, or you notice visible scale despite regular cleaning—consider professional servicing. Technicians have specialized equipment and commercial-grade descaling solutions that reach areas you cannot access.
Troubleshooting Common Issues
Understanding common problems helps you address them before they require expensive repairs. Many issues stem directly from inadequate cleaning or descaling.
Cloudy or discolored ice. Cloudiness typically results from mineral-rich water or dissolved gases. This is primarily an aesthetic issue but indicates your water supply contains high mineral content. Consider using filtered water in your ice maker’s reservoir, similar to how you might improve quality when maintaining other water-dependent appliances. Alternatively, run a vinegar descaling cycle to remove existing mineral deposits, then use distilled water for the next several batches of ice.
Ice tastes odd or has freezer smell. This indicates mold or bacteria growth, or stale ice sitting too long in the bin. Empty the bin completely, wash it thoroughly, and run several cleaning cycles. Establish a habit of emptying the bin daily. If the problem persists after cleaning, the evaporator plate or internal water lines may harbor mold that requires professional cleaning.
Slow ice production or thin ice cubes. Mineral scale blocking water flow or insulating the evaporator plate prevents proper freezing. Perform a complete descaling procedure using citric acid or vinegar. If production doesn’t improve after descaling, the compressor may be failing and require professional service.
Leaking water. Check all connection points where the water supply line connects to the machine. Tighten fittings if loose. If leaking continues, the inlet valve may be stuck open—usually caused by mineral deposits. Run a vinegar descaling cycle to clear the valve. If leaking persists, the valve requires replacement by a technician.
Machine won’t freeze water. Verify the power connection and that the machine is plugged in. Check that the water reservoir is filled. If these basics check out, mineral scale may have completely blocked water flow or damaged the evaporator. Run an aggressive descaling cycle, then test again. If the machine still doesn’t freeze, professional service is necessary.
For additional guidance on cleaning appliances and maintaining your kitchen, explore our comprehensive DIY cleaning guides and maintenance resources that cover various household systems and surfaces.
Frequently Asked Questions
How often should I clean my countertop ice maker?
At minimum, clean your ice maker monthly. If you have hard water, live in an area with high mineral content, or use the machine frequently, clean it every two weeks. If you notice performance changes before the scheduled cleaning, address it immediately rather than waiting for the regular cycle.
Can I use tap water in my ice maker, or should I use distilled water?
You can use tap water, though distilled water produces clearer ice and reduces mineral buildup. If you use tap water and notice cloudiness or scaling, switch to distilled water or use a quality water filter pitcher to supply your ice maker. The slight additional cost of distilled water pays for itself through reduced cleaning frequency and extended machine lifespan.
Is white vinegar safe to use in my ice maker?
White vinegar is safe and effective for most ice makers, but always check your manufacturer’s manual first. Some machines specifically recommend commercial ice maker cleaner or citric acid instead. If your manual doesn’t address vinegar, a 50/50 vinegar-and-water solution is a safe starting point. Never use undiluted vinegar unless you’ve confirmed it’s safe for your specific model.
What should I do if my ice maker produces ice but it smells bad?
Bad-smelling ice indicates mold, bacteria, or stale ice. First, empty the bin completely and wash it thoroughly. Run several cleaning cycles with vinegar or commercial cleaner. If the smell persists after cleaning, the evaporator plate or internal water lines likely harbor mold that requires professional cleaning. Never consume ice that smells bad, as it may pose health risks.
Can I take apart my ice maker to clean internal components?
Only disassemble components that your manual explicitly says you can remove—typically the water reservoir and ice bin. Never attempt to remove the evaporator plate, compressor, or electrical components unless you’re a trained technician. Improper disassembly can damage seals, electrical connections, and refrigerant lines, resulting in expensive repairs or complete machine failure.
How long does a countertop ice maker typically last with proper maintenance?
Well-maintained countertop ice makers typically last 3-10 years depending on usage frequency, water quality, and build quality. Machines that receive regular monthly cleaning and appropriate descaling last significantly longer than those that are neglected. Proper maintenance also prevents the gradual performance decline that makes machines less useful over time.


