
How to Clean Baseball Hats: Expert Tips for Maintaining Your Favorite Caps
Baseball hats are more than just sports accessories—they’re everyday wear that accumulates sweat, dirt, and environmental grime. Whether you’re a casual fan or a dedicated collector, knowing how to properly clean your baseball caps will extend their lifespan and keep them looking fresh. Unlike delicate garments, baseball hats require specific cleaning techniques to preserve their shape, color, and structural integrity without causing damage.
The challenge with cleaning baseball hats lies in their unique construction. The stiff bill, fabric panels, and often-delicate embroidery demand a gentler approach than throwing them in the washing machine. This guide covers everything from basic spot cleaning to deep cleaning methods, ensuring your favorite hats remain in pristine condition for years to come.

Understanding Your Baseball Hat Material
Before you begin any cleaning process, identify your hat’s material composition. Baseball caps are typically made from cotton, polyester, wool, or a blend of these fabrics. Each material responds differently to water, heat, and cleaning agents. Cotton caps are generally more durable and forgiving, while wool requires extra care to prevent shrinking. Synthetic blends offer moderate durability but may hold stains more stubbornly than natural fibers.
Check the interior label for care instructions—most manufacturers provide specific guidance. Look for any special embellishments like embroidery, patches, or leather accents that require modified cleaning approaches. The bill is usually reinforced with plastic, buckram, or cardboard, which determines whether your hat can withstand water-based cleaning methods. A quick inspection saves time and prevents costly mistakes.
Understanding fabric composition also helps you select appropriate cleaning products. Wool caps benefit from specialized wool detergent, while cotton and polyester blends work well with standard mild detergents. If your hat features leather sweatbands or metal eyelets, you’ll need to protect these components during cleaning.
Pre-Cleaning Inspection and Preparation
Proper preparation prevents damage and improves cleaning effectiveness. Start by gently brushing the exterior with a soft-bristled brush to remove loose dust and debris. This step reduces the amount of dirt that will transfer to cleaning water, keeping your cleaning solution cleaner longer. Pay special attention to the bill’s underside and seams where dirt accumulates.
Identify stain locations and types before cleaning. Fresh sweat stains differ from set-in dirt or food marks, and treatment varies accordingly. Note any discoloration that might indicate mold or mildew—these require different approaches than standard sweat stains. Check the bill’s interior for any water damage or deterioration that might worsen with moisture exposure.
Test your cleaning solution on an inconspicuous area first, such as the interior sweatband. This patch test reveals whether the solution will cause color bleeding or fabric damage. Allow the test area to dry completely before proceeding with full cleaning. If you notice any adverse reactions, dilute the solution further or switch to a gentler cleaning method.
Gather all necessary supplies before beginning: mild detergent, soft brushes, clean towels, and a hat form or clean bowl to maintain shape during cleaning. Having everything ready ensures efficient work and reduces the risk of damaging your cap through rushed or improvised techniques.
Hand Washing Method
Hand washing remains the safest cleaning method for most baseball caps, particularly those with delicate embroidery or special finishes. Fill a sink or basin with lukewarm water—hot water can damage some fabrics and cause shrinking. Add a small amount of mild detergent, typically just a teaspoon for a basin of water. Stir gently to distribute the soap evenly.
Submerge your cap completely and let it soak for 10-15 minutes. This soaking period allows the detergent to penetrate the fabric and loosen embedded dirt. For heavily soiled caps, extend soaking time to 30 minutes. Gently agitate the water around the hat without scrubbing forcefully, as this can damage fibers and set stains.
After soaking, focus on problem areas with a soft brush or cloth. Use gentle circular motions on the bill and sweatband where sweat and dirt accumulate most heavily. The crown typically requires less aggressive scrubbing. Avoid twisting or wringing the cap, as this distorts its shape permanently.
Rinse thoroughly under cool running water until all soap residue disappears. Cloudy water indicates remaining detergent—continue rinsing until the water runs clear. Inadequate rinsing leaves detergent residue that attracts dirt and creates visible staining over time. Gently squeeze excess water without wringing, supporting the hat’s structure throughout.
Machine Washing Guide
Some caps can withstand machine washing, but only with proper precautions. Use a mesh laundry bag designed for delicate items to protect your hat from agitation damage. Place the cap inside, zip it closed, and set your washing machine to the delicate or hand-wash cycle with cold water. Never use hot water, as temperature variations can shrink fabric and damage the bill’s structure.
Select a mild detergent appropriate for your hat’s material—wool-specific detergent for wool caps, and gentle laundry soap for cotton or synthetic blends. Use less detergent than normal laundry, as concentrated soap damages fibers. Avoid bleach and fabric softeners, which can discolor your cap and weaken fibers.
For added protection, place your cap in a hat washing cage, a specialized device that holds the cap’s shape while allowing water circulation. These inexpensive tools prevent crushing and deformation during the wash cycle. If using a standard mesh bag, ensure your cap maintains its shape inside.
Never use the dryer for baseball caps. Machine drying causes shrinking, color fading, and permanent shape distortion. Always air-dry your caps using the methods described in the drying section. Machine washing works best for sturdy cotton caps without delicate embroidery or special finishes.
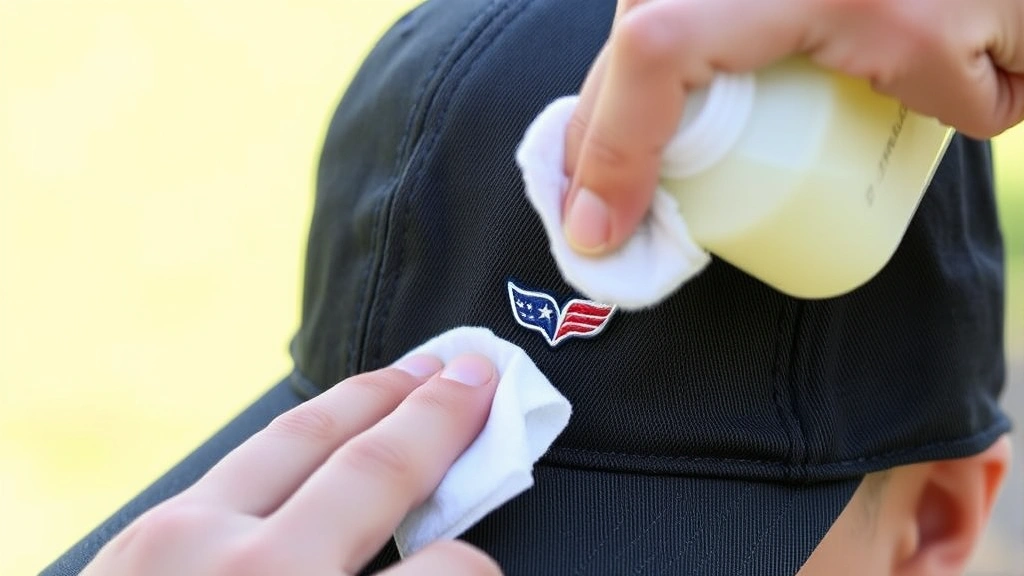
Spot Cleaning Techniques
Spot cleaning addresses specific stains without full-cap cleaning, ideal for minor soiling or between deep cleans. Mix a small amount of mild detergent with cool water to create a cleaning solution. Dampen a clean cloth and gently dab the stained area, working from the outside edges toward the center to prevent spreading.
For sweat stains on the sweatband, create a paste with baking soda and water. Apply this paste directly to the discolored area and let it sit for 15-30 minutes. Gently scrub with a soft brush, then rinse thoroughly. Baking soda is non-toxic and highly effective for organic stains without harsh chemicals.
Treat oil-based stains with a small amount of dish soap, which breaks down grease effectively. Apply sparingly to avoid oversaturating the fabric. Let the soap sit for 5-10 minutes before gently working it in with a soft cloth. Rinse multiple times to remove all soap residue.
For ink or dye stains, use rubbing alcohol on a cotton ball. Test this method on hidden areas first, as alcohol can affect some dyes. Dab gently without rubbing, allowing the alcohol to dissolve the stain. Some stains set permanently—don’t expect complete removal of old or stubborn marks.
Drying and Storage
Proper drying is crucial for maintaining your cap’s shape and preventing mold growth. Never hang your wet cap on a hook, as this stretches the crown and distorts the shape. Instead, place it on a hat form, clean bowl, or even a rolled towel to maintain its natural contours. The form should fit snugly enough to hold shape but not so tightly that it leaves creases.
Air-dry your cap in a well-ventilated area away from direct sunlight. Sunlight fades colors over time, while direct heat sources like radiators or hair dryers cause shrinking and damage. A shaded, breezy location dries your cap evenly without risking damage. Drying typically takes 4-8 hours depending on humidity and fabric thickness.
Once dry, store your caps properly to maintain their condition. Use hat forms or hanging organizers that support the crown without crushing. Keep caps away from damp basements where mold develops, and avoid attics with extreme temperature fluctuations. Store in a cool, dry closet with good air circulation.
Never stack caps directly on top of each other, as this compresses the crown. Use shelving, hat stands, or individual storage boxes. If stacking is necessary, place acid-free tissue paper between caps to prevent direct contact and color transfer. Proper storage extends your cap’s lifespan significantly.
Removing Stubborn Stains
Stubborn stains require patience and targeted approaches. For grass stains, create a solution with equal parts white vinegar and water. Apply this mixture to the stain and let it sit for 30 minutes. The acidity helps break down plant matter without damaging fabric. Gently scrub with a soft brush and rinse thoroughly.
Rust stains can be treated with lemon juice and salt. Mix these into a paste and apply directly to the stain. Let the paste sit for 2-3 hours, checking occasionally. The citric acid dissolves rust effectively. Rinse thoroughly and repeat if necessary. This method works best on fresh rust stains before they set permanently.
For mold or mildew, mix equal parts white vinegar and water in a spray bottle. Spray affected areas lightly and let sit for 15-20 minutes. Gently scrub with a soft brush and rinse thoroughly. Air-dry immediately in sunlight if possible—UV rays kill remaining mold spores. Prevention through proper storage prevents this problem entirely.
Yellowing that occurs over time may be reversible with hydrogen peroxide. Test on hidden areas first, as peroxide can affect some dyes. Mix a weak solution (3% peroxide) with water and apply to yellowed areas. Let sit for 10-15 minutes and rinse thoroughly. This method works best on white or light-colored caps.
Protecting Your Investment
Prevention is more effective than correction when protecting your baseball caps. Consider applying a fabric protectant spray designed for hats, which creates a water-resistant barrier that repels stains and moisture. Apply these products in a well-ventilated area following manufacturer instructions. Reapply annually or after cleaning to maintain protection.
Minimize sweat accumulation by wearing your cap for shorter periods and allowing it to air between wearings. Sweat builds up over time and creates stubborn stains and odors that are difficult to remove. Rotating between multiple caps extends each one’s lifespan significantly.
Avoid storing caps in plastic bags or sealed containers, as trapped moisture promotes mold growth. Use breathable fabric storage bags or open shelving instead. Keep caps away from extreme temperatures, humidity fluctuations, and direct sunlight. These environmental factors degrade materials and cause fading.
For valuable or vintage caps, consider professional cleaning services specializing in hat care. These experts have advanced equipment and solutions for delicate or irreplaceable items. The cost is worthwhile for caps with significant sentimental or monetary value. Professional cleaning also provides restoration services for damaged bills or embroidery.
FAQ
Can I put my baseball cap in the washing machine?
Some caps can withstand machine washing on delicate cycles with cold water, but hand washing is safer for most hats. Use a mesh laundry bag or hat cage for protection. Never use hot water or the dryer, as these damage the bill and cause shrinking.
How do I remove yellow sweat stains from my cap?
Create a paste with baking soda and water, apply to stains, and let sit 15-30 minutes. Gently scrub with a soft brush and rinse thoroughly. For stubborn stains, try a weak hydrogen peroxide solution. Test on hidden areas first to ensure color safety.
What’s the best way to dry a baseball cap?
Place the wet cap on a hat form or clean bowl to maintain shape. Air-dry in a well-ventilated area away from direct sunlight and heat sources. Never hang the cap on a hook or use a dryer. Drying typically takes 4-8 hours depending on humidity.
Can I clean embroidered caps?
Yes, but use extra care around embroidered areas. Hand wash gently, avoiding vigorous scrubbing near embroidery. Use a soft brush and mild detergent. Test cleaning solutions on hidden areas first, as some embroidery threads may bleed color.
How often should I clean my baseball cap?
Clean caps when visibly soiled or every 2-4 weeks if worn regularly. Spot-clean sweat stains weekly to prevent buildup. Proper storage and rotating between multiple caps reduces cleaning frequency and extends lifespan.
What should I do if my cap smells bad?
Soak the cap in a solution of equal parts white vinegar and water for 30 minutes. The vinegar neutralizes odors naturally. Rinse thoroughly and air-dry completely in sunlight if possible. Store in a breathable bag rather than sealed containers.
Can I use bleach on my baseball cap?
Never use bleach on baseball caps. Bleach damages fibers, causes discoloration, and weakens the fabric structure. Use mild detergents and gentle cleaning methods instead. For whitening, try weak hydrogen peroxide solutions tested on hidden areas first.


