Build a Shed Base? Expert Tips for Stability and Longevity
A solid shed base is the foundation of any successful outdoor structure project. Whether you’re planning a small garden shed, a storage unit, or a workshop, the base determines how long your investment will last and how well it performs year-round. Many DIY builders overlook this critical step, focusing instead on walls and roofing, but a poorly constructed base can lead to structural failure, pest infiltration, and costly repairs within just a few years.
The good news is that building a stable, long-lasting shed base doesn’t require professional contractors or advanced engineering knowledge. With proper planning, the right materials, and attention to detail, you can create a base that will support your shed for decades. This comprehensive guide walks you through every stage of the process, from site selection and preparation to material choices and installation techniques that ensure maximum stability and drainage.
Why a Proper Shed Base Matters
The shed base serves multiple critical functions that go far beyond simply providing a level surface. It distributes the weight of your structure evenly across the ground, prevents frost heave during winter cycles, manages water runoff and moisture intrusion, and creates a barrier against ground-dwelling pests and rodents. When these functions fail, you’re looking at sagging floors, rotting wood, foundation cracks, and pest problems that become exponentially more expensive to fix.
Building codes and construction standards emphasize proper foundation work because the consequences of cutting corners are severe. A properly engineered base protects your investment and ensures your shed remains structurally sound through freeze-thaw cycles, heavy snow loads, and seasonal ground movement. The time and money you invest upfront in a quality base will save you thousands in repairs and premature replacement costs.
Most homeowners underestimate how much ground movement occurs beneath their sheds. Soil expands when frozen and contracts when thawed, a process that occurs multiple times during winter months. Without a proper base that accommodates this movement, your shed will shift, settle unevenly, and develop cracks. Additionally, moisture wicking from damp soil can rot wooden floor joists and sills, while poor drainage creates standing water that attracts pests and promotes mold growth inside your shed.
Choosing Your Base Material
Several material options exist for shed bases, each with distinct advantages and limitations. Your choice depends on budget, climate, soil conditions, shed size, and intended use. Understanding the pros and cons of each option helps you make an informed decision that matches your specific situation.
Concrete Slabs: Concrete is the most durable and long-lasting option, offering excellent moisture protection and a level, stable surface. A properly poured concrete slab with adequate thickness, reinforcement, and drainage can last 40+ years. However, concrete requires more preparation, expense, and skill to install correctly. It’s also permanent, making future modifications difficult. Concrete works best in well-drained areas with stable soil.
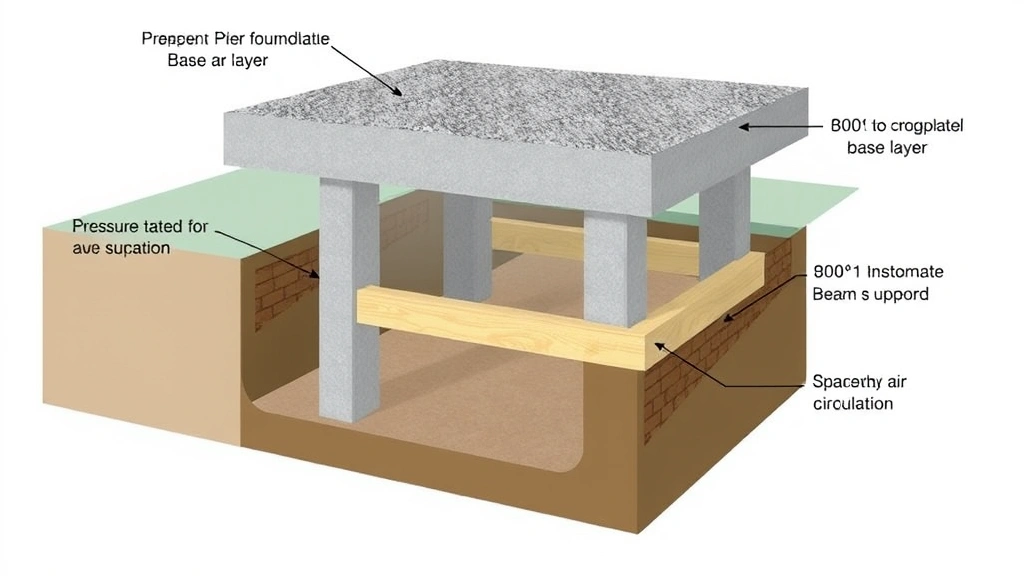
Concrete Piers: These individual concrete footings support a wooden frame structure, allowing air circulation underneath. Piers are more affordable than a full slab, easier to adjust for uneven terrain, and permit drainage. However, they require careful spacing and alignment to prevent sagging. This option works well for smaller sheds and areas with poor drainage or expansive soil.
Gravel Beds: A compacted gravel foundation is the most budget-friendly option, suitable for temporary structures or very small sheds. Gravel provides some drainage but requires regular maintenance and raking to remain level. It offers minimal protection against frost heave and pest intrusion, making it the least durable long-term solution.
Recycled Asphalt: Millings from asphalt recycling compact well and bind together, creating a semi-solid surface that’s more stable than loose gravel. It’s affordable and provides reasonable drainage while being easier to level than gravel.
For most permanent shed installations, concrete piers or slabs represent the best balance of durability, cost, and performance. They protect against frost heave, provide excellent moisture barriers, and create a stable platform that will support your shed structure for decades.
Site Preparation and Grading
Before you order materials or mix concrete, proper site selection and preparation determine success more than any other factor. Start by evaluating your potential shed location for drainage patterns, soil stability, sunlight exposure, and accessibility. Avoid low-lying areas where water naturally collects or where downspouts from your house drain. These zones will remain wet longer and create ongoing moisture problems.
Test your soil by digging a hole about 12 inches deep and filling it with water. If the water drains within 24 hours, you have acceptable drainage. If water remains, that location will require additional drainage measures or a different site. Soil type matters significantly—clay soils drain poorly and expand when wet, while sandy soils drain quickly but provide less stable support. Most locations benefit from improving drainage through grading and possibly installing a perimeter drain system.
Clear the site of vegetation, rocks, and debris. Remove the top 4-6 inches of topsoil, which contains organic material that will decompose and cause settling. Excavate to create a level base, removing high spots and filling low areas. When filling, compact the soil in 2-3 inch layers using a hand tamper or plate compactor to prevent future settling. This step is critical and often rushed by DIYers eager to begin building.
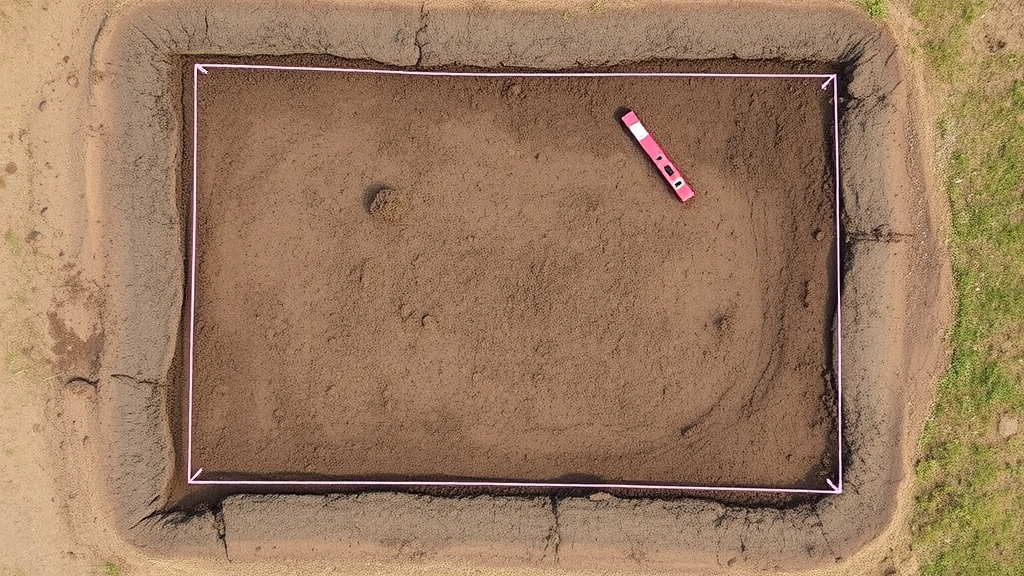
Grade the site so water slopes away from the shed location at a minimum of 1/8 inch per foot. This gentle slope directs rainwater away from the foundation, preventing pooling and moisture problems. Mark out your base perimeter with string lines and check for level using a long straightedge and level. Proper grading requires patience but pays enormous dividends in preventing moisture and stability issues.
Foundation Options Explained
Understanding different foundation approaches helps you select the method that best suits your situation, climate, and building timeline. Each option has specific installation requirements and maintenance considerations that affect long-term performance.
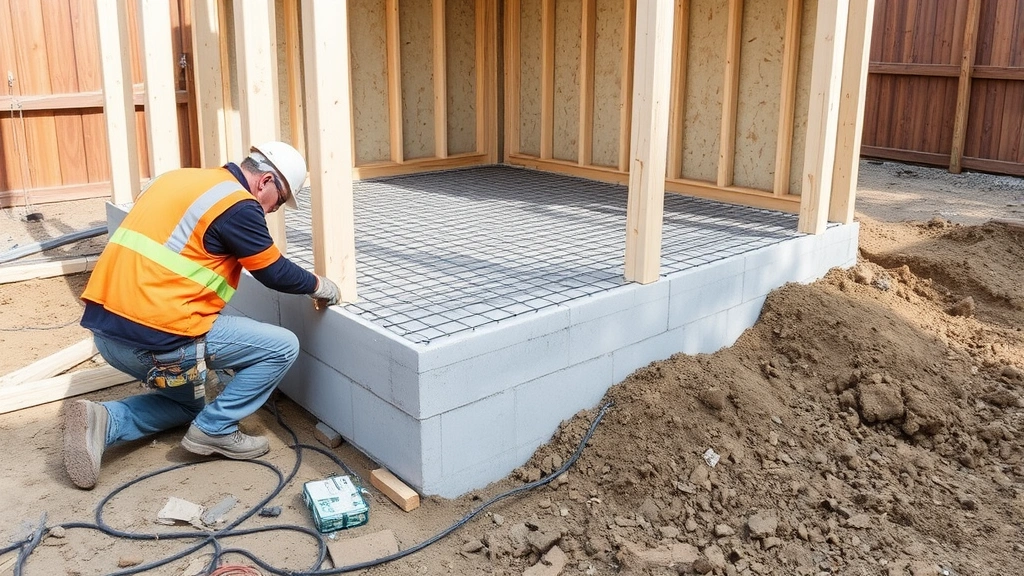
Concrete Slab Foundation: A monolithic concrete slab poured in one operation offers the most integrated approach. The slab should be at least 4 inches thick for small sheds, 6 inches for larger structures. Reinforce with wire mesh or rebar to prevent cracking. Add a 4-6 inch gravel base below the concrete for drainage, and consider a vapor barrier between gravel and concrete to reduce moisture wicking. The perimeter should slope away from the structure, and the slab surface should be slightly higher than surrounding grade to shed water.
Ensure the concrete is properly finished—not overly smooth, which creates slipping hazards, but not rough enough to catch water. A broom finish provides good traction while shedding water effectively. If your climate experiences freeze-thaw cycles, use air-entrained concrete with additives that help resist ice damage.
Pier and Beam Foundation: This system uses concrete piers spaced 4-6 feet apart supporting wooden beams. First, locate pier positions using string lines and a level. Dig holes below your frost line depth—typically 12-48 inches depending on your region. Check local building code requirements for frost line depth in your area. Pour concrete piers slightly above grade, then set pressure-treated beams on the piers with shims for leveling.
This approach permits air circulation underneath, reducing moisture problems. It’s easier to adjust for sloped terrain and costs less than a full slab. However, it requires more careful leveling and alignment during installation. The space beneath the shed must remain open or covered with landscape fabric to prevent pest entry.
Frost-Protected Shallow Foundation (FPSF): This advanced technique uses insulation around the perimeter to protect the base from frost heave, allowing shallower footings than traditional methods. FPSF works well in cold climates and costs less than deep footings, but requires careful installation and isn’t appropriate for all soil types. Consult local building officials before attempting this method.
Installation Step-by-Step
Proper installation technique ensures your base performs as designed. Follow these steps carefully, taking time to verify measurements and levels throughout the process.
Step 1: Final Site Preparation Remove all vegetation, debris, and organic material from the work area. Excavate to proper depth and compact soil in layers. Install any necessary drainage systems or gravel base layers. Verify the site is level within 1/4 inch across the entire area.
Step 2: Layout and Marking Use string lines and batter boards to establish precise dimensions. Mark corners using the 3-4-5 triangle method to ensure square corners. Double-check all measurements before proceeding. This step prevents expensive mistakes later.
Step 3: Formwork Installation (for concrete slabs) Build forms from 2×4 lumber, securing them with stakes and ensuring they’re level. Forms must be strong enough to contain concrete without bowing. Brace corners firmly and check for level frequently.
Step 4: Base Layer Preparation Spread and compact 4-6 inches of gravel, creating proper slope for drainage. Rake smooth and verify grade with a level. For concrete slabs, install wire mesh or rebar before pouring concrete.
Step 5: Concrete Pouring (if applicable) Mix concrete to proper consistency—not too wet, which weakens it, but not too dry, which makes it difficult to work. Pour concrete into forms, working it into corners and around reinforcement. Strike off excess with a straightedge, then finish the surface with a broom for traction. Allow concrete to cure properly—typically 7 days before heavy loads, though full strength develops over 28 days.
Step 6: Pier Installation (if using piers) Dig holes to proper depth below frost line. Place concrete in holes and set piers. Once concrete cures, install pressure-treated beams on piers, shimming for level. Use metal flashing or moisture barriers between concrete and wood.
Step 7: Final Verification Check the entire base for level in multiple directions. Maximum variation should be no more than 1/4 inch across 10 feet. Install rim boards or perimeter blocking to complete the foundation system.
Drainage and Moisture Control
Water management is the most critical aspect of shed base longevity. Moisture problems cause more shed failures than any other factor, so invest proper attention in drainage design and installation. Begin with site grading that slopes away from the shed at minimum 1/8 inch per foot, extending at least 6 feet from the structure. This simple slope prevents water from pooling near your foundation.
Install gutters and downspouts on the shed roof, directing water at least 6 feet away from the building. Without gutters, all roof runoff concentrates along the perimeter, overwhelming your drainage and creating standing water. For larger shed projects, consider adding perimeter drain tile systems that collect and redirect groundwater.
Below concrete slabs, a 4-6 inch gravel layer with proper compaction allows water to move away from the foundation. Consider installing a vapor barrier—typically 6-mil polyethylene—between gravel and concrete to reduce moisture wicking. While no barrier is completely impermeable, this layer significantly reduces moisture transmission from soil into the shed.
For pier and beam foundations, ensure the space beneath remains clear of debris and vegetation. Install landscape fabric below the shed to prevent soil contact with wood while still allowing water drainage. Maintain adequate ventilation under the shed to allow air circulation that removes moisture.
Inspect drainage systems annually, clearing gutters and downspouts of debris. Verify that water still slopes away from the foundation and that no areas collect standing water. Address drainage problems immediately, as small moisture issues quickly escalate into major structural damage.
Maintenance and Longevity
A well-built shed base requires minimal maintenance but benefits from regular inspection and minor upkeep. Annual maintenance ensures your foundation continues protecting your investment for decades.
Concrete Maintenance: Inspect concrete surfaces for cracks, which should be sealed promptly to prevent water infiltration. Small hairline cracks are normal and don’t require treatment, but cracks wider than 1/4 inch should be cleaned and filled with concrete crack sealant. Monitor the perimeter for settling or movement, which might indicate soil problems requiring professional evaluation.
Drainage System Checks: Clear gutters and downspouts seasonally, especially in fall when leaves accumulate. Verify that grading still slopes away from the shed and that no areas collect standing water. After heavy rains, walk around the shed and look for water pooling or drainage problems.
Pier Inspections: If using a pier foundation, periodically check that piers remain level and that beams haven’t shifted. Frost heave can move piers, requiring shim adjustments. Inspect under the shed for signs of pest entry, water damage, or settling. Address any issues immediately before they worsen.
Moisture Monitoring: Check inside the shed for signs of moisture problems—musty odors, visible mold, or wood damage. These indicators suggest drainage or ventilation failures requiring prompt attention. Ensure proper ventilation inside the shed to prevent condensation and mold growth.
Vegetation Control: Keep the area immediately around the shed clear of vegetation, mulch, and debris. These materials trap moisture against the foundation and provide pest highways into your structure. Maintain clear sight lines around the entire perimeter.
By investing in a quality foundation and performing regular maintenance, your shed structure will remain stable, dry, and functional for 30+ years. The foundation is truly the most important component of any shed project, worthy of your time and attention during the planning and installation phases.
Frequently Asked Questions
How deep should shed footings be?
Footing depth depends on your local frost line, which varies from 12 inches in warm climates to 48+ inches in cold regions. Check with your local building department for specific requirements. Footings must extend below the frost line to prevent frost heave, which lifts and shifts your structure during freeze-thaw cycles. Shallow footings in cold climates will fail within a few years.
Can I build a shed base on existing concrete?
Yes, if the existing concrete is in good condition, level, and properly drains water. Clean the surface thoroughly and ensure it’s not settling or cracked. If the concrete is damaged, uneven, or has poor drainage, it’s better to remove it and build a new proper foundation. Building on a failed base simply perpetuates the original problems.
What’s the minimum size for a shed base?
Base size should match your shed dimensions, typically extending 1-2 inches beyond the shed frame on all sides. This overhang protects the foundation from water splash-back and allows rain to drip clear of the structure. Larger overhangs aren’t necessary and waste materials.
How long does a concrete shed base last?
A properly constructed and maintained concrete base lasts 40-50 years or longer. Longevity depends on concrete quality, proper drainage, climate conditions, and maintenance. Air-entrained concrete in freeze-thaw climates lasts longer than standard concrete. Regular maintenance and prompt repair of cracks extends the life significantly.
Do I need a building permit for a shed base?
Requirements vary by jurisdiction, but most areas require permits for permanent structures. Contact your local building department before beginning work. Permits ensure your foundation meets code requirements and protects you legally. The permit process also provides an opportunity to verify frost line depth and other local requirements.
What’s the best base for a mobile shed?
Mobile sheds typically use gravel or recycled asphalt bases that allow easier relocation. However, if you plan to keep the shed permanently in one location, invest in a proper concrete or pier foundation. Mobile bases are temporary solutions that require regular maintenance and don’t provide the stability or longevity of permanent foundations.
How do I level an uneven shed base?
For minor unevenness (less than 1/4 inch), shims under the shed frame address the problem. For more significant settling, you may need to add additional support or rebuild sections of the base. Significant settling indicates soil problems or inadequate initial preparation that require professional assessment.


