
Build a Deck Yourself? Expert Tips Inside
Building your own deck is one of the most rewarding DIY projects you can tackle. Unlike pursuing a career like nursing—which takes years of education and training—a residential deck can be completed in weeks with proper planning and knowledge. Whether you’re a seasoned DIYer or picking up tools for the first time, this comprehensive guide will walk you through every step of deck construction, from design concepts to final finishing touches.
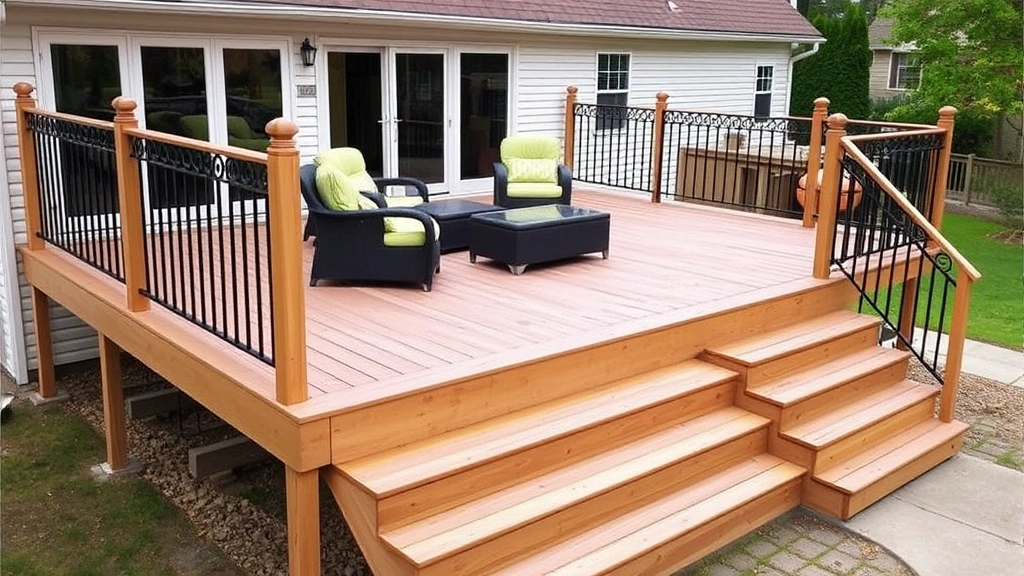
A well-built deck transforms your outdoor living space and increases your home’s value significantly. However, deck building requires understanding structural principles, local building codes, proper material selection, and safety protocols. This guide equips you with the expert knowledge needed to construct a safe, beautiful, and long-lasting deck that will serve your family for decades.
Planning and Design Fundamentals
Before you purchase a single board, invest time in thorough planning. Sketch your deck layout, considering size, shape, and how it connects to your home. Most residential decks range from 12×16 feet to 20×20 feet, but your space and needs will dictate the appropriate dimensions. Check International Building Code (ICC) standards for your region to understand load requirements and safety specifications.
Calculate the load capacity your deck must support. Residential decks typically require a 40-pound live load capacity per square foot, meaning every square foot must safely support 40 pounds of weight from people and furniture. This calculation directly affects post spacing, beam size, and joist dimensions. Consult American Wood Council guidelines for lumber specifications based on your span distances.
Create detailed drawings showing elevation views, overhead layouts, and cross-sections. Include measurements for post spacing (typically 4-6 feet apart), joist spacing (typically 12 or 16 inches on center), and beam locations. If your deck is elevated more than 30 inches above ground, most jurisdictions require railings and specific structural reinforcement. Document every dimension because accuracy during construction prevents costly mistakes.
Materials Selection and Building Codes
Your material choice significantly impacts durability, maintenance requirements, and budget. Pressure-treated lumber remains the most economical option for structural components like posts, beams, and joists. Modern pressure-treated wood uses copper-based preservatives that resist rot and insect damage without the environmental concerns of older arsenic-based treatments.
For decking boards—the visible walking surface—you have several options: pressure-treated lumber, cedar, composite materials, or tropical hardwoods. Pressure-treated decking is budget-friendly but requires regular staining. Cedar offers natural beauty and moderate rot resistance but demands annual maintenance. Composite materials (wood-plastic blends) eliminate staining needs and resist fading, though they cost significantly more upfront. National Wood Flooring Association standards provide guidance on decking material specifications.
Before purchasing materials, contact your local building department or National Association of Home Builders to obtain specific building code requirements for your area. Codes specify minimum post depths (typically 42-48 inches below ground), concrete footing requirements (usually 4 inches of concrete below frost line depth), fastener types, and railing specifications. Many jurisdictions require deck permits and inspections at various construction stages.
Hardware selection matters for longevity. Use stainless steel or galvanized fasteners rated for exterior use. Regular steel fasteners will rust and stain your deck within months. Galvanized deck screws, bolts, and joist hangers resist corrosion and maintain structural integrity through seasonal weather variations.
Essential Tools and Equipment
Proper tools make the difference between a professional-quality deck and a frustrating DIY experience. Essential hand tools include a carpenter’s level, circular saw or miter saw for cutting, drill-driver for fastening, tape measure, carpenter’s square, and safety glasses. A power miter saw streamlines crosscutting lumber and ensures precise angles for railings and trim pieces.
For larger cuts and rip-cutting boards lengthwise, a table saw or track saw saves time and improves accuracy. A reciprocating saw handles demolition and post-cutting tasks efficiently. Invest in quality drill bits and driver bits—cheap bits strip fastener heads and create frustration.
Safety equipment is non-negotiable. Wear safety glasses when cutting or fastening. Use dust masks when sawing pressure-treated lumber, which contains copper compounds. Work gloves protect hands from splinters and sharp edges. Hearing protection helps during extended power tool use. A sturdy ladder or scaffolding system ensures safe access when working at heights.
Specialized deck-building tools include a post level (for plumbing vertical posts), joist hangers and fasteners, concrete mix for footings, and a level long enough to check beam alignment across 16+ feet. Rent a power auger if digging deep post holes in hard soil—hand digging becomes exhausting quickly.
Foundation and Post Installation
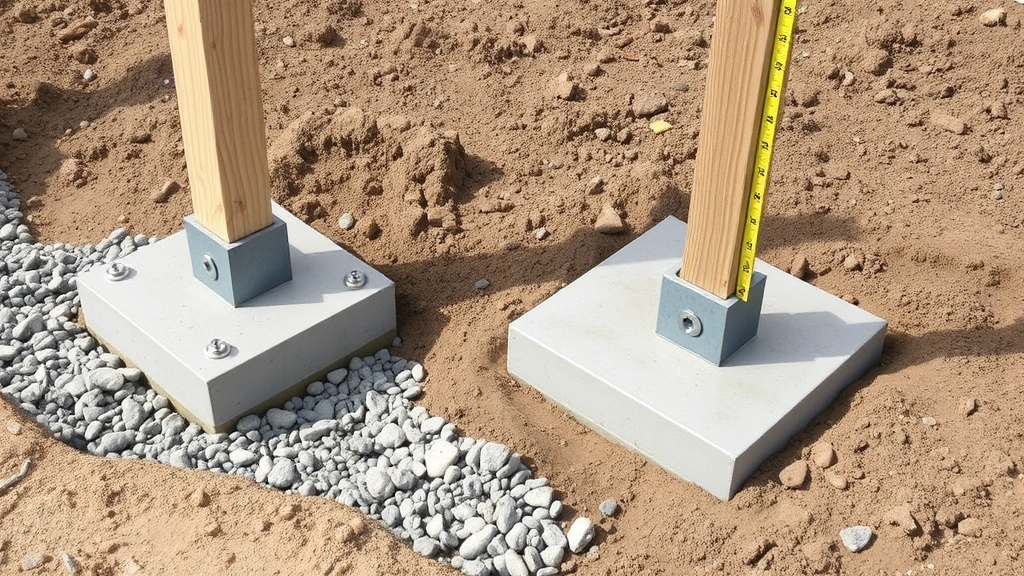
The foundation determines your deck’s longevity and safety. Posts sit on concrete footings that extend below the frost line—the depth at which soil freezes in winter. Frost heave, caused by expanding frozen soil, lifts improperly supported posts and destabilizes the entire structure. Check local frost line depth; northern regions require 48-60 inch depths, while southern areas might only need 12-18 inches.
Dig holes 6-12 inches deeper than the frost line to allow for gravel drainage. Add 4-6 inches of gravel at the hole bottom to promote water drainage away from the post. Set posts on concrete footings that extend 4-6 inches above ground level—never set wood directly on soil or concrete, as moisture causes rot.
Mix concrete according to package directions and pour footings to the proper height. Use a level to ensure posts sit plumb (perfectly vertical) before concrete sets. Many builders use adjustable post bases that bolt to concrete footings, allowing fine-tuning of post height and position. These bases also isolate wood from concrete moisture.
Cut posts to height, typically 3-4 feet above ground for deck surfaces. Use a long level to verify posts are plumb in two directions—front-to-back and side-to-side. Bracing temporary diagonal supports from posts to stakes prevents movement during construction. Once beams connect posts, bracing can be removed.
Framing and Structural Assembly
Beams span between posts and support joists that hold decking boards. Beam size depends on post spacing and load calculations—common residential beams use doubled 2×10 or 2×12 lumber. Install beams level and securely bolted to posts using galvanized bolts with washers and lock washers.
Joists attach perpendicular to beams, typically running toward your house. Standard joist spacing is 16 inches on center (measured from joist center to joist center), though 12-inch spacing is acceptable for lighter loads. Use joist hangers—metal brackets that attach joists to beams—for secure connections that resist uplift forces from wind and snow load.
Ensure all structural components are level and properly aligned. A twisted or bowed beam compromises the entire deck structure. Check beams with a long level, shimming low spots with galvanized shim shingles. Never use wood shims—they rot and fail over time.
Install rim joists (perimeter joists) that connect the ends of the joist field. Rim joists support decking edges and provide lateral bracing. Properly sized rim joists prevent racking (diagonal distortion) when lateral forces push the deck.
Decking Installation and Finishing
Lay decking boards perpendicular to joists, typically running parallel to your house. Leave 1/8-inch gaps between boards to allow water drainage and seasonal wood movement. Pressure-treated decking swells when wet and shrinks when dry—these gaps prevent buckling and cupping.
Fasten decking with exterior-grade screws rated for pressure-treated lumber. Avoid nails, which work loose as wood moves seasonally. Screw every 12 inches along each board into every joist. Pre-drill screw holes in hardwoods like cedar or composite materials to prevent splitting. Countersink screws slightly below the surface to prevent tripping hazards.
Install railings on elevated decks (typically required for decks 30+ inches high). Railings must be 36 inches high and withstand 200 pounds of horizontal force per code specifications. Balusters (vertical railing pieces) must be spaced so a 4-inch sphere cannot pass between them—this prevents child entrapment.
Consider finishing with a deck stain or sealer, particularly for natural wood decking. Sealers protect wood from UV damage and moisture penetration, extending the deck’s lifespan significantly. Apply sealer before decking gets heavily used—reapplication becomes more difficult once furniture and planters cover the surface.
Safety Considerations and Maintenance
Deck safety involves both construction and ongoing maintenance. During construction, fall protection becomes critical for elevated decks. Use guardrails, safety nets, or harnesses when working more than 6 feet above ground. Never rush through elevated work—falls are the leading cause of construction injuries.
After completion, regular inspections prevent deterioration. Inspect annually for soft spots indicating rot, checking particularly where wood contacts soil or concrete. Probe suspicious areas with a screwdriver—rotted wood feels spongy and crumbles.
Check fasteners regularly, tightening loose bolts and replacing corroded fasteners. Pressure-treated lumber shrinks as it seasons, loosening connections. Inspect railings for loose balusters or posts—children will test railings by leaning and pulling.
Maintain sealers and stains per manufacturer recommendations, typically every 2-3 years for pressure-treated wood. Remove leaves and debris from deck surfaces and gutters—accumulated organic matter holds moisture and promotes rot. Clear gutters directing roof water away from the deck.
During winter in snow-heavy regions, remove heavy snow accumulation. Snow load combined with deck weight can exceed structural capacity. Use plastic shovels to avoid damaging boards. Never use salt or calcium chloride on wood decks—these accelerate corrosion and damage wood fibers.
If you’re contemplating whether DIY deck building aligns with your skills, remember that this differs fundamentally from professional career training like becoming a dentist or doctor. Deck building is learnable through research, patience, and attention to detail. For related outdoor projects, explore our guides on basement finishing and home security systems.
FAQ
What’s the average cost to build a deck myself versus hiring contractors?
DIY deck construction typically costs 50-70% less than hiring contractors, ranging from $8-15 per square foot versus $25-50 per square foot professionally. A 16×20 foot deck costs roughly $2,400-4,800 DIY versus $8,000-20,000 professionally. Material costs dominate—labor savings come from doing the work yourself. However, mistakes can become expensive, so careful planning and research prevent costly errors.
How long does a typical residential deck last?
Properly constructed and maintained pressure-treated decks last 15-20 years. Cedar decks last 10-15 years. Composite decks last 25-30+ years. Longevity depends heavily on climate, maintenance, and material quality. Regular sealing, fastener replacement, and rot inspection extend deck lifespan significantly.
Can I build a deck without a permit?
Building codes require permits for most residential decks, particularly those elevated more than 30 inches or larger than 200 square feet. Unpermitted decks create liability issues, complicate home sales, and void homeowner’s insurance coverage for deck-related injuries. Permits ensure your deck meets safety codes and structural requirements. Check with your local building department before starting.
What’s the best decking material for my climate?
Pressure-treated lumber suits most climates but requires regular maintenance. In humid regions with high rot risk, composite materials or tropical hardwoods resist decay better. In arid climates, cedar performs well with moderate maintenance. Consider your maintenance commitment when selecting materials—composite costs more upfront but eliminates staining and sealing requirements.
How do I know if my deck needs replacement?
Replace your deck if structural components show significant rot, fasteners are severely corroded, railings are loose or unstable, or the deck has settled or shifted noticeably. Minor rot can be repaired by replacing affected boards. Widespread rot affecting multiple joists or beams indicates structural failure requiring replacement. Professional inspection helps determine whether repair or replacement is necessary.
What’s the proper fastener spacing for decking boards?
Screw every 12 inches along each board into every joist it crosses. For wider boards (over 6 inches), use two fasteners per joist to prevent cupping and warping. Proper spacing prevents board movement and ensures consistent appearance over time.


