DIY Kendrick-Inspired Studio? Expert Tips Inside
Building a professional-quality recording studio in your home doesn’t require years of audio engineering experience or a Hollywood budget. Whether you’re inspired by Kendrick Lamar’s meticulous approach to production or simply want to create a dedicated space for music creation, this comprehensive guide walks you through every step of transforming a room into a functional recording environment. From acoustic treatment to equipment placement, we’ll cover the technical and structural considerations that separate amateur setups from studios that produce radio-ready tracks.
The foundation of any great studio is the space itself. Before you purchase a single microphone or mixing console, you need to understand how sound behaves in your chosen room, what modifications will improve audio quality, and how to properly isolate your space from external noise. This guide combines building science, acoustic principles, and practical DIY techniques to help you create a studio that rivals professional facilities.
Choosing Your Studio Space
The room you select will determine 80% of your studio’s success. Unlike finishing a basement for general living space, a recording studio requires specific acoustic properties. Ideally, you want a room that’s roughly rectangular with dimensions that avoid problematic acoustic modes. Avoid perfectly square rooms, as they create standing waves at specific frequencies that muddy your recordings.
Size matters significantly. A room between 150 and 250 square feet provides excellent acoustic characteristics for recording and mixing. Smaller rooms (under 100 sq ft) can work for vocal recording but make mixing accurately difficult. Larger rooms require more extensive treatment and can introduce unwanted reflections. Basements are popular choices because they naturally isolate from external noise and typically have consistent temperatures, but don’t forget security considerations if your studio contains valuable equipment.
Ceiling height affects acoustic behavior significantly. Standard 8-foot ceilings work, but 9-10 feet provides better low-frequency response. Avoid rooms with exposed ductwork, pipes, or mechanical systems that vibrate and transmit noise. If your chosen room has these elements, you’ll need additional isolation measures that increase costs substantially.
Check for existing structural issues before committing. Look for cracks in walls or foundations, moisture problems, or settling. These issues become expensive to address once you’ve invested in acoustic treatment and equipment. If you discover moisture concerns, address them immediately using proper waterproofing techniques before proceeding with construction.
Acoustic Treatment Fundamentals
Acoustic treatment controls how sound behaves within your studio. This differs from soundproofing—treatment manages reflections and resonance inside the room, while soundproofing prevents sound from escaping. You need both for a professional studio.
Understanding absorption is crucial. Different materials absorb different frequencies. Bass frequencies (below 100 Hz) require thick, dense materials or specialized bass traps. Mid and high frequencies absorb more easily into soft materials like foam and fiberglass. The Acoustic Fields resource library provides detailed frequency-specific absorption data.
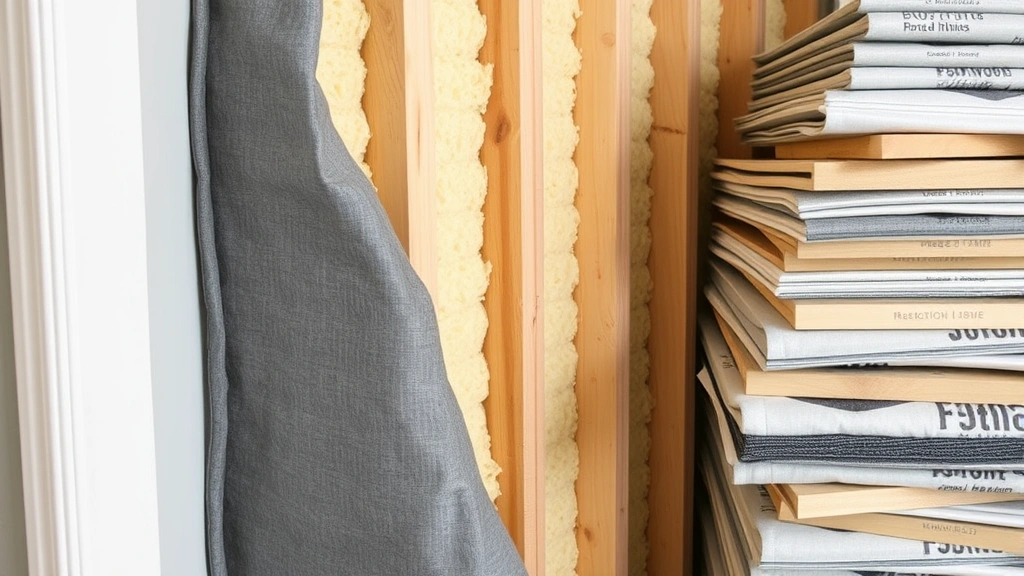
Start with bass traps in room corners. Bass energy accumulates at boundaries, so corner placement maximizes effectiveness. Build corner traps using rockwool or fiberglass insulation wrapped in acoustically transparent fabric. A 12-inch thick trap covering the entire corner height works well for most home studios. Use furring strips to frame the trap and maintain air space between the trap and wall.
Install broadband absorbers on reflection points. Identify these by sitting in your mixing position and having someone move a mirror around the room. Where you see the speaker reflection in the mirror indicates a first-reflection point. Cover these with 2-4 inch thick absorption panels. Space them evenly rather than clustering them in one area.
Diffusion complements absorption by scattering sound rather than deadening it completely. Diffusers prevent the dead, lifeless feeling of over-treated rooms. Position diffusers on rear walls and side walls opposite your mixing position. Acoustic product manufacturers offer detailed installation guides for various treatment types.
Calculate absorption coefficients for your materials. The Acoustical Society of America publishes absorption data for common materials. Dense fiberglass (4-6 lb/cubic foot) provides excellent absorption across frequencies. Avoid cheap foam—it absorbs poorly and off-gasses chemicals harmful in enclosed spaces.
Soundproofing and Isolation
Soundproofing prevents external noise from entering your studio and studio noise from disturbing neighbors. This requires mass and decoupling. Sound travels through solid structures, so you must break the path it travels.
Add mass to existing walls using resilient channels and drywall. Resilient channels decouple drywall from studs, preventing vibration transmission. Install channels perpendicular to studs with isolation clips rated for your drywall weight. Add a second layer of drywall on top of channels. This assembly reduces sound transmission by 10-15 decibels compared to standard construction.
Seal all air leaks meticulously. Sound travels through gaps faster than through solid materials. Use acoustical caulk (not standard caulk) around outlets, switches, and penetrations. Caulk the gap where drywall meets the ceiling and floor. Install door sweeps and gaskets on all doors. A single unsealed gap can reduce your soundproofing by 50%.
Replace standard doors with solid core or acoustic doors. Hollow core doors provide virtually no sound isolation. Solid core doors weigh 40-60 pounds and reduce transmission by 20+ decibels. For maximum isolation, install double doors with acoustic seals on both.
Treat windows if your studio has them. Double-pane windows with different thickness panes (laminated glass) provide better isolation than standard dual-pane. Alternatively, seal windows and use acoustic panels that you can remove. Heavy curtains alone don’t isolate adequately for recording work.
Decouple your studio from the rest of the building. If possible, build the studio as a separate structure within the room using isolated framing. This “room within a room” approach provides superior isolation but requires significant space. For most home studios, decoupling the floor using isolation pads under equipment provides adequate isolation from vibration transmission.
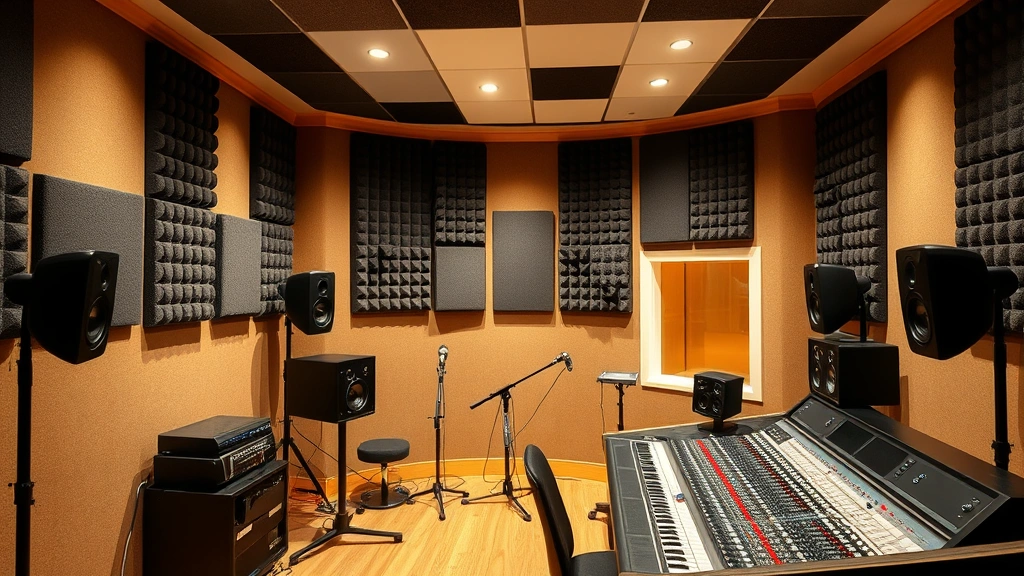
Building Your Control Room
Your control room is where mixing happens. This space needs different treatment than recording areas. The goal is a neutral, accurate acoustic environment where you can hear exactly what you recorded.
Design the room using proper proportions. The ITU-R BS.1116-3 standard recommends specific dimension ratios to minimize acoustic modes. While perfect proportions aren’t always possible in existing spaces, avoid ratios like 1:1 (square) or 1:2. A ratio of approximately 1:1.5:2.5 works well for home studios.
Position your mixing console and monitor speakers carefully. Speakers should form an equilateral triangle with your listening position, with ears at tweeter height. In most setups, this means speakers 3-6 feet apart and 3-6 feet from your ears. Angle speakers slightly inward, not straight ahead.
Install acoustic treatment to create a “live end, dead end” design. Treat the front half of the room (near speakers) with absorption to reduce reflections. Leave the rear half slightly more reflective using diffusion. This prevents the dead feeling of complete absorption while maintaining accuracy for mixing decisions.
Use monitor stands or wall mounts to position speakers correctly. Avoid placing speakers on shelves or furniture—they’ll vibrate and color the sound. Isolate speakers from the floor using speaker stands with isolation feet. This prevents vibration transmission into the floor structure.
Install bass traps at the boundaries between your control room and recording area if they’re separate. Bass frequencies travel through walls easily, so extra isolation in low frequencies improves separation between spaces.
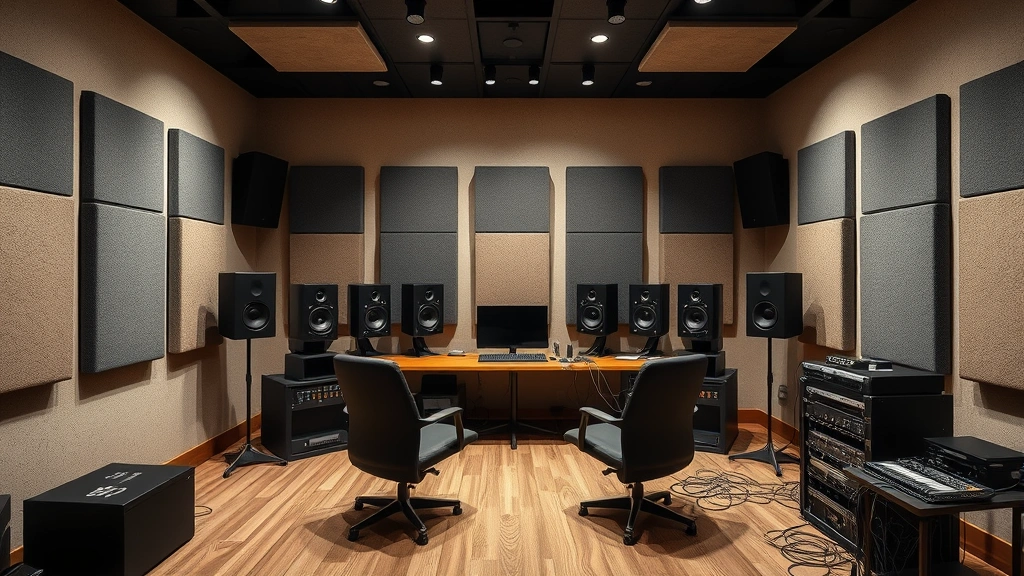
Equipment Setup and Placement
Professional studios follow specific equipment arrangement principles. Your layout should minimize cable runs, reduce interference, and allow comfortable operation for extended sessions.
Position your mixing console at a comfortable working height—typically 36-42 inches from the floor. Ensure adequate space behind the console for cable routing and access to rear connections. Leave at least 18 inches of clearance behind equipment for airflow and maintenance.
Organize cables using cable management systems. Separate audio cables from power cables to minimize interference. Use shielded cables for all audio connections. Label everything with a label maker—future troubleshooting becomes exponentially easier with clear identification.
Create dedicated zones for different functions. Your recording area should be separate from your control room if space allows. If using one room, use portable acoustic barriers to separate recording and mixing zones. This prevents control room reflections from entering microphone recordings.
Install equipment racks with proper ventilation. Audio equipment generates heat—inadequate cooling reduces lifespan and causes intermittent failures. Ensure 3-4 inches of clearance on all sides of equipment racks. Install rack-mounted fans if temperature exceeds 75°F during operation.
Position microphone stands away from walls and hard surfaces. Walls reflect sound back into the microphone, creating comb filtering and phase issues. Place stands at least 2-3 feet from any wall. Use boom arms mounted to desks to keep stands stable and reduce vibration transmission from the floor.
Treat vibration sources seriously. Separate your studio from HVAC systems, refrigerators, and other mechanical equipment. If your studio shares a wall with a furnace room or mechanical closet, add extra isolation. Use vibration isolation pads under all equipment that vibrates—computers, amplifiers, and subwoofers especially.
Electrical and Power Considerations
Professional studios require dedicated electrical infrastructure. Standard household wiring introduces hum, noise, and potential equipment damage. Building proper electrical systems prevents audio problems and ensures safety.
Install a dedicated electrical circuit for your studio equipment. Run a separate line from your main panel if possible, using 20-amp capacity minimum. This prevents your studio equipment from sharing circuits with high-draw devices like refrigerators or air conditioners that cause voltage fluctuations.
Use isolated ground wiring for audio equipment. Isolated ground (IG) outlets connect directly to the main panel ground, bypassing standard ground paths. This significantly reduces hum and noise in sensitive audio equipment. Consult the National Fire Protection Association (NFPA) electrical code requirements for proper installation.
Install quality power conditioning equipment. Uninterruptible power supplies (UPS) with power conditioning protect equipment from surges and voltage fluctuations. Choose models with automatic voltage regulation (AVR) and sine wave output for audio-grade protection.
Avoid cheap power strips. They provide minimal surge protection and can introduce noise. Use hospital-grade outlets and high-quality surge protection rated for continuous use. Audio equipment requires consistent power quality—cheap protection costs more in damaged equipment than quality solutions.
Plan for future expansion. Run extra conduit and pull strings during initial construction so you can easily add circuits later. Running electrical work after drywall installation costs significantly more than planning ahead. Install more outlets than you think you’ll need—studios always require more power than initially anticipated.
Consider backup power for critical systems. If your studio records vocals or instruments that require multiple takes, losing power mid-session is devastating. A small UPS keeps your recording computer running long enough to save work and shut down properly. Larger studios benefit from generator backup for extended outages.
Ensure all electrical work meets local building codes. Hire a licensed electrician for main panel work and circuit installation. While some DIY electrical work is permitted in many jurisdictions, audio studio wiring should meet professional standards. Improper electrical work creates fire hazards and voids equipment warranties.
FAQ
How much does building a home studio cost?
Budget varies dramatically based on space and ambitions. A basic vocal recording setup costs $1,000-3,000. A professional-quality studio with proper acoustic treatment, soundproofing, and equipment runs $5,000-15,000 for DIY construction. High-end studios exceed $50,000. Start with recording essentials and expand gradually as your skills develop.
Can I use a bedroom or closet for recording?
Closets work surprisingly well for vocal recording due to natural absorption from clothing. Bedrooms require acoustic treatment to control reflections. Neither provides ideal acoustic environments for mixing, but both work for initial recording. Plan to eventually build a dedicated space as you advance. Consider basement finishing options for a permanent, isolated studio location.
What’s the difference between acoustic foam and fiberglass?
Acoustic foam is convenient but absorbs poorly at low frequencies. Fiberglass (rockwool, mineral wool) absorbs across all frequencies and costs less per absorption unit. Fiberglass requires wrapping in fabric for safety and aesthetics. Most professional studios use fiberglass for treatment and reserve foam for portable applications. Avoid cheap foam—quality matters significantly for absorption performance.
Do I need soundproofing if I only record during the day?
Yes, if you live in shared housing or want professional-quality recordings. External noise—traffic, neighbors, HVAC systems—ruins recordings regardless of time. Soundproofing isolates you from these sources. Additionally, your studio noise affects others. Proper soundproofing is courteous and necessary for professional work.
How do I treat a small apartment studio?
Small spaces benefit from strategic treatment focusing on first-reflection points and bass traps. Use portable acoustic panels that you can reposition or remove. Soft furnishings (couches, curtains, carpets) provide absorption. Avoid over-treating small spaces—they sound dead with too much absorption. Balance treatment with diffusion to maintain liveliness while controlling reflections.
What’s the best flooring for a studio?
Hard flooring (concrete, tile, laminate) with area rugs provides flexibility and absorbs vibration better than carpet. Avoid floating floors that transmit vibration easily. If you have hardwood, add rugs in recording areas. For DIY flooring installation, choose materials that dampen rather than reflect sound. Concrete provides excellent isolation properties for basement studios.
How do I reduce echo in my studio?
Echo (distinct delayed repetitions) differs from reverb (dense reflections). Echo indicates insufficient absorption or improper speaker placement. Add absorption panels at first-reflection points and in corners. Reposition speakers to form proper listening triangle. If echo persists, you need additional bass traps or broadband absorption. Professional acoustic measurement tools identify problem areas precisely.


