How to Build a Shower Pan: A Plumber-Approved Guide
Building a shower pan is one of the most critical steps in bathroom renovation or construction. This waterproof foundation prevents costly water damage to your home’s structural elements and ensures your shower remains functional for decades. Whether you’re installing a new bathroom or replacing an existing shower, understanding proper shower pan construction is essential for long-term durability and compliance with building codes.
A properly constructed shower pan requires precision, quality materials, and attention to detail. Many DIY enthusiasts attempt this project without understanding the critical waterproofing requirements, leading to leaks, mold growth, and structural damage that can cost thousands to repair. This comprehensive guide walks you through every step of building a shower pan that meets professional standards and passes inspection.
Understanding Shower Pan Basics
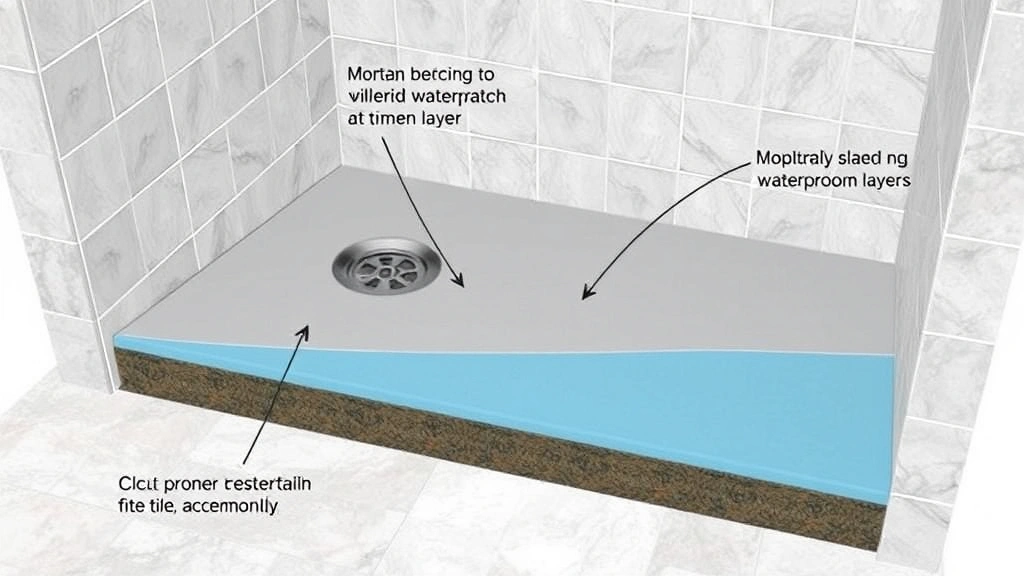
A shower pan is the foundation of your shower enclosure, designed to contain water and direct it toward the drain. The pan consists of multiple layers: a structural base, a waterproofing membrane, a sloped surface to direct water, and a finished surface layer. Understanding how these components work together is crucial before you begin construction.
The slope of your shower pan is critical—typically 1/4 inch per foot toward the drain. This slope ensures water flows naturally to the drain rather than pooling in corners or creating low spots where water can sit and cause damage. Building this slope correctly requires careful measurement and planning during the base installation phase.
Building codes vary by location, so check with your International Code Council (ICC) standards and local building department requirements before beginning. Most jurisdictions require specific waterproofing methods, drain specifications, and substrate materials. Understanding these requirements prevents costly rework and ensures your project passes inspection on the first attempt.

Materials You’ll Need
Selecting quality materials is non-negotiable when building a shower pan. Poor-quality materials lead to premature failure and expensive water damage repairs. Here’s what you’ll need for a professional-grade shower pan:
- Cement backer board – Provides a stable, moisture-resistant substrate. Standard drywall absorbs water and fails quickly in shower environments.
- Waterproofing membrane – Either liquid-applied or sheet-based membrane. Liquid membranes offer superior coverage in corners and penetrations.
- Mortar bed materials – Portland cement, sand, and water for creating your sloped base. Pre-mixed mortar saves time but fresh-mixed provides better control.
- Shower drain assembly – Choose a quality drain with adjustable height to match your finished floor level.
- Tile and adhesive – Select porcelain or ceramic tile rated for wet areas. Use thinset mortar, never standard grout.
- Grout and caulk – Epoxy grout provides superior water resistance compared to standard cement grout.
- Slope-creating tools – Level, straightedge, and possibly a slope gauge for accurate 1/4-inch-per-foot slope.
Budget for premium waterproofing products—this is where cutting corners causes the most expensive failures. A quality waterproofing membrane costs $200-400 but prevents $5,000+ in water damage.
Preparing the Subfloor
Proper subfloor preparation determines whether your shower pan succeeds or fails. Begin by removing any existing flooring and inspecting the structural framing beneath. The subfloor must be solid, level, and capable of supporting the weight of a wet shower enclosure with multiple people using it simultaneously.
Check for rot, soft spots, or movement in the subfloor. Any compromised framing must be replaced before proceeding—water will eventually find weaknesses and cause structural failure. If you’re dealing with significant subfloor damage, consult a structural engineer or experienced contractor before continuing.
Install cement backer board directly over the subfloor, using corrosion-resistant screws spaced 8 inches apart. Never use drywall in wet areas—it absorbs water and fails quickly. Backer board provides a stable, moisture-resistant base that won’t deteriorate when exposed to constant moisture. Tape all seams with waterproof mesh tape and thin-set mortar, creating a continuous moisture barrier.
Before installing your waterproofing membrane, ensure the backer board is completely dry and secure. Any movement or soft spots in the base will cause the waterproofing membrane to crack and fail.
Installing the Shower Base
Creating the sloped base is where many DIY projects fail. This is the critical step that determines whether water reaches your drain or pools in corners. Mix your mortar to a consistency similar to peanut butter—not too wet, not too dry.
Begin at the drain and build your mortar bed outward, creating the proper slope as you go. Use a level to verify your 1/4-inch-per-foot slope in all directions. The highest point should be at the shower walls, sloping continuously toward the drain in the center. Use a straightedge across the drain to check your slope regularly—this prevents costly corrections later.
Allow the mortar bed to cure according to manufacturer specifications, typically 24-48 hours depending on humidity and temperature. Don’t rush this step—premature waterproofing installation over uncured mortar causes failure.
Some builders prefer pre-sloped shower pans or foam slope kits for faster installation. These products simplify slope creation but cost more initially. They’re worth considering if you’re uncomfortable creating slopes manually or working in tight spaces.
Waterproofing Your Shower Pan
This is the most critical phase of shower pan construction. Your waterproofing membrane is the only thing preventing water from destroying your home’s structure. Don’t compromise on materials or technique here.
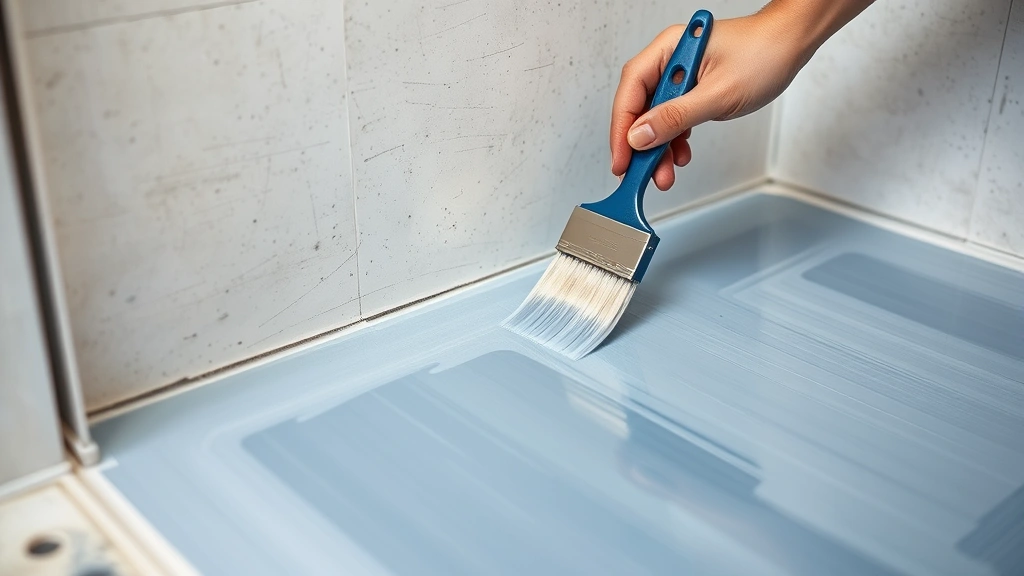
Liquid waterproofing membranes offer several advantages over sheet membranes: they conform to irregular surfaces, seal around penetrations easily, and provide complete coverage without seams. Apply liquid membrane according to product specifications, typically using a roller or brush. Most products require two coats, with proper drying time between applications.
Pay special attention to the drain area—this is where most leaks originate. Install a waterproofing collar or boot around the drain pipe, extending the membrane up the pipe to create a sealed connection. Many professionals apply extra membrane layers around the drain for redundancy.
Extend your waterproofing membrane up the shower walls at least 6 inches. This protects the wall substrate if water runs down the walls instead of draining properly. Some building codes require higher extensions, so verify local requirements.
When waterproofing is complete, perform a flood test before proceeding with tile installation. Fill the shower pan with water and let it sit for 24 hours, checking for leaks underneath. This catches problems before tile installation, when repairs are simple and inexpensive.
For additional guidance on waterproofing standards, consult the National Kitchen and Bath Association (NKBA) guidelines, which provide detailed specifications for shower construction.
Tile Installation and Finishing
Once your waterproofing is verified and cured, you’re ready for tile installation. Always use thinset mortar specifically formulated for wet areas—never use wall tile adhesive or grout as your tile base.
Begin tile installation at the drain, working outward and upward. Use tile spacers to maintain consistent grout lines, typically 1/8 to 3/16 inch for standard tiles. Larger format tiles require thicker thinset and slightly larger grout lines for structural stability.
When grouting, use epoxy grout if possible—it resists water penetration far better than standard cement grout. Apply grout in diagonal strokes across the tiles, filling all joints completely. Remove excess grout with a damp sponge before it hardens, but don’t oversaturate the grout lines with water.
Caulk the corners and where walls meet the pan with waterproof caulk, not grout. Grout is rigid and cracks with movement; caulk remains flexible and maintains the seal. This seemingly small detail prevents leaks that develop over time as the structure shifts slightly.
For complex tile layouts or if you’re unfamiliar with tile installation, consider reviewing Tile Council of North America installation guidelines before proceeding.
Common Mistakes to Avoid
Understanding common pitfalls helps you avoid expensive failures. Many shower pan problems stem from preventable mistakes made during construction.
Using standard drywall instead of cement backer board: Drywall absorbs water and fails within months. This forces expensive demolition and reconstruction. Always use moisture-resistant materials in wet areas.
Incorrect slope: Slopes that are too flat or irregular cause water pooling. Build your slope carefully and verify it repeatedly during construction. A slope gauge makes this easier and more accurate.
Inadequate waterproofing: Single-layer waterproofing with gaps or thin coverage leads to leaks. Apply waterproofing generously, with particular attention to corners, penetrations, and the drain area.
Skipping the flood test: Testing before tile installation catches leaks when they’re easy to repair. Many contractors skip this step to save time, but it’s a false economy.
Poor drain installation: Improperly sealed drains leak immediately or after a few months. Ensure your drain assembly is rated for your application and properly sealed to the waterproofing membrane.
Mixing grout and caulk: Using grout in corners instead of caulk causes cracks and leaks. Grout is rigid; caulk is flexible. Use each where appropriate.
Rushing curing times: Using the shower before waterproofing and mortar bed are fully cured causes failure. Follow all curing time specifications, adding extra time in cool or humid conditions.
If you’re tackling bathroom renovation alongside your shower pan project, understanding basement finishing techniques helps you manage moisture throughout your project. Similarly, proper flooring installation practices apply to shower pan construction, particularly regarding substrate preparation and slope.
FAQ
How long does a shower pan take to build?
Most shower pans require 3-5 days of actual work, spread over 2-3 weeks to allow proper curing. The mortar bed requires 24-48 hours to cure, waterproofing requires 24-48 hours between coats, and the flood test requires 24 hours. Rushing these steps leads to failure, so patience is essential.
Can I use a prefabricated shower pan instead of building one?
Yes, prefabricated pans simplify installation and eliminate slope-building challenges. However, they cost more and require precise framing dimensions. Custom-built pans offer more flexibility for unusual bathroom layouts. Both approaches work when executed properly.
What’s the difference between a shower pan and a shower base?
These terms are often used interchangeably, but technically a shower pan is the waterproofed structure you build, while a shower base is the finished surface you walk on. The pan is underneath; the base includes the finished surface.
Do I need a permit to build a shower pan?
Most jurisdictions require permits for bathroom work, including shower pan construction. Permits ensure your work meets code and protects you legally. Unpermitted work can affect insurance claims and home resale value.
What slope is required for a shower pan?
Standard practice is 1/4 inch of drop per foot of horizontal distance toward the drain. This provides adequate slope for water drainage without creating noticeable unevenness underfoot.
Can I tile over an old shower pan without rebuilding it?
Only if the existing pan is structurally sound and has no leaks. If the old pan shows any signs of water damage, soft spots, or previous leaks, rebuild it completely. Tiling over a failing pan seals the problem temporarily but eventually fails.
What’s the best waterproofing membrane for shower pans?
Liquid-applied membranes generally outperform sheet membranes for shower pans because they seal corners and penetrations more effectively. Look for products meeting ASTM standards for waterproofing membranes, which ensure quality and durability.
Should I caulk or grout the corners of my shower pan?
Always use caulk in corners where the pan meets walls. Grout cracks with movement; caulk remains flexible. This prevents leaks that develop as the structure settles and shifts with temperature changes.


