Ceiling Fan Replacement: Electrician Tips for Safe Installation
Replacing a ceiling fan is one of the most common electrical upgrades homeowners tackle, yet it remains one of the most dangerous if proper precautions aren’t followed. Unlike simpler projects such as changing a bathroom fan, ceiling fan installation involves working at height with live electrical circuits. This comprehensive guide provides electrician-tested tips to ensure your replacement is safe, code-compliant, and long-lasting.
Whether you’re upgrading to a more efficient model, replacing a noisy unit, or simply refreshing your home’s aesthetic, understanding the electrical requirements and installation process is critical. We’ll walk through every step, from shutting off power correctly to securing the mounting bracket and connecting the wiring. By following these professional guidelines, you’ll avoid common mistakes that lead to flickering lights, breaker trips, or worse—electrical fires.
Safety First: Electrical Preparation
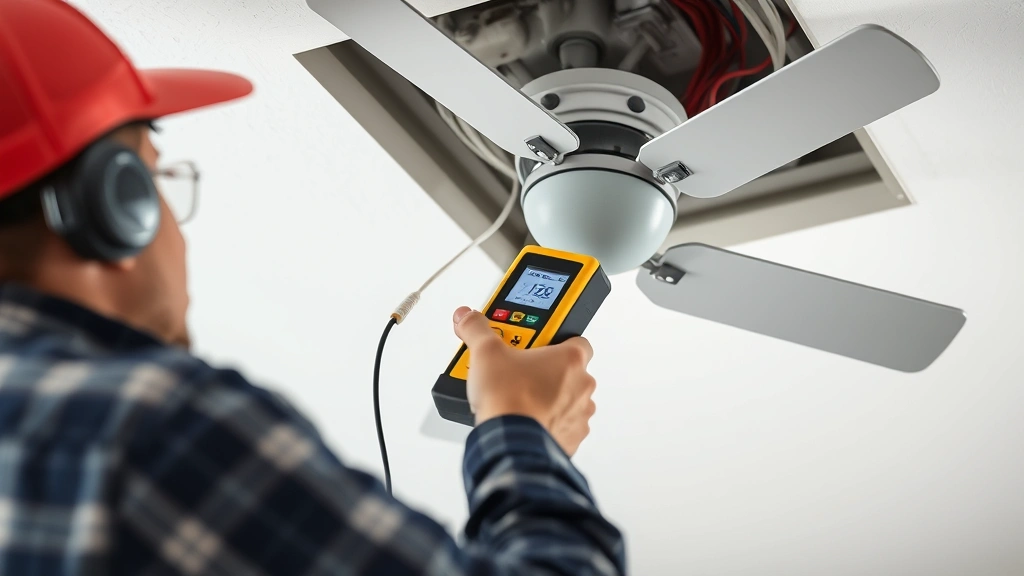
Before touching any part of your ceiling fan, you must completely disconnect power from the circuit. Turn off the wall switch, then locate your home’s electrical panel and flip the breaker serving that circuit to the OFF position. This is non-negotiable—many homeowners skip this step and risk serious injury or electrocution.
After turning off the breaker, test the existing fixture with a non-contact voltage tester to confirm no power is flowing. Hold the tester near the light socket, switch, and wiring connections. A proper voltage tester will indicate zero volts if the circuit is truly dead. Never rely solely on the wall switch being in the off position; breakers are the only reliable kill switch.
If you’re unfamiliar with your electrical panel or cannot identify which breaker controls your ceiling fixture, now is an excellent time to label all breakers for future reference. This task takes 30 minutes and prevents confusion during emergencies. Consider taking a photo of your labeled panel for quick reference.
For added safety, especially when working with older homes, use a multimeter set to AC voltage to double-check that power is off. This two-step confirmation prevents potentially fatal mistakes. If you’re uncomfortable with electrical work at any point, consulting a licensed electrician is always the safest choice.
Tools and Materials Checklist
Professional electricians keep specific tools within arm’s reach during fan installation. Having everything prepared prevents unnecessary trips up and down the ladder.
- Non-contact voltage tester – Essential for confirming power is off
- Multimeter – Verifies voltage and tests circuit continuity
- Ladder or step stool – Sturdy, properly positioned at correct height
- Drill with bits – For mounting bracket installation into ceiling joists
- Wire strippers – Removes insulation from wire ends cleanly
- Wire nuts – Secures electrical connections (usually included with fan)
- Screwdrivers – Phillips and flathead for various fasteners
- Adjustable wrench – For securing mounting hardware
- Needle-nose pliers – Bends and holds small wires during connections
- Electrical tape – Provides additional insulation on connections
Materials you’ll need include the new ceiling fan (verify it matches your ceiling height and room size), a proper mounting bracket rated for your fan’s weight, wire nuts appropriate for your wire gauge, and a ceiling medallion if desired. Check that your new fan’s voltage rating matches your home’s electrical system (typically 120V in North America).
Removing Your Old Ceiling Fan
With power confirmed off, carefully lower the existing fan canopy to expose the wiring connections. Some fans have a setscrew holding the canopy; others simply slide down. Take photos of the wire connections before disconnecting anything—this reference proves invaluable when installing the new unit.
You’ll typically find three or four wires: black (hot/live), white (neutral), bare copper or green (ground), and possibly a second black wire (for a separate light circuit). Using your wire strippers, carefully remove approximately half an inch of insulation from each wire end. Gently untwist the wire nuts and separate the connections.
Once wires are disconnected, remove the mounting bracket by unscrewing it from the electrical box or ceiling framing. Inspect the existing electrical box—it must be rated for fan installation, which requires a heavier-duty box than standard light fixtures. Standard boxes often lack the bracing needed to support a fan’s weight and vibration. If your box appears flimsy or damaged, you’ll need to replace it with a code-approved fan-rated box.
Carefully lower the old fan and set it aside. Now examine the ceiling opening and surrounding area. Look for any signs of water damage, mold, or previous electrical problems. Address these issues before installing your new fan.
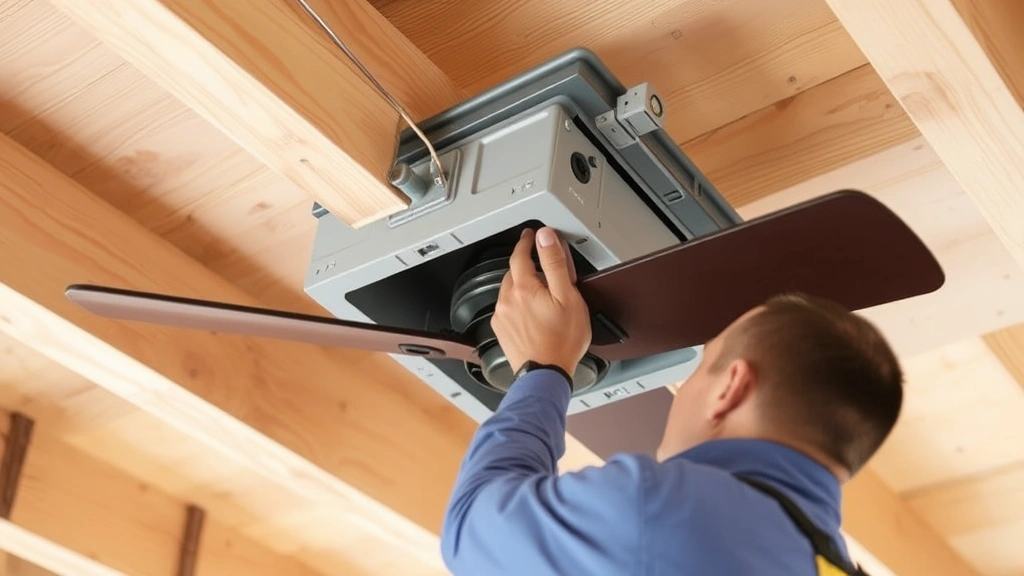
Installing the New Mounting Bracket
The mounting bracket is your fan’s foundation, and improper installation is a leading cause of fan failure and safety hazards. Your new fan kit includes a bracket specifically designed for that model—never substitute with a generic bracket.
Position the bracket so it aligns with ceiling joists if possible. Ceiling fans create significant rotational force and vibration; anchoring to solid wood provides the strongest support. If your electrical box doesn’t align with a joist, you’ll need to install cross-bracing between joists rated for fan installation. This bracing is available at any home center and comes with clear installation instructions.
Secure the bracket using all fasteners provided, typically lag bolts or heavy-duty wood screws. Tighten firmly but don’t over-torque, which can strip threads or crack the bracket. The bracket should feel absolutely solid with no movement when you apply downward pressure.
If you’re working with a standard electrical box that wasn’t rated for fans, this is your moment to upgrade. Turn off power at the breaker, disconnect the existing box, and install a new fan-rated electrical box. This extra step ensures your installation meets current electrical codes and provides years of reliable service.

Wiring Connections and Circuit Considerations
Understanding your home’s electrical circuits prevents overloads and dangerous situations. Most ceiling fans draw between 0.5 and 2.0 amps when running at full speed, but initial startup current is higher. If your fan is on a circuit already serving other high-draw devices (heating elements, air conditioners), you risk overloading the breaker.
Examine your breaker panel to determine circuit capacity. A standard circuit in most homes is 15 amps, though some are 20 amps. If your fan shares a circuit with multiple other devices, consider having an electrician install a dedicated 15-amp circuit for the fan alone. This eliminates tripping issues and provides safer operation.
When making wire connections, strip approximately three-quarters of an inch of insulation from each wire end. Twist the exposed copper strands together firmly—black to black (hot), white to white (neutral), and copper or green to copper or green (ground). Never mix wire types or colors.
Insert the twisted wires into appropriately sized wire nuts and turn clockwise until snug. The nut should grip all wires securely with no exposed copper visible. Wrap each connection with electrical tape for additional safety and moisture protection, especially in humid environments. This extra step is common practice among professional electricians and adds minimal time to installation.
Some fans include a light fixture with separate wiring. If your fan has a light controlled by a wall switch, ensure the black wire from the switch connects to the fan’s light circuit. Pull any slack wiring into the electrical box carefully, ensuring nothing pinches or damages the insulation.
Balancing and Testing Your Fan
Before declaring your installation complete, test all functions with the power restored. Turn the breaker back on, flip the wall switch, and verify the fan motor runs smoothly. Listen for grinding, squeaking, or unusual noises—these indicate installation problems or bearing issues.
Once running, observe the fan’s rotation. Excessive wobbling suggests an imbalanced fan or improperly secured mounting bracket. Turn off power immediately and check all fasteners. Tighten any loose bolts or screws, then test again. A properly installed fan should run nearly silently with minimal vibration.
If the light flickers or dims when the fan motor runs, this suggests inadequate wire gauge or a circuit overload. Flickering indicates voltage drop under load. Consult with an electrician about upgrading to a dedicated circuit, which solves most flickering issues.
Test the wall switch’s dimmer function if your fan includes one. Some fans aren’t compatible with standard dimmers—check your manufacturer’s specifications. Using an incompatible dimmer causes buzzing, overheating, and potential fire hazards.
Check that the remote control (if included) operates all fan speeds and light settings. Test the reverse switch, which changes blade direction for seasonal optimization—forward in summer for cooling, reverse in winter to push warm air downward.
Common Mistakes to Avoid
Undersized electrical box: Standard light fixture boxes lack the structural support fans require. Always use a fan-rated box rated for your fan’s weight.
Improper grounding: Never skip the ground wire connection. Grounding protects against electrical shock and surges. If your home has old two-wire (no ground) circuits, consult an electrician about upgrading.
Overloaded circuits: Adding a fan to an already-saturated circuit causes breaker trips and potential fire hazards. Dedicated circuits are the professional standard.
Loose wire connections: Loose connections generate heat, corrode wires, and eventually fail. All connections must be tight and secure, with no exposed copper.
Ignoring manufacturer specifications: Each fan model has unique requirements for mounting, wiring, and operation. Read the manual completely before starting work.
Working with live circuits: Never assume power is off without testing. Use a voltage tester every time, without exception.
Inadequate support for heavy fans: Large diameter fans (52+ inches) or heavy-duty fans require additional bracing. Don’t attempt to mount these on standard fixtures.
When to Call a Licensed Electrician
Ceiling fan replacement is a straightforward project for experienced DIYers, but several situations warrant professional help. If your home has aluminum wiring, knob-and-tube wiring, or any wiring you’re unfamiliar with, hire an electrician. These older systems have unique safety requirements and compatibility issues.
Call a professional if you encounter a missing or damaged electrical box, as replacing it requires ceiling access and proper installation. Similarly, if you need to add a dedicated circuit, this requires breaker panel access and is best left to licensed professionals.
If you’re uncomfortable working at height, experience any electrical shock sensations, or encounter unexpected wiring configurations, stop immediately and consult a professional. Your safety is worth the service call cost. Many electricians charge $150-$300 for ceiling fan installation, a reasonable investment for peace of mind.
For complex installations in older homes, homes with plaster ceilings, or situations involving multiple circuits, professional installation ensures code compliance and optimal performance. When in doubt, contact your local building department for guidance on what permits or inspections your project requires.
Consider reading our guide on DIY home security systems to understand how electrical work integrates with your home’s overall safety infrastructure. Additionally, proper home maintenance and finishing touches complement your newly installed fan.
FAQ
Can I install a ceiling fan without turning off power?
Absolutely not. Working on live circuits risks electrocution and death. Always turn off the breaker and verify power is off with a voltage tester before touching any wires or connections.
What size breaker do I need for a ceiling fan?
Most ceiling fans operate safely on standard 15-amp breakers. However, if the circuit serves other high-draw devices, upgrade to a dedicated 20-amp circuit for the fan alone. Consult your fan’s specifications and an electrician for your specific situation.
Can I use a standard light fixture box for ceiling fan installation?
No. Standard boxes aren’t designed to handle a fan’s weight and vibration. Always use a fan-rated electrical box specifically rated for your fan’s weight and motor type. This is a code requirement in most jurisdictions.
What should I do if my ceiling fan wobbles after installation?
Turn off power immediately and check all fasteners on the mounting bracket. Tighten any loose bolts or screws. If wobbling persists, the fan blades may be unbalanced. Most fans include balancing weights—follow the manufacturer’s instructions for blade adjustment.
Is it normal for my ceiling fan to flicker lights?
No. Flickering indicates voltage drop under load, suggesting the circuit is overloaded or wiring is undersized. Have an electrician evaluate your circuit and consider installing a dedicated line for the fan.
Can I install a ceiling fan in a bathroom?
Yes, but it must be rated for damp/wet locations and installed according to code. Bathroom fans require GFCI protection and proper ventilation. Follow the same procedures as standard fan installation, but ensure all components are moisture-rated.
How often should I maintain my ceiling fan?
Clean fan blades monthly to prevent dust buildup and vibration. Tighten mounting bolts quarterly. Lubricate motor bearings annually if your fan model allows. Most modern fans are sealed and maintenance-free, but check your manual.
What’s the difference between forward and reverse fan operation?
Forward (counterclockwise) pushes cool air downward during summer, creating a cooling breeze. Reverse (clockwise) at low speed pushes warm air that rises to the ceiling back downward, improving heating efficiency in winter. Use the reverse switch seasonally for optimal comfort.


