Replace Shower Head Easily: Plumber-Approved Guide
Replacing a shower head is one of the most straightforward plumbing projects you can tackle as a homeowner. Whether you’re upgrading to a water-saving model, fixing a leaky fixture, or simply refreshing your bathroom’s appearance, this task requires minimal tools and takes just minutes to complete. Unlike more complex plumbing work, changing a shower head doesn’t require special permits or professional installation—making it an ideal entry point for DIY enthusiasts.
This comprehensive guide walks you through every step of the process, from selecting the right replacement to troubleshooting common issues. We’ll cover the tools you’ll need, safety considerations, and pro tips that plumbers use to ensure a watertight seal. By following these instructions, you’ll save money on service calls while gaining confidence in your home maintenance skills.
Tools and Materials You’ll Need
Before you begin, gather these essential items to ensure a smooth replacement process. Having everything within arm’s reach prevents frustration and keeps your project moving forward efficiently.
- Adjustable wrench or pipe wrench: This is your primary tool for loosening and tightening the shower head connection. A 10-inch adjustable wrench works well for most standard shower heads.
- Teflon tape (plumber’s tape): This white tape creates a watertight seal on threaded connections, preventing leaks. It’s inexpensive and essential for professional results.
- New shower head: Choose one compatible with your existing plumbing. Standard sizes are 1/2-inch NPT (National Pipe Thread), which fits most homes.
- Cloth or old towel: Protect your shower head finish by wrapping it in cloth before applying the wrench. This prevents scratches and cosmetic damage.
- Bucket or small container: Water will drip from the shower arm when you remove the old head, so have something ready to catch it.
- Plumber’s putty (optional): Some installations benefit from this sealant, though Teflon tape is typically sufficient.
If you’re also planning to change a faucet, you’ll already have most of these tools available. The techniques are similar, though faucet replacement involves additional steps and components.
Types of Shower Heads and Compatibility
Not all shower heads are created equal, and understanding the different types helps you select the right replacement for your needs and budget.
Standard fixed shower heads mount directly to the wall and remain stationary. These are the most common type and typically the least expensive. They come in various styles and finishes—chrome, brushed nickel, oil-rubbed bronze—allowing you to match your bathroom décor.
Adjustable or articulating heads feature a ball joint that allows you to change the angle and direction of water flow. These offer flexibility for different users and preferences, though they cost slightly more than fixed models.
Rainfall shower heads provide a luxurious wide spray pattern that mimics rainfall. They’re larger and heavier, requiring sturdy wall support. Many are designed to work with existing plumbing without modifications.
Handheld shower heads include a hose and holder, offering convenience for bathing children, pets, or cleaning the tub. Some models feature both handheld and fixed options in one system.
Water-saving or low-flow models restrict flow to 2.0 gallons per minute or less, compared to the standard 2.5 GPM. These reduce water consumption without sacrificing pressure, helping you lower utility bills and environmental impact. According to the EPA WaterSense program, these fixtures can save families approximately 2,700 gallons of water annually.
Check your current shower head’s threading—most residential installations use 1/2-inch NPT, which is universal. Verify this before purchasing a replacement to avoid compatibility issues.
Step-by-Step Removal Process
Removing your old shower head is straightforward, but attention to detail ensures you don’t damage the shower arm or surrounding fixtures.
Step 1: Prepare the area. Turn off the water supply if you’re performing major repairs, though this isn’t strictly necessary for simple replacement. Place your bucket underneath the shower arm to catch residual water. Remove any decorative trim rings or escutcheons (the flanges that hide gaps between the wall and pipe).
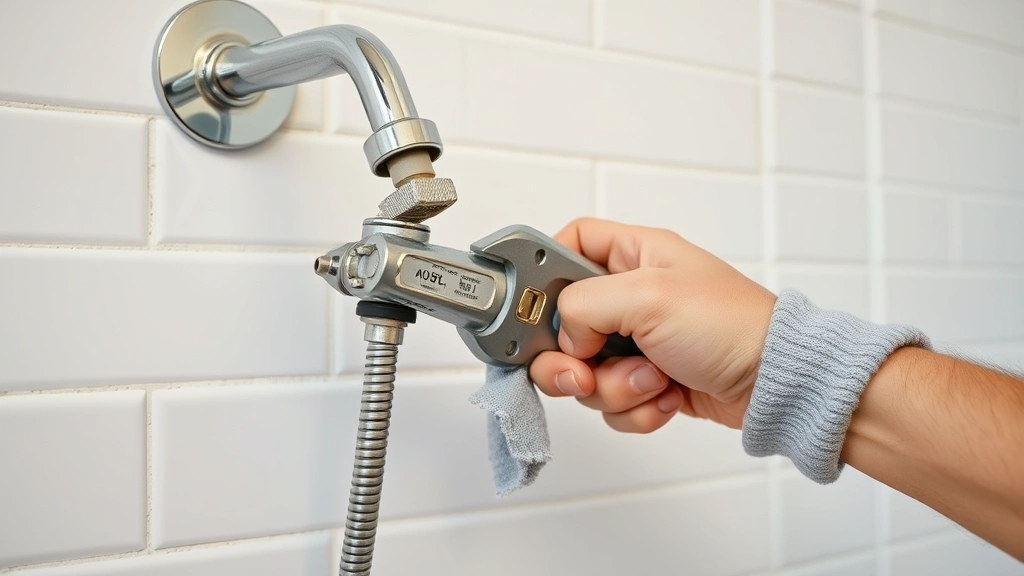
Step 2: Protect the finish. Wrap your cloth or old towel around the shower head connection where the wrench will grip. This crucial step prevents scratches and damage to the chrome or finish you’ll see in your shower.
Step 3: Apply the wrench. Position your adjustable wrench on the connection nut—the hexagonal fitting where the shower head meets the arm. Hold the shower arm steady with one hand (or have someone hold it) while turning the wrench counterclockwise. The arm should remain stationary; all rotation comes from the shower head connection.
Step 4: Unscrew completely. Continue turning until the shower head separates from the arm. Water will drip—this is normal. Let it drain into your bucket. If the connection is particularly tight, apply penetrating oil and wait 15 minutes before trying again.
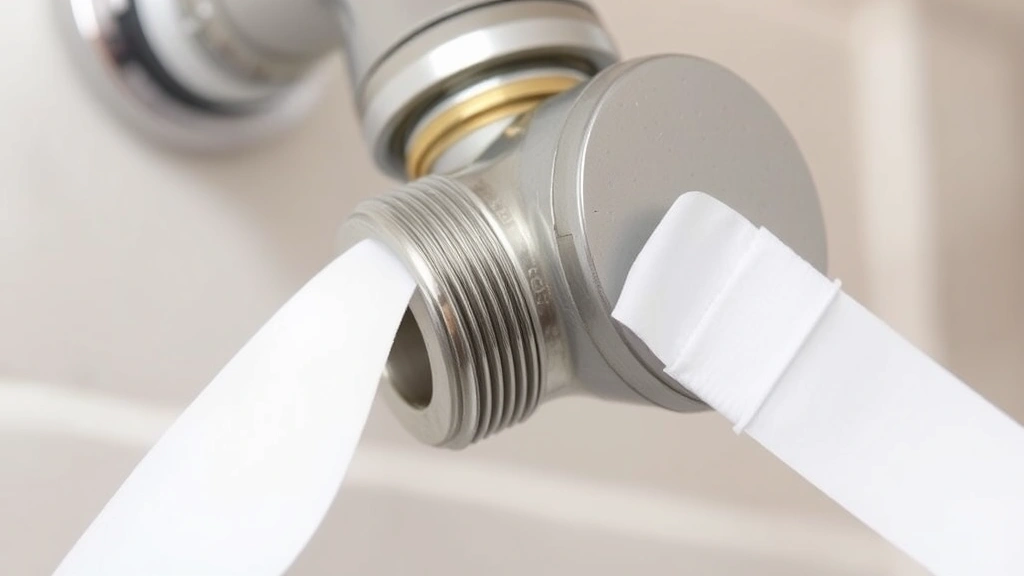
Step 5: Clean the threads. Using a cloth or soft-bristled brush, remove old Teflon tape, mineral deposits, and debris from the shower arm threads. This is crucial for creating a proper seal with your new installation. For stubborn buildup, ANSI-approved white vinegar works effectively on mineral deposits without damaging the threads.
This process mirrors the initial steps in changing electrical fixtures, where preparation and protection of existing materials prevent costly damage.
Installing Your New Shower Head
Proper installation technique ensures your new shower head functions perfectly and remains leak-free for years. This is where most DIYers either succeed or encounter problems—precision matters.
Step 1: Apply Teflon tape. Wrap the shower arm threads with Teflon tape, starting at the base and wrapping clockwise (the direction you’ll turn the shower head). Use 3-4 wraps around the threads, ensuring complete coverage. The tape should be snug but not bunched. This creates the watertight seal that prevents leaks.
Step 2: Hand-thread the shower head. Carefully screw the new shower head onto the arm by hand. Turn clockwise until it’s snug—you should feel slight resistance. Never force it; forcing can crack the fitting or cross-thread the connection, requiring professional repair.
Step 3: Tighten with the wrench. Once hand-tight, wrap your cloth around the connection again and use the wrench to tighten an additional 1/4 to 1/2 turn. This final tightening creates the seal without over-tightening, which can damage the fitting or make future removal difficult.
Step 4: Reinstall trim rings. If your shower head uses a decorative escutcheon or trim ring, slide it over the arm before final tightening, or install it after tightening depending on your model’s design. These rings hide the gap between the wall and pipe, creating a finished appearance.
Step 5: Adjust the angle (if applicable). For articulating or adjustable models, set your preferred spray angle now. Some heads allow adjustment after installation; others are fixed once tightened.
The installation process requires the same methodical approach as other DIY home improvement projects—take your time, follow steps sequentially, and don’t skip the preparatory work.
Testing and Troubleshooting
Before considering your project complete, test the installation thoroughly to identify any issues while you still have tools available.
Turn on the water. Start with low pressure, gradually increasing to full flow. Observe the connection point where the shower head meets the arm. Any water dripping indicates an incomplete seal.
Check for leaks. If water leaks from the connection, turn off the water and tighten an additional 1/8 turn with your wrench. Retest. If leaking continues, remove the head, add one more wrap of Teflon tape, and reinstall. Leaks at the connection point are almost always resolved by adding more tape.
Verify water pressure. New shower heads sometimes feel different from your previous model. Low-flow models intentionally restrict water for conservation. If pressure seems inadequate, check that the aerator screen isn’t clogged with debris from the old installation. Hold the head upside down and run water through it to flush any particles.
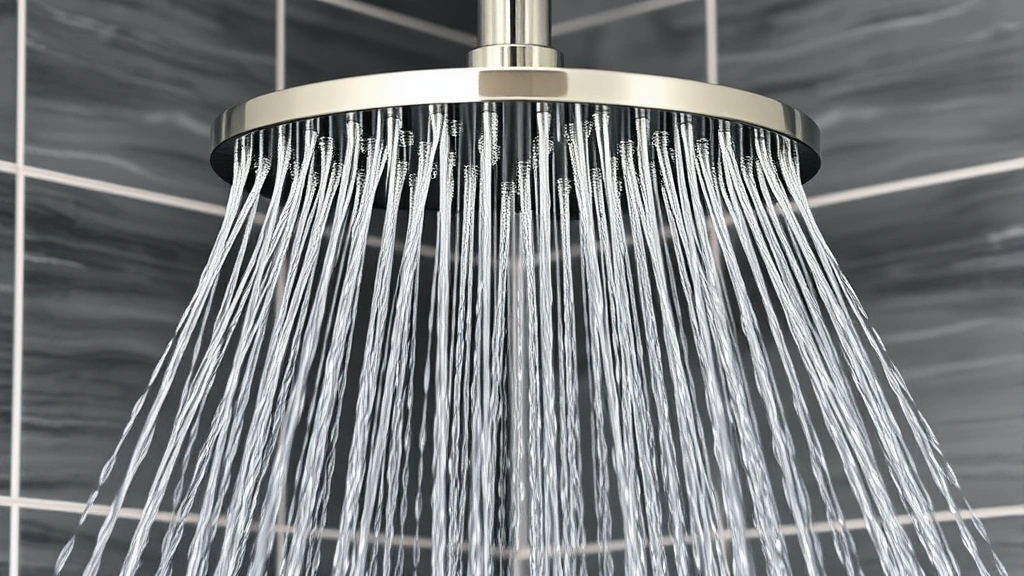
Test spray patterns. If your head has multiple settings, cycle through each one to ensure they function smoothly. Some heads feature rainfall, massage, and mist patterns—test each to confirm proper operation.
Monitor for 24 hours. Even if no leaks appear immediately, monitor the connection periodically over the next day. Sometimes small leaks develop as water pressure settles. This is your opportunity to make adjustments before declaring the project complete.
According to International Code Council building standards, all plumbing connections must remain watertight under normal operating pressure. Your DIY installation should meet this standard.
Maintenance Tips for Longevity
Proper maintenance extends your shower head’s lifespan and preserves water-saving performance if you installed a low-flow model.
Clean regularly. Hard water deposits accumulate on shower heads over time, potentially clogging spray holes. Monthly cleaning with white vinegar prevents buildup. Soak the head in vinegar for 30 minutes, then use an old toothbrush to scrub away mineral deposits.
Check seals periodically. Even well-installed connections can develop minor leaks over years of temperature fluctuations and water pressure changes. A quick visual inspection during your monthly cleaning catches issues early.
Don’t over-tighten. Resist the urge to tighten your shower head excessively. This damages internal seals and makes future removal difficult. Snug is sufficient—you shouldn’t need tools to hand-tighten.
Flush the system. If you notice reduced water pressure after installation, remove the head and run water through the arm to flush debris. Old Teflon tape particles or mineral deposits sometimes block flow initially.
Replace washers if needed. Some shower head models include rubber washers that wear out over time. If you notice persistent leaking despite proper tightening, the washer may need replacement. This is a $2-5 fix requiring only a wrench and replacement washer kit.
Just as you’d maintain other home systems after installation, your shower head benefits from occasional attention. This preventive approach avoids emergency repairs and keeps your bathroom functioning optimally.
FAQ
Can I replace a shower head without turning off the water supply?
Yes, turning off the main water supply isn’t necessary for shower head replacement. Water will drip from the arm when you remove the old head, but this is manageable with a bucket. However, if you’re uncomfortable with water dripping or performing other plumbing work, turning off the water is a reasonable precaution.
What if the old shower head won’t unscrew?
Mineral deposits and corrosion sometimes cause stubborn connections. Apply penetrating oil (like WD-40) and wait 15-30 minutes. Try again with your wrench. Avoid excessive force, which can break the fitting. If it remains stuck, wrap the connection in a hot, damp cloth for several minutes to expand the metal slightly, then try again.
Do I need Teflon tape if I use plumber’s putty?
Plumber’s putty and Teflon tape serve different purposes. Putty seals the gap between trim rings and the wall; tape seals the threaded connection. For most shower head installations, Teflon tape alone is sufficient and preferred by professional plumbers. Using both is harmless but unnecessary.
Why does my new shower head leak from the connection?
Leaking connections typically result from insufficient Teflon tape, improper wrapping, or under-tightening. Remove the head, inspect the threads for old tape residue, clean thoroughly, apply fresh tape (3-4 wraps), and reinstall with proper tightening. If leaking persists, the fitting itself may be defective—contact the manufacturer.
Are all shower heads compatible with my plumbing?
Most residential shower heads use 1/2-inch NPT threading, which is universal in North America. However, some older homes or specialized installations may differ. Verify your current head’s size before purchasing a replacement. Most hardware stores can help identify your threading if you’re uncertain.
Will a low-flow shower head reduce my water pressure too much?
Modern low-flow heads (2.0 GPM or less) maintain adequate pressure through advanced aerator design. You’ll notice a difference from older 5+ GPM heads, but pressure remains sufficient for comfortable showering. Many users prefer the water-saving benefits and lower utility bills to slightly increased shower duration.
How long does a shower head typically last?
Quality shower heads last 8-10 years or longer with proper maintenance. Low-flow models may last slightly less due to internal aerator complexity, but many remain functional for 10+ years. Mineral-heavy water areas may require more frequent cleaning or earlier replacement, making regular maintenance essential.


