
Charge Your Car Battery Safely: Expert Tips
A dead car battery is one of the most frustrating situations any driver can face, leaving you stranded and unable to start your vehicle. Whether you’re dealing with a battery that won’t hold a charge or one that’s been drained by leaving lights on overnight, knowing how to charge your car battery with a charger is an essential skill that can save you time and money. Rather than calling for roadside assistance or waiting for a jump start from a friend, you can take control of the situation and restore your battery’s power yourself using a dedicated battery charger.
Understanding the proper technique for charging your car battery is not just about convenience—it’s about safety. Improper charging methods can damage your battery, harm your vehicle’s electrical system, or even create dangerous situations involving sparks, hydrogen gas, or electrical shock. This comprehensive guide will walk you through everything you need to know about safely charging your car battery, from selecting the right charger to connecting it properly and monitoring the charging process. By following these expert tips, you’ll gain confidence in handling this common automotive maintenance task.

Understanding Car Battery Basics
Before you begin charging your car battery, it’s helpful to understand how your vehicle’s battery works and what causes it to lose charge. A standard car battery is typically a 12-volt lead-acid battery that stores electrical energy and provides the power needed to start your engine, run your lights, and operate your vehicle’s electrical accessories. Over time, batteries naturally lose their charge through normal use, and various factors can accelerate this process.
Car batteries contain cells with chemical reactions that generate electrical current. When you start your car, a significant amount of power is drawn from the battery to turn the starter motor and ignite the engine. Once the engine is running, your vehicle’s alternator takes over, recharging the battery while supplying power to your electrical systems. If your alternator isn’t functioning properly or if your battery is simply old, the battery won’t maintain its charge, and you’ll need to recharge it using an external charger.
The capacity of a car battery is measured in amp-hours (Ah), which indicates how much current the battery can supply over a specific period. A typical car battery might have a capacity of 40 to 100 amp-hours, depending on your vehicle’s size and power requirements. Understanding this measurement helps you select an appropriate charger and estimate how long the charging process will take. If you’re interested in learning more about automotive maintenance, check out our guide on DIY car repairs for beginners to expand your knowledge.
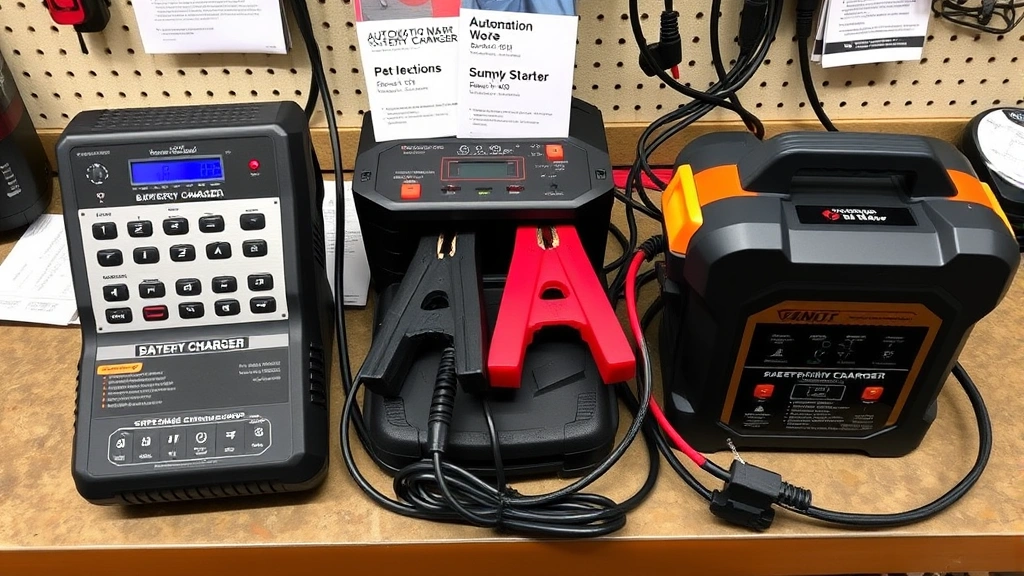
Types of Car Battery Chargers
Not all battery chargers are created equal, and selecting the right type for your situation is crucial for safe and effective charging. Understanding the different charger options available will help you make an informed decision based on your needs, budget, and the condition of your battery.
Manual/Traditional Chargers: These are the most common type of battery charger found in garages and workshops. Manual chargers require you to set the amperage and monitor the charging process throughout. They typically offer charging rates between 2 and 10 amps, making them ideal for a slow, gentle charge that’s less stressful on your battery. Manual chargers are affordable and reliable, but they require more attention and knowledge to use safely.
Automatic/Smart Chargers: Modern automatic chargers feature intelligent circuitry that monitors your battery’s condition and adjusts the charging rate accordingly. These chargers automatically stop charging when your battery is full, preventing overcharging and extending battery life. Smart chargers are more expensive than manual options but offer superior safety and convenience, making them excellent for regular home use.
Trickle Chargers: These specialized chargers deliver a very low current (typically 1-2 amps) over an extended period, making them perfect for maintaining a battery’s charge when your vehicle isn’t in use. Trickle chargers are ideal if you have a car that sits idle for extended periods or if you want to keep your battery in peak condition year-round.
Jump Starters/Portable Chargers: Compact battery packs with built-in jumper cables provide emergency starting power without needing another vehicle. While convenient, these shouldn’t be your primary charging solution but rather a backup for emergencies.
Solar Chargers: These eco-friendly options use solar panels to charge your battery slowly over time. They’re excellent for maintaining charge on vehicles that sit unused but aren’t practical for rapid charging situations.
When selecting a charger, consider your vehicle’s battery capacity, how quickly you need to charge, and how often you’ll use the charger. A versatile automatic charger with multiple amperage settings offers the best balance of safety, speed, and flexibility for most home mechanics.
Safety Precautions Before Charging
Safety must be your top priority when charging a car battery. Batteries contain corrosive sulfuric acid and can produce flammable hydrogen gas during charging, making this task potentially hazardous if proper precautions aren’t taken. Before you connect your charger, follow these critical safety steps.
Inspect Your Battery: Examine your battery for visible damage, cracks, or leaks. If you notice any of these issues, do not attempt to charge the battery. A damaged battery is unsafe to charge and should be replaced immediately. Look for white or blue corrosion around the battery terminals, which indicates age and deterioration. While minor corrosion can be cleaned, extensive corrosion may indicate your battery needs replacement.
Work in a Well-Ventilated Area: Always charge your battery outdoors or in a well-ventilated garage. Hydrogen gas produced during charging can accumulate in enclosed spaces and create an explosion hazard. Proper ventilation ensures that any gases escape safely and don’t pose a risk to you or your property.
Remove Metal Jewelry and Accessories: Take off any rings, watches, or metal bracelets before working with your battery. Metal objects can accidentally contact battery terminals and create dangerous electrical arcs or short circuits that could cause burns or ignition.
Wear Protective Equipment: Safety glasses protect your eyes from potential acid splashes or sparks. While working with batteries, wear gloves to protect your hands from corrosion and accidental contact with terminals. If you spill battery acid, baking soda neutralizes it effectively.
Ensure the Engine is Off: Always turn off your vehicle’s engine before connecting or disconnecting the charger. Connecting a charger to a running vehicle can damage your alternator and create electrical surges that harm your battery and charging equipment.
Check Your Charger’s Condition: Before use, inspect your charger for damaged cables, cracked casing, or exposed wiring. Never use a damaged charger, as it poses serious electrical hazards. Keep your charger in good working condition by storing it in a dry location and protecting cables from damage.
Step-by-Step Charging Process
Now that you’ve prepared yourself and your workspace, you’re ready to begin the charging process. Follow these steps carefully to ensure safe and effective battery charging.
Step 1: Locate Your Battery Open your hood and locate your car’s battery. In most vehicles, it’s in the engine compartment, typically near the front or side. Familiarize yourself with the battery’s location and identify the positive (red) and negative (black) terminals. Take a moment to ensure you can clearly distinguish between them before proceeding.
Step 2: Clean the Battery Terminals Using a wire brush or baking soda solution, clean any corrosion from the battery terminals. Corrosion creates resistance that slows charging and reduces efficiency. If you find heavy corrosion, create a paste of baking soda and water, apply it to the corroded areas, let it sit for a few minutes, then scrub with your wire brush. Rinse with clean water and dry thoroughly.
Step 3: Position Your Charger Place your charger in a safe location away from the battery, preferably on the ground beside your vehicle. Ensure the charger’s power cord is fully extended and won’t create a tripping hazard. Keep the charger away from water, moisture, and flammable materials.
Step 4: Set the Charging Parameters Before plugging in your charger, set it to the appropriate amperage. For a standard car battery, a 10-amp charge rate is typical and provides a good balance between charging speed and battery safety. If your battery is severely discharged, you might start with a lower 2-5 amp rate. Check your charger’s manual for specific recommendations based on your battery’s capacity and condition.
Step 5: Connect the Positive Cable First This is critical for safety. Take the red cable from your charger and firmly attach it to the positive terminal of your battery. The positive terminal is marked with a plus sign (+) and is typically larger than the negative terminal. Ensure the connection is tight and secure. A loose connection creates resistance and may cause sparking.
Step 6: Connect the Negative Cable to Ground Instead of connecting the negative (black) charger cable directly to the negative battery terminal, connect it to a clean, unpainted metal surface on your engine block or vehicle frame away from the battery. This technique, called grounding, prevents sparks near the battery where hydrogen gas may be present, significantly reducing explosion risk. Look for a bolt or metal bracket on the engine that provides good contact.
Step 7: Plug in the Charger Once both cables are securely connected, plug your charger into a standard electrical outlet. Most chargers will have an indicator light showing that power is connected. Check that all connections remain tight and no unusual sounds or smells are present.
Step 8: Monitor the Charging Process Depending on your battery’s condition and the charger’s amperage, charging typically takes 4-24 hours. Most automatic chargers will show charging progress through LED indicators or a digital display. Check on your battery periodically, but avoid touching the terminals or cables during charging. If you notice any unusual smells, excessive heat, or sparking, immediately disconnect the charger and investigate the problem.
Step 9: Disconnect the Charger Properly When charging is complete, disconnect in reverse order of connection. First, unplug the charger from the electrical outlet. Next, remove the black negative cable from the engine ground. Finally, remove the red positive cable from the battery’s positive terminal. This reverse order prevents sparks and ensures safe disconnection.
Step 10: Test Your Battery After charging, wait a few minutes, then attempt to start your vehicle. If it starts successfully, let it run for several minutes while your alternator recharges the battery further. If the battery still won’t start your car, you may have a deeper electrical problem that requires professional diagnosis.
Charging Different Battery Types
Modern vehicles may have different battery types, and charging procedures can vary slightly depending on what you have. Understanding your battery type ensures you use the appropriate charging method.
Lead-Acid Batteries: The traditional battery type found in most vehicles, lead-acid batteries handle standard charging well. These can tolerate relatively fast charging rates without damage. The procedure outlined above works perfectly for lead-acid batteries.
AGM (Absorbent Glass Mat) Batteries: These advanced lead-acid batteries are sealed and require a charger specifically designed for AGM batteries. Using a standard charger on an AGM battery can cause overcharging and permanent damage. Check your battery’s label to confirm if it’s AGM, and select an AGM-compatible charger. Many modern smart chargers automatically detect battery type and adjust accordingly.
Lithium-Ion Batteries: Hybrid and some electric vehicles use lithium-ion batteries that require specialized charging equipment. Never attempt to charge these with standard automotive chargers. Always consult your vehicle’s manual for proper charging procedures, as improper charging can damage the battery or create safety hazards. For more information about automotive electrical systems, explore our guide on changing batteries in key fobs, which covers similar principles.
Deep Cycle Batteries: If you have auxiliary deep-cycle batteries in your vehicle, they may require slower charging rates than standard automotive batteries. These batteries are designed for repeated discharge and recharge cycles and benefit from gentle charging at lower amperage rates.
Troubleshooting Common Charging Issues
Even with proper technique, you might encounter problems during the charging process. Here’s how to address common issues.
Charger Won’t Turn On: If your charger doesn’t power up, check that the electrical outlet is functioning by plugging in another device. Verify that all charger cables are properly connected and undamaged. If the outlet works but the charger doesn’t, the charger may be defective and needs replacement.
Slow Charging Progress: If your battery charges very slowly, check for corrosion on the terminals that might be creating resistance. Ensure your charger’s amperage setting is appropriate for your battery. Some batteries that are extremely discharged or damaged may charge very slowly or not at all, indicating they need replacement.
Battery Gets Hot During Charging: Mild warmth is normal, but excessive heat indicates a problem. Immediately disconnect the charger and inspect for loose connections or damaged cables. If the battery itself is very hot, it may be defective and should be replaced. Never continue charging a battery that becomes dangerously hot.
Charger Sparks When Connecting: Small sparks when initially connecting are sometimes normal, but continuous or large sparks indicate a serious problem. Disconnect immediately and check all connections for corrosion, damage, or loose contact. Ensure you’re connecting in the correct order and to the right terminals. If sparking persists, your charger or battery may be defective.
Battery Still Won’t Start Car After Charging: If your battery charges fully but won’t start your vehicle, several issues could be responsible. Your alternator might not be functioning, preventing proper battery recharge while driving. Your starter motor could be faulty. Or your battery might be too old or damaged to hold charge effectively. Have a professional mechanic diagnose the problem. For related automotive maintenance knowledge, check out our guide on changing your oil, which covers similar vehicle maintenance principles.
Charger Turns Off Before Battery is Fully Charged: Some automatic chargers have safety features that shut off if they detect a problem. This could indicate a damaged battery that won’t accept a full charge. Manual chargers might shut off due to overheating protection. Allow the charger to cool and try again, or consider having your battery professionally tested.
Maintenance Tips to Prevent Battery Drain
The best approach to battery problems is prevention. By maintaining your battery and vehicle’s electrical system properly, you can avoid being stranded with a dead battery.
Limit Accessory Use When Engine is Off: Leaving lights, radios, or climate control running while your engine is off drains your battery quickly. Make it a habit to turn off all accessories before exiting your vehicle. Modern cars automatically turn off lights, but older vehicles require manual management.
Keep Battery Terminals Clean: Inspect your battery terminals monthly and clean any corrosion with a wire brush and baking soda solution. Clean terminals ensure maximum electrical conductivity and efficient charging by your alternator. This simple maintenance prevents many battery problems.
Drive Regularly: Frequent driving allows your alternator to keep your battery fully charged. If you have a vehicle that sits unused for extended periods, use a trickle charger to maintain the battery’s charge. Even a few hours of driving per week keeps your battery healthy.
Check Your Alternator: Your alternator is responsible for recharging your battery while you drive. If your battery drains quickly even with regular driving, your alternator might be failing. Have it tested by a professional if you suspect problems. A failing alternator will eventually leave you stranded.
Avoid Extreme Temperatures: Batteries perform poorly in very cold or very hot conditions. In winter, park in a garage if possible. In summer, park in shade to reduce heat exposure. Extreme temperatures reduce battery efficiency and lifespan.
Replace Old Batteries Proactively: Car batteries typically last 3-5 years. If your battery is approaching this age and you experience slow starting or repeated drainage issues, replace it before it fails completely. A new battery costs less than roadside assistance or emergency repairs.
Use a Battery Maintainer: If you have a vehicle that sits idle frequently, a battery maintainer or trickle charger keeps it in optimal condition. These devices charge slowly and automatically shut off when the battery is full, preventing overcharging.
For comprehensive vehicle maintenance knowledge, explore our guide on changing a tire and other essential maintenance procedures. Additionally, check out our complete guide to car detailing for comprehensive vehicle care information.
FAQ
How long does it take to charge a car battery with a charger?
Charging time varies based on your battery’s capacity and the charger’s amperage. A standard 10-amp charger typically takes 4-8 hours to fully charge a dead battery. Lower amperage (2-5 amps) takes longer but is gentler on the battery. Smart chargers automatically adjust and may take anywhere from 4-24 hours depending on battery condition. Always check your charger’s manual for specific time estimates based on your battery’s amp-hour rating.
Can I charge my car battery while it’s still in the car?
Yes, you can safely charge your battery while it remains installed in your vehicle, provided you follow proper safety procedures. The key is ensuring the engine is completely off and you’re not creating any electrical hazards. Most home charging is done with the battery in place. However, if your battery is extremely corroded or damaged, removing it for cleaning and inspection is sometimes advisable.
Is it safe to leave a battery charger on overnight?
Automatic and smart chargers are designed to shut off when the battery is fully charged, making them safe for overnight charging. Manual chargers should not be left unattended for extended periods, as they lack automatic shutoff and can overcharge your battery. If you use a manual charger, monitor it regularly and disconnect once charging is complete. Always read your charger’s manual for specific recommendations about unattended charging.
What’s the difference between charging and jump starting?
Jump starting provides immediate starting power by borrowing current from another vehicle’s battery, allowing your engine to start right away. Charging, by contrast, slowly restores your battery’s stored energy over several hours. Jump starting is faster but doesn’t fully restore your battery’s charge. If you need to drive any distance after a jump start, your alternator will need to recharge your battery. For a complete restoration of battery health, proper charging is necessary.
Can I charge a completely dead battery?
In most cases, yes. A completely discharged battery can be charged using a standard charger, though it may take longer than a partially charged battery. Some chargers have a “recovery mode” specifically for deeply discharged batteries. However, if a battery has been dead for an extended period or is very old, it may not accept a full charge due to internal damage. If charging doesn’t restore functionality, the battery likely needs replacement.
What should I do if my battery is leaking acid?
If you notice acid leaking from your battery, do not attempt to charge it. A leaking battery is unsafe and should be replaced immediately. Neutralize any spilled acid with baking soda, wear gloves and eye protection, and carefully dispose of the damaged battery according to local regulations. Most retailers that sell batteries accept old batteries for recycling and proper disposal.
Do I need to remove the battery to charge it?
No, you don’t need to remove your battery to charge it in most cases. Charging in place is convenient and safe when done properly. However, removing the battery can be helpful if you need to clean extensive corrosion or if your vehicle’s engine compartment is too cramped to work comfortably. If you decide to remove your battery, disconnect the negative terminal first, then the positive terminal, and reverse the process when reinstalling.


