Check Amps with Multimeter: Electrician Tips
Measuring electrical current is one of the most fundamental skills every electrician and serious DIY enthusiast must master. Whether you’re troubleshooting a faulty circuit, verifying that a device is drawing the correct amount of power, or diagnosing electrical problems in your home, knowing how to check amps using a multimeter is essential. A multimeter is an incredibly versatile tool that measures voltage, resistance, and current—making it indispensable for anyone working with electricity.
The process of measuring amperage (current) with a multimeter differs significantly from measuring voltage or resistance, and understanding these differences can mean the difference between accurate diagnostics and damaged equipment. In this comprehensive guide, we’ll walk you through everything you need to know about measuring amps safely and effectively, from selecting the right multimeter settings to interpreting your readings correctly.
Understanding Amperage and Multimeters
Amperage, measured in amps (A), represents the flow of electrical current through a circuit. Think of it like water flowing through a pipe—voltage is the pressure, resistance is the pipe’s diameter, and amperage is the actual volume of water flowing. A multimeter is an electronic measuring device that combines three essential functions: a voltmeter (measures voltage), an ohmmeter (measures resistance), and an ammeter (measures current).
When you measure current with a multimeter, you’re determining how much electrical charge is flowing through a conductor at any given moment. This measurement is critical for several reasons: it helps identify overloaded circuits, confirms that appliances are operating within their rated specifications, and reveals when components are drawing abnormal amounts of power—often a sign of failure or malfunction.
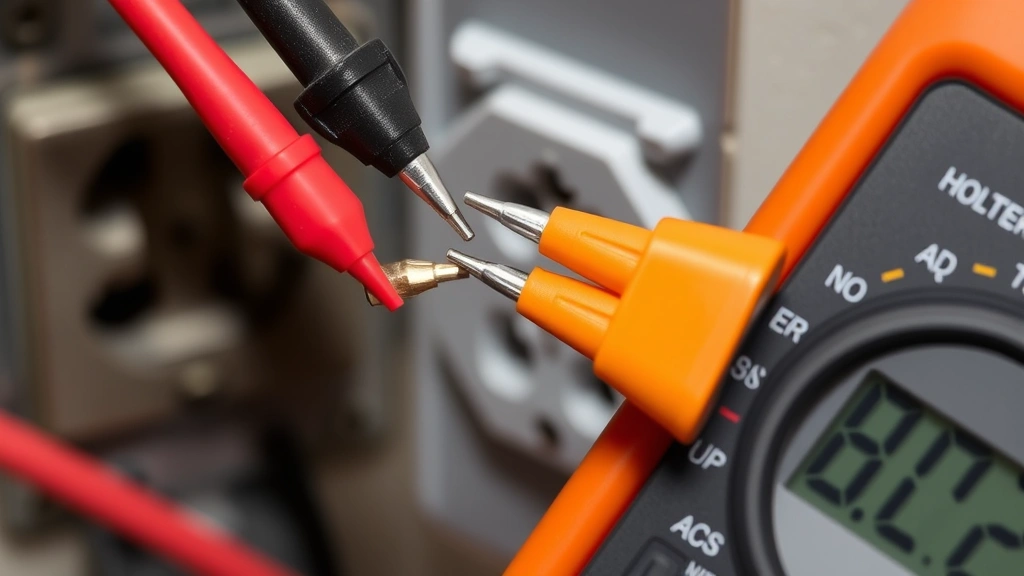
Unlike voltage measurement, where you connect the multimeter in parallel with the circuit, measuring amperage requires you to connect the multimeter in series with the circuit. This means the current must flow through the multimeter itself, which is why understanding the proper setup is crucial to both accuracy and safety.
Types of Multimeters for Amp Measurement
Not all multimeters are created equal when it comes to measuring amperage. Understanding the differences between digital and analog multimeters, as well as their amp measurement capabilities, will help you choose the right tool for your needs.
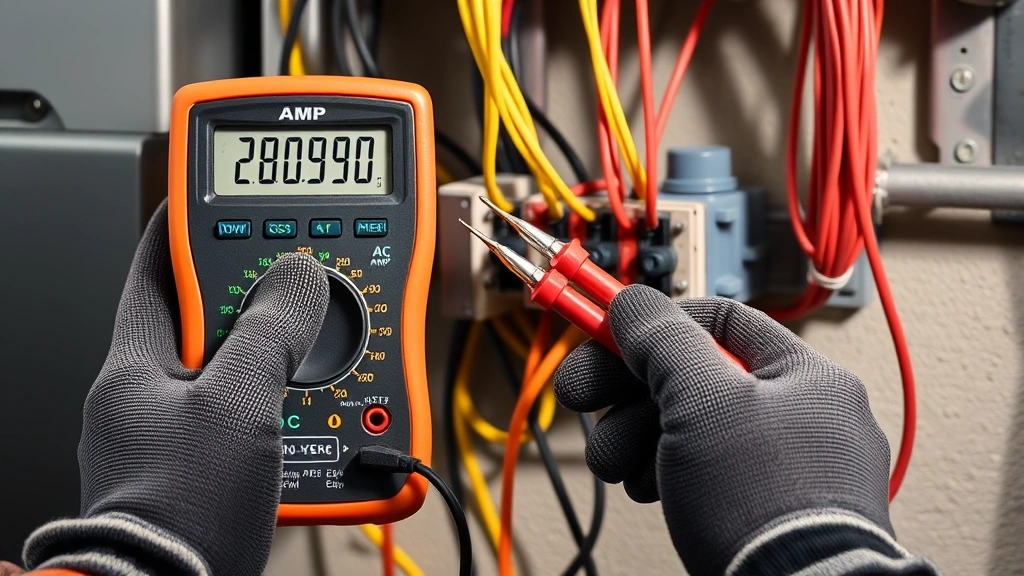
Digital Multimeters (DMM): These are the most common choice for modern electricians and DIY enthusiasts. Digital multimeters display readings on an LCD screen and typically offer two methods for measuring current: direct connection (inserting the meter into the circuit) and through a clamp feature on more advanced models. Most standard digital multimeters can measure both AC and DC amperage, though they usually have limited amp ranges (often 200mA, 2A, 10A, or 20A maximum).
Analog Multimeters: These older-style meters use a needle that moves across a graduated scale. While some electricians still prefer them for certain applications, analog meters are less common for amp measurement because they require more skill to read accurately and don’t work well with rapidly fluctuating currents.
Clamp Meters: These specialized tools feature a hinged clamp that opens to encircle a single conductor without breaking the circuit. Clamp meters are particularly useful for measuring large currents and are often the preferred choice for checking relay circuits and larger electrical systems. Many modern clamp meters also measure voltage and resistance, making them multifunctional.
For most home electrical work, a standard digital multimeter with amp measurement capability is sufficient, but understanding when to use a clamp meter is important for safety and accuracy.
Safety Precautions Before Measuring Current
Measuring amperage carries specific safety risks that differ from voltage or resistance measurement. Because you must insert the multimeter directly into the circuit path, you’re creating a direct connection to live electrical components. Here are the critical safety steps you must follow:
- Always wear appropriate personal protective equipment (PPE): This includes safety glasses and insulated gloves rated for the voltage you’re working with. OSHA electrical safety guidelines emphasize the importance of proper PPE when working with live circuits.
- Never exceed the multimeter’s amp rating: If you’re measuring a circuit that might draw more current than your multimeter can handle, use a clamp meter or higher-capacity instrument instead. Exceeding the rating will damage the meter and potentially cause dangerous arcing.
- Ensure the circuit is properly grounded: Before you begin any measurement, verify that the circuit is properly grounded to prevent electrical shock.
- Turn off the circuit if possible: While measuring live circuits is sometimes necessary, whenever possible, de-energize the circuit first, verify it’s off with a non-contact voltage tester, and then take your measurements on the de-energized circuit if you’re measuring resistance.
- Use a properly functioning multimeter: Test your multimeter on a known circuit before using it on unknown circuits. A damaged meter can give false readings and expose you to danger.
- Never touch the probe tips while measuring: Keep your hands away from the probe tips and the live components you’re testing to avoid accidental contact with high voltage.
- Keep the meter away from moisture: Water conducts electricity and dramatically increases shock risk. Never use a multimeter in wet conditions unless it’s specifically rated for such use.
Understanding proper fuse testing procedures and related electrical safety practices will enhance your overall competency with multimeters.
Step-by-Step Guide to Measuring AC Amps
Alternating current (AC) is the standard electrical current in most homes and commercial buildings. Here’s the detailed process for measuring AC amperage with a standard digital multimeter:
Step 1: Prepare Your Multimeter Locate the amp measurement function on your multimeter. Most digital multimeters have a dial with different measurement options. Look for markings that say “A” or “A~” for AC amps. Some multimeters have separate jacks for different amp ranges (typically 200mA and 10A or 20A). Ensure you’re using the correct jack configuration for the expected current range.
Step 2: Select the Appropriate Amp Range Choose a range that’s higher than the expected current draw. If you’re unsure of the current, start with the highest range available (usually 10A or 20A). You can always switch to a lower range for better precision once you have an initial reading. Starting with a higher range protects both you and the meter from overcurrent damage.
Step 3: Turn Off Power and Prepare the Circuit Before making any connections, turn off the circuit breaker that controls the circuit you’re testing. Use a non-contact voltage tester to confirm the circuit is de-energized. This is the safest approach for learning and troubleshooting.
Step 4: Disconnect One Wire Carefully disconnect one of the wires in the circuit where you want to measure current. This is typically done at a connection point, outlet, or device. Be extremely careful not to touch live wires or create a short circuit.
Step 5: Connect the Multimeter in Series Connect one probe to the disconnected wire end and the other probe to the circuit component you disconnected it from. The multimeter is now in series with the circuit, meaning all current must flow through the meter. This is fundamentally different from voltage measurement, where the meter is connected in parallel.
Step 6: Restore Power and Take Your Reading Turn the circuit breaker back on. The multimeter should display the current flowing through the circuit. If the reading is very small (in the milliamp range) and you selected a 10A or 20A range, you may want to switch to a lower range for better accuracy. Read the display carefully and note the value.
Step 7: Turn Off Power and Disconnect Once you have your reading, immediately turn off the circuit breaker again. Disconnect the multimeter probes and reconnect the wire you disconnected earlier, ensuring the connection is secure and properly insulated.
Step 8: Restore the Circuit Turn the circuit breaker back on and verify that the circuit is functioning normally. Check that all connections are tight and that there are no signs of overheating or damage.
Measuring DC Amps Safely
Direct current (DC) is commonly encountered in battery-powered devices, solar systems, and automotive applications. The process for measuring DC amperage is similar to AC measurement, but with some important differences:
DC circuits have polarity—positive and negative terminals matter. When measuring DC amps, connect the black probe to the negative side of the circuit and the red probe to the positive side. Reversing the polarity won’t damage most modern digital multimeters, but it will give you a negative reading, which can be confusing.
Select the DC amp setting on your multimeter (usually marked as “A” or “A—” without the tilde symbol). Follow the same series connection procedure as with AC measurement. The major advantage of DC measurement is that the current typically remains steady, making it easier to get stable, reliable readings.
When working with battery systems and chargers, understanding DC amp measurement is essential for verifying proper charging rates and detecting battery problems.

Common Mistakes and Troubleshooting
Even experienced electricians occasionally make mistakes when measuring amperage. Learning from these common errors can help you avoid problems:
Connecting the Meter in Parallel Instead of Series: This is the most common mistake. If you connect the multimeter across the circuit (in parallel) when measuring amps, you create a short circuit that will blow the meter’s internal fuse or damage it permanently. Always remember: amps in series, volts in parallel.
Selecting the Wrong Amp Range: If you select a range that’s too low for the expected current, you may blow the internal fuse. Always start with the highest available range and work downward. Most multimeters have a replaceable fuse for the amp measurement function—check your manual for the correct fuse specifications.
Exceeding the Meter’s Maximum Amp Rating: Every multimeter has a maximum current it can safely measure. This is typically 200mA for the lower range and 10-20A for the higher range. Exceeding this rating will damage the meter and create safety hazards.
Not Fully Disconnecting the Wire: If you only partially disconnect the wire or create a poor connection, you may get inaccurate readings. Ensure complete disconnection before connecting the multimeter.
Forgetting to Reconnect the Wire Properly: After taking your measurements, failing to properly reconnect the wire can result in an open circuit and potential electrical hazards. Always double-check your reconnections.
Measuring Current on a Dead Circuit: If the circuit is de-energized, you’ll get a zero reading, which is correct but not useful for diagnosing live circuit problems. Some measurements require working with energized circuits, but this should only be done by qualified electricians following proper safety protocols.
If your multimeter isn’t giving readings, check that the probes are making good contact, verify you’re measuring on an active circuit, and confirm that the meter’s internal fuse hasn’t blown. Understanding multimeter function checks will help you troubleshoot meter problems quickly.
Using Clamp Meters as an Alternative
Clamp meters offer a safer, more convenient alternative to traditional multimeters for measuring amperage, especially in electrical systems. Instead of breaking the circuit, a clamp meter uses magnetic induction to measure the current flowing through a conductor without direct contact.
Advantages of Clamp Meters: The primary advantage is safety—you don’t need to disconnect any wires or create a series connection. Simply open the clamp, place it around a single conductor carrying the current, and close it. The meter displays the current instantly. This makes clamp meters ideal for measuring high currents that would exceed a standard multimeter’s capacity.
Clamp meters are also faster and more convenient for troubleshooting electrical systems, especially in panels with multiple circuits. They can measure AC currents up to hundreds of amps, making them suitable for large industrial and commercial applications. Many modern clamp meters also include voltage measurement and continuity testing functions, making them truly multifunctional tools.
Limitations of Clamp Meters: Standard clamp meters measure AC current only; DC clamp meters are available but more expensive. The clamp must fit around the conductor, so they don’t work well in tight spaces. Some models aren’t as precise as multimeters for very small currents. For residential electrical work, a standard digital multimeter is usually sufficient, but professional electricians typically carry both tools.
When checking AC capacitors and related components, having a clamp meter available can simplify the troubleshooting process significantly.
FAQ
Can I measure amps with any multimeter?
Not all multimeters have amp measurement capability. Budget models may only measure voltage and resistance. Check your multimeter’s specifications to confirm it has an ammeter function. Additionally, not all multimeters can measure the same amp ranges—some are limited to 200mA maximum, while others can measure up to 20A or more. Always verify your meter’s capabilities before attempting to measure current.
What’s the difference between measuring amps and measuring volts?
The fundamental difference is connection method: volts are measured in parallel (across a component), while amps are measured in series (in line with the circuit). This difference is critical for both safety and accuracy. Connecting an ammeter in parallel will short-circuit the device and damage the meter, while connecting a voltmeter in series will give you no reading. Understanding this distinction is essential for proper multimeter use.
How do I know if I’m measuring AC or DC amps?
AC (alternating current) is the standard household current in most developed countries, typically 50 or 60 Hz. DC (direct current) is found in battery-powered devices, solar systems, and automotive applications. Your multimeter will have separate settings for AC and DC measurement. If you’re unsure which type of current you’re measuring, consult the device’s documentation or use a non-contact voltage tester that indicates AC or DC.
What should I do if my multimeter reading keeps changing?
Fluctuating readings can indicate a loose connection, a failing component, or an intermittent circuit problem. Ensure all probe connections are secure and making good contact. If the reading is genuinely fluctuating, this often indicates a problem with the circuit or device being tested. Document the range of fluctuation and investigate the cause. This is valuable diagnostic information.
Is it safe to measure amps on a live circuit?
Measuring amps on a live circuit is possible but carries significant risk and should only be done by qualified electricians following proper safety protocols. Whenever possible, de-energize the circuit before making measurements. If you must work on a live circuit, wear appropriate PPE, use insulated tools, and follow all safety guidelines. When in doubt, consult a licensed electrician.
How often should I replace the fuse in my multimeter?
The fuse in your multimeter’s amp measurement circuit should rarely blow if you’re using the meter correctly. If you blow a fuse, investigate why before simply replacing it. Common causes include exceeding the meter’s amp rating, connecting the meter in parallel instead of series, or using the wrong probe jack. Replace the fuse with one rated for the same amperage and voltage as specified in your meter’s manual.
Can I measure amps through insulation?
No. You must have direct electrical contact with the circuit to measure amps with a standard multimeter. This is why you need to disconnect a wire and create a series connection. Clamp meters, however, can measure current flowing through a conductor without removing insulation, as they use magnetic induction rather than direct electrical contact.


