
How to Test a Capacitor with a Multimeter: Professional Guide
Capacitors are fundamental electrical components found in countless household appliances, HVAC systems, and electronic devices. When they fail, they can cause equipment malfunction, safety hazards, or complete system breakdown. Learning how to check a capacitor with a multimeter is an essential skill for any DIY enthusiast tackling home electrical projects or troubleshooting appliance problems.
Testing a capacitor properly requires understanding both the equipment and the electrical principles involved. A multimeter is your primary diagnostic tool, but the method varies depending on the capacitor type and your multimeter’s capabilities. This guide walks you through every step, from safety precautions to interpreting results, ensuring you can confidently diagnose capacitor issues without damaging equipment or risking electrical shock.
Whether you’re experiencing air conditioning problems, refrigerator malfunctions, or washing machine failures, a faulty capacitor is often the culprit. By mastering this diagnostic skill, you’ll save money on service calls and gain the confidence to handle electrical troubleshooting as part of your broader DIY home improvement arsenal.
Understanding Capacitors and Their Function
A capacitor is an electrical component that stores and releases electrical energy. It consists of two conductive plates separated by an insulating material called a dielectric. When voltage is applied, one plate accumulates positive charge while the other accumulates negative charge, creating an electrical field that stores energy temporarily.
Capacitors serve multiple critical functions in household appliances and electrical systems. In air conditioning units, they provide the initial surge of power needed to start the compressor motor. In refrigerators, they stabilize voltage and smooth power delivery. In ceiling fans and washing machines, they enable smooth motor operation and prevent voltage fluctuations that could damage sensitive components.
There are several capacitor types commonly found in residential settings. Electrolytic capacitors are polarized, meaning they have positive and negative terminals and must be connected correctly. Film capacitors are non-polarized and more durable, used in AC applications. Ceramic capacitors are small, non-polarized, and found in electronics. Start capacitors provide temporary boost power to motors, while run capacitors maintain continuous operation. Understanding which type you’re testing affects how you approach the diagnostic process and interpret results.
Safety Precautions Before Testing
Working with capacitors demands strict safety protocols because even after power is disconnected, a charged capacitor retains electrical energy capable of delivering dangerous shocks. This stored energy can cause serious injury or death if released improperly. Before touching any capacitor, treat it as live, regardless of whether the device appears powered off.
Always follow these critical safety steps:
- Disconnect the device completely from electrical power at the breaker or outlet
- Wait at least 5-10 minutes for residual charge to dissipate
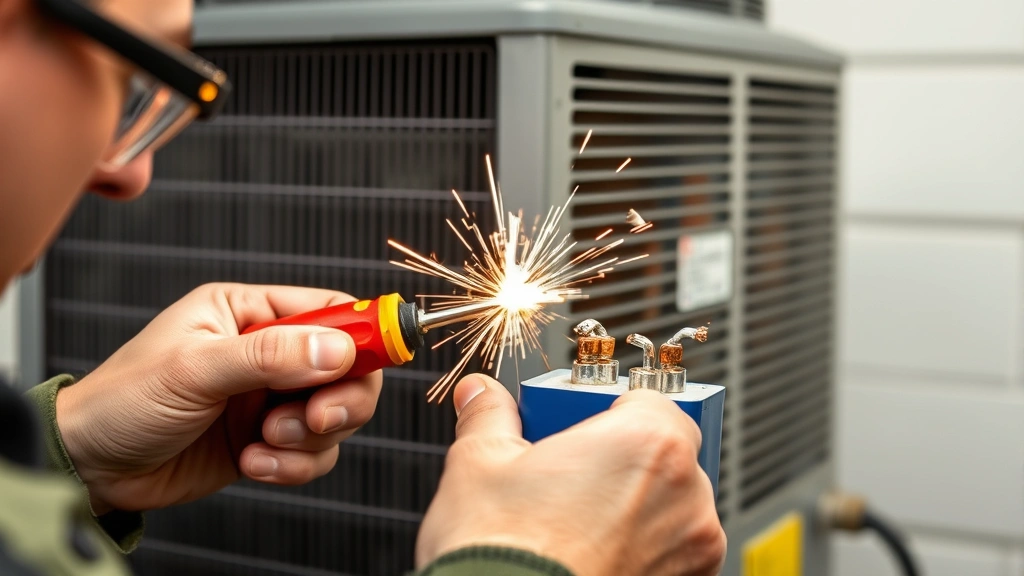
- Use an insulated screwdriver to short the capacitor terminals together, discharging any remaining electrical energy safely
- Wear safety glasses to protect against potential sparks during discharge
- Never work on capacitors with wet hands or in damp environments
- Use an insulated mat or rubber gloves when handling components
- Keep one hand in your pocket when testing to prevent current from crossing your chest
- Never test capacitors while the device is powered on
These precautions aren’t excessive—they’re essential. Capacitor-related electrical injuries are serious and potentially fatal. Respecting the danger while maintaining proper technique allows you to test safely and effectively. If you’re uncomfortable with electrical work, consulting a licensed electrician is always the prudent choice, especially for high-voltage systems like air conditioners.
Multimeter Types and Capacitance Measurement
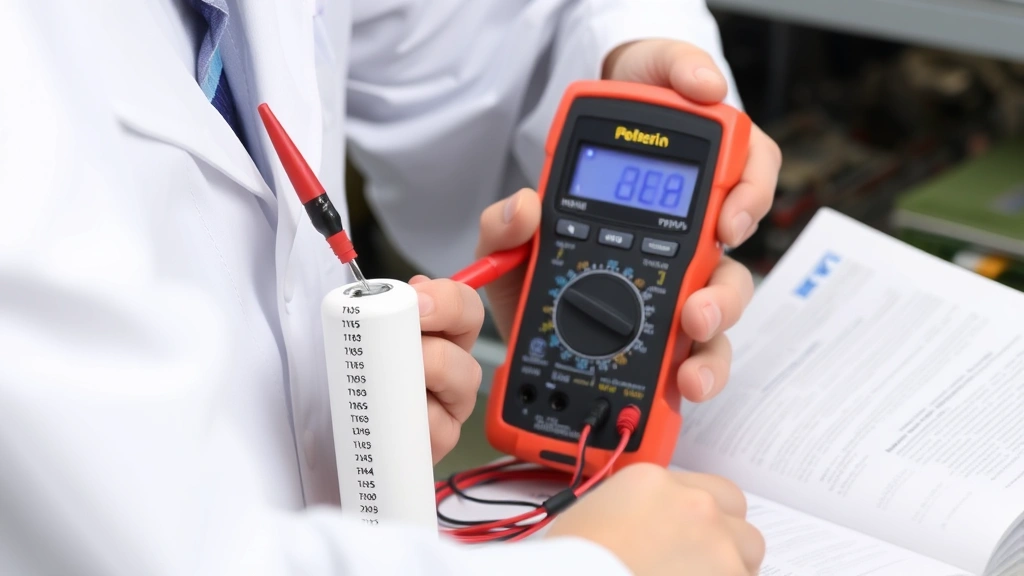
Not all multimeters can measure capacitance. Analog multimeters, the older needle-based models, cannot directly measure capacitor values and are unsuitable for this test. You need a digital multimeter (DMM) with a dedicated capacitance measurement setting, typically marked with a capacitor symbol (⊥⊥) or labeled “CAP” or “μF.”
Digital multimeters range from basic models costing $15-30 to advanced models exceeding $200. For testing household appliance capacitors, a mid-range meter ($40-80) with capacitance capability is ideal. Look for meters offering multiple capacitance ranges, as capacitors vary from microfarads (μF) to millifarads (mF). A quality meter from reputable manufacturers like Fluke, Klein Tools, or Extech provides accuracy and reliability for serious DIY work.
Some multimeters include additional features useful for comprehensive electrical diagnostics: continuity testing (beeping when circuits connect), voltage measurement (AC and DC), resistance testing (ohms), and temperature measurement with thermocouples. These features don’t directly help with capacitor testing but enhance overall electrical troubleshooting capability for various home improvement projects.
When selecting a multimeter for capacitor testing, verify the measurement range matches your capacitors. Most household appliances use capacitors between 1-100 microfarads, though some high-capacity units reach 500 microfarads or higher. Your meter should accommodate the expected range with reasonable accuracy (typically within 5-10% for adequate diagnostics).
Step-by-Step Testing Procedure
Preparation Phase: Before beginning, gather your multimeter, insulated screwdriver, safety glasses, and the device containing the capacitor. Document the capacitor’s location, markings, and connections with photographs—this proves invaluable when reassembling. Note the voltage and capacitance ratings printed on the capacitor case; you’ll reference these when interpreting results.
Safety Discharge: Unplug the device and wait 10 minutes. Locate the capacitor and visually inspect it for damage: bulging tops, leaking fluid, burn marks, or corrosion indicate failure. Using an insulated screwdriver, carefully short the capacitor terminals together momentarily. You may see a small spark—this is normal and confirms the capacitor held charge. This step is non-negotiable for safety.
Multimeter Configuration: Set your digital multimeter to the capacitance measurement mode. Select the appropriate range based on the capacitor’s rating. If testing a 50 μF capacitor, select the 200 μF or 2000 μF range (depending on available settings). Starting on a higher range and working downward prevents meter damage from overage.
Connection Method: For in-circuit testing (capacitor installed in device), connect the multimeter’s red probe to the positive terminal and black probe to the negative terminal (if polarized). For out-of-circuit testing (capacitor removed), follow the same polarity convention. Some multimeters automatically detect polarity, but checking your specific meter’s manual ensures correct orientation.
Reading the Display: The multimeter displays a numerical value in microfarads or millifarads. Wait 2-3 seconds for the reading to stabilize—capacitance measurements require brief charging time. Note the final stable value. A steady reading indicates the meter successfully measured the capacitor’s capacitance.
Interpreting Multimeter Results
Interpreting your multimeter reading requires comparing the measured value against the capacitor’s rated value, typically printed on the component case in microfarads (μF) or millifarads (mF). A healthy capacitor measures within 10-20% of its rated value. For example, a 50 μF capacitor should measure between 40-60 μF for acceptable operation.
Good Capacitor: Measured value falls within 80-120% of rated value. The capacitor stores and releases energy properly, maintaining electrical system stability. No replacement necessary; the component functions adequately for continued service.
Marginal Capacitor: Measured value falls between 50-80% of rated value. The capacitor functions but with reduced efficiency. While it may not immediately fail, replacement is recommended soon, especially in critical applications like air conditioning units where capacitor failure causes compressor damage. This is the “yellow flag” scenario warranting planned replacement.
Failed Capacitor: Measured value is below 50% of rated value or reads zero. The capacitor cannot store adequate energy and fails to perform its function. This requires immediate replacement. A failed capacitor in an AC unit, for instance, prevents the compressor from starting and may damage the motor if not replaced promptly.
Infinite Reading: The meter displays “OL” (overload) or infinity, indicating an open circuit or severe internal damage. The capacitor is definitely failed and requires replacement. This reading suggests internal dielectric breakdown or a severed connection.
Capacitor Leakage Test: Some advanced multimeters include a leakage resistance test. Electrolytic capacitors naturally leak small amounts of current; excessive leakage indicates failure. If your meter supports this, readings below 100 kilohms (100 kΩ) suggest a failing capacitor, though this varies by capacitor type and size.
Troubleshooting Common Issues
Several scenarios complicate capacitor testing and require specific troubleshooting approaches. In-circuit testing problems occur because other components in the circuit may interfere with measurements. If readings seem inconsistent, test the capacitor out-of-circuit by carefully unsoldering or unclipping it from the device. This isolates the capacitor and eliminates interference, providing accurate readings.
Multimeter compatibility issues arise when your meter lacks adequate capacitance range. If your capacitor is rated 500 μF but your meter’s maximum range is 200 μF, you cannot obtain accurate readings. Upgrade to a meter with higher range capability, or consult the device’s service manual for alternative testing methods.
Polarized capacitor confusion occurs when testing electrolytic capacitors. Always connect the red probe to the positive terminal (marked with a plus sign or longer lead) and black probe to the negative terminal. Reversed polarity may damage the multimeter or produce incorrect readings. If you’re unsure of polarity, check the capacitor case markings carefully.
Fluctuating readings indicate the multimeter is still charging the capacitor. Wait longer between connections—3-5 seconds is often necessary for large-value capacitors. Some meters require 10+ seconds for stable readings on high-capacitance components. Patience ensures accuracy.
Zero readings on functional capacitors may result from poor probe contact. Clean the terminal contacts with a soft brush or cloth, removing corrosion or oxidation. Dirty contacts prevent proper electrical connection and produce false failure readings. Retest after cleaning.
When troubleshooting produces conflicting results, consider testing a known-good capacitor of similar value on your multimeter. This confirms your meter functions correctly and helps distinguish between meter issues and actual capacitor failure.
When to Replace vs. Repair
Capacitor replacement is nearly always the correct choice over repair for residential applications. Unlike other electrical components, capacitors cannot be reliably repaired by DIY methods. Once internal dielectric breakdown occurs, structural damage is permanent. Attempting to patch, reseal, or modify a failed capacitor creates serious safety hazards including fire risk and electrical shock danger.
Replace immediately if: The capacitor measures below 80% of rated value, shows physical damage (bulging, leaking, burned areas), failed the multimeter test, or is more than 10 years old (electrolytic capacitors degrade over time even if currently functional). For critical systems like air conditioning, err on the side of replacement—a failed AC capacitor can damage the compressor, creating a $1,000+ repair bill versus a $20-50 capacitor replacement cost.
Monitor closely if: The capacitor measures 80-90% of rated value but shows no physical damage and the device operates normally. Test monthly, documenting readings to track degradation. If readings drop below 80%, schedule replacement during your next maintenance window. This approach balances economy with reliability for less critical applications.
Professional replacement considerations: While capacitor replacement is achievable for DIYers comfortable with electrical work, high-voltage systems (AC units, some refrigerators) warrant professional service. Manufacturers often recommend licensed technician replacement for warranty and safety reasons. Weighing the cost savings against safety and warranty implications helps determine whether to handle replacement yourself or hire professionals.
When replacing a capacitor, purchase an exact match with identical voltage and capacitance ratings. Installing an undersized or overvoltage-rated capacitor creates electrical instability and potential equipment damage. Always photograph the original capacitor’s markings before removal to ensure accurate replacement part selection.
FAQ
Can I test a capacitor while it’s installed in the device?
Yes, in-circuit testing is possible with most digital multimeters. However, surrounding circuit components may interfere with readings, producing inaccurate results. If you obtain questionable results, remove the capacitor and test it out-of-circuit for definitive diagnosis. Always ensure the device is unplugged and the capacitor is safely discharged before touching it.
What does it mean when my multimeter shows “OL” or infinity?
An overload reading indicates the capacitor has failed catastrophically, either through internal dielectric breakdown or a severed connection. The component cannot store electrical energy and must be replaced immediately. This is the most definitive failure reading possible.
Why does my capacitor reading fluctuate?
Fluctuating readings typically result from the multimeter still charging the capacitor during measurement. Large-value capacitors require extended charging time. Wait 5-10 seconds between test connections, allowing the meter to complete its charging cycle and stabilize the reading. Persistent fluctuation after extended waiting suggests a failing capacitor.
Can an analog multimeter test capacitors?
No, analog multimeters cannot directly measure capacitance. You must use a digital multimeter with a dedicated capacitance measurement function. If you only have an analog meter, consider upgrading to a basic digital multimeter—they’re inexpensive and provide superior functionality for modern electrical diagnostics.
Is it safe to test capacitors myself?
Testing capacitors is safe when you follow proper precautions: unplug the device, wait for discharge, manually discharge the capacitor using an insulated screwdriver, wear safety equipment, and never test while power is applied. These steps eliminate the primary hazards. If you’re uncomfortable with electrical work, consulting a licensed electrician is always appropriate, especially for high-voltage applications like air conditioning systems.
How often should I test household appliance capacitors?
Preventive testing isn’t necessary for functioning appliances. Test capacitors only when equipment malfunctions or as part of troubleshooting. However, appliances over 10 years old may benefit from annual capacitor inspection, as electrolytic capacitors degrade with age. If you notice reduced performance or unusual sounds (AC humming without starting, for instance), testing immediately helps identify capacitor failure before it damages other components.
What’s the difference between start and run capacitors?
Start capacitors provide high-value energy bursts to initiate motor rotation, then disconnect via a centrifugal switch once the motor reaches operating speed. They’re typically rated 100-500 μF at high voltage. Run capacitors remain continuously connected, stabilizing voltage and improving motor efficiency throughout operation. They’re usually 5-50 μF at lower voltage. Testing procedures are identical, but replacement requires matching the correct type—installing a start capacitor where a run capacitor belongs creates serious motor problems.


