Clean Your Cricut Mat: Expert Tips for Longevity
Your Cricut mat is one of the most essential tools in your crafting arsenal, serving as the foundation for precise cutting, scoring, and writing projects. Over time, dust, adhesive residue, and debris accumulate on the mat’s surface, compromising its ability to grip materials securely and affecting the quality of your cuts. A well-maintained mat can last for months or even years, while a neglected one may require replacement within weeks. Understanding how to properly care for and clean your Cricut mat will save you money and ensure consistent, professional results with every project.
The sticky surface of a Cricut mat is engineered to hold materials in place during the cutting process, but this same tackiness makes it susceptible to collecting lint, paper particles, and other contaminants. Regular cleaning is not just about aesthetics—it’s about preserving the mat’s functionality and extending its lifespan. Whether you’re working with vinyl, cardstock, fabric, or delicate materials, a clean mat makes all the difference in achieving precise cuts and preventing material slippage.

Understanding Your Cricut Mat’s Sticky Surface
Cricut mats come in different adhesive strengths designed for various materials. The standard mat features a light-tack adhesive suitable for most paper and cardstock projects. The strong-grip mat offers enhanced stickiness for thicker materials and vinyl, while the fabric mat provides a gentler grip for delicate textiles. Understanding which mat you’re using is crucial because the cleaning methods and intensity must match the mat’s composition.
The adhesive layer is a specialized compound that remains tacky through repeated use but loses effectiveness as contaminants build up. When dust particles, paper fibers, and other debris settle on the surface, they create a barrier between the mat and your material, reducing grip strength. This is why consistent cleaning is essential—you’re not just removing dirt; you’re restoring the mat’s original functionality. Unlike general-purpose cleaning methods with vinegar that work on various surfaces, Cricut mats require gentle, specific approaches to avoid damaging the adhesive layer.
The lifespan of a Cricut mat typically ranges from three to twelve months, depending on usage frequency and care. A mat that’s used several times per week with proper maintenance can last significantly longer than one used sporadically without cleaning. The investment in learning proper cleaning techniques pays dividends by extending your mat’s usable life and maintaining consistent cutting quality throughout its lifetime.

Daily Cleaning Methods for Regular Maintenance
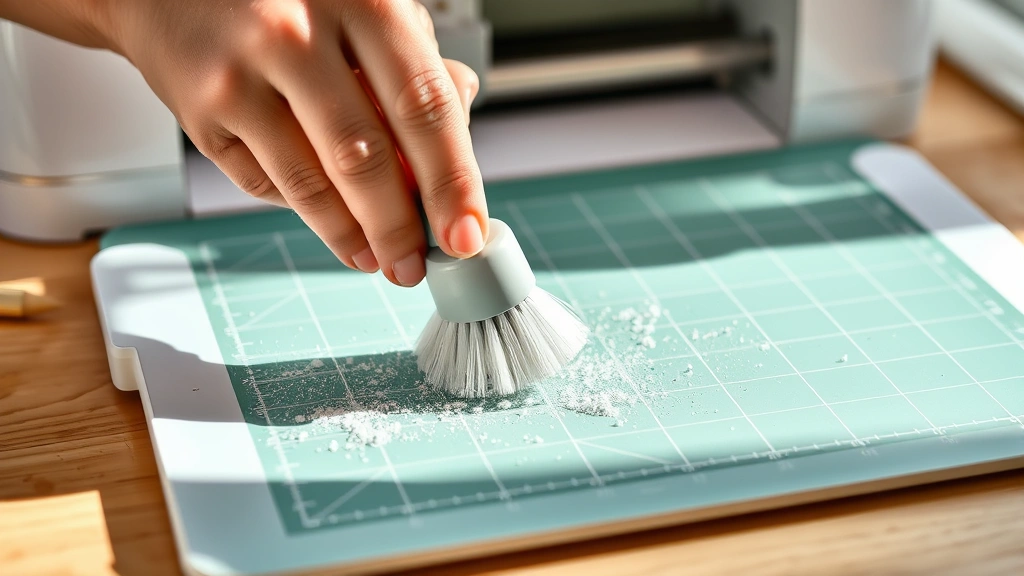
The easiest and most effective way to keep your Cricut mat clean is through daily maintenance using simple, non-damaging methods. After each cutting session, take a moment to remove loose debris from the mat’s surface using a soft brush or your fingers. This preventive approach stops small particles from accumulating and becoming embedded in the adhesive.
Using a Soft Brush or Lint Roller
A soft-bristled brush, such as a clean makeup brush or dedicated mat cleaning brush, works wonderfully for removing loose debris. Gently brush across the mat’s surface in one direction, being careful not to apply excessive pressure that might damage the adhesive. Similarly, a lint roller—the kind used for removing pet hair from clothing—effectively lifts particles from the mat without requiring any liquid or harsh chemicals. Roll the lint roller across the mat several times, replacing the sheet when it becomes full of debris.
Weeding Scraps and Trimming Excess
After cutting projects, immediately remove weeded scraps and trimmed material pieces from the mat. These fragments can stick to the adhesive surface and create additional buildup. Use a weeding tool or small craft knife to carefully lift away excess material, being mindful not to gouge or scratch the mat’s surface. This step prevents material from drying onto the mat and becoming increasingly difficult to remove as time passes.
Using Painter’s Tape for Light Cleaning
Painter’s tape or low-tack masking tape can serve as an effective cleaning tool for your mat. Press the tape firmly onto the mat’s surface, then peel it away slowly. The tape will lift dust, lint, and light debris without damaging the adhesive. This method works particularly well for maintaining mat stickiness between deeper cleaning sessions and requires no water or chemicals. Repeat with fresh tape sections until the mat appears clean.
Deep Cleaning Techniques for Stubborn Residue
When daily maintenance isn’t enough, deeper cleaning methods become necessary. These techniques address stubborn adhesive residue, dried material, and persistent buildup that compromises mat functionality.
The Water and Mild Soap Method
One of the safest deep-cleaning approaches involves distilled water and mild dish soap. Mix a small amount of gentle dish soap with distilled water to create a slightly soapy solution. Dampen a soft, lint-free cloth with this mixture—the cloth should be damp, not dripping wet. Gently wipe the mat’s surface in circular motions, working in small sections. Avoid soaking the mat or allowing excess water to accumulate, as moisture can seep into the mat’s layers and cause warping or adhesive degradation.
After wiping with the soapy solution, use a separate cloth dampened with plain distilled water to rinse away soap residue. Finally, dry the mat completely with a clean, soft towel. Allow the mat to air dry for several hours in a horizontal position before using it again. This method is effective for removing light to moderate buildup without harsh chemicals.
Adhesive Restorer Products
Cricut and third-party manufacturers offer specialized mat cleaning solutions and adhesive restorers designed specifically for craft cutting mats. These products are formulated to remove stubborn debris while rejuvenating the mat’s stickiness. Follow the product instructions carefully, as different formulations have varying application methods. Generally, you’ll spray or apply the cleaner to the mat, allow it to sit briefly, then wipe it clean with a soft cloth.
Popular commercial options include Cricut’s official cleaning products and third-party solutions available through craft retailers. These products often contain ingredients that dissolve dried adhesive and lift embedded particles more effectively than water alone. Always test any new cleaning product on a small, inconspicuous area of the mat first to ensure compatibility.
Rubbing Alcohol for Stubborn Spots
Isopropyl rubbing alcohol can address particularly stubborn residue and dried material spots. Use 70% isopropyl alcohol rather than higher concentrations, as stronger solutions may damage the adhesive layer. Apply a small amount to a cloth and gently rub problem areas using circular motions. The alcohol evaporates quickly, reducing moisture exposure. However, avoid using this method excessively or on the entire mat, as repeated alcohol applications can gradually degrade the adhesive. Reserve this technique for targeted problem areas that resist other cleaning methods.
The Freezer Method for Dried Adhesive
For particularly stubborn dried material or adhesive buildup, the freezer method can provide surprising results. Place your Cricut mat in a freezer for 15-20 minutes. The cold temperature causes dried adhesive and stuck-on material to become brittle. Remove the mat and gently peel or scrape away the hardened debris using a plastic scraper or old credit card. Be gentle to avoid gouging the mat’s surface. This method works well for addressing specific problem spots without exposing the entire mat to moisture or chemicals.
Materials and Tools You’ll Need
Assembling a proper mat cleaning kit ensures you’re prepared for any maintenance situation. Unlike specialized equipment needed for projects like cleaning appliances, mat maintenance requires only basic supplies available in most homes.
Essential Cleaning Supplies
- Soft-bristled brush: A clean makeup brush, soft toothbrush, or dedicated mat brush works perfectly for removing loose debris
- Lint roller: Standard clothing lint rollers effectively lift particles without moisture
- Painter’s tape or low-tack masking tape: Excellent for light cleaning between deeper sessions
- Distilled water: Prevents mineral deposits that tap water might leave
- Mild dish soap: Choose gentle formulas without harsh chemicals or degreasers
- Soft, lint-free cloths: Microfiber cloths or high-quality cotton work best; avoid paper towels that shed fibers
- Isopropyl rubbing alcohol (70%): For targeted stubborn spot treatment
- Plastic scraper or old credit card: Gentle scraping tool for dried residue
Optional but Helpful Items
- Cricut’s official mat cleaner or similar adhesive restorer products
- Small spray bottle for applying cleaning solutions evenly
- Soft rubber roller for ensuring material adheres properly after cleaning
- Storage containers for organizing cleaning supplies
Organizing these supplies in a dedicated cleaning kit near your craft workspace ensures you can perform regular maintenance without searching for scattered supplies. This proactive approach encourages consistent mat care, which directly translates to longer mat lifespan and better cutting results.
Common Mistakes to Avoid When Cleaning
Understanding what not to do is just as important as knowing proper cleaning techniques. Many crafters inadvertently damage their mats through well-intentioned but inappropriate cleaning methods.
Avoiding Excessive Water and Moisture
One of the most common mistakes is using too much water during cleaning. Soaking a Cricut mat or allowing water to pool on its surface can cause the mat to warp, buckle, or separate into layers. The adhesive layer is sensitive to moisture, and excessive water exposure can permanently reduce stickiness. Always use damp cloths rather than wet ones, and never submerge your mat in water. If your mat gets saturated accidentally, stand it upright in a well-ventilated area and allow it to dry completely before using it again.
Steering Clear of Harsh Chemicals
Never use harsh degreasers, acetone, strong solvents, or abrasive cleaners on your Cricut mat. Products containing these chemicals can dissolve or damage the adhesive layer permanently. Similarly, avoid bleach-based cleaners and heavy-duty bathroom or kitchen cleaners. Stick to gentle, craft-specific solutions or simple combinations of distilled water and mild soap. When in doubt, test any new cleaning product on the mat’s edge or corner before applying it to the main working surface.
Preventing Scratches and Gouges
Aggressive scrubbing or using hard-bristled brushes can scratch and gouge the mat’s surface. These marks not only affect aesthetics but can also impact how materials adhere in scarred areas. Always use soft-bristled tools and gentle pressure when cleaning. If you must scrape away stubborn material, use plastic tools rather than metal implements, and work slowly and carefully to avoid damaging the mat.
Not Allowing Adequate Drying Time
After wet cleaning, many crafters are eager to use their mats again and don’t allow sufficient drying time. Using a damp mat can cause materials to slip, warp, or not adhere properly, resulting in ruined projects and frustration. After water-based cleaning, allow your mat to air dry completely in a horizontal position for at least 2-4 hours, or overnight if possible. This ensures all moisture has evaporated and the adhesive has returned to optimal tackiness.
Ignoring Manufacturer Recommendations
Cricut provides specific care instructions for their mats, and ignoring these guidelines can void warranties or damage your mat. Always consult your mat’s documentation before trying new cleaning methods. If you’ve lost the original packaging or instructions, check Cricut’s official support resources for detailed care information specific to your mat model.
Storage and Prevention Tips
Proper storage and preventive measures reduce the frequency of deep cleaning needed and extend your mat’s overall lifespan significantly.
Storing Your Mat Correctly
Always store your Cricut mat flat and horizontal, never rolled or folded. Rolling can cause permanent creases and warping that affect material adhesion and cutting accuracy. Store the mat in a cool, dry location away from direct sunlight, extreme heat, or humidity fluctuations. Excessive heat can soften the adhesive, while extreme cold can make it brittle. A craft storage shelf or flat drawer in a climate-controlled room provides ideal conditions.
Many crafters use protective sheets to cover their mats when not in use. Silicone baking mats, plastic sheets, or dedicated mat covers prevent dust accumulation and protect the sticky surface from accidental contact with other materials. If you use a protective covering, ensure it’s clean before placing it on the mat, as dirt on the covering can transfer to the mat’s surface.
Protecting the Sticky Surface During Use
Prevent unnecessary debris accumulation by working in a clean craft space and removing loose material before placing it on the mat. Keep your workspace free of crumbs, dust, and lint that might transfer to the mat. Wash your hands before crafting sessions to avoid transferring oils, food particles, or dirt to the mat’s surface. These simple habits dramatically reduce buildup and the frequency of deep cleaning required.
Using Appropriate Materials for Your Mat Type
Match your project materials to the appropriate mat type. Using thin, delicate materials on a strong-grip mat designed for thick materials can result in tearing or excessive adhesion. Conversely, using thick materials on a light-tack mat may cause slipping and poor cuts. By using the right mat for each project, you minimize material damage and reduce the amount of adhesive residue left behind. This approach also extends mat life by preventing unnecessary wear from unsuitable material combinations.
Rotating Multiple Mats
If you craft frequently, maintaining multiple mats and rotating their use can extend the lifespan of each mat significantly. While one mat rests and recovers, another handles your projects. This rotation prevents any single mat from becoming overused and allows adhesive to maintain its stickiness longer. Many serious crafters keep light-tack, standard, strong-grip, and fabric mats on hand, rotating based on project requirements and mat condition.
Knowing When to Replace Your Mat
Eventually, even well-maintained mats lose stickiness and require replacement. Signs that your mat has reached the end of its lifespan include materials slipping during cutting, visible damage to the surface, persistent bare spots that won’t stick, and a noticeably reduced adhesive feel. When these signs appear despite thorough cleaning, it’s time to invest in a replacement. Continuing to use a worn-out mat leads to failed projects, wasted materials, and frustration. Just like maintaining other tools through proper cleaning, knowing when to replace equipment is part of responsible crafting.
FAQ
How often should I clean my Cricut mat?
Perform light cleaning after every cutting session using a soft brush or lint roller. Deep cleaning should occur weekly if you craft regularly, or whenever you notice reduced stickiness or visible buildup. The frequency depends on your usage level and workspace cleanliness.
Can I use regular household cleaners on my Cricut mat?
Avoid harsh household cleaners, degreasers, and bleach-based products. Stick to mild dish soap with distilled water, specialized mat cleaner products, or isopropyl alcohol on specific problem areas. Always test unfamiliar products on a small area first.
What’s the best way to remove dried vinyl or adhesive residue?
The freezer method works well for dried residue—place the mat in a freezer for 15-20 minutes, then gently peel away hardened material with a plastic scraper. For stubborn spots, try rubbing alcohol on a cloth, working in circular motions. Avoid excessive scraping that might damage the mat.
Is it safe to wash my Cricut mat in the washing machine?
Never machine wash your Cricut mat. The excessive moisture and agitation can damage the adhesive layer, cause warping, and potentially separate the mat’s layers permanently. Hand cleaning with damp cloths is always safer.
How can I restore stickiness to my mat?
Light-tack mats can sometimes regain stickiness after thorough cleaning removes accumulated debris. For more significant stickiness loss, commercial adhesive restorer products specifically designed for craft mats can help. If restoration methods fail, replacement becomes necessary.
Can I use my Cricut mat without its protective cover?
You can use your mat without a cover, but protection extends its lifespan by preventing dust accumulation and accidental contact with contaminants. Using a protective cover when the mat isn’t in use is recommended practice for serious crafters.


